Content
- Material selection
- Eco leather
- Natural and artificial suede
- How to replace finished braid
- Tools
- Beginning of work
- Working with leather
- Types of seams
- Advice from the experts
- Designer braids
The steering wheel braid is always in the hands of the driver. The comfort and safety of driving depends on it. Motorists notice that the factory leather braid wears out after 50,000 km. mileage Upholstering the steering wheel yourself is not difficult if you first study the instructions and follow the tips.
Material selection
Most experts recommend braids made of genuine leather. It is good in everything: it doesn’t get cold in the cold and doesn’t overheat in the heat, doesn’t stick to the palms, and absorbs sweat. The steering wheel doesn't slip. Genuine leather is comfortable to hold with your hands.
The surface of the leather with abrasions looks “vintage”. The steering wheel looks stylish in the classic interior of the cabin.
But you don’t need to take old jackets or remnants of furniture leather for homemade braiding. They will wear out quickly. The tanned leather steering wheel cover gets your hands dirty (it is treated with water-based dyes).
Experts recommend Russian-made leather grades Vista (Ryazan)
All types of Vista leather differ in their embossing pattern. But it is difficult to cut it yourself. The pieces for the pattern must be selected according to quality. Buyers are attracted by the price.
High quality leather is produced in Germany, Italy, and Spain. They are suitable for cutting with your own hands. Automotive leather is sold under the brands of automakers. The steering wheel braids are made of branded leather.
The disadvantage of natural leather is that it does not stretch well. When re-upholstering the steering wheel, the seam is tightened gradually. The higher the quality of the leather, the easier it is to work with.
You may be interested in: How to put seat covers on
Correct selection of future braid
The choice of upholstery determines the method of its fastening, further care for it, as well as the durability of the selected material.
Leather braids
It is customary to use natural leather as upholstery material. It is more durable and practical to process. The material is selected with or without perforation. The presence of holes helps to add volume to the product and is also an additional decoration. It also slightly visually smoothes out possible surface unevenness or minor technical problems during processing.
Leather is the most comfortable of materials due to its performance qualities.
It is easy to care for and is also more hygienic than other braid options. This point is especially relevant in cases where the car has several drivers. The leather steering wheel can be easily wiped with an antiseptic solution before driving. This procedure is not dangerous for the material, but will protect you from receiving “unwanted surprises.”
High-quality material may initially scare you off due to its price. However, you should not skimp on such an important part of the car. The price will pay off with a long period of use, a good mood while driving and easy care.
Fur braids on the steering wheel
The use of fur braids only in the first couple of days can be of interest; then such an impractical and easily soiled material will bring more negative emotions when driving. The fur quickly wrinkles in areas of the most intensive use. The pile also gets dirty too quickly and loses its aesthetic appearance, especially light colors.
Fur braided steering wheel
A large amount of dust and dirt gets stuck between the fibers , which reduces the level of hygiene for such a frequently used control. In summer, hands quickly sweat, the pile can also get wet, which causes slippage when controlling. This factor can affect the safety of driving a vehicle.
Braided wire braids
Wire braids were once fashionable on cars. They were often used to decorate mainly domestic VAZ models. The practicality of this option lies in the relative strength of the plastic wire winding. It rarely wore out even with intensive use.
However, compared to artificial leather or genuine leather, the woven base is not as attractive and not hygienic enough . Dirt quickly collects between loose coils and is not so easy to remove. The use of solutions with household cleaning chemicals helps to restore a neat appearance.
Braided braids for VAZ
In winter, such material quickly “stiffens” and warms up poorly. You have to use gloves while driving.
Useful braids on the steering wheel
By making your own braid, you can make it not only beautiful, but also useful. For this purpose, special massage inserts are made in the outer part. They increase the ease of use of the steering wheel and also help improve blood microcirculation in the palms and fingers.
Along with massage seat covers, this braid helps during long car journeys.
You can install heating under a self-made braid. The option will be useful for all drivers in Russia, since the cold season in our country lasts for several months. The button to turn on the heating can be displayed on the instrument panel.
Eco leather
This is fabric-based polyurethane foam. The embossing pattern is an imitation of genuine leather. The material is porous. It is believed to absorb sweat. But the tactile sensation is worse than that of natural leather. In hot weather, the steering wheel feels slippery.
Eco leather is elastic. Suitable for steering wheel reupholstery. Attracts with its affordable price and variety of colors. The result is a bright, extravagant steering wheel. Braids made of eco-leather and genuine leather cannot be distinguished by appearance. The surface of the steering wheel is regularly wiped from sweat.
Braids of complex shapes are made from polyurethane. For example, with perforated thickenings for hand ventilation. A series of bumps on the bottom of the steering wheel massage your fingers. Hands get less tired.
Gel pads compensate for impacts and reduce the load on the hand. Any driver will appreciate a heated steering wheel in winter. These options will be suggested and installed by professionals.
You may be interested in: Caring for leather car interior
Why do you need a steering braid?
You've probably wondered more than once: why do we need a braid at all, if the steering wheel can simply be painted in the desired color? To begin with, it performs a decorative function. You can choose the appropriate material and color scheme and thereby refresh the car interior. The braid also has other useful functions. For example, it increases the thickness of the steering wheel, making the grip more comfortable. The material will be soft under your hands and, in cold weather, warmer than the original plastic handlebar.
In addition, the braid protects the steering wheel itself from mechanical damage: scratches, chips, abrasions. If the material has deteriorated during use, the braid can be easily removed and a new one installed, while the steering wheel itself will have to be restored for a long time and carefully. If you get a used car whose steering wheel no longer boasts a factory look, such a cover will help hide all the imperfections.
Another important feature: the braid will provide reliable grip between the surface of the steering wheel and your hands. Your palms will not slip while driving, which means your trips will be safer.
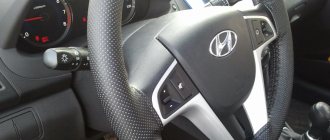
The appearance of the steering wheel has become much more expensive; it now looks like on cars of a higher class. I would also like to especially note that the steering wheel has become thicker, not as slippery as before, and most importantly, it is now pleasant to the touch. In short, I'm happy with how it turned out, including the price tag and ease of installation.
Arseny https://www.drive2.ru/l/3031715/
When choosing a braid for your steering wheel, you will be faced with a wide variety of materials. Among the most popular types are the following:
Useful braids can be identified as a separate category: in addition to their main functions, they have a number of additional advantages. These include, for example, heated steering wheel covers and massage pads. Let's look at each type in more detail.
Leather braids
As we have already noted, both natural and artificial leather are used to make braids. Of course, genuine leather will be more durable, softer and more pleasant to the touch than artificial leather. However, its price can be 3-4 times higher, which makes it inaccessible to many motorists. Both artificial leather (also called eco-leather) and natural leather have good performance characteristics. Such material will not fade in the sun and will not swell from moisture. He is not afraid of temperature changes.
Typically, leather cases are chosen by males. This material looks solid and expensive and fits into the interior of any car. A leather case can be a good holiday gift.
When choosing such a braid, give preference to perforated leather. It is softer to the touch and allows air to pass through better, creating a breathable effect.
Fur
The fur used for steering braids can also be artificial or natural. Natural fur retains heat better in cold weather. Although, if you don’t ride around Arctic cities, then artificial material will do just as well. Sheepskin is often used to make covers.
Faux fur with long pile is often dyed in bright colors and complemented with fun elements. Using such a cover will give off a cheerful and carefree personality to the car owner. Such braids are most often chosen by young women.
Wicker covers
Wire woven covers are also called retro braids because they were very popular in the middle of the last century. Now such braids are used by those who want to style their iron horse as a classic car from the times of the Soviet Union.
Wicker covers retain their main functions: protecting the steering wheel from damage and from slipping of your hands. At the same time, their price is much lower than that of leather and fur counterparts. The most popular material for making wicker covers is ordinary insulated wire, which can be found in almost everyone’s garage. Some craftsmen make braids from hard and thin clotheslines.
Wire braiding can be ordered from special workshops, or you can make it yourself using weaving patterns. Using different colors, you can create your own unique steering wheel design.
Silicone and foam covers
Silicone or foam rubber is often used to make steering braids. Manufacturing technology helps make cases made from these materials inexpensive, but capable of performing all tasks perfectly. The color range of such braids is very diverse: you can find both calm pastel shades and bright neon tones. Foam rubber covers are often printed with a colored pattern, and transparent silicone will protect your steering wheel, but will reveal its original appearance.
Useful braids
Useful covers, as mentioned earlier, include heated braids. Any material can be used in their manufacture, but most often it is natural or eco-leather. Simply connect the wire from the case to the cigarette lighter, and you are provided with additional heating for your palms.
Braided massage inserts are usually made of rubber. The special relief affects certain points on the palms, improves blood circulation, thereby preventing fatigue and numbness in the hands.
Natural and artificial suede
Natural suede is suitable for reupholstering the steering wheel. It is softer and more flexible than other types of automotive leather. But it quickly absorbs sweat and the steering wheel becomes greasy.
“Artificial suede” Alcantara is a non-woven microfiber fabric with a velvety surface. Alcantara with a soft backing and an adhesive layer is suitable for replacing braid. Alcantara is easy to care for. It's nice to hold the wheel in the cold.
Important! Any braid material absorbs sweat. The steering wheel is treated with antiseptics when an odor appears.
Finished braids are black, gray, sometimes brown. These are the most non-marking colors. You can order beige or light gray. They look attractive in the photo, but quickly get dirty.
How to replace finished braid
Steering wheel braids are selected according to the make of the car. Manufacturers use proprietary patterns. The customer receives all the material for the work. The set includes: a leather braid blank, a thread for a tie, and needles.
The braid blank has stitching along the edge. When tightening the edges on the handlebars, the thread is passed into the stitches. This is easier than piercing the edge of the leather with an awl. A figured joining seam is made on the steering wheel.
The edge of the homemade pattern is stitched on a sewing machine with a needle without thread. Use a punch - a tool to make a series of even holes. The lacing is threaded through the holes.
How to choose a steering wheel braid
As when selecting any other device for a car, you need to choose a steering wheel braid based on your own needs and preferences. Nevertheless, there are general parameters here that help you choose the best option for the buyer:
- Braid size depending on the size of the steering wheel (S – diameter 35-36 cm, M – 37-38 cm, L – 39-40 cm, XL – 41-43 cm, 2XL – 47-48 cm, 3XL – 49 cm) .
- The make of the car for which the braid is purchased is a determining factor, because the size of the steering wheel depends on the make of the car.
- The type of braid must correspond to the visual characteristics of the machine and the material of its internal upholstery.
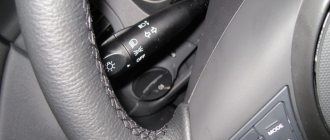
Tools
It is not immediately clear why there is a hook in the braiding kit. It is needed to tighten the threads. It is passed under the thread and pulled until the edges of the braid meet. To get a beautiful seam, you need tools and equipment:
- Gypsy needle (a thick needle with a curved and flattened point)
- Thimble
- Narrow spatula for tucking leather under plastic edging
- A utility knife or scalpel for trimming leather and threads
You may be interested in: Car floor mats: features of choice
Beginning of work
Craftsmen in a car workshop change braids without removing the steering wheel, sitting in the car's interior. Beginners are advised to remove the steering wheel. When replacing the braid, the steering wheel is held in a comfortable position.
The process of removing the steering wheel of any car is simple. The differences depend on the design of the fasteners. For dismantling you need a set of screwdrivers and hexagons. We begin dismantling:
- Place the machine on a flat surface
- Apply emergency brake
- Lock battery battery
- Remove the outer plastic steering wheel trim (press the latches or remove the screws from the bottom side)
- Inspect the cable (electrical wires and terminals under the cover)
- Disconnect the wires, turn off the power to the steering wheel
- Find the center nut that secures the steering wheel to the steering shaft
- Secure the steering wheel with a steering wheel lock
- Unscrew the nut, but not all the way
- Remove the steering wheel
Important! The steering wheel may suddenly jump off the shaft, causing injury to the driver. The steering wheel is removed carefully.
Make sure that your car's steering wheel does not require a special puller. Study the instructions on how to remove the steering wheel of a specific brand of car.
Options for selecting steering wheel trim
To calculate the length and diameter of the steering wheel (by the way, who doesn’t know, according to geometry, a figure in the shape of a steering wheel is called a torus) you don’t need to remove it. You need to buy a flexible tailor's meter and measure the perimeter of the outer circle of the steering wheel and the diameter.
To the data obtained, you need to add another 3 to 5 mm for the overlap seam. The diameter of the steering wheel is generally 35-40 cm. Large steering wheels are installed from the factory on executive class cars, and small ones on sports class cars.
There is a State standard that regulates what diameter the steering wheel of a passenger car should be. According to GOST of the Russian Federation, the diameter of the steering wheel should not be more than 40 cm.
Working with leather
Re-upholstering the steering wheel begins with removing the old braid. Cut the seam with a scalpel. Remove the braid from the old leather. The surface of the steering wheel is cleaned of glue residues.
It is possible to re-tighten it over the old braid. The dimensions of the new braid are selected taking into account large sizes. The steering wheel with braid is thicker.
There should be grooves on the surface of the steering wheel. What are they needed for? Skin thickness is more than 1 mm. The thickening at the junction of the parts is noticeable. Therefore, the seam is tucked into the groove.
If the constriction is done over the old braid, mark the locations of the seams. Grooves are cut. The surface of old leather is cleaned of dirt and degreased.
The leather blank is applied so that the protrusions of the braid coincide with the places where the spokes connect to the wheel. Secure with double-sided tape.
The edges of the braid are pulled together end-to-end on the inside of the steering wheel. Excess skin is trimmed with a blade.
Important! The seam begins between the knitting needles in the middle. Pull the thread under the stitch and leave the two ends of equal length. Otherwise, the workpiece will move along the rim of the steering wheel.
You may be interested in: Material for car covers - which is better?
Sewing braids yourself
Reliable tools and high-quality, carefully selected material will help you get a good result. Let's give an example of tuning a steering wheel with leather . To make a braid you will need to stock up on the following set:
- a leather strip measuring approximately 120x10 cm and several additional flaps;
- durable nylon cord for stitching, about 3 meters, it can be replaced with leather twine;
- punch for perforation under the lace;
- at least two needles with a length of 50 mm and a hook with a small head for tightening nylon thread;
- a pair of tailor's thimbles ;
- a roll of cling film and a roll of tape;
- A1 drawing for the pattern.
Decorative seam on braid
There are two options for steering wheel trim. In one case, only steering wheel tuning is used, and in the second, the spokes are also upholstered. Both options, when carefully executed, look nice, but the method of decoration without upholstering the spokes is considered to be less labor-intensive.
Spokeless steering wheel cover
In this case, you can get by with a strip of leather, the length of which is calculated using the formula, multiplying the number pi (3.14) by the length of the diameter. Additionally, you can use a tailor's meter to take empirical measurements of the outer circumference. In this case, before the last stitching of the tape into a ring, you need to make a slight tension on the leather , since it will stretch slightly on the steering wheel.
The ring can be made not only from a single piece, but also from combinations of perforated and smooth elements, material with embossed milling or relief embossing, using multi-colored inserts of various leather tones that harmoniously fit into the overall interior of the cabin.
The allowances left for sewing together the parts of the braid will need to be coated with leather glue. This operation will add strength and subsequently prevent the threads used to connect the pattern pieces from standing out at the joints. The seams may protrude due to the allowances of the leather. This can be removed by lightly tapping the seals with a hammer.
Holes are prepared for lacing using a punch. It is a metal tube with one edge sharpened. By pointing it with this side on the skin, on the other side you need to hit it with a hammer, you will get a hole. The excess skin will go into the puncture hole.
Having marked along the entire side for stitching, you can punch out perforations for lacing with thread or leather twine. It is difficult to buy such string separately, and finding a long two-meter piece of genuine leather is almost impossible. For this, a device made from a knitting needle and a sharpened simple pencil .
Making a leather cord
They are tightly held together with tape and a spiral is drawn on a piece of leather. The tip of the knitting needle is held above the line drawn with a pencil. Parallelism is maintained between the edges of such an Archimedean spiral, which most engineers studied in universities. The thickness of the twine must be at least 3-4 mm, otherwise it will break if pulled too hard.
To pull such a cord you will need to use an awl. The process will be longer, but the result will be more original than stitching with nylon thread.
It will be more convenient to start lacing immediately after the knitting needle. This way the knot will not be “conspicuous”. The operation is performed using several types of cross lacing. The simplest options are cross stitches or sequential stitches. It is preferable to tighten after a complete passage along the sector between the nearest knitting needles.
For better fixation, you can pour a little shoe glue into the cut between the braid and the steering wheel with a syringe until it is completely tightened. Heating the glued surfaces with a hair dryer will better distribute the liquid. Additionally, smoothing is applied along the outside of the braid.
Punch for perforation
The knots of the nylon cords must be coated with superglue so that they do not unravel. The nylon slides together, and a small amount of glue will fix it in one place.
Spoke steering wheel cover
A more complex option involves making a pattern for sewing upholstery. It is done using cling film and wrapping bark around all areas for new upholstery. We fix this base with molar tape. After this, we draw the seams with a marker and number the resulting pattern pieces. On a separate sheet we draw a diagram of the location of the numbered parts.
Now you can carefully cut the masking tape along the marked seams. We straighten the resulting parts and outline them on sheet A1. Then we cut out the patterns taking into account the addition of dimensions for the joining seams.
We sew the parts together using a machine along the length of the steering wheel. You definitely need to make a little tension. Punching perforations for lacing. Now you can fix the braid on the steering wheel and lace up the seam. First you need to remove the plastic decor and the airbag cartridge. After lacing, we return everything to its place. If necessary, glue the gap between the steering wheel and the upholstery. Dry the glue with a hairdryer.
Types of seams
The seam can decorate the steering wheel. You can take a nylon thread of a contrasting color, a leather strap, or a metallic cord. The main thing is that the seam does not interfere with driving and does not spoil the appearance of the leather.
Before sewing, the leather blank is secured around the steering wheel with stripes, laces or tape.
The seam is always made end-to-end. Common types of joint seams for leather:
- The thread is passed under the stitching along the edge. By mixing the stitch, a W-shaped “macro” seam is obtained.
- The second pass will result in an XXX-shaped “sporty” seam.
- "Squares". The thread goes in a U-shape.
- Pigtail seam. The thread is brought under the opposite edge of the workpiece and threaded into the hole from below.
- Herringbone seam. The thread goes like lacing.
First, make the first pass of the seam. The edges of the skin are pulled together using a hook. Then make a second pass of the thread. The thread is tightened so that the braid tightly fits the steering wheel, without creases or protrusions. The braided thread is tied and the ends are melted.
While working with needle and thread, the steering wheel is held as comfortably as possible. On your lap, on a table or on a stand. To tighten it tightly, the steering wheel must be fixed. For example, in a bench vice. Or put it in place in the car.
Tuck the edges of the leather under the plastic edging. The steering wheel is ready to move.
You may be interested in: Car interior reupholstery
How to properly put on and lace a braid
Now you have to properly put on and lace the resulting braid. This process will differ, although not dramatically, depending on whether the cover involves covering the steering wheel spokes.
Methods of installation on a steering wheel with and without spokes
The main difference is the need to remove the steering wheel. If the braid is not designed to fit the spokes, you can secure it while leaving the steering wheel in place. But to install a cover with material for the spokes, you will have to remove the steering wheel in the standard way.
Before removing the steering wheel, do not forget to disconnect the battery. If the housing contains an airbag, wait at least 5 minutes before starting to disassemble the steering wheel.
There are one-piece covers on sale that do not need to be laced. They are put on the top of the steering wheel, and then with force they are pulled over the entire wheel. It is advisable to have someone help with this by fixing the lining at the top. Otherwise it may slip off. The edges of such a cover will close together, and you will not have to waste precious time on lacing.
If you made the braid yourself, or bought an option that involves lacing, you will have to secure it yourself. This is a rather long, but completely uncomplicated process. You don't need to know how to sew or make beautiful stitches, because everything you need is already ready.
- If your case is made of genuine leather, soak it in warm water for 15–20 minutes. This will increase the elasticity of the material
- Arm yourself with a sewing needle. It should not be particularly thick, as you will have to pass it under the threads.
- You will not need to pierce the material with a needle. Pay attention to the line that you (or the manufacturer) made in points No. 3 and 7 of the instructions for making the pattern. Pass the needle under the stitches and pull the material together.
- Start at the bottom of the handlebar and move counterclockwise. It is most convenient to make the first tie at the beginning of one of the lower knitting needles.
- Carefully straighten and lightly stretch the material. Try to avoid folds and distortions.
- Process the entire seam in a similar manner. On the knitting needles you will have to fasten and break the thread. You can estimate the required length and number of threads in advance by measuring the distance between the knitting needles.
- When the braid is completely secured, smooth it out again and dry it. After this, the material will fit tightly around the steering wheel.
pass the needle under the stitches and join both sides
If in some places you cannot perfectly stretch the skin, warm it up with a regular hairdryer. As the temperature rises, its elasticity increases.
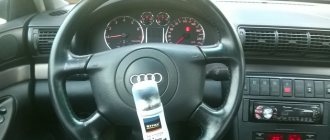
I put it on the steering wheel, aligned the seam in the center, and began to deal with the thread.
I decided to sew through one, I just looked at how the leather steering wheels were trimmed on cars from the factory. As a result, an hour and a half to two hours of work and the steering wheel is ready. There's definitely still a meter of thread left. Now it looks like it’s original, everything fits the steering wheel. I am very pleased with the result, the steering wheel has become more comfortable and pleasant to the touch. Tema Vorobyov https://www.drive2.ru/l/422671/
Video: installing braid on the steering wheel
Types of steering braid lacing
Lacing a braid is not much more difficult than lacing boots. You can use threads to match the material. In this case, it does not make much difference which method you use to lace the braid. But if you want to give your steering wheel a unique look, use threads in one or more contrasting colors. Bright threads can be used even at the stage when the part is stitched.
Braiding can be done in several ways.
Which one is more convenient and nicer. I used the simplest one, when the thread is threaded into each seam, bordering the braid along the contour and tightening it like a shoe lace. The thread was the same color, the solution was temporary - so I didn’t show off. There were plans for the future to use red thread for the tie. But, for this, at a minimum, you need normal leather + additional covering of at least the automatic transmission lever. So that the finishing of key elements does not differ from each other. maa https://mysku.ru/blog/aliexpress/17827.html
depending on the type of lacing chosen, the overall appearance of the steering wheel can change dramatically
Some types of lacing require the simultaneous use of two needles and threads. Study carefully and choose the scheme that suits you best.
Macrame lacing looks quite unusual, so it is often used when fixing the steering braid. The thread is passed under the stitch, pulled to the opposite side, and then passed under the stitch one above. This creates diagonal lacing every second stitch on both sides. The thread is pulled tightly and a seam is formed.
Macrame seam is the lightest and most popular among motorists
Video: macrame seam
In order to make lacing, called sports, you need to start weaving using the previous method, and before the final tie, start a second thread, which will pass under all the missed stitches in the same way. This double macrame is considered sports lacing.
with sports lacing, one more thread is added to the macrame seam
There is a second option for sports lacing. It uses only one thread, and it is threaded into each stitch, without skipping. After tightening, the seam looks very interesting.
the second type of sports seam is made with one thread and without skipping stitches
Video: second version of the sports seam
There are also lacing methods that do not require a starting line. Holes for the thread are punched using a special device. Such seams include braid, herringbone and some others. You can understand the weaving patterns by studying the following image and video.
For some types of lacing you need to pierce the fabric
Video: herringbone seam
Advice from the experts
If the reupholstery is carried out inside a car in winter, first turn on the stove and warm up the air. The leather material will be softer.
The edge of the eco-leather braid is folded 5-6 mm and stitched. The holes will not stretch when tightened. To ensure a better fit on the steering wheel, the eco-leather is heated with a hairdryer.
When covering with self-adhesive Alcantara, the workpiece is first glued to the outer edge of the steering wheel. Then they are tightened on the inside. Apply marks to align the edges of the workpiece. The joints must be stitched.
You may be interested in: Alcantara - what kind of material is it?
Designer braids
They can be with a soft backing, figured constriction and stitching. The perforated surface of the leather looks impressive. The original wicker edging along the outer rim of the steering wheel is eye-catching. Wooden inserts emphasize the solidity of genuine leather.
For women - extravagant decoration on the steering wheel. Fur, stretch satin, and leather inlay with rhinestones look bold.
The bells and whistles for the steering wheel are ordered from a car shop. They look expensive if they are made well.
DIY steering wheel trim
There are tuning studios for cars that specialize in covering the steering wheel with leather and other materials, covering car seats, etc. But, if you have the necessary material and tools, you can easily do it yourself.
Materials and tools for steering wheel braid:
- leather strip, approximate size 10x120 centimeters;
- high strength nylon cord, approximately 3 meters long;
- awl or special punch;
- two needles from 5 cm long;
- a hook with a small head for pulling out nylon thread;
- a thimble to prevent holes in your fingertips;
- roll of tape;
- cling film;
- white sheet (whatman paper) of A1 format for the pattern.
The steering wheel can be sheathed completely, that is, with the steering wheel spokes or just the steering rim. Let's consider both options.
Steering wheel upholstery without spokes (only the steering wheel rim is upholstered)
We calculate the length of the leather strip using the formula: multiply the outer diameter of the steering wheel by the number P (3.14). Let's get the length of the circle. You can check with a tailor's flexible meter. When you approach the joint, you need to tighten the leather strip, since the leather itself will still stretch and you need to make sure that the upholstery does not sag.
It is not necessary to make the skin one color. Some sew together pieces of leather of different colors to create a custom design.
There are the following seam options:
You can coat the seams with special leather glue. This will protect the threads from ripping.
Holes are made for the nylon thread. A breakdown is a hollow metal tube with one sharp edge along its entire diameter.
One side of it is placed on the skin, and on the other side it is hit with a hammer and a hole is created.
If you make holes for lacing with an awl, then the rope must be wound immediately after the awl.
Full steering wheel cover (with spokes)
This option is much more complicated. You need to make a pattern for sewing the trim. The pattern is made using cling film. To do this, you need to wrap all the parts of the steering wheel with film and secure it with tape so that it does not unravel.
Next, you need to draw all the seams and number them. On paper you need to draw diagrams of the numbered pieces of future upholstery. Now you can cut the film at the seams, put these pieces on whatman paper and trace them with a pencil. To the drawn contours we add 5 mm at the seam joints and cut them out.
Now we cut out the patterns from the leather. We sew the parts along the length of the steering wheel either by machine or by hand. Place it on the steering wheel and tighten it. Then we make holes and lace. If the plastic decor of the steering wheel is in the way, then remove it first.