Is it possible to paint a car using old paint?
The problem is this!
A long time ago, back in 98, I felt very bad after an accident when the hood and front fenders were painted! Now this paint is partially peeling off (white spots appear; if you rub it with a rag, the paint remains on the rag). I would like to fix this before winter! But there is no money for complete and professional painting. Is it possible to simply coat the top (after sanding off the rust) with spray paint and varnish? To somehow stop the corrosion! Or is this a lost cause? My opinion is either to do it well or not to do it at all. This applies to everything, especially the body and paintwork. If you have no experience and a wild desire to delve into it, learn from mistakes, etc. -The best option is to find a person who does the preparation and painting at an affordable price.
In your case, having only acrylic and primer in cans on hand, it should be something like this. Painting is 85% surface preparation.
Option 1, select the problem area, use sandpaper (100-200) on a grater to evenly remove the coating until the rust is “even” and completely removed, change the sandpaper to 400-600 and grind, preferably do all this with water (plastic bottle with a hole suitable in a traffic jam). Then drying and degreasing with a solvent, only the rag should not be wet but slightly moistened, then it is advisable to separate the cleaned area and fill it with primer. Then grind again until “smooth”, evaluate the resulting surface, because... the paint will only reveal all the “strays”. Before painting, it is very advisable to heat the surface and let the can hang for min. 5 and warming it up to 30 degrees won’t hurt. Place the first layer from afar and not completely, then after drying the next ones, again do not allow the surface to cool.
2nd option, a room with good lighting, without dirt and dust. It is easier to paint horizontal surfaces with spray cans; it is better to remove the hood. Apply all of the above to the entire surface with the possible addition of putty, 2-3 cans per hood (depending on the layer). Varnish is needed only for metallic or “advanced” painting. I paint “VIKA” myself, it’s not a fountain, but it’s not guano either. Estimate the financial and time costs yourself.
3rd option, clean it, coat it with some anti-rust and save money. Anything else will be a useless transfer of money.
Source
Preparing the room, tools and materials
In order for the painting to proceed without complications and to avoid subsequent swelling of the car enamel, it is necessary to properly prepare the garage. It is not recommended to carry out painting work outdoors; a sudden wind may dust the wet paint.
- Carry out a wet cleaning of the room.
- Ensure sufficient air flow without drafts.
- Prepare the lighting.
- If the door will be painted entirely, it is recommended to prepare a lift or hook for hanging the part.
To reconstruct a rusty door you will need:
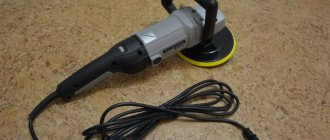
- Sander;
- replaceable wheels: hard for preparing metal for repair and subsequent grinding and polishing;
- grinder or electric drill for stripping metal;
- screwdrivers for disassembling the door panel;
- rubber spatula;
- construction knife;
- rubber gloves, goggles, respirator.
You can prepare the door for painting without a sanding machine. You will need to use sandpaper to sand and prepare the metal, and soft polishing rollers for finishing.
Technology
In order to varnish any part or the entire car, you will need equipment and, in fact, the varnish itself. Despite the fact that these things can be combined in one “can,” let’s first consider the basic option - we’ll look at aerosols a little lower.
Equipment
In principle, the requirements for equipment are similar to those for painting, except that the various tolerances are greater. You need a spray gun and a compressor, as well as a warm room in which there is no dust, or its presence is reduced to a minimum (to avoid further polishing).
Material
Car varnish consists of several components that are mixed before use.
In the simplest case, it is the mixture itself and its hardener. But it is advisable to add a couple of additives to them. The first is anti-silicone, which prevents problems due to greasy (oil) stains or dust particles. The varnish simply “won’t stick” to a greasy surface without such a product, i.e. Over time (after hardening) it will peel off. Of course, the presence of such stains should be kept to a minimum, but this can be difficult, especially when the paint is fresh (after all, solvent cannot be used). In addition, fingerprints are also greasy in composition, so the use of such a product is justified when varnishing on your own.
The second additive is a hardening accelerator. This is a useful thing, especially when there is no long period of time for drying, or the temperature in the room where painting is carried out is low.
The ratio of the parts to be mixed is written in the instructions, but the overall picture is as follows:
Preparation
Before you start work, you need to prepare. You need to connect and configure the equipment, prepare the surface and mix the varnish.
The surface to be varnished must be cleaned as much as possible from dirt and blown with compressed air. Otherwise, all the dust particles will be literally buried under a layer of varnish, but they can be very noticeable in sunlight, and polishing will not help here.
Car varnish should be diluted immediately before application. The fact is that it hardens quite quickly, so you shouldn’t cook it in large portions at once. It is better to carry out the whole process in several steps. Another very important point is that you need to mix thoroughly, otherwise the unevenness of the coating (and, more importantly, hardness) will be quite strong.
Coating
This procedure is much simpler than that for applying paint. By and large, you need to open the spray gun to maximum and get started. The essence is quite simple to grasp - you just need to practice on a test surface.
The varnish is applied to the car in 2-3 layers. The layers are increasing - the further you go, the thicker the layer. But you need to be wary of smudges, although they can be easily removed by mechanical polishing.
The first layer has a minimum thickness - the varnish must literally be sprayed onto the surface. The next ones are already applied to a mirror shine.
The spray gun is driven at a uniform speed, at an angle of 45 degrees to the surface in a forward mode (the spray torch looks at the part that has not yet been painted). It is better to start with joints and corners (as well as other transitions and irregularities), and only then cover a flat area.
If it is necessary to pause work, for example to dilute a new batch of varnish, it would be optimal to choose some kind of transition. You should not stop in the middle of a large area, otherwise the joint in the final result may be visible.
Aerosols
When it is necessary to process only a small part, it is tempting to use car varnish in cans. But this choice, in addition to the obvious advantages, also has disadvantages.
The advantages include the absence of the need to use specialized equipment (compressor and spray gun), and ease of use. After all, it is enough to purchase an aerosol and you can apply it immediately. There is no need to carefully mix the ingredients in exact proportions.
But the lack of additional additives can backfire. In addition, the varnish from a spray can will be cloudier than a similar one, but with full-fledged technology. Yes, and applying it from such a “spray gun” is more difficult, because a real spray gun has greater productivity and dosing accuracy.
However, if you need to varnish a small, inconspicuous part, then using an aerosol may be quite sufficient.
Good day, forum users. This may be a tired question, but I want to get an answer to it.
I have a 2014 Lada Priora, my personal car, which I bought new. In just over 4 years, not a single wash has touched the car, the car doesn’t drive particularly on highways, but chips appear.
Why you shouldn’t delay restoring paintwork
Painting a car door is a responsible job that some drivers trust to car service specialists, while others do it themselves. Car service services allow you to free yourself from the expenditure of time and effort, but they entail financial expenses.
Painting a car door yourself will require some time and effort, but in this case you will not have to pay for the work. In addition, any car repair work is gaining useful experience, which is never superfluous.
The main stages of painting car doors
Painting consists of the following steps:
- Choice of paint;
- Preparing the premises, tools and materials;
- Surface preparation;
- Painting;
- Varnishing (if necessary).
Paint selection
The choice of paint is extremely important, since you are faced with the task of determining and purchasing exactly the type and color that was previously used for your car. Otherwise, your car door will differ in color from the body and other parts.
If you paint a small area, the situation will not be better - a blot of a different shade will be visible from the side.
There are several approaches that will help determine the type and color of enamel used to paint a car:
- Identification by VIN code - each car has its own unique number, which can be used to find out information about the production date, factory paint, etc. A plate with this code is located under the hood on the engine or at the bottom of the side of the doorway near the driver. If the color is not indicated on the plate itself, provide the VIN code to the dealer from whom you bought the car - he will find out the information you need from the database.
- Determination by eye is a method that requires serious experience and knowledge of the properties of enamels. Contact a professional colorist and after he names the type of enamel, perform a control coloring. Apply paint to a small piece of metal, wait until it dries, and compare it with the color of your car. If they match, get to work.
Preparing the room, tools and materials
To work, you will need a room with full lighting and good ventilation, where wet cleaning has been done. Dust and dirt during the painting process will cause a lot of trouble - they will settle on the freshly painted surface, as a result of which the paint layer will be uneven and with pimples.
The premises must have access to the electrical network and fire safety equipment.
Gather the necessary equipment and supplies:
- Sander;
- Abrasive wheels with different degrees of grain size;
- Spatulas;
- Sandpaper with different grain sizes;
- Pneumatic spray gun;
- White Spirit;
- Putty;
- Priming;
- Auto enamel;
- Avtovarnish (if needed);
- Microfiber cloths
- Masking tape;
- Thick paper.
After you have collected everything you need, start preparing the surface.
Surface preparation
The surface must be prepared for painting - otherwise the paintwork will not last long. After a short period of time, it will begin to peel off and your car will again become defenseless against corrosion.
In order to prepare the surface for painting, follow the given algorithm:
- Wash the door thoroughly and carefully dry it.
- Use masking tape and thick paper to cover the windows and all areas that need to be protected from paint.
- Using a local light source, conduct a thorough inspection and mark with a marker all areas where defects will be found - cracks, scratches and chips.
- Use a spatula to pick out any loose enamel wherever possible.
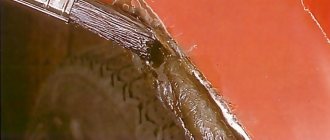
- Using a sander and a coarse abrasive pad, sand down all areas. Pay special attention to areas of corrosion - they need to be removed. To do this, use a grinder and sandpaper.
Cleaning damaged areas of the body using a grinder
- Degrease all cleaned areas with white spirit and wipe dry with a microfiber cloth.
- To level the relief, apply putty - prepare it first, following the instructions on the package. The choice of putty depends on what kind of auto enamel you are going to use to paint the door.
- After the putty has dried, remove all micro-irregularities using a sander and abrasive.
- Apply primer over the putty in two or three layers.
- After the primer has dried, sand to remove uneven terrain.
- Next you will need to matte the surface you are going to paint. If we are talking about local painting, matt only the area being treated; if we are talking about complete painting, you will have to work on the entire door. Matting consists of applying micro-irregularities to the surface - it is necessary to increase adhesive properties that affect the adhesion of auto enamel to the surface. Matting is done using fine-grained sandpaper.
- Using white spirit and a microfiber cloth, degrease the surface - this procedure completes the process of preparing the surface for painting.
About the choice of materials
Body coating material can be applied in two ways, immediately after applying paint or on a dry surface. Therefore, you should choose materials based on the chosen painting method. In most cases, two types of materials are used, a simple soft composition or one that requires the use of a hardener. It’s difficult to say which varnish is best for painting a car, since its processing technologies are different in all cases.
This type of car coating will take longer to dry, the protective function is less pronounced, but it is easier to polish and grind. Usually the varnish is applied in several layers. The designation of such a substance contains the letters MS.
Solid materials are distinguished by the fact that they are used with a hardener; the designation contains the symbols HS. Their composition is thicker, the fluidity is low, this allows you to apply an even layer of uniform thickness. It is enough to apply one and a half layers.
Cellulose varnishes still find their consumers. Applying this varnish to a car after painting gives a weak shine, rapid loss of colors is possible, and a fire may occur. Despite the existing shortcomings, people still buy it. Cellulose varnish for car painting is applied in at least three layers. Intermediate drying of each should be at least 15 minutes. The last layer of varnish should be more liquid. Drying of the latter lasts approximately 40 minutes, and complete hardening of the paint occurs after 5-6 hours. More modern materials include products made from glyphthalic compounds. Experts note the good shine of this varnish on cars; it can be obtained without polishing. We can confidently say that the product has good covering power, however, it will take much longer to dry than those previously described. It is this reason that complicates the process of applying it to the area of the car to be painted.
It is recommended to dry the varnish coating on a car at a temperature of 60 degrees, but in exceptional cases a temperature of at least 20 degrees is allowed. The degree of heating of the body being painted also plays an important role, which should be at least 20 degrees. When, for one reason or another, painting is carried out in an ordinary room with “poor” ventilation, a special thinner is used. Its use will allow you to quickly and efficiently obtain a film on the surface being treated. Also, car varnish coating can be done using the hot method, which allows you to obtain the coating without the use of special solvents.
Considering the high cost of modern materials, the use of the previously described products will allow for material savings on special solvents and hardeners for varnish. Let's take a closer look at the process of applying such compositions.
The best metallic car enamels
Spectacular
Duxone basecoat is a composition with an acrylic copolymer base, used primarily for painting passenger cars. It is successfully used for local, unit and complete repair of coatings, both factory and secondary. Fits perfectly on any hard surfaces and planes created with DuPont primers.
Preparation is carried out with soapy water, degreasing, mechanical adjustment, dry and wet grinding. Finishing with the composition is carried out in 2 passes with a break of up to 15 minutes on the undried layer.
Advantages:
- ease of application, quick drying, ease of polishing;
- high quality components;
- ability to withstand chemicals for some time;
- excellent shine, long lasting color;
- strength, stability, efficiency;
- affordable price.
Flaw:
- hiding power and spreadability sometimes fail.
The material, the money spent on it, pays for itself completely. You can easily come to this conclusion if you compare the pros and cons given by users in percentage terms.
Efficient
Mobihel metalik is a professional composition for repairing and finishing buses, cars and trucks, as well as painting metal objects.
At the preparation stage, the surfaces are sanded and degreased, after which they are treated with 1st polyester putty and a universal 2K primer or 2K HS contact primer. To achieve a high-quality coating, sophisticated techniques and spraying methods are used, as well as proprietary thinners and colorless 2K acrylic varnish. The substance is applied in 2 or 3 layers with intervals of 1/4 hour. The paint dries completely within 40 minutes.
Advantages:
- mechanically and chemically resistant high-gloss coating;
- good covering ability and excellent consumer properties;
- rich color, high fade;
- wide range of colors;
- volumetric appearance, durability.
Flaw:
- n-butanol and xylene contained in the composition are harmful to health.
The reviews about this car enamel are mostly positive. The main assessment is its high popularity among users.
About coating technology
The process of applying a layer of varnish to a car is much simpler than painting the body with enamels, but it also requires skills and special equipment. Improper coating on a car can cause a number of defects. These are smudges, an uneven coating layer, the appearance of shagreen, and other defects. Eliminating them will entail additional financial costs and time.
Before applying varnish to a car, you should decide what to do with those body parts that will not be coated. Most often they are dismantled or covered with paper.
Now you need to start preparing the car for processing, it differs from painting work. In general, no work will be required only if the composition is applied to still “wet” paint. In other cases, it is necessary to matt the surface on which the coating will be applied. To obtain a matte varnish surface, it is best to use abrasive materials with a grain size of approximately P1000-1500. If you use smaller materials, you may not get reliable adhesion, and if you use larger materials, you risk causing large scratches.
The process of obtaining a matte finish is best carried out using water, but in some cases a good surface is obtained by manual dry method. Next, it’s time for degreasing. This process should also be approached carefully, since the use of solvent 646 can lead to the dissolution of paint already applied to the car. Before we tell you how to properly apply varnish to a car, let's figure out how to dilute the varnish for painting a car.
Ensuring a clean surface
The paint must be applied to a clean, prepared surface, so the car must be washed before painting. The water temperature for washing the car before painting should approximately correspond to the ambient temperature. A significant temperature difference can cause microcracks in the existing paint layer, which, in turn, will lead to defects in the applied coating.
Washing a car before painting is carried out in compliance with a strict sequence: from the roof to the side surfaces, and then to the wheels. A special car shampoo can be added to the water.
A soft brush or brush is used as a tool. You should refrain from using foam sponges, as they can trap microparticles of sand that have an abrasive effect on the surface.
How to thin varnish
Work on preparing the composition for painting begins with the obligatory straining of all ingredients. As a filter, you can use mesh filters, which are sold in retail chains along with paints and varnishes, but you can also use regular nylon.
The painting mixture is prepared as follows:
There is a risk of side effects due to incorrect dosage of ingredients during painting. Therefore, this operation should be done very carefully. A good mixture can only be obtained with good mixing. When the preparation of the varnish composition is completed, you can begin to apply it.
Auto enamel of which company to choose
The car market is saturated with a variety of products for various purposes. One of them is enamels, necessary for repairing the bodies of light and heavy vehicles. These compounds are produced by large and small, well-known and not so well-known companies.
The following manufacturers are popular with buyers:
DuPont is the world's largest American company, founded in 1802. It produces chemical products, including high-quality paints and varnishes. The inexpensive line is represented by Duxone auto enamels.
Vika is a brand under which Yaroslavl has been selling paint and varnish materials since 2001.
Mobihel is a leading manufacturer of paints and varnishes in Central Europe. Its facilities are located in Slovenia.
About Coating
How many layers of varnish need to be applied to a car depends on the chosen material, this has already been discussed, so let’s look at the application process itself. The painting process should begin with the ends and various recesses of the body, then move on to the main surfaces. It is important to choose the right spray gun nozzle; for “wet” use it should have a size of no more than 1.5 mm. The application process depends on the area of the surface to be painted.
In the case where a large surface of the car body is being painted, the varnish is applied with a cross-shaped movement of the spray gun. If the surface has a small area, the varnish is applied by rotating in a spiral. They start moving from the outside of the surface to be painted and gradually move towards the center. The distance of the spray gun from the surface should be no more than 25 cm; if this distance is reduced, you can get sagging, smudges, and other defects.
The best car enamel pencils
Practical
Mobihel Pencil is a hand-made product for fixing scratches, chips and abrasions. Suitable for repairing any types of vehicles: buses, trucks, cars.
The pencil is filled with a proprietary composition of 12 ml. After using paint of the desired color, the effect is secured by applying 1K clear varnish. Thanks to the small size and convenient shape of the tool, the enamel is applied evenly and in the required quantity, and after use the rod retains its properties and, if necessary, is reused.
Advantages:
- optimal amount of diluent - the composition does not spread after application;
- convenience, speed and correctness of use;
- a wide range of colors, allowing you to accurately determine the option;
- high quality, reusable, optimal results;
- cheapness.
Flaw:
- If stored incorrectly, the product may leak from the marker.
The pencil does not replace a painter - that is not what it is intended for, but it masks shallow scratches perfectly. The enamel dries within a few hours, and if the line is too wide, the excess can be easily removed with a napkin or rag. Users find this product useful, especially since it is cheap.
Convenient
Vegatex pencil is a ready-to-use paint marker designed for repairing scratches. Recommended for both the bodies of any vehicle and ordinary metal products.
Made from Japanese parts using Mobihel and Eurocolor fillers. The air-drying composition is applied to a previously degreased surface, and the exposed area is completely covered to avoid corrosion and for aesthetic reasons.
Advantages:
- speed and ease of use;
- the ability to select a color that does not differ from the factory one;
- high-quality camouflage, optimal consumption of product;
- acceptable cost.
Flaw:
- When storing horizontally or vertically (head down), leakage is possible.
Users note that the pencil is good for masking small chips and abrasions. The main thing is to choose the right color.
Do I need to apply primer to old car paint?
Any car loses its shine and attractiveness over time. This occurs due to the influence of weather factors, mechanical damage and natural aging of iron. Therefore, every car owner has to face the problem of updating the body. Many zealous owners wonder whether painting a car with their own hands can give the original appearance of an iron horse? It all depends on the character of the car owner.
If he has free time and a great desire to restore his car, then everything will turn out no worse than the famous garage painters.
What paint should I paint my car? 4 types + tips
The eternal question of car owners: what paint to paint the car with, is now drilling into your head with renewed vigor.
Looking at a car that has lost its former luster, we come to the inevitable conclusion that it’s time to paint your favorite to return it to its original fresh look. This problem must be solved in advance, because there is a direct dependence on the availability of money and time.
If you decide to paint your car yourself, then first of all soberly assess your capabilities. But, if everything is clear with the service, qualified workers will solve this problem perfectly, and deciding what paint to choose, how to prepare the car for painting, finding a place to carry out the process itself - this lies on your conscience.
Preparatory chores
Even if partial painting of the car is required, it will take up to 90% of the time to prepare for applying the paintwork material. To paint at least one body element (door, fender, threshold, etc.), you need to collect a whole arsenal of available tools and materials, as well as protect other body parts from dust and splashes of fresh paint. Naturally, before painting a car, some preparation of the old coating is required.
If there is no damage to the body parts, you just need to sand the old paint (matting). Then the adhesion of the new material to the factory base will be reliable and durable.
If there are “bugs” or dents on the surface of the body, you will have to completely remove the old paint, clean the metal of rust and smooth out all the unevenness using putty.
Local painting can be performed on dismantled parts. Primers for old paint for wallpapering? For example, the hood or door of any car can be removed, which will allow you to get rid of additional body protection and save on the purchase of masking tape, film, and special easily washable products.
The painting process will require the following equipment and tools:
One of the most important stages when painting a car locally is the selection of paint and varnish material.
Preparing a car for painting
Before painting a car, it is necessary to prepare the room inside which the work will be carried out. To ensure high quality performance, the room should not contain sources of dust and contamination.
To clean the room from dust, you should thoroughly moisten the floor, then treat the walls and ceiling with a stream of warm air from a compressor or industrial vacuum cleaner. Dust raised from the treated surfaces of the room settles on the damp floor. In this case, the car must be located outside the garage, or be protected with plastic film. After wet cleaning is completed, the walls and ceiling are also covered with film. Under the ceiling, the film can be secured using several rows of fishing line stretched from the top of one wall to the other.
Paint selection
There are several answers to the question of how to paint a car. Choosing one of them becomes the defining moment when buying paint. If you need to completely paint the car, you will need about 2-3 liters of paint.
In this case, it is better to buy a ready-made paint material that best matches the color of the factory coating. Some motorists consider this necessity an excellent reason to radically change their appearance. Ready-made paint is sold in metal cans and is much cheaper than similar material when selected by computer.
When removing mechanical damage or pockets of corrosion on one or more elements, a different approach is required. It is important not just to buy 50-200 g of paint, the new coating must match the color scheme of the entire car body. To do this, remove the smallest body element, which is the gas tank flap. It is presented to computer selection specialists, who mix certain colors, achieving perfect similarity of paint with the presented sample.
If the selection is made at a high level, then even the local painting of the car does not stand out against the background of the factory coating. The main thing when painting a part of a body element is not to make straight boundaries. Then the average person will not be able to detect the tinted areas.
Painting a car door
Painting must be carried out without stopping; it must not be allowed that after applying the first layer the master needs to leave for several hours. How to paint a car door yourself step by step:
- Place the sprayer on the paint container if you are using enamel in cans.
- Immediately before painting, degrease the surface, wipe with an antistatic agent or an antistatic cloth.
- Spray the first coat of paint horizontally, starting at the top of the door.
- Spray the second coat perpendicular to the first.
- The direction of the enamel jet is 90 degrees to the surface, the distance is at least 20 cm.
When painting a part of a door locally, when it is necessary to repaint a small area, so as not to get a mismatch of shades, craftsmen recommend using professional tricks:
- If there are metal stampings on the door, then paint over the area until it breaks. The perekant will hide the discrepancy in shade.
- After painting, sand the entire area and varnish in two layers.
For paintwork in light shades, it is better to use acrylic enamel and paint the doors using a smooth transition method. Paint over the factory coating in places of contact with the area to be repaired with matting paste, wash the transition area and degrease. Apply the enamel as the first layer with minimal coverage of the transition zone, apply the second layer after the first has dried beyond the transition zone.
Applying primer
Before painting the car, it is necessary to create a substrate that has good adhesion. This function has long been performed by primer. It adheres perfectly to the metal base, while forming a matte surface. The shiny paint coating “sticks” to it perfectly.
In addition to these useful characteristics, the primer reveals all defects that went unnoticed at the preparatory stage.
Automotive primer is most often produced in light gray color. It must be diluted with an organic solvent recommended by the manufacturer. How to remove old paint from plastic from a car?
It is also important to follow the proportions when mixing the primer and solvent, which are indicated in the instructions.
The soil is poured into the spray gun through a disposable filter to remove mechanical impurities. Then the spray gun is adjusted on the sample plate, after which the body is primed.
Automotive primer can also be applied to old paint. In this case, the factory coating must adhere firmly to the body element. Since the primer will not adhere well to a glossy or non-greased surface, abrasive treatment of the old paint will be a necessary condition.
Helpful information
Tips for painting a car:
- The composition should not be applied to a loose layer of rust; it must be cleaned off.
- If the paint contains a primer, then it is used as a mono product. The number of layers must be at least 3.
- The coating can only be applied to a dry surface.
- When painting a large area, the paint is applied in stripes. In this case, each line must overlap the previous one.
You can learn a lot of important and useful information about the methods and methods of removing rust from a car here.
Do-it-yourself body painting
The quality of application of a new paint layer will be influenced not only by proper preparation and the choice of high-quality paint. It is necessary to adhere to fairly ordinary moments.
The most popular car painting technology is the sequential application of 3-4 layers with a thickness of 80-120 microns. This layer can only be applied with a cool “gun”. It should be noted that the viscosity of the paint and varnish material of the next layer should be lower than that of the previous one.
Under no circumstances should you try to cover up the original paint after the first spraying.
Painting cars is quite a painstaking job. Only calm and balanced people reach the upper levels of painting skills. But to reveal these abilities, you should try to paint at least one car.
Additional Information:
The first layer of primer is usually applied in a thick enough layer to evenly cover the surface, and the material itself will fill all micro-irregularities and chips. Next, let it dry for about 10 – 15 minutes. If necessary, rub problem areas and apply a second layer.
They wait for it to dry a little, if all is well, then leave it for about a day and move on to the final painting.
Before painting the car, it is necessary to create a substrate that has good adhesion. This function has long been performed by primer. It adheres perfectly to the metal base, while forming a matte surface.
The shiny paint coating “sticks” to it perfectly. In addition to these useful characteristics, the primer reveals all defects that went unnoticed at the preparatory stage.
Acrylic primer is used to fill small pores of putty and old layers of paint and form an adhesive layer for the base paint. One of the undesirable properties of this soil is hygroscopicity. The moisture accumulated by it contributes to metal corrosion, so acrylic must be dried well.
Passivating primer GF-089 (black) contains carbon black, zinc trioxychromate, and microtalc. At room temperature 18 – 22°С it cures within 24 hours, and at a temperature of 120°С – no more than 10 minutes. It is applied to driveshafts and some other car parts.
Treatment with a primer is carried out before applying the final paint coating. Acid soils are used to protect metal body elements from moisture, salt and other adverse external factors, as well as corrosion.
When completely painting a car, it is necessary to remove handles, windows, door locks, mudguards and fender liners, moldings, antennas, headlights and similar elements. Disassembly is carried out individually each time, and what exactly is removed depends on whether the entire body is being painted or just part of it.
Two primary primers are used: acid (etching) and epoxy. Acid is applied to metal with residual traces of corrosion and transforms rust, stopping the process of its spread. It is necessary to apply secondary acrylic primer to it, and then apply putty or other coatings.
If your car is painted without primer
Cars with original paintwork are more valuable. And this is understandable, because the correct materials were used in this case. However, this does not mean that parts painted in the garage will necessarily peel off. There is just such a possibility.
In general, it is better not to buy cars whose paint quality is suspicious. It is extremely important to ring the entire body with a thickness gauge and determine which parts were painted and which were not. If the owner claims that the car has not been damaged or painted, then it is doubly important to check this fact.
The primer layer is up to 50% of the thickness of the paintwork, provided that there is no putty underneath. If the thickness gauge shows too thin a layer in places, then this is a reason to doubt the adherence to the painting technology. However, if such a car has already been purchased and the paint has begun to peel off, but no soil is found underneath it, then there is only one way out - complete repainting!
Reading every day various questions on how to properly or incorrectly prepare a car for painting, I observe a thoroughbred gag from the majority of participants in this community. For a good result, you should always adhere to technical recommendations when working with paintwork, simply read the instructions for putty, primer and even paint - DEFINITELY WORTH IT. So, in front of you is a car, old, new, who paints it? Even more so with your own hands? Only pros, first we determine the defects - it’s worth starting with disassembling and troubleshooting, welding rot and replacing parts, often the car was in an accident and this came to light, it’s worth aligning the bones, adjusting all the gaps with new parts, and having disassembled the car, start. If we have parts in black primer, it is advisable to clean it down to metal, level it with putties, prime it with epoxy or acid primer, sand it and paint it. Many people are faced with a dilemma: what comes first? Primer or putty? The answer is simple - you applied epoxy, you can’t put putty on the acidizer, when you rub the putty - you will wipe its borders to the metal and still prime it, many will say - so under the putty, but the soil won’t rot under it, it won’t rot anywhere - if you cover the putty and the bare metal on top with epoxy or acid primer and do not break through it during grinding, it is they that block the access of air and moisture to the metal, and according to observations, not only mine, when using epoxy primer, there is no subsidence of the putty and no lining of repair areas. Next, you can cover it all with wet acrylic primer, filler, dry, sand and paint, here you should always use watches and scales and do not pour the wrong solvents/thinners, you can pour them at your own peril and risk, and I believe that your neighbor is a hundred thousand million times I did this, but after polishing an old car, you are unlikely to be happy with saving 200-300 rubles on a normal solvent, with which there are guaranteed to be no problems or abnormal reactions. You also shouldn’t skimp on materials. This applies to putty and primer and paint and varnish. When grinding Gradation 100, the main rule is the use of carbon development - it is important when reducing the risk. When working from metal - p80 on a machine, stamped on the metal, putty, sharpen the mold with p120, apply development and interrupt with p220, you can use a machine, develop again p320 - machine, primer. Do not forget that the risk when processing with a p320 machine is equivalent to approximately p600 manually. Next, we also sharpen the soil with R 320 developer manually - we made the forms, take the machine and R 400 developer, 600 and we can paint.
Is it possible to paint a car over old paint?
I will say the following about primers and putties. Be sure to look at the date. Even the best brand, if frozen or sitting in a warehouse, is already a “garbage dump”. It is better to use primers, putties, and paints from the same manufacturer. There will be no possibility of formulation rejection occurring. When working, be sure to use protective equipment. The best respirators are 3M. Everything is terribly harmful. The better a chemical is, it is often also more harmful. Even the pleasant-smelling Tikkurila (solvent 1031) is worse for health than our terrible-smelling white spirit.
Often, car owners save on materials for painting the body, thereby violating the technology of car painting. Are there any consequences from such savings? Why do such methods of car repair flourish?
Painting a car with your own hands without a primer is stupid, but “economical.” Let's take a thorough look at this matter.
Of course, few people want to overpay, even if the quality of car repair depends on it. When involved in an accident, most drivers stop appreciating their car, especially if this is not the first time a traffic accident has happened. They are not looking for the best craftsmen who repair cars with high quality, but amateurs whose services are as cheap as possible.
However, the savings grab you by the throat and force the average driver to delve into painting technology. After this action, the idea dawns on him that he can paint the car without primer and save 15-20% of money. Not all masters go for such a trick, because they know how it ends. Of course, it is possible to paint a car without a primer, but this option is chosen if the car is being prepared for sale.
If you paint a car without a primer, the paint will begin to flake off in flakes within six months, or even earlier. Such paintings are ordered by car resellers. And if you consider that 40% of cars on the secondary market are sold through the hands of resellers, then it immediately becomes clear why low-quality paint jobs flourish.
No one can determine whether there is primer or at least primer-putty under the paint. And even with “normal painting” the car will shine and shine like new. Alas, the buyer on the secondary market takes a pig in a poke.
You can paint your car without primer if you are sending it on its “last journey.” If you still want to drive it, then you should do everything as the car painting technology tells you. And the more expensive the car painting materials, the longer they will last on your car. Low-quality materials last for 3-4 years, while average-priced and expensive materials last for 7-10 years.
Every car owner should value and respect his vehicle, and also keep it in good condition so that the putty does not fall off on uneven city roads, injuring passers-by, and the paint does not come off. A car is not only a means of transportation, but also a part of the image. Take care of it no worse than your favorite clothes.
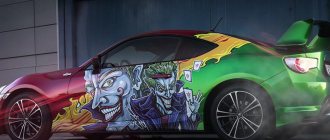
Painting a car with hammer paint
Unusual painting of a car with this type of paint will absolutely attract the attention of others! Its special feature is the unique frost effect on the glass. It is worth noting that hammer paint was known and popular back in Soviet times; all previously presented car painting options do not have the same durability and reliability as this one. It is very, very difficult to peel off the enamel, and besides, it is not afraid of sudden temperature changes. A particularly significant advantage of hammer paint is that it can be applied directly to a rusty surface, without any preparatory work or primer. Any external defect of the car can be easily hidden with its help.
Interestingly, this type of coating got its name due to the fact that the painted surface visually resembles the surface of a hammer head. Also another, lesser known name for this paint is blacksmith paint.
The paint is based on alkyd-styrene and epoxy bases; it also contains fine glass and aluminum powder. It is thanks to these components that the paint acquires special strength and resistance to corrosion.
Another advantage of this coating is its wide color spectrum, which even includes golden and copper shades. In addition, thanks to the metallic shine, it will give the impression that the car is mirrored.
You can buy paint at any large hardware store; most often they also sell varnish along with it, which will help consolidate the effect and give the car an even more mirror-like appearance.
When it is applied to the car body, you should get a small shagreen patch.
The most popular, but also expensive, is hammer paint from the English company Hammerite, however, our domestic manufacturers of hammer enamel are no worse than their foreign competitors.
It is worth noting that it is best to apply this paint with a velor roller, since this effect cannot be achieved with a gun. When painting a car with a spray gun, you should apply about 4 layers. The effect will be wonderful!
Rules for painting cars with hammer paint
- Do not paint in rain or high humidity;
- It is not recommended to dilute the liquid, as this will worsen the characteristics of the paint;
- The paint roller should have short bristles;
- If you paint the body with an aerosol, then you need to maintain a distance of about 20 cm from the surface.
More and more often, car enthusiasts have a question: how to paint a car cheaply? Experts note that to paint a car with hammer paint at home, you do not need to spend huge sums of money; the costs consist only of spending on the paint itself and on the brush.
What is the function of the primer?
As already mentioned, primer ensures reliable adhesion of paint to metal. It acts as an intermediate layer, a connecting link, so to speak. But this definition is valid only in general terms, because there are different types of primers that have certain properties.
Main types of soil:
There are also primers that combine various properties. They are called universal. Therefore, if you don’t know what kind of primer you need to coat your car with before painting, then choose a universal one. Acid and epoxy primers are classified as special primers.
The fill primer contains bulk particles that form a porous layer with high adhesion on the body. This layer fills in all the small defects left after grinding (washing). Filling soil can also be sanded, but the risk is so small that it is not visible to the naked eye.
The stability of the entire paint coating depends on how well the filling primer adheres to the metal. The better the primer, the better the paint will adhere. You should not skimp on primer if you are making a car for yourself. By and large, you shouldn’t do this, even when the car is being prepared for sale, because palming off a person who gives you a considerable amount of money is, at a minimum, dishonest.
Acid primers are not an alternative to fillers. The acids they contain react with the metal, forming a sealed coating of oxides. This coating has anti-corrosion properties. If the body is stripped down to metal, then treatment with acid primer will be very useful.
Epoxy primers form an impermeable layer on the surface. They preserve the underlying layers and at the same time have excellent adhesion. They can be applied both to metal and to primer or putty. Epoxy primers help seal materials and separate layers.
Surface priming
As with traditional painting technology, which involves removing the old paint layer, painting car body surfaces over the existing coating involves first applying a primer. The primer is applied to the surface after it has been thoroughly degreased. The old paint is covered with a primer using a spray gun held perpendicular to the body part being treated. The first layer of primer is absorbed into the paint, filling microcracks in the surface layer.
The technology for treating the surface with a primer mixture, including the operating pressure of the compressor, the proportions of the components when preparing the primer mixture, the drying time and temperature conditions, is indicated on the primer packaging. Painting a car without removing the existing paint requires applying 3 layers of primer.
Spraying of the primer mixture must be carried out so that the limits of each subsequent layer are larger than the boundaries of the previous one. Compliance with this requirement will reduce the risk of ground halo appearance.
Depending on the type of primer, its complete drying time can be up to 5 hours. After drying, the car surface is sanded. The quality of the primer is checked using developing powder, which allows you to identify existing irregularities.
Source
Is primer needed when painting a putty part?
Some craftsmen, in order to save money, try to paint completely puttied parts without primer. But the savings are negligible, meanwhile the quality of the painting suffers. The fact is that it is unlikely that it will be possible to wash off the putty so that after painting no risk appears. Usually they also add a developing layer to bring the polishing to perfection.
The pore size of filling primers is much smaller than that of automotive putties. Accordingly, the primer washes out much better. In addition, it fills in all surface defects of the putty itself. Therefore, it is necessary to prime the putty.
What does it contain?
Henry Ford once said that a customer could buy a car in any color, but for now his requirement was black. These are not manifestations of Ford's temper and eccentricities. In fact, everything is much simpler - in those years, only one quick-drying material was produced, suitable for painting work on a conveyor belt. It was a black, natural-based varnish made in Japan.
Also, the main function of car enamel at that time was protection against corrosion, and not aesthetic appearance. But then the situation began to change, and other types of paint for cars appeared - for example, Ford did not even dream of dyes that would glow.
The physical characteristics of modern automotive paints, namely density, hardness and elasticity, can affect the protective properties and attractive appearance of the car. The composition of modern coatings includes the following components:
- A binder is a pure or dispersion solution, the main function of which is to bind the paint and varnish material;
- The film former is a pure and natural natural component, but the substance can also be synthetic;
- Solvents – designed to adjust the viscosity of paint;
- Coloring pigment - it gives color;
- Specialist. pigments – with their help you can obtain effects such as “metallic”, “mother of pearl”, “chameleon”, luminous surface effects in three-component compositions;
- Fillers - these substances create the final volume and density.
But the content of all these components is not necessary. Powder paint contains no solvents, and clear varnish contains no coloring pigment. However, binders are the main part of any paintwork material.