Carbon fiber (carbon) is also popular due to its special appearance, strength and light weight. In terms of strength-to-weight ratio, it surpasses both fiberglass and metal. However, carbon is not as accessible as fiberglass and working with it is more difficult, so it is used less often.
This article will take a closer look at how to make a hood out of fiberglass (fiberglass and laminating resin).
The reason for making your own fiberglass hood can be to copy an expensive hood, create a custom hood design, or lighten the weight of the car. Perhaps the car enthusiast wants to fully study the process in order to continue manufacturing fiberglass panels. After studying the information in this article, you can make a high quality fiberglass hood.
Advantages of a fiberglass hood
- To make a fiberglass hood, you do not need any special skills. The main thing is to follow the sequence of manufacturing stages and dry the layers for the required amount of time.
- You can make a hood that has an individual design that no one else has.
- A fiberglass hood is lightweight (usually 3 times lighter than a steel hood) without compromising its structural stability. This lightens the overall weight of the vehicle.
- Fiberglass, resin and other related materials (discussed below) are reasonably priced. Thus, a hood made by yourself will not cost much.
- Fiberglass panels have good resistance to temperature changes.
- The fiberglass and resin hood will not wrinkle or rust.
The cost of overlays and the possibility of purchasing them
Prices for ready-made overhead “gills” depend on the complexity of their design, as well as the presence of additional functionality and auxiliary elements. Thus, the simplest turn signal repeaters, made in the “shark gill” style, will cost those wishing to purchase them about 500 rubles.
Despite the relatively low price, such imitations of air intakes have a rather stylish design and are of good workmanship. Photo: smotra.ru
The cost of more complex and multifunctional products for tuning a modern car can reach several thousand rubles or more.
Purchasing any of them will not be difficult. To do this, the easiest way is to use the services of network selling services (Online stores) specializing in tuning and decorating personal cars.
Workshop
Workshop conditions are very important when creating fiberglass matrix and panels. The temperature should be between 18–22 degrees Celsius. Direct exposure to sunlight should be avoided. Any heating in the workshop should be directed away from the work area. Humidity should be normal and constant. All this is important, since the drying of fiberglass panels must be gradual and uniform. It is better for the product to dry slowly, naturally. This will prevent distortion of the shape of the fiberglass hood.
Ventilation must be provided in the workshop, as the resin produces toxic fumes.
Preparatory stage
Preparatory work must be carried out with special care. It is necessary to clean the area of the part to be repaired from old paint and corrosion, so that not a drop of rust remains. After this, the surface to be treated should be sanded, dried well and degreased.
Proper preliminary work is the key to quality repairs.
Methods for making a fiberglass hood
Let's look at how you can make a fiberglass hood. There are only two ways:
- Making a fiberglass and resin hood without using a die
- Making a fiberglass and resin hood using a die
Making a fiberglass and resin hood without using a die
Fiberglass and resin are applied to the outer (front) surface of the original hood. The reinforcements on the reverse side can also be made from fiberglass with resin according to the template of the original hood, and then glued to the first part. Another option for strengthening on the inside is to create their shape from any material (foam, polystyrene foam, cardboard) locally, and then apply glass mat with resin over them with an overlap, on the back side of the hood. This results in a uniform backside with fiberglass reinforcements.
On the hood, made without a matrix, reinforcements were added in the form of polyurethane foam covered with fiberglass and resin.
Flaws:
- The disadvantage is the rough front part, which requires additional leveling (putty and sanding), which will require additional time, make the hood heavier and thicker.
- If the panel is copied directly from the original, without a matrix, then its shape may be slightly distorted during hardening. This will also require additional leveling. Therefore, it is important that hardening occurs gradually, without temperature fluctuations.
- The form (in this case, the hood) made without a matrix turns out to be slightly larger than the original, since it is made on top of it. This may require additional adjustment of the hood to fit.
A mold (hood) without the use of a matrix can be produced when there is no need to make many copies of the original or the high quality of the front side is not required. As described above, high quality faceplates can be achieved by additional leveling after the fiberglass hood has fully cured. If you want to use this method, you can use the same principle as when creating a hood using a matrix. It will be described in detail below. The exception is that layers of fiberglass with resin are placed on the original hood (donor), and not inside the matrix, and a layer of gel coat (gelcoat) is not applied, since the meaning is lost.
Making a fiberglass and resin hood using a die
If you need to make several copies of the original (or a full-scale mock-up created), and also require high quality of the front side of the hood, then before making a fiberglass hood, you must first make a matrix.
A hood made from a matrix will be the most accurate copy of the hood from which this matrix was made. The method of making a fiberglass hood using a matrix can be considered the only correct way to obtain a high-quality product. If the matrix was made correctly, then you will receive a hood that will not require additional alignment and will be exactly the same size as the original (unlike a hood made without a matrix).
Flaws:
- Making a hood using a die requires additional costs for more materials (than making a hood without a die), and it will also take more time. Again, the excellent quality of the resulting copy using a matrix will not require additional labor and materials to align the hood (as is the case with a hood made without using a matrix).
- If you only need to make one copy of the hood, then the matrix will have to be thrown away, given away or sold to someone, or stored until the moment when it can be useful again.
"Bad-fight" for the "nine"
This type of VAZ 2109 hood tuning is very popular today. Such a hood will give an outwardly completely ordinary car an aggressive and serious appearance. The process will require another hood - it can be easily found at a disassembly site.
So, first of all, two triangular pieces are cut out of a sheet of metal. They should be carefully processed - they must be strictly symmetrical. Then they are attached to the base with self-tapping screws. Using a welding machine, the pieces are welded and the screws are removed. Welding seams must be carefully processed. Use a grinder to carefully level the surface. Then putty is performed using carbon fiber. When the surface is dry, everything is sanded, then primed and painted. After the paint has dried, the work can be considered complete.
This is how you can transform the appearance of the hood; tuning 2109 allows you to come up with other options. These are the cars that can be tuned and changed almost beyond recognition.
How to make a hood? Detailed analysis of the manufacturing process
Making a hood is a multi-step process. Let's look at each stage in detail. We will consider the process of creating a fiberglass hood using a matrix. As mentioned earlier, this is the most correct option, as a result of which you can get an identical copy of the metal hood, which will not need to be further aligned, but can be immediately prepared for painting and painted.
You will need:
- Fiberglass. Glass mat (CSM – chopped strand mat), density 225 and 450 gsm.
- Special rollers to expel air bubbles and smooth out resin-impregnated fiberglass. A cheaper option is a paint roller with a section of PVC pipe on top of the roller.
- 4 liters gel coat. Gel coat (in Russia it is often written in Russian letters without translation “gelcoat”) is a special polyester resin that is used as the initial layer when creating a matrix or copy. It contains an additive for increased elasticity to improve impact resistance and increased wear resistance. This resin also has the property of not flowing off vertical surfaces.
- 4 liters of laminating resin
- Release agent. Wax (Parting Wax) and PVA (water/alcohol-based polyvinyl alcohol)
- Brushes with natural bristles, 10–12 cm wide. It is better to use brushes with short bristles or cut the bristles to 3 cm in length.
- Containers for mixing resin with hardener.
- Work clothes. It's better to wear a work robe.
- Acetone (for cleaning). It washes off stuck resin well.
- Latex gloves
- Sanding paper (P120-P240), putty.
Safety measures during work
When carrying out repair work, it is imperative to use personal protective equipment: rubber gloves, safety glasses, a respirator.
The main danger during work is the contact of chemicals with human skin. Epoxy resin and hardeners can cause severe skin irritation. Also, resins and hardeners can cause allergic reactions. When grinding, dust may enter the respiratory tract. During the repair process, evaporation of resin, hardener and sanding dust can cause eye irritation.
How to restore a car body using fiberglass is shown in detail in the video.
Creating a Matrix
- The matrix must be made using the original part as a template. The matrix for the hood is an exact copy of the desired shape, turned inside out. The glass fiber is laminated inside the matrix. Before creating the matrix, additional elements can be added to the original hood, or the shape can be radically changed (for this you can use modeling clay, polyurethane foam with putty, cardboard, etc.). Thus, you can get a hood with an individual design.
- The matrix should be thicker (usually 3–5 times) and stronger than the future mold poured over it. This will prevent matrix distortion and mold damage.
- When creating a matrix, you need to consider how you will extract the form poured into it. A factor to consider is the taper angle of the casting. This is the angle of the edges of the panel along which the matrix is made. The poured mold is easier to remove from the die with a positive angle. That is, the edges of the donor (or die) need to be slightly beveled so that the mold can be easily released.
- The original hood must be perfectly flat before creating the matrix. All the irregularities and imperfections of the original hood will be imprinted on the created matrix. Therefore, if there is a need for this, you need to make cosmetic repairs to the hood before moving on to creating the matrix.
- The hood must be thoroughly washed and dried.
- We will consider a method of creating a matrix, which involves pouring a matrix on the front side of the hood and hardening it, then turning the hood over and making a matrix on the other side of the hood (amplifier), hardening and separating these halves. This method involves pre-fabricating a barrier from a dense material, which is glued to the edge of the back side, before creating a matrix on the front of the hood. This barrier will serve as the basis for creating a tapered angle from modeling clay or special wax (a beveled angle around the perimeter of the hood edge to facilitate separation of the hardened matrix). Also, the barrier will not allow the resin to flow onto the back side of the hood and will serve as the basis for a supply of fiberglass with resin along the edge, that is, the fiberglass will be laminated both on the hood and on the glued barrier (you will get an edge). This edge will give additional rigidity to the die, and will also ensure a safer separation of the two halves of the die once they are ready. You can split the edges with any flat tool without fear of damaging the original hood (its edge will be far from the edge of the filled matrix halves).
- The barrier can be made of polycarbonate or thick plastic sheet. First you need to use masking tape to make a template around the edges of the hood. Then you can transfer the template shape onto thick plastic and cut a barrier out of it. Masking tape is pasted along the perimeter of the hood, 10 cm wide. It is necessary to mark the cut points in order to obtain separate segments that will be convenient to paste. The barrier segments need to be marked so that they can be easily glued in the right place. Before gluing the barrier to the hood, you need to apply masking tape so that the barrier can be easily peeled off. Masking tape is applied to the edge of the back of the hood. Hot glue is applied to this tape. Then the barrier is glued. Tape is placed between the joints of the barrier segments to seal the joints.
- Next you need to use modeling clay or special wax to make a taper angle around the edge of the hood between the hood and the barrier. This angle will prevent the resin from flowing under the hood, which would prevent the mold from releasing. This way, when the matrix is ready, it will easily separate and will not get caught on the edge of the hood.
You need to create a smooth transition between the edge of the hood and the plastic barrier using modeling clay or special wax. It will prevent the resin from flowing under the edge of the hood and will facilitate the separation of the matrix after curing.
- Next, a mold release / separating agent is applied to the surface of the hood (and to the glued barrier). This is necessary to prevent the resin from sticking to the surface of the original hood. Firstly, this will help not to spoil the original hood, and secondly, the separating agent is necessary so that the poured form can be separated from the surface without any problems. The most commonly used release agent is a combination of wax and PVA (Parting Wax and PVA Release Film). You must first apply wax to the matrix. To apply wax you need to use a clean cloth or a special applicator. Let the wax dry for an hour. Next, a layer of PVA is sprayed (or brushed on).
- After the release agent has dried, a gel coat is applied. To do this, you can use either a special spray gun or a brush. You can apply 2 thin layers or one thick (0.8 mm). For a medium-sized hood you will need approximately 700 grams of gel coat. Allow this layer to dry and harden, but still make sure it sticks when touched.
- Next, a connecting layer (coapling coat) is applied. The connecting layer is done in the same way as conventional fiberglass lamination. For this layer, a special resin can be used (available from the manufacturer), which serves as a connecting (transition layer) between the gel coat and the main resin. Resin is applied to the surface, then glass mat is placed and impregnated with resin. You need to use glass mat with a density of 225 gsm or less dense. Make cuts in the fiberglass mat, if necessary, so that it follows the shape of the hood. Due to the fact that the glass mat is less dense, this allows it to follow all the contours of the hood well and fit well. This ensures that there are no voids left between the gel coat layer and the first layer of resin-impregnated fiberglass. After soaking the glass mat, it needs to be rolled with a roller to completely remove air bubbles. This layer should dry within 3 hours. It should become firm but still sticky.
- Now you need to use glass mat with a density of 450 gsm. First, resin is applied, then glass mat is placed and again impregnated with resin. Next, a second layer of glass mat is placed and again impregnated with resin. Everything is rolled with a roller to even out the layers and remove air bubbles.
- Most matrices using chopped strand mat consist of 8–10 layers. Thicker fiberglass fabric (Woven Roving, Tooling Fabric) can be added after the third layer of glass mat to more quickly increase the thickness and strength of the matrix. Vary the position of the fibers of the layers to ensure uniform strength. Do not apply more than 3-4 coats at a time as heat build-up may distort the matrix.
- On large matrices (as in our case), reinforcement is added on the reverse side for additional rigidity. To do this, you can make spacers (from PVC pipes) and apply 2 layers of glass mat with resin on top of them. These reinforcements must run along both the center and the edges of the die, where a constant amount of stress will increase from the impact of the poured mold.
After curing, reinforcements can be added to the back of the matrix, in the form of plastic pipes coated with two layers of fiberglass and resin.
- After the matrix made on the front part has hardened, you need to turn the hood over without separating the hardened fiberglass part. Next, you can start making the mold for the inside of the hood (reinforcement). At this point, you can remove the plastic sheet barriers that are glued to the edge of the hood. Removing the plastic barrier will leave a fiberglass edge.
Reverse side of the hood
- To prepare the backside for the application of resin and fiberglass, all seams and holes need to be sealed. When the resin is applied, it should not seep into any cracks or holes as this will interfere with the release of the mold. Small seams can be sealed with modeling clay, and large holes can be sealed with tape or special adhesive tape (flash/release tape).
Before starting to create the matrix, all cracks and holes on the back of the hood must be sealed.
- You will also need to add clay to the edges of the reinforcements to prevent the resin from getting underneath them.
- Just like when making the face of the hood, a taper angle needs to be created along the edges of the hood (between the barrier, which is now made of fiberglass, and the edge). That is, make a beveled edge from modeling clay.
- Now you need to apply and spread the wax and spray or brush PVA mold release (release agent) onto the inside of the hood.
- Now the entire surface is generously coated with gel coat using a brush (or applied by spraying). The layer should be quite thick (0.8 mm). This layer should remain slightly tacky before applying the fiberglass and resin.
- Next, resin is spread and glass mat 225 gsm is placed. On the not completely dry layer of resin and glass mat, a second glass mat with a density of 450 gsm is applied and impregnated with resin. In total you should get at least 4 layers of 450 gsm. Everything is carefully rolled with a roller. The applied layers must dry within 24 hours.
Separating the matrix from the hood
After the matrix has completely hardened, it must be released. For this purpose, there are special wedges of different sizes and different hardnesses. These plastic wedges are convenient to use because they will not damage the edge, unlike screwdrivers, spatulas and other tools. In our case, it is not too important not to damage the edges, since we have an additional edge around the perimeter of the hood. It is necessary to cut off a few centimeters of this edge so that the junction of the two halves of the matrices is clearly visible. First you need to mark a cut line around the entire perimeter of the hood. A jigsaw is used for cutting. Use a tungsten carbide blade. Insert wedges or any other flat tool around the perimeter of the die and gently push inward. This needs to be done gradually, moving around the perimeter. Sometimes you may need to use a hammer to lightly tap the wedges or other tool.
Special wedges of different sizes for separating the fiberglass matrix or hood.
Large panels and matrices are sometimes difficult to separate, even after separating the edges. This is affected by slight adhesion of the cast mold and static. If disconnection is difficult, you can apply compressed air or pressurized water into the gap between the matrix and the breadboard to help disconnect the matrix.
In this form, the matrix can be used as is, but to give an additional smoothness to the surface, you need to sand the surface with P1200 sanding paper and water. This stage will remove minor imperfections on the surface and make the surface perfectly smooth. Thus, the form filled in this matrix will not imprint small irregularities in the surface of the matrix.
How to make a fiberglass hood using a matrix
- The process of making a replica hood is similar to creating a matrix. When creating the final hood replica, you don't need to use a lot of resin, unlike a die. It will be enough for the fiberglass to be saturated with resin, but not filled.
- Apply 3 layers of mold release paste wax to the surface of the matrix, then several layers of liquid PVA release agent.
- After the separating agent has dried, 3 thick layers of gel coat are applied. This layer will provide a smooth front surface of the future hood. If you immediately apply resin, and then apply glass mat and saturate it, then the front part will have irregularities in the form of protruding fiberglass fibers (especially if thick glass mat is used) and pores.
- After applying the gel coat, you need to wait 2–4 hours.
- Next, the resin is applied. To create a hood, the manufacturer can recommend Vinyl Ester Resin, which has better properties than cheaper polyester.
- A layer of glass mat is placed and impregnated with resin. The fiberglass should extend slightly beyond the edges of the matrix. Enough resin is applied to completely saturate the fiberglass. However, avoid applying excessive amounts of resin so as not to increase the weight of the hood. Excess resin does not increase strength either. The resin is applied to the surface from the center to the edges.
- It is necessary to apply 4 layers of glass mat. Lay layers of glass mat so that the fibers are located at different angles relative to different layers. This increases strength in all directions.
- After applying and leveling the first layer, you need to wait about 40 minutes, then lay down the 2nd layer of glass mat. You want the first coat to be firm but still tacky before applying the second coat.
- With 3-4 layers it will be approximately 2.5 - 3 mm thick, which matches the thickness of factory fiberglass hoods.
- Roll out the applied layer with a roller to remove air bubbles. If bubbles remain, then the top layer on the front side may crack in this place.
- In a cast mold, distortion (warping, curling) can be avoided by allowing each layer to cure (to a tacky surface) before applying the next layer.
- Dry the resin slowly. The faster a fiberglass panel dries and the higher the drying temperature, the more fragile the panel will be.
Trimming excess fiberglass and gluing fasteners
It is necessary to cut off the excess along the edges of the two parts of the new hood and cut openings between the amplifiers on the part of the hood that belongs to its reverse side. It is convenient to use a Dremel to trim off excess fiberglass. When cutting the edges, you need to follow the edge line imprinted from the original hood. It is necessary to cut with a slight indentation from the line of the edge of the hood, since the edges will need to be finalized by sanding. Before starting work, do not forget about protective equipment. Wear a respirator, safety glasses and gloves. After cutting the edges, use a file or sandpaper on a block to smooth out the edges (P120-P240).
Factory mounts for composite hoods.
Such fastenings are not difficult to make with your own hands. Next you need to drill holes for attaching the hinges. To do this, you need to mark the necessary places, in accordance with the places on the original hood. Use a drill and the correct size bit. The area at the front of the hood that connects to the lock needs to be cut out using a Dremel and the edges smoothed with a file. A two-component epoxy adhesive is used to glue the fasteners. This glue adheres well to both composite materials (in this case fiberglass) and metal. As long as the two halves of the hood (face and amps) are not glued together, the mounts can easily be glued to the back of the amps.
Connection of two parts of the hood
Before gluing the two halves together, you need to sand the joints so that they are flat.
To glue the two halves, you can use 3M fiberglass panel adhesive, which is specially designed for this, or polyurethane adhesive-sealant. Glue needs to be applied to the edge around the perimeter, then leveled so that it is approximately 3 mm thick and 4 mm wide. Next, the halves of the hood are connected and pressed with clamps for 24 hours. If you use clamps, try to avoid bending at the edges.
To glue the two halves of the hood (hood panel and reinforcement) together, you can use the matrix from which the front part of the hood was cast. This is necessary so that the front part is not distorted when gluing. We take the hood panel (front part) and put it back into the matrix, apply glue and press the second half (amp). You need to place weights on top of the amplifier in several places. With this gluing method, you can do without clamps.
Engine
Without modifying the power unit, tuning the VAZ 2109 is absolutely unthinkable. In this case, it is recommended to contact a certified service station.
Serious engine rework involves a whole range of actions. Usually the goal is one of 2 results:
- Getting a return of 98 hp. With. and acceleration to 183 km/h;
- Sports option.
Getting a return of 98 hp. With. and acceleration to 183 km/h
To do this, the following parts are installed:
- lightweight connecting rods 121 mm;
- lightweight crankshaft with a piston stroke of 78 mm;
- forged pistons (diameter 82.5 mm);
- lightweight piston rings;
- 11.3mm camshaft;
- Cylinder head from Lada Kalina.
Sports option
In this case, lightweight components are installed: flywheel, crankshaft, pistons and connecting rods. In addition, installation of oil nozzles, a new gearbox, clutch, copper radiator, contactless ignition system, and a sports muffler will be required.
In addition, VAZ 2109 engines are often bored to increase volume, and an upgraded generator and thermostat are installed. The injection system offers several methods:
- installation of a new Solex carburetor;
- installation of 2 carburetors;
- conversion of the carburetor power system into an injection system.
How to prepare a fiberglass hood for painting?
First of all, you need to know that the fiberglass panel must dry and harden properly. How long does it take for a newly made hood to dry? The longer the better. The minimum time is 48 hours, and the maximum is up to a week. Complete curing is especially important if the part will be painted black or another dark color. Since dark shades absorb heat, bubbles or even distortion of the shape may appear on a hood that is not dry in the sun.
After hardening, you need to put the hood on the car and check all the gaps. You may need to trim the panel somewhere and sand it down so that all the gaps are even. When sanding fiberglass panels, be sure to use a respirator and also work in protective clothing.
After fitting, you need to thoroughly wash the fiberglass panel. This is necessary to remove the release agent, which is used to facilitate the removal of the hood from the matrix. If this substance is not completely removed, fish-eye defects may occur during painting.
In many ways, preparing a fiberglass and resin hood is similar to preparing a metal panel (see the article “Preparing for Paint”). It is important to remove all unevenness by puttying, sanding and priming, if any remain.
What primer should I use to coat a fiberglass hood? There may be several options here. You can use epoxy primer (see article on the properties and uses of epoxy primer). Next, you can apply acrylic primer, prepare it and paint it.
Another big difference between a fiberglass hood and a steel hood is that a regular hood has the same surface on both sides, while the face of a fiberglass hood is smooth and the back is rough and uneven. You can apply raptor polyurethane paint or an analogue to the back of the hood, having previously prepared the surface. This will add durability to the hood and also improve its appearance.
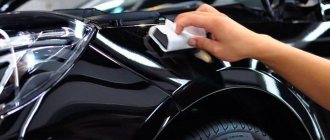
Pasting with vinyl film
This is another of the most popular do-it-yourself hood tuning. Vinyl wrap can look very impressive. The appearance is especially transformed if you choose an option with a pattern. There are many options for these films. You can find a large selection of colors with a glossy or matte texture, carbon-look film. The latter is very popular among owners of domestic cars.
All these options differ in cost, as well as in characteristics. Most car owners choose a film with carbon imitation. You can do the gluing process yourself. To do this you will need a special spatula. It is important that the spatula has a soft tip. You will also need a hair dryer (a home hair dryer is not suitable for this tuning), masking tape, a tube of superglue, soap solution, and white spirit.