PROCEDURE FOR ADJUSTING VAZ 2107 VALVES - STEP-BY-STEP INSTRUCTIONS
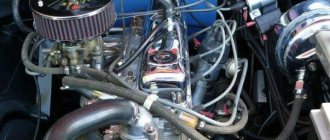
When everything is ready, you can begin direct regulation. Before mastering the procedure, you should understand the structure of the gas distribution mechanism and find out where the thermal gap is located that should be adjusted. The valves on the VAZ 2107, in fact, like on the vast majority of automobile engines, are located at the top, that is, the valve closes the hole located above the piston.
For each cylinder there are two valves: an inlet for supplying a combustible mixture and an outlet for removing exhaust gases. The clearance in the cylinder head opens due to the action of the camshaft cams. The camshaft is located above the valves and has its own eccentric cam for each of them, which transmits movement to the valve stem through a special lever. The gap between the cam (the point opposite the eccentric) and the lever should be adjusted.
Now you need to take two open-end wrenches for “13” and “17”, as well as a dipstick. The valves are regulated in accordance with a certain order, for which they are numbered from the front of the engine.
The VAZ 2107 valves are adjusted as follows:
1. insert the probe between the cam and the lever of the 8th and 6th valves alternately; 2. if the probe passes with little effort, then the gap corresponds to the norm; 3.unimpeded passage or sticking of the probe indicates the need for adjustment; 4. fix the head of the adjusting bolt with a wrench set to “13”, release the lock nut using a wrench set to “17” and turn the bolt in the desired direction to increase or decrease the gap, tighten the lock nut and check the gap. It is necessary to proceed in this way with each valve, each time turning the crankshaft 180° from the previous point. This operation corresponds to turning the camshaft by 90°. With each turn it is necessary to adjust the following numbered valves:
1) 180° - 4th and 7th; 2) 360° - 1st and 3rd; 3) 540° - 5th and 2nd. The procedure for adjusting the valves of the VAZ 2107 must be strictly followed, otherwise the settings of the gas distribution system can be completely disrupted. After each valve has been checked, it is necessary to turn the crankshaft several times and check the clearances again. It is necessary to ensure that the probe enters each of the gaps with absolutely the same force.
The procedure for adjusting valves on a VAZ 2107 with your own hands
The 8-valve engines that were installed on the Zhiguli Classic from time immemorial until they left the assembly line in 2012 were not equipped with hydraulic compensators. Therefore, adjusting the valves of the VAZ 2107 is part of the routine maintenance of these cars. You can do it yourself. Compliance with this requirement does not depend on the injection system (carburetor or injector).
Normal operation of the timing belt is impossible without observing the gas distribution phases. Violation of the factory clearances even on one pair of valves leads to inefficient combustion and poor removal of crankcase exhaust. The engine begins to chug, rev and make strange sounds (metallic knocking) during operation. If these symptoms occur, it is time to adjust the valves.
What will happen if you do nothing?
Improper combustion causes increased wear on almost all engine parts.
If the valve clearance is greater than desired, the camshaft cam will hit the actuator arm and valve stem. And as a result, they all wear out quickly.
If the gap is small, the valve does not sit entirely on the seat. Hot gases from the combustion chamber penetrate into the resulting gap. As a result, the exhaust valve burns out, the seals wear out, oil starts to burn and other joys begin. Therefore, if symptoms appear, do not waste time. Adjusting the valves of the VAZ 2107 is a must.
Signs and consequences of improper clearance
After starting the engine, it itself and all its parts begin to heat up significantly and automatically expand
It is also worth taking into account the natural wear and tear of the elements in contact with each other. All this is the basis for ensuring strictly established gaps between certain parts
If the gap is larger than the required size, the driver will begin to hear the characteristic clatter of the engine, which gradually goes away as the car warms up. With increased clearance, the camshaft fist does not push through the rocker of the valve stem, but simply begins to knock on it.
Such long-term shock load leads to such unpleasant consequences as:
- significant reduction in valve life;
- riveting;
- chipping of the end, which further increases the gap;
- increased noise during engine operation.
With a very small gap, the car engine will not be able to fully realize its functionality. This will automatically affect the overall speed and dynamic characteristics of the vehicle. At the same time, there will be significant overheating of all exhaust valves with melting of their edges. Among the main consequences of a reduced gap size are the following factors, based on the loss of combustion chamber tightness:
- Reducing compression due to the release of the air-fuel mixture.
- During the working stroke, exhaust and hot gases break through and lead to severe burnout of the valves.
- The plates no longer touch the seats, which disrupts heat transfer.
- The valves are heated to temperatures that significantly increase corrosion and oxidation.
- Increased load on timing belts.
Based on everything said above, we can conclude that adjusting the gaps must be done without fail. The process must be carried out if the following signs are present:
- in the upper part of the cylinder head of installed cylinders there is an extraneous, slightly ringing noise;
- repair of the gas distribution mechanism;
- the adjustment was made more than 20 thousand kilometers ago;
- a clear decrease in engine output;
- increased fuel consumption.
It is advisable to combine the adjustment with an oil change. This will prevent dirt, sand and dust from getting into the engine.
Symptoms
The engine reports any malfunctions in advance by uneven operation. Among the main signs of valve clearance violations:
- metallic knocking when the engine is running;
- deterioration of acceleration dynamics;
- tripping at idle;
- increased fuel and oil consumption;
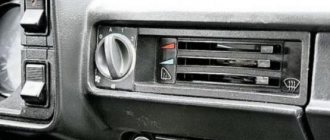
- “breathing” effect on carburetor cars.
First of all, pay attention to the knock. Other signs often indicate simpler malfunctions: incorrect ignition, a carburetor that requires adjustment, failure of one of the sensors (on the injector), etc.
Do-it-yourself valve adjustment
Adjustment sequence table
Adjusting the valves is a simple procedure; you can easily do it yourself at home. The order of setting the gaps depends on the injection system: a carburetor is installed or an injector.
Please note that on a hot engine, the valves can be adjusted in pairs: 1st cylinder with the 4th, and the 3rd with the 2nd. At this point, the valves are in overlap, the nose of the cam faces sideways and not up, intake and exhaust can be adjusted simultaneously
Carburetor cars
- remove the air filter housing, disconnect the choke and gas hoses, do not remove the carburetor;
- remove the cylinder head cover (you will need a “ten” key);
- use a 0.15 mm calibration feeler to check the current gaps: according to factory specifications, the feeler gauge should fit between the cam and the lever with little effort;
- if the gap on some valves is different (the dipstick does not fit in or, on the contrary, hangs out), make an adjustment.
Using a feeler gauge to adjust gaps
Valve adjustment order: 8-6 (set TDC for cylinder 4 according to the mark on the crankshaft pulley), 4-7 (rotate 180 degrees), 1-3 (rotate another 180 degrees), 5-2 (and another 180 degrees ).
To facilitate the procedure in the future, when disassembling the engine, it is recommended to mark the TDC position marks for each cylinder on the camshaft pulley.
Injector
The process of adjusting the valves on the “seven” with an injector is similar. It is also easy to do it yourself. The only difference is that you need to disassemble or disconnect to access the cylinder head cover:
- hoses going to the fuel rail;
- air filter tubes;
- accelerator cable.
Further actions are similar.
Adjusting the valve clearances on a VAZ-2107 with a carburetor or injector can be done not with a feeler gauge, but with the help of a special adjustment rail and a micrometric indicator. In this way, you can set the gaps with factory accuracy without “dancing with a tambourine.” After carrying out these measures, the engine should run like a clock. Do not forget to check the compression in the cylinders after finishing the work. This will help assess the condition of the engine.
Adjusting the valves should be combined with replacing the cylinder head cover gasket. This is the weak point of VAZ cars. It rarely lasts long after removal.
Adjustment procedure for injection and carburetor engines
To adjust the valves on a rear-wheel drive VAZ car with a carburetor engine, prepare the tool and open the hood. The work should be done on a cold engine, the size of the feeler gauge for adjustment is 0.15 mm. We perform the following sequential actions:
- put the gearbox in neutral;
- unscrew the 3 nuts of the upper air filter cover (10th key);
- dismantle the cover and filter element;
- unscrew the 4 nuts securing the air filter housing (key 8), remove the crankcase gas hose, and move the housing to the side;
- disconnect the choke cable from the carburetor and the accelerator rod from the valve cover;
- unscrew the six bolts securing the cover;
- Having gained access to the valves, we proceed to adjustment. We take a 38mm wrench (special for a ratchet), place it on the crankshaft pulley nut, turn the crankshaft until the marks on the crankshaft align;
- We insert a feeler gauge between the r/v cam and the rocker (rocker arm), and measure the gap. The probe should enter with a slight force (tension), if it does not go through, or the gap is very large, it is necessary to make an adjustment;
- in this position of the marks, valves No. 8 and No. 6 are adjusted, the counting is carried out from the engine radiator;
- the excess clearance is determined by hand moving up/down with the feeler gauge installed; if the TK is higher than normal, the rocker will “play.” If the gap is less than the specified one, you will not be able to insert the feeler gauge;
- to adjust with a 17 key, loosen the lower lock nut, and by changing the position of the nut under the 13 key, set the required gap;
- Having adjusted the valve with the dipstick installed, holding it with the 13th key, tighten the locknut. There is one small nuance here: usually when the locking nut is tightened, the gap decreases somewhat (“tightens”), so when adjusting, the feeler gauge between the rocker and the camshaft should move a little more freely. However, you can easily adapt to this; everything becomes clear as you work;
- turn the crankshaft 180 degrees, the camshaft mark should move 90º, in this position we make the cam number 7 and 4;
- We turn the crankshaft again, here the upper mark will no longer be visible, so we are guided by the lower mark, which is located on the c/shaft pulley;
- in this position we adjust valves 1 and 3;
- Let's turn the crankshaft 180º again (the mark on the camshaft will be shifted 90 degrees from the top position, but in the other direction), adjust the clearances. No. 5 and No. 2.
Having completed the ROK, close the valve cover, start the engine, and check the operation of the engine.
VAZ classic engines with a fuel injection system were produced both with hydraulic pushers and with a mechanical drive. The adjustment scheme for the VAZ-2107 injector is absolutely no different from the standard valve adjustment on a carburetor engine, there are only some design differences (a different air filter housing, no carburetor, a changed crankshaft pulley (with teeth for reading pulses)).
The procedure for adjusting the indicator when using the indicator generally does not differ from the sequence of actions when adjusting using a probe, but a different tool is used. To adjust the valve mechanism in this case, you will need a rack (bar) and the indicator itself; the device is sold as a set in specialized auto stores.
Here it makes sense to refer to the table, which provides data on indicator settings, since when adjusting with a probe, TK is measured in millimeters, and with an indicator - in divisions. For example, for a standard value of 0.15 mm the indicator value is 52, which means that the arrow with the required gap deviates by fifty-two divisions. If the TK is greater than the norm, it needs to be reduced; let’s look at how this happens:
- Let’s say, instead of the required 52, the indicator showed the value 72 (“extra” 20 divisions);
- set the arrow to “zero”, loosen the lock nut, use a 13mm wrench to turn the adjusting bolt towards decreasing the gap, watch the indicator;
- when you turn the key, the indicator needle begins to deviate counterclockwise, it is necessary that it “passes” 20 divisions (since 72-52 = 20);
- Having achieved the desired reading on the dial gauge, holding it with a key of 13, use the “seventeenth” key to tighten the lock nut;
- Having adjusted both valves (8 and 6) in this way, turn the shaft and adjust the cl. No. 4 and 7, then we then repeat all the operations that were described earlier for a carburetor internal combustion engine.
After the adjustment, install the valve cover, start the engine, see how it works, listen for any extraneous sounds.
A situation often arises when, even after adjustment, the valves continue to knock, and the knocking can be quite strong and unpleasant. The main reasons for extraneous noise in this case:
- worn camshaft cams;
- development on rockers;
- camshaft play in the bed (aluminum body);
- wear of pushers.
DETAILS: Replacing the cabin filter Opel Corsa D
To determine the defective parts, it is necessary to remove the r/shaft and do a visual inspection. The wear of the camshaft bearings is determined using a micrometer; each of the bearing journals has its own specific size.
Adjustment of valve clearances on rear-wheel drive VAZ cars is usually carried out every 20-25 thousand kilometers, also when knocking occurs or there is a suspicion that the valves are “pinched”. If the gaps are less than normal, the engine runs unevenly, especially at idle, acceleration dynamics are lost, and dips appear.
The difference in the process for the fuel injection system is that the control marks for the initial position of the engine crankshaft are located differently. One of them is applied to the generator belt drive pulley. It should align with the protrusion on the cover body. The other, as in the previous case, is located on the camshaft gear and should correspond to the cast on the body.
Otherwise, adjusting the valves of the VAZ 2107 injector with your own hands is carried out in the same sequence as for the carburetor power system. If the operation is carried out correctly, extraneous noise will disappear, and the performance of throttle response and fuel consumption will improve.
Below you can watch a video on how to adjust the valve clearances of a VAZ 2107 with your own hands.
Adjusting valves on VAZ 2107
“Classic” engines do not have hydraulic compensators in the timing belt, so adjusting the valves of the VAZ 2107 is a mandatory element of regular vehicle maintenance. The work is simple and can be done independently. The special tool required for adjustment is quite accessible and does not require special qualifications to use.
Adjustment sequence
So, we aligned the mark on the camshaft with the bevel on its cover and checked that they matched the knees. shaft Additionally, you can check the correct installation using the distributor slider. Its contact protrusion should be directed towards the output of the high voltage wire of the 4th cylinder.
If all marks match, you can begin checking and adjusting.
The procedure for adjusting the VAZ-2103 valves is given in the table:
| The procedure for adjusting the valve mechanism of the VAZ “Classic” | |
| Knee rotation angle. shaft | Adjustable valves |
| 0 | 8, 6 |
| 180 | 4, 7 |
| 360 | 1, 3 |
| 540 | 5, 2 |
Why adjustment is needed
When heated, engine parts, like any physical body, expand. This is especially true for elements of the gas distribution mechanism. The main timing parts - the valves - are in direct contact with the hot gases in the cylinder, opening and closing the intake and exhaust ports. The tightness of valve closure affects engine compression, efficiency and power.
The valves close under the influence of special springs, and to open they are pressed by rockers - levers driven by camshaft cams. When the rocker is not pressing on the valve stem, there should be a thermal gap between it and the camshaft. Why is valve clearance needed on VAZ 2107?
This is interesting: Setting up the carburetor on a scooter
When the engine heats up, the length of the valve stems increases especially strongly (the larger the linear dimension, the greater the absolute value of thermal deformation). If in a cold state the parts fit tightly, when heated the rod will be constantly pressed, the valve will not close the window, which will lead to gas breakthrough. This threatens, in addition to reducing efficiency, burnout of the valve plates and engine breakdown. Therefore, there should be a gap of 0.15 mm between the rocker and the camshaft of a cold engine.
If the gap is greater than what is provided, the valves do not open well and the mechanism knocks; if it is less, the valves remain slightly open when this is unacceptable.
Over time, parts wear out and wear appears on the camshaft cams, rockers and valve stems. Therefore, owners of cars that are not equipped with hydraulic valve clearance compensators have to regularly check and adjust the timing belt clearances.
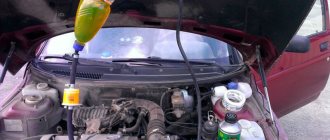
Preparatory work
Before starting the adjustment, you should perform the following operations:
- remove the air filter housing from the carburetor;
- remove the pipes and wires that prevent the dismantling of the timing cover;
- unscrew the nuts securing the timing cover;
- remove the timing cover.
When access to the valves is ensured, you can begin adjusting the thermal clearances. It should be remembered that the gap value of 0.15 mm was set by the designers for a cold engine. Therefore, before carrying out work, you must wait until the engine has cooled down. In addition, working on a hot engine can cause burns.
Adjusting the valves on a VAZ 2107 carburetor and on an injection model is absolutely no different.
The only exceptions are engines on which hydraulic clearance compensators are installed. In this case, no adjustment is required.
How to adjust valves on a VAZ 2107
The procedure is as follows:
- Check the chain tension and tighten it if necessary. If the chain is loose, the valve clearances will not be adjusted correctly.
- Turn the crankshaft with a wrench so that the mark on the pulley aligns with the long mark on the front engine cover. Make sure that the timing phase is not shifted (the marks on the sprocket and the camshaft cover match).
When the timing belt and crankshaft are aligned to the marks, you can begin adjusting the thermal clearances of valves 6 and 8.
Adjusting the gap is done as follows:
- Using a 17mm wrench, loosen the tightening nut (locknut) of the valve adjusting bolt;
- insert a dipstick (0.15 - intake valves, 0.20 - exhaust valves) between the camshaft and the valve pusher;
- set the required gap by turning the adjusting bolt with a key to 13;
- While continuing to hold the adjusting bolt, tighten the locknut;
- check the gap with a feeler gauge;
- If the gap is broken when tightening the locknut, the adjustment must be repeated.
After adjusting the valves, all that remains is to reinstall the timing cover and other parts. The machine is ready for use.
Adjustment table
Not everyone can remember by heart the order in which the valve should be made, so for those who are “forgetful”, special adjustment tables are compiled, from which you can easily understand at what position of the crankshaft a particular valve needs to be adjusted.
There are also tables of the dependence of the recommended gap on the ambient temperature; they can also indicate values for the RK using an indicator.
If you look at the table, you can understand from it that the optimal value of 0.15 mm is valid at an ambient temperature of 20ºC. If you decide to adjust the valves outside in winter at zero degrees, then in this case you need to set the gap to 0.135 mm, and if at 30º - 0.158 mm.
So, after making sure that the timing chain tension is normal, you need to turn the crankshaft until the marks on the oil pump cover and the pulley match. Please note that the camshaft also has several marks.
Next, turn the crankshaft half a turn. In this case, the distributor will move a quarter turn. In this position, measure the gap in the seventh and fourth valves. The next half revolution of the crankshaft is frozen in the third and first.
Injection engines have some minor features. In them, the marks are located on the pulley that drives the generator, as well as on the sprocket mounted on the camshaft.
These are all the differences, so don’t be alarmed if you have an injector installed in your power system; the valve adjustment table for the VAZ 2107 is similar. The gaps are adjusted in exactly the same way as on engines equipped with a carburetor injection system.
And a little about how to properly adjust the gap. To do this, use a 17 key to loosen the valve. Then install the probe (its thickness should be 0.15 mm) between the cam and the VAZ 2107 valve.
DETAILS: 5 main reasons why the heater on a VAZ 2110 does not work Frequent malfunctions of the VAZ heater of the tenth family 2110-12 and their diagnosis
The ideal gap is when the feeler gauge rubs slightly against the surface and there is very little resistance to movement. Use a 13 key to adjust the gap size. Then, holding it in one position from turning, tighten the nut with a 17mm wrench. That's all, using this analogy, all eight valves are adjusted. And before starting the engine, it is better to double-check all the gaps.
Each valve is adjusted at a certain position of the crankshaft. We begin the adjustment with valves 6 and 8 in the TDC position and then according to the table. To turn the crankshaft, we need a 38mm wrench and a piece of metal pipe.
The procedure for adjusting the valves of the VAZ 2107
As mentioned above, with the marks on the crankshaft pulley and the front engine cover aligned, you can adjust the clearances of the 6th and 8th valves installed on the 3rd and 4th cylinders. Next, you need to rotate the crankshaft with a special key to change the position of the camshaft. The camshaft rotates twice as fast as the crankshaft, so the latter must be rotated a maximum of 540 degrees, which corresponds to a camshaft rotation of 270 degrees. Each pair of valves is adjusted after turning the camshaft 90 degrees:
- 0 degrees - 6 and 8 valves;
- 90 degrees - 4 and 7 valves;
- 180 degrees - 1 and 3 valves;
- 270 degrees - 5 and 2 valves.
The valve adjustment tables for all “classics” are similar.
Specifics of the work
There is a category of drivers who strive to do all the maintenance and repair work on their car themselves.
This is especially true for owners of domestic cars, and this is commendable.
But such drivers need to realize that a number of works, especially those related to adjustments, require not only theoretical knowledge and experience, but also a kind of “feeling” that comes with time, through trial and error.
Especially such work includes all adjustments carried out on the carburetor, as well as valve adjustment and a number of other adjustments.
Therefore, if you are doing this for the first time, then call a person who has done such work on his car at least 3-5 times, and preferably on the same model as yours.
Also, before carrying out work, check the timing belt tension.
It is important
If you have just arrived at the garage and want to adjust the valves on the same day, then it will take about 5-6 hours for the engine to cool down.
You can immediately begin removing the valve covers and other parts; this will reduce the engine cooling time to 1-2 hours, as the heat exchange between the hot engine and the environment will increase.
It’s better to proceed from the principle: arrive in the evening, carry out the work in the morning.
By the way, don’t forget about the gasket under the valve covers; in 90% of cases it has to be replaced, so you should have a new gasket on hand.
Counting cylinders and valves.
The valves are counted as follows. Stand to the left of the car in the direction it is moving, near the engine. Face the engine.
Cylinders and valves are counted from left to right of the timing chain.
The last will be the 4th cylinder and 7.8 valves, but the adjustment begins with valves No. 6 and 8.
Adjusting valves on a VAZ 2107 by micrometer
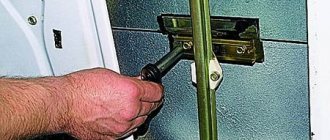
Instead of a feeler gauge, a micrometer mounted on a special rail is used to adjust the valve clearance. With its help you can control the amount of free play of the rockers. A gap of 0.15 millimeters corresponds to a rocker free play of 0.52 millimeters.
The rack has special nuts that allow it to be screwed onto the camshaft mounting studs. This allows it to be installed sequentially over each pair of valves. It is necessary to tighten the rack fastening nuts well so that it does not swing during measurements. After this, you need to fix the micrometer (indicator) on the rail so that it rests against the edge of the rocker that presses the adjustable valve.
To check the clearance, you need to lift the rocker cam with a special grip or finger and check the amount of free play using the arrow of the device. If it is not equal to 0.52 mm, then it should be set in the same way as when adjusting using a feeler gauge.
This adjustment method is more accurate and reliable. The feeler gauge, passing between the rocker and the camshaft, ignores the possible gap that appears as a result of wear on the parts.
The micrometer determines the actual amount of free play of the rocker; in addition, it is easier and more reliable to navigate by the indicator readings than by the free movement of the feeler gauge. This allows you to adjust the clearances in the valve mechanism as accurately as possible.
Setting valve clearances using an indicator
The procedure for adjusting the indicator when using the indicator generally does not differ from the sequence of actions when adjusting using a probe, but a different tool is used. To adjust the valve mechanism in this case, you will need a rack (bar) and the indicator itself; the device is sold as a set in specialized auto stores. If you really want to, you can make a bar for installing the indicator yourself; finding the necessary drawing on the Internet is not a problem.
When setting the gaps using an indicator, a more precise setting is obtained, since the feeler gauge is not able to catch all the irregularities of the camshaft cams and wear on the rockers. The procedure for the RK using a special device is as follows:
- just as when adjusting with a feeler gauge, set the gear to neutral, open the hood, remove the valve cover;
- we combine the camshaft marks to adjust the 8th and 6th valves;
- We attach the indicator strip to the studs on the left side of the camshaft bed;
- if we adjust the sixth valve, we fix the indicator on top of the corresponding (6th) rocker using a holder;
- Using a key or hand, we raise and lower the rocker, and note on the indicator how many divisions the arrow deviates.
Here it makes sense to refer to the table, which provides data on indicator settings, since when adjusting with a probe, TK is measured in millimeters, and with an indicator - in divisions. For example, for a standard value of 0.15 mm the indicator value is 52, which means that the arrow with the required gap deviates by fifty-two divisions. If the TK is greater than the norm, it needs to be reduced; let’s look at how this happens:
- Let’s say, instead of the required 52, the indicator showed the value 72 (“extra” 20 divisions);
- set the arrow to “zero”, loosen the lock nut, use a 13mm wrench to turn the adjusting bolt towards decreasing the gap, watch the indicator;
- when you turn the key, the indicator needle begins to deviate counterclockwise, it is necessary that it “passes” 20 divisions (since 72-52 = 20);
- Having achieved the desired reading on the dial gauge, holding it with a key of 13, use the “seventeenth” key to tighten the lock nut;
- Having adjusted both valves (8 and 6) in this way, turn the shaft and adjust the cl. No. 4 and 7, then we then repeat all the operations that were described earlier for a carburetor internal combustion engine.
After the adjustment, install the valve cover, start the engine, see how it works, listen for any extraneous sounds.
Adjusting valves VAZ 2107 carburetor
Volzhsky auto has reliable and easy-to-maintain gasoline engines with a displacement of 1500 cm 3 . On such power units, after reaching a certain mileage, the thermal gap is checked and adjusted. This process is usually accompanied by replacement of the gasket and repair of individual engine components, within the framework of the routine maintenance provided for in the service book.
During operation of the power unit, its parts heat up, but if there is no gap between the valve lever and the cam, they knock on the seat. This malfunction does not allow the carburetor to be adjusted correctly and leads to increased fuel consumption. Careful adjustment and, if necessary, replacement of failed parts will help eliminate the problem.
Regulation of the gas distribution mechanism
To perform service work, you will need an equipped garage box, a set of plumbing tools and a calibrated one. Maintenance and repair of the timing belt is also carried out if the valves knock with a sharp increase in engine speed. In this case, it is not necessary to dismantle the carburetor; it does not interfere with checking and setting the correct gap in the gas distribution mechanism.
Repair and adjustment of valves is carried out on a cold engine at an ambient temperature of about 20 °C. This will require replacing the head cover gasket. The work is performed in the following sequence:
- The carburetor and other units are inspected, and the air filter housing is removed from it.
- Using a “10” wrench, the fastening bolts are unscrewed and the heads are dismantled.
- We set the gearbox to the neutral position and, using a special key, set the piston of the first cylinder to the top dead center position.
- Using a calibrated feeler gauge 0.15 mm thick, check the gap between the cam and the lever in accordance with the table.
- If the indicator does not correspond to the standard, then adjustment is made using two keys, one is released and the lock nut is held, the other is screwed in or the stop is unscrewed.
- Rotate the crankshaft 180° and check the gap in the next pair of parts.
This is interesting: Wiring diagram for VAZ 2114 power windows
The operation is repeated four times for all eight valves, further repairs include replacement and installation of a new gasket. When attaching the cover, the bolts are tightened in a certain order. At the end of this process, the air filter housing is installed on the carburetor.
Compression check and troubleshooting
This procedure allows you to assess the condition of the parts of the cylinder-piston group. It shows quite accurately whether engine repair, replacement of worn parts, tuning and adjustment of the gas distribution mechanism is required. In some cases, the situation can be corrected by grinding in the VAZ 2107 valves, which restores the tightness of the joint between the parts.
The measurement is carried out with a special pressure gauge with the spark plugs turned out, and it is advisable to disconnect the carburetor from the fuel pump. This will prevent it from flooding with fuel and make starting easier. The test is carried out with the throttle valve fully open, so that the carburetor creates minimal resistance to air flow. The lowest indicator demonstrates the degree of maximum wear of the cylinders.
If the difference in compression values for different cylinders is above a certain value, which means a large gap between the cylinder wall and the piston.
Engine repair and subsequent valve adjustment will be required. During the work, compression and oil scraper rings are usually replaced.
Purpose of valves in an engine
During operation, the engine consumes air and fuel and emits exhaust gases. The valves allow air-fuel mixture to enter the cylinder (through the intake valve) and exhaust gases to be removed (through the exhaust valve). The alternation of intake and exhaust cycles is called the engine duty cycle. It consists of four measures.
- Inlet. Inlet valve is open. The piston moves downwards and, due to the vacuum created in the cylinder, carries with it the air-fuel mixture, which enters through the open intake valve.
- Compression. Both valves are closed. The piston moves upward (toward the spark plug) and compresses the air-fuel mixture.
- Working progress. Both valves are closed. The spark plug produces a spark that ignites the air-fuel mixture. During combustion of the air-fuel mixture, a lot of gas is formed, which pushes the piston down.
- Release. The exhaust valve is open. The piston moves up and pushes exhaust gases out of the cylinder through the open exhaust valve.
The engine operating cycle consists of four strokes, during which the working mixture enters, is compressed and burns, then the exhaust gases are removed
Video: how the engine works and the purpose of the valves
The meaning of valve adjustment
The opening of the valve is controlled by the camshaft cam. When the engine is running, the valve heats up and elongates, which can cause it to not close completely. To compensate for this elongation, there is a gap between the valve and the camshaft cam . The point of adjusting the valves is to set the required value of this gap.
Signs of improper valve adjustment
Signs of improperly adjusted valves include:
- Extraneous metallic knocking noise from under the valve cover.
- Reduced engine power.
- The smell of pure gasoline in the exhaust gases.
Adjusting the valves on VAZ 2107 cars is mandatory after repairing the gas distribution mechanism, as well as after a mileage of 10–15 thousand kilometers.
Video: operating principle of the gas distribution mechanism
Features of timing belt
For example, the gas distribution mechanism - with the upper position of the valves and camshaft. shaft The timing drive of the engine was carried out via a chain, and this is on all models.
A special feature of the valve mechanism is the use of push levers, also known as rockers. They are located between the camshaft and the end of the valve stem. That is, the cam acts on the valve not directly, but through the rocker. Also, thanks to the push lever, it is possible to adjust the thermal gap.
This gap is needed in order to compensate for the change in the geometric parameters of the constituent elements of the valve mechanism that occurs as a result of heating, during which the metal expands. If this gap did not exist, then after heating the power plant there would be a violation of the valve timing. To put it simply, when heated due to the expansion of the metal, the valves do not close completely, which leads to loss of compression and, as a result, a drop in power.
The list of maintenance work for the power plants of these models included such an operation as adjusting the valves. This is due to the design features of the valve mechanism. During operation, the working surfaces of the valve end, rocker and camshaft cams are erased, which leads to a violation of the thermal clearance.
Fortunately, the same design is quite simple, so the adjustment work is quite simple and you can do it yourself
It is only important to know the order of work and the sequence of adjusting the valves on the “Classic”. It is noteworthy that the operation is identical for almost all models, so the procedure for adjusting the valves of the VAZ-2101 and, for example, the VAZ-2105 is the same, only in the VAZ-2107 it is slightly different
Since for most models the operation is done identically, then all Zhiguli models belonging to the “Classics” will appear below.
The first and basic rule of the operation is that it is performed only on a cooled engine. This is due to the same expansion of the metal. If the valve adjustment on a VAZ-2102 or any other model is done on a heated unit, then the operation will not give a positive result, because when it cools, the metal will return to its original shape and the gap will not correspond to the norm, it will simply increase.
You also need to know when the VAZ-2105 valves should be adjusted. A sure sign that the valve mechanism is out of adjustment is a loud metallic knock from the engine compartment when the engine is running. Moreover, its intensity changes in proportion to the increase or decrease in speed.
Adjustment of valves on the VAZ-2104 must also be carried out every time repair work is carried out on the cylinder head associated with removing the camshaft.
Adjusting valves on a VAZ 2107
Adjusting the valves on the VAZ 2107 is not difficult. However, you will need some spare parts and materials, as well as detailed instructions.
Required tools and materials
Before you begin adjusting the valves, you must acquire the following tools and materials:
- A set of feeler gauges for adjusting gaps (or a micrometer and a rod). This is the main tool in the work. It must be of good quality; you should not buy probes from a dubious manufacturer.
- Set of medium-sized open-end wrenches (10–19 mm).
- Valve cover gasket. It is better to choose a good gasket manufacturer: Corteco or Elring.
- Clean rags or paper towels.
A feeler gauge set is the main tool for adjusting valve clearances.
Valve mechanism malfunctions
A situation often arises when, even after adjustment, the valves continue to knock, and the knocking can be quite strong and unpleasant. The main reasons for extraneous noise in this case:
- worn camshaft cams;
- development on rockers;
- camshaft play in the bed (aluminum body);
- wear of pushers.
To determine the defective parts, it is necessary to remove the r/shaft and do a visual inspection. The wear of the camshaft bearings is determined using a micrometer; each of the bearing journals has its own specific size.
Adjustment of valve clearances on rear-wheel drive VAZ cars is usually carried out every 20-25 thousand kilometers, also when knocking occurs or there is a suspicion that the valves are “pinched”. If the gaps are less than normal, the engine runs unevenly, especially at idle, acceleration dynamics are lost, and dips appear.
Related articles:
- Features of replacing the rear side members of a VAZ-2109, the cost of repairs in a car service center Cars of the VAZ-2108-09 family are not distinguished by a strong body, durable body iron, the metal rusts especially quickly if it is not treated with anticorrosive. Over time, on the metal […]
- Location of components and parts on the injection VAZ-21099 car Front-wheel drive VAZ cars are very popular in Russia due to their high maintainability, relatively low cost of spare parts, and simple design. But due to the large […]
- Self-repair of the underbody of a VAZ-2110 car The car body is subject to corrosion over the years, and it begins to rust especially quickly if you do not take care of it and do not apply an anti-corrosion coating. How soon do they begin to cover […]