Preface
For some car enthusiasts, having a car radio in the car is just a pleasant addition to the options. Such car owners are not particularly happy about the presence of audio preparation from the factory or a good radio. They pay more attention to the presence of heated seats and steering wheel, climate control operation, seat upholstery and the presence of floor mats.
Yes, you can drive without a car radio, but not all car enthusiasts think so.
Another, larger group of car owners love to listen to music in their car. And they are not at all indifferent to high-quality reproduction.
They read a lot about car acoustics, about amplifiers, crossovers and the car radio itself (in the world it is called a “head unit”). They strive to recreate a more pleasant sound in their car, since they can spend more time in the car than at home.
For such connoisseurs of high-quality music reproduction, the problem often arises is how to make the sound more acceptable and enjoyable.
A simple car audio system is affordable for most, since solving such a problem will require the smallest budget.
A car music system can be very expensive. Often, car owners and music lovers strive to get high-quality sound at minimal cost, and this already borders on fantasy. But let's try to figure it out - is it possible to get acceptable sound for minimal investment?
We will not consider the system - what it should look like ideally, what should be included and how much it might cost. Let’s just try to understand whether it is possible to obtain acceptable sound characteristics in the factory (simple) car audio configuration and what needs to be done.
Radio control and design
An important nuance when choosing a radio is ease of use. After all, a high-quality PG has such controls that you can use it to find your favorite tracks and make settings right while driving the car.
It is best if the radio has an additional joystick that will be mounted on the steering wheel. It will greatly facilitate the control of the PG while driving. If you have extra money, you can choose a device not only by functionality, but also by design.
There are radio tape recorders for every taste on the market.
Variety of speakers
Speakers play an important role when installing high-quality car audio.
They come in several types:
- The first type is broadband speakers, the main difference of which is the increased sound of mid frequencies, but obvious “dips” in low and high frequencies. They are usually not very expensive, so it is very difficult to achieve high-quality car audio on such devices.
- The second popular type is coaxial speakers, which share the audio track among themselves, thereby creating a surround sound effect. Each speaker in this system has a certain frequency that it serves, and a certain sound filter is applied to each of them. The output is quite decent car sound.
- Well, the third main subtype is component acoustics. This system is truly suitable for the most demanding listeners and gourmets who value truly crystal clear sound. It is, of course, the most expensive of all three options, but also the best. When installing it, various speakers with divided purity are used. The only problem is the need for additional space, as it takes up a lot of space. It is usually installed in expensive SUVs or premium crossovers.
You will learn about the list and prices of small cars from an interesting article on our website.
Here is useful information on how to change brake fluid.
This article contains a video from which you will understand the principle of operation of a diesel engine.
History of car audio
The beginning of the entire history of car sound (we will call it car sound), one might say, was laid in the 30s of the 20th century. With the development of radio technology, the first radio receiver for a car appeared. And already in the late 60s, the first car tape recorder was invented in America. From that moment it all began! The era of car audio has begun.
Now we will not delve into the intricacies of radio technology of those times and analyze historical moments in detail. Although there were a lot of interesting things there (maybe we’ll return to this issue later).
Composition of the sound system in a car
The list of devices and components of a car audio system is not that long. But it will not be possible to exclude any of the components.
- The head unit (GU) is the audio recorder itself. It is clear that the radio is almost always present there. But there are also important additions - with the ability to play CDs or DVDs, as well as USB flash drives, in other words - you can play any formats of music and even video. The device can also have a large screen, like a small tablet (usually called 2 din), it is very convenient and beautiful.
- Acoustic system. There is a huge field here where any dream and fantasy can unfold! The sound system can range from two speakers in the front doors to a full-fledged 5.1 home theater system or even more.
- Amplifier. Its presence is not necessary if a simple sound system is used (two speakers in the front doors and two speakers in the rear parcel shelf). But with an amplifier you can achieve higher volume and different sound quality. It will allow you to use other speakers, more powerful and in greater quantity and quality.
- Wires. This is also not an unimportant point in car audio. Often, this point is neglected and considered a waste of time and money. And then “the speakers don’t play”, “there is distortion”, “the speakers are blocked” and many other points will come up. Calculation and correct routing of wires for an audio system is a very important issue. When there is factory wiring, everything is calculated based on the power of the car radio amplifier, the speakers themselves, and then many people redo the wiring for a standard audio system, trying to get more quality and less interference.
If you approach this issue according to the principle - “it will do” or “it doesn’t matter”, and to any of these components separately, then the audio system will not be able to please with its quality, volume, and most importantly - there will not be the pleasure that is expected from car audio system.
Radio or main device
Initially, it should be said that the entire acoustic system is tied to the main element - the radio tape recorder.
Next priorities are amplifiers, speakers and wiring. The first thing we'll look at is the car radio.
If you buy a cheap and low-quality radio, but at the same time equip it with an expensive subwoofer, wiring and speakers, then you still will not achieve ideal sound quality. When choosing a radio, the country of manufacture of the device and the brand are not the last things to consider.
Modern popular brands have truly worthy products, which have been tested by several years of experience from satisfied customers. On average, today you can buy a fairly decent car radio for 5,000-15,000 thousand rubles.
Of course, often the more expensive the GU (main device), the better and more multifunctional it is. We would advise you to pay attention to products from Mystery and Prology.
Before purchasing a GU, you should determine your main priority: being equipped with various functions and additions or high-quality sound. Of course, having a modern device that can be controlled remotely and download music from the Internet is cool, but this is not the main purpose of the radio, you must agree.
In this video, they will show you how to assemble and configure car audio with your own hands. Enjoy watching!
The simplest car audio - can you listen to it?
Today, in any car, even a new one, not a premium class one, a sound system is installed in the cabin, which is often designed to listen to the radio. This means that the car does not have interior audio preparation, there is no minimum sound insulation and the speakers are full-range. It will not be possible to obtain any acceptable sound in this situation.
But if you take small measures, you can improve the sound picture a little, but it will still be at a level slightly above the initial level.
Is it possible to improve the sound in a simple car audio system?
Full range speakers
The vast majority come from the factory with standard speakers, which are called broadband, usually 16-gauge.
Such acoustics are as simple as two pennies - this speaker tries to reproduce the entire spectrum of frequencies that the head unit produces. He plays both “bottoms” and “tops” independently. But how “low” does this speaker play? How “high” can he reach? This can only be seen by taking measurements, which makes no sense to do now - everyone’s broadband devices are different and the indicators, naturally, will be different.
But the main thing that all broadband devices must have according to their passport is their own resonant frequency. Usually it is indicated 90-110 Hertz. And when measured, under ideal conditions, it is exactly that. It can be very difficult to get these frequencies at the door.
And high frequencies on broadband speakers begin to decline from 10-12 kHz. But if it is smooth, then you can hear almost undistorted cymbals. You won’t be able to achieve higher frequencies in a car, or rather, they will be practically inaudible. After all, the interior of a car is not an ideal sound chamber. Should we be too worried that we won’t be able to hear 12 or 14 kHz in the car? I think no.
All the advantages of using wideband speakers in a car, as well as their disadvantages, are obvious. A very reasonable price, significant space savings, and most importantly, the ease of connecting these speakers!
But do not forget that one speaker, even a “very cool” brand, will not be able to cope with the entire frequency spectrum. He will be able to play the “low frequencies” well, he will cope with the “middle frequencies” quite well, but it will not be easy for him to play the “high frequencies”.
There is an option to conjure with reproduction technologies. You can try using the head unit settings to raise the “tops”. But even then, it is unlikely that you will be able to obtain a sound that exceeds the capabilities of the “midbass”. Midbass is a speaker that can handle mid and low frequencies well.
So, in terms of sound quality, wideband acoustics are inferior to coaxial and component ones (we’ll talk more about these systems, their characteristics and capabilities another time). Now let us briefly mention their differences.
Coaxial acoustics
Coaxial acoustics - speakers are located in almost the same housing and are located on the same axis. This allows you to reduce the volume occupied in the car interior.
In this case, there is a frequency division between the low-mid-frequency speaker and the tweeter - high-frequency speaker, performed by a built-in “crossover” of the “capacitor” type.
Component acoustics
Component acoustics are a system in the most expensive price segment. It uses the most advanced technologies. Such a system will already consist of mid-frequency (often used “mid-bass”) and high-frequency speakers, a subwoofer, and an external crossover for filtering frequencies.
The technologies of materials and assembly of such speakers make it possible to obtain an almost ideal signal with low frequency response fluctuations. The speakers have high sensitivity and allow you to obtain high power and high-quality sound.
Bottom line
You can use wideband speakers, but it makes no sense to demand from them anything beyond what they can do. If such speakers are already installed in your car when you purchase it, be it a new car or a second-hand one, then you should think about when and what to replace them with. But if you are satisfied with how they sound, but want to tweak them a little, then you can try to do a little pre-preparation.
You can read more about these points on the websites of private specialists and professional studios. They have experience and skill. And also, they can tell you whether it’s worth doing pre-preparation for standard speakers at all, when using a standard PG (or even a purchased one, but not a high level one). And most importantly, they know exactly how and what to do in such a situation. This article is not about that.
How to make car audio
Creating a good and high-quality system requires not only high costs, but also special skills, knowledge and abilities. It should be understood that the acoustics in each car interior have certain features. The propagation of sound is hampered by the presence of many absorbing surfaces. You can solve the problem with the help of professionals who will adjust the sound in the car. You can do it yourself, but it is much more difficult.
High-quality acoustics in the car
Perfect Sound
To ensure good sound in your car, you must first install all the equipment correctly and follow all instructions. This applies even to a regular car antenna. If you want to expand the capabilities of your existing audio system, it is important not to overdo it. After all, there is absolutely no need for a concert hall in a car, especially if the driver prefers traditional popular music. To do this, it is enough that the car audio can emphasize the depth of a certain sound stage.
Types of car audio systems
An acoustic system in a car can be created in two ways:
- Individual components are selected, and then installation and configuration are carried out. This option is not only expensive, but also complicated. In addition, it will take a lot of experience to ensure that the car acoustics turn out to be of truly high quality.
- Creating a system from proven components that are always available to you. The result directly depends on the amount of funds available, and in the process of performing the work you will be able to gain experience, and in the future adjust the car audio, and bring it to the perfect level. As a result, even a simple car antenna will allow you to enjoy the sound of music from any radio wave.
Do-it-yourself acoustic installation
Is it possible to make a simple car audio system play?
Yes, you can. But it will still be the same simple acoustics and your head unit (radio tape recorder). It’s worth thinking - where to start?
About preparing the speakers in the doors
Let's start with the speakers. They, as we have already discussed, can be broadband or coaxial. But both of them have significant limitations on the spectrum of frequency reproduction, as well as on their distribution in the interior of your car.
Therefore, let’s discard the topic of “sound directionality”, “quality of reproduced frequencies”, “cost of speakers”. Let's see what we can do with the speakers we already have.
First. If they wheeze, then further actions are 100% meaningless. Such speakers simply need to be replaced with new or used ones, but without such a defect.
You can, if you have the skill, try to clean them. But the work to carry out such manipulation will require real effort. Such repairs have already been written about here. Think about it - do you need it?
The speakers work and do not wheeze. Let's try to remove them from the door card. It happens that you have to drill out the rivets that attach the speakers to the door body. But it's not a problem.
Then we look at the condition of the inside of the door trim - where the speaker “plays”. There is nothing there? Is there “bare metal”? Amazing. There is no audio preparation.
Further. If there is no rust, then we wipe the place where we will glue the vibration insulation. Otherwise, we first get rid of the rust so that the “vibration” does not fall off in a day. They sealed it up.
Everyone’s recommendations are different, but for me, simple foil insulation based on resin or tar (a black mass that can be washed off with gasoline), 2-3 millimeters thick, will do the job.
This is enough to slightly stop the vibration of the door trim sheet itself. There is no talk of any volume in the door yet. This will be the next stage of audio preparation, a more professional one, which we will not touch on here.
You can also glue some holes in the door itself with this “vibration”. This is the plane that is located immediately behind the door trim (card). This will create some volume for the speaker. It may very well happen that he will play “lower” than before. And that's what we need. After all, this was the goal of audio training – to improve some sound parameters.
You can finish preparing the door. Further work will not make an “audible” difference. That's why it's worth stopping at this point. Let's deal with the wires and terminals that connect the speaker itself.
About wires
The cross-section of the standard wire for standard car audio speakers at the factory is almost always made with a small margin. “Practically” does not mean that it is so. You need to look and study this issue first.
Does this mean that you can only connect to the standard wires the same low-power speakers as the standard ones? No. This is not entirely true. But this question requires serious analysis. It all depends on the resistance of the acoustics itself, the amplifier (car radio), the length of the wire and the power supplied to the speakers (more precisely, the supplied current).
Do I need to change or buy additional wiring for simple audio preparation? No, not necessarily. Standard wires will be quite enough. Since we are currently not going to connect our speakers to an additional amplifier, there is no point in changing the wires.
We won’t be able to overload the wire with the car radio so much that it can heat up. Thicker wires will be required if more power is supplied to the speaker.
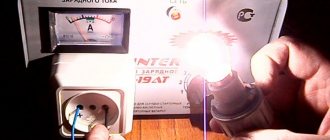
The picture above shows the ideal way to connect the stock wiring from the speakers to the car radio connector. This eliminates oxidation and thereby eliminates dips and wheezing in the sound path. You can use other connectors for such a connection (such as Wago), but the option with soldering wires is ideal.
About wire thickness
Frequently asked questions - “How to determine the cross-section of wires for car audio speakers?” Or - “What cross-section is needed for the wire to connect the speakers to the car radio?”
In world practice, it is accepted that the standard cross-section of wires for acoustics should not be less than 0.75 mm2 (0.75 square). And this almost always happens. But often, especially in old cars, foreign cars, the wire cross-section is larger, and is usually 1 mm2.
This is often enough to, within certain limits, “boost” midbass, coaxials, and component acoustics. It is important to correctly and efficiently connect the connectors from the control unit to the standard wiring and to the speakers directly.
When it comes to using amplifiers and powerful speakers in a car audio system, then you will need to lay new wires to the speakers. Their thickness should already be at least 1 “square”, and ideally 1.5 mm2. You can see how to choose a section here. And what wire can be used was discussed here.
And so, it turns out that a 1.5 mm2 wire will allow good current to be supplied to the speakers (note, not power, but CURRENT!). Because it is not power that comes from the amplifier, but current. And for the required current you need a wire of the appropriate cross-section.
How to determine the wire cross-section?
There is also an article that discussed in detail how to measure the cross-section of a wire. I highly recommend checking it out. Everything is not complicated at all; using a simple formula, you can get a fairly accurate idea of the cross-section of the wire you are using, or the wire you are going to use. This is the formula, and it is described in more detail in the article.
About connecting to speakers
First point.
You should never forget about the presence of a “plus” and a “minus” in a car - short circuits lead to disastrous situations. The same applies to connecting speakers. There are also “plus” and “minus” .
Connecting them incorrectly (reversing the polarity) will not cause serious problems to the speaker, as well as to the radio amplifier. But you won’t be able to get good or just adequate sound. This is why there are markings on speakers and cables, so that the “minus” from the amplifier goes to the “minus” of the speaker, and nothing else.
How to determine which terminal to connect the “plus” to and where to connect the “minus”? There is nothing tricky here. All manufacturers of acoustics for car audio mark the terminals with icons symbolizing “+” and “-“, or stick a sticker with a picture of where and what to connect.
If there is no such marking, then the thickness of the terminals indicates this. The “positive” terminal is wider and more massive than the “negative” terminal. The picture clearly shows the difference.
It is necessary that the diffusers of each of the speakers oscillate synchronously. And if the speakers do not work synchronously, then the sound waves will be out of phase. This means that the waves will partially compensate each other. In this case, the spatial orientation of the sound source may be distorted.
The music will play, but you will listen to 100% cacophony, strangled and overwhelmed in frequencies in almost the entire spectrum! Please take this into account. It will feel like you have cotton earbuds placed on your ears and you are trying to listen to the sound from the speakers.
If connected correctly - maintaining polarity, the speaker cones will operate in phase. The sound waves will add up, thereby creating a complete and accurate sound picture. This concerns polarity reversal.
Second point.
When connecting wires to the speaker, in the door itself, you should keep in mind that there is an “aggressive environment” there - moisture. It very quickly oxidizes the contacts (terminals) of the speakers. Likewise, the wires themselves, when exposed to constant moisture, can oxidize and fall off at the most unpredictable moment. And it’s good if the wire cannot be shorted to the car body (to the door trim).
The ideal option, in my opinion, is to solder good wires to the terminals and put a connector at the end (as in the picture). The length of this wire should allow the connector to be brought out to the outside of the door, and the mating part of the connector be placed there. This way you can avoid rapid oxidation of parts of the connectors, since moisture often prevails only inside the door.
Let's pay attention to how the speakers in your car are connected now - there is probably no soldering there. But the speakers from the factory use a terminal connection, this is one way. But there is nothing better than soldering. And in any case, you need to protect the soldering points or the terminal connections themselves with cambrics and always with a moisture-repellent compound and lubricant.
A little physics. From school we know that the surface of anything smooth and even always remains rough. And no matter how well we make the contact between the speaker terminals, the metals do not touch the entire area.
Here the lubricant will help fill the voids to remove all the air from the contact patch. The lubricant used is conductive, so the transition resistance at the connection point will not be high. Here is some example - Aluminum grease (spray), Ciatim 221, LIQUI MOLY lubricants, even Solidol and CV joints will do.
Car audio and wires
The standard wires from the factory sound system to the speakers are carried out together with the wires that go into the doors to the electric locks, to the power windows, to the door opening limit switches. And they already have a normal cross-section, as we previously found out. They are carried out in common loops, in general insulation. This does not affect the sound quality of a simple audio system.
There is very rarely interference from the generator. Therefore, there is no point in changing anything for our simple system. But if the wires were damaged somewhere and their repair is not possible or simply not practical, then you can lay new wires to the speakers. We have already talked about thickness. But about the place where they will be laid again - no.
Actually, you can lay new wires exactly where the factory wires were. Sometimes this is a very real idea. And often, you just have to go through the wiring. And to do this, disassemble half of the interior. It's not always worth it.
You can lay new wires in a convenient and accessible place, but take into account that they do not interfere with the future removal of rugs and seats in order to perform any other manipulations. I think that it would be better to intertwine the wires, as if to make a “twisted pair”. This concept came from electronics. And now it is used in computer technology almost everywhere.
All local networks are made in this way. Intertwining the wires with each other is like putting them into a screen. At a time when radio was developing, the wires were simply shielded to reduce and eliminate interference on low-voltage parts of the radio equipment.
But in this case, you can use this “shielding” method to cut off possible interference to these wires. Although this part of the audio system is practically not critical to such interference in the car.
The main thing is to check that in places where doors open, in places where the wire is often bent, the insulation does not delaminate and moisture does not get in.
What kind of car radio should it be?
You simply cannot achieve high-quality car audio without a good radio, so this is the first thing you need to worry about. Like other components, the head unit affects the sound quality, and even if you have a good sub and amplifier, but the radio itself turns out to be complete slag, then you can forget about good sound.
Build quality
When choosing a head unit (head unit), I recommend relying primarily on the brand and build quality. Pioneer and Alpine are brands that have proven themselves well in the modern market. On average, for 4000-12000 you will buy a pretty good radio. Monsters such as McIntosh, Denon and Nakamichi are more designed for professionals.
Well, if your budget is too limited and you still don’t want to listen to advice, then pay attention to Mystery, Prology, Challenger, etc.
Here you can give one piece of advice: remember - it is better to buy not a fancy, but a high-quality radio for its intended purpose. Most second-tier manufacturers offer a device stuffed with stupid functions that not only hardly work, but in principle you don’t even have to use them.
A highly targeted device will do its job much better than a multimedia combine - this has been tested many times.
Number of linear outputs
Next, we look at the number of line outputs. One line output allows you to connect one two-channel amplifier. Two outputs allow you to connect a four-channel amplifier, etc. More details about amplifiers are written in another article.
Below is a simple diagram that should help you understand the essence of linear outputs.
Remember, if the radio does not have linear outputs, then we are not interested in it and should take a closer look at another device.
Management, design
Yes, specifically for management. When choosing a radio, we press all the buttons, check the joystick, see where the equalizer settings are hidden, how quickly the track switches, etc. If you have extra money, it’s better to invest it in wiring, then you can buy a radio with a fancy design. Although personally, I prefer to amaze people with high-quality sound rather than show-off.
It is worth noting that in conditions of frequent falsification of products, it is almost impossible to specifically indicate which radio tape recorder is better, therefore the purchase of a car system, even in branded stores, must be accompanied by a “live” check of the parameters.
More information about choosing a radio is written here - How to choose a car radio