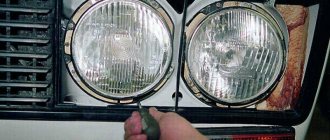
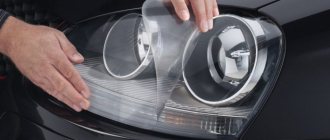
While driving on the road, stones fly out from under the wheels of the vehicle in front, which can cause mechanical damage to the headlights. To protect the optics, a special film for car headlights is glued to it. What is she? How to stick it on, care for it and remove it? The article provides answers to these questions.
Characteristics of protective film for headlights
Protecting optics from small stones, midges and other materials that can cause damage has always been a hot topic. Previously, metal grilles were installed on optics. But they looked natural on SUVs and sports models, while they spoiled the appearance of luxury cars. The situation changed with the advent of protective films that are glued to car headlights (video author – AvesAuto).
Armored protection does not have high strength qualities, but has the following advantages:
- reduces impact force;
- easily removed from the surface;
- protects against dust and dirt;
- protects the glass surface from minor damage.
If a large stone hits, the force of the impact spreads over the entire surface, which makes the impact not so strong. Even if the headlight does break, the glass will not crumble inside the housing, but will remain on the film. It makes cleaning the optics easier, since it is easier and faster to wash off dirt from a smooth surface than from a ribbed surface.
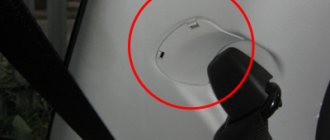
Film gluing areas
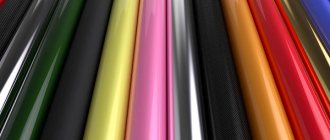
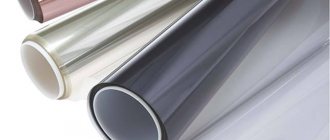
Types of material
There are currently two types of protection:
Film for headlights made of polyurethane is more often used for optics of complex configurations. It is stronger, more durable, but, however, more expensive than vinyl.
Vinyl protection is more popular. Its advantage is low cost, density, wide range of colors, and the ability to choose thickness. The advantage of vinyl coating is better light transmission than polyurethane, it ranges from 97 to 99%. In addition, it stretches well and makes it possible to reserve headlights at home.
Popular manufacturers
One of the popular manufacturers is the Canadian company Ricochet. The material has good strength and transparency. Ricochet film protects against small stones, scratches, and piercing objects. The material has increased elasticity, which allows it to be used for optics of complex configurations.
Ricochet protection
Polyurethane film from the American company Venture Shield provides reliable protection for headlights and other body elements from scratches, chips and cracks. The manufacturer provides a 5-year warranty on its products. At the same time, the material retains its qualities: it does not turn yellow, does not delaminate, and does not slip. A special feature of the Venture Shield material is its resistance to ultraviolet rays.
Anti-gravel products from Vissbon reliably protect optics from stones, branches, gravel, hail and other mechanical influences. The transparency of the material makes it possible to use it for light optics and mirrors. It protects not only from damage through mechanical impact, but also from corrosion, dirt and dust.
How film protects car headlights
Previously, headlight covers were made of glass, and they still do this now, but in much fewer cases. The main material here is high-strength plastic. In terms of hardness, it does not reach the level of glass, but it is much more viscous and resistant to impacts from hard objects.
Long ago, back in the days of glass deflectors, it was noticed that pasting headlights greatly increases their durability. This is due to the effect of combining layers of materials with different properties.
That’s why composite tank armor and reinforced fiberglass work on the same principle. The production of special armor films for car headlights was launched.
Instructions for covering headlights
Reserving headlights with film is a simple procedure and consists of a sequence of steps:
- Before gluing, you need to wash and dry the headlights.
- Then the surface of the glass should be degreased using industrial alcohol.
- Next, you need to cut out the blanks with an overlap of about 2 cm at the edges.
- Before gluing, the prepared blanks must be heated with a hairdryer until they become elastic.
- When removing the backing, you should immediately glue the protection before it loses its elastic properties. In this case, use a spatula to remove bubbles from under the material. It is recommended to heat 4 cm sections and glue each one sequentially.
- The remains are trimmed with scissors.
- At the end of the work, you need to warm up the entire surface with a hairdryer again and work with a spatula, finally leveling the surface.
Leveling the material with a spatula
DIY headlight tinting. Video
Today we’ll talk about tinting your headlights yourself (VIDEO) and dispel the myth that Chinese car film can only be applied to cheap cars.
One of the cheapest ways to make your car stand out from the crowd is to tint the headlights. After watching the video, you will be able to tint your headlights yourself.
To tint your headlights yourself, you will need: 1. A warm room (desirable temperature not lower than 12°C)2. Tools:
- a regular sewing needle - a combined squeegee - an industrial hair dryer - an Olfa knife for fine work (can be replaced with a regular stationery knife) - a solution of water and isopropyl alcohol 1:1 (a total of one liter is enough), - installation fluid - a spray bottle (any will do, for example for flowers) - microfiber
What is mounting fluid? Mounting liquid is a soap solution that is used so that the film can be easily repositioned during gluing. In our case, the installation fluid is a solution of water and Jonsons Baby shampoo (1 liter of water + 2-3 drops of Jonsons Baby).
Note: 1. The film used for tinting headlights was Oracal 8300 dark gray (074).2. Room temperature - 15ºС.3. The rear optics are quite simple to apply.4. The headlights were tinted “wet” - installation fluid was used (1 liter of water + 2-3 drops of Jonsons Baby).
Before you start tinting the headlights with your own hands, wrap the combined squeegee with a microfiber cloth and secure it with masking tape, or maybe with electrical tape - this is so as not to scratch the surface of the film and not leave streaks.
DIY headlight tinting process: 1. Warming up the room to 15°C.2. The rear optics are pre-washed.3. We take measurements of optics.4. We cut off pieces of film with a margin of 5-7cm on each side. Remove the film.5. We degrease and clean the rear optics using a soft microfiber with a solution of water and isopropyl alcohol 1:1.6. Apply the mounting fluid to the surface of the headlight and film in a thin layer using a sprayer.
Next, it is better to study the steps of tinting headlights with your own hands in the video.
If there are small bubbles of water left on the surface of the headlight after pasting, carefully break them with a sewing needle - over time, the water will evaporate on its own.
The most popular colors for tinting headlights with your own hands are dark gray (Oracal8300_034), extreme black CF, and matte black film CF. But the choice of colors is very rich - yellow, blue, red, green, purple and other colors of films for tinting headlights with your own hands.
PS Oracal 8300 film for tinting headlights with your own hands has a high initial adhesion, so to make it easier to reposition we used mounting fluid. The film has a thickness of 80 microns, therefore it is very elastic and has a high stretch coefficient - 250% - it is possible to cover almost any spherical surface. The film is perfect for tinting headlights with your own hands - but to more reliably protect the headlight, use a thicker film, for example, CF headlight tinting film with a thickness of 200 microns, especially when it comes to headlights. The film for tinting CF headlights with a thickness of 200 microns will not only serve as decoration, but will also reliably protect the headlight from chips, scratches and even a glancing blow.
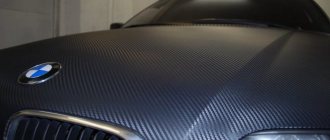
Regarding the myth that Chinese film is only applied to cheap cars, we invite you to watch another small video - the result of partial wrapping (hood + roof + trunk lid) of a Honda Civic with 3d Orajet carbon fiber and tinted rear optics with Oracal 8300 (074) film. In general, the partial carbon fiber covering and tinting of the rear optics looks very harmonious, beautiful, and holistic.
Of course, we will return to films for tinting headlights and conduct a detailed review of the manufacturers.
Sincerely, Valery Churukanov.
Tips for removing film
Although some manufacturers provide a 7-year warranty on their products. Due to poor-quality road surfaces, the film has to be changed after 3-4 years. High-quality branded film can be removed from the glass surface without any problems.
Removing headlight protection
If the material is of poor quality, then after removal, an adhesive base remains on the surface. The adhesive is removed mechanically using chemicals.
Price issue
How to properly apply film to headlights
Applying a protective film is quite accessible for doing it yourself, without the additional costs of professional labor. It is better to purchase everything you need in the form of a ready-made kit designed for a specific car, although it is quite possible to buy the material in the form of a roll.
Tools
It would not be superfluous to remind you that it is advisable to work with high-quality tools and proven materials. Otherwise, the result may be a waste of time and you will have to repeat everything.
The following tools, consumables and materials will be required:
- the film itself in the form of a roll or a ready-made kit, cut according to patterns to fit the headlights of a specific car;
- a set of keys, screwdrivers and tools for removing connectors, clips and plastic latches;
- an industrial hair dryer for heating the material and giving it the necessary elasticity;
- a degreasing solution, which can be used as pure ethyl alcohol, which removes dirt well and does not leave streaks;
- detergent for initial cleaning of surfaces, any composition for household use is suitable;
- sharp knife and scissors for trimming excess;
- a fairly soft rubber spatula to ensure a tight fit of the film to the headlight glass when pasting;
- technical lint-free rags used in surface preparation.
The composition of materials, tools and consumables does not depend on the quality of the film; all work is carried out using the same technology, be it polyurethane or polyvinyl chloride (vinyl).
Preparing the headlights
Headlights must be removed from the vehicle for wrapping. It is hardly possible to carry out the work carefully without dismantling the optics.
Removing light elements on different cars can be quite simple or quite complex. When integrating head optics into the front part of the car, various technical solutions are used, so dismantling of adjacent parts, both outside and located in the engine compartment, is not excluded.
On the outside, extreme care must be taken, especially with the plastic parts of the bumper and trim. The presence of fastening clips and latches made of material that hardens over time complicates the task. If cracks or breakages occur, parts will have to be replaced with new ones.
This is interesting: How to seal an aluminum car radiator and its plastic parts
Electrical connectors, fitting sockets and light bulbs are removed from the headlight, if provided for by the dismantling technology. The main fastener is unscrewed and the headlight is removed from the car. It should lie on a soft surface, especially if the deflector is glass.
The initial washing of the removed optics is carried out with ordinary water and a detergent solution.
After drying, the headlight glass is carefully treated with a degreasing compound, dried, and you should not touch the pasting area with bare hands again. The skin of the fingers contains fatty deposits, even if the hands are clean.
Pasting
Typically, the coating, in a roll or in the form of ready-made patterns, is supplied with a protective layer, which must be separated directly during pasting.
If the material is laid in a roll, then you must first make patterns in the shape of the headlight glasses, according to which blanks from the working material are cut.
The blanks made with reserve are placed on the headlight, after which, heating the material with a hairdryer, they are stretched over the volumetric surface taking the approximate shape of the cap. After all these procedures, the glass will most likely become dirty again and the degreasing and drying operation will need to be repeated.
For your information: How to make your own anti-freeze agent for your car washer
The method of applying the film is that the protective layer is separated in a small area of several centimeters, the material is applied to the cap and carefully leveled using a hairdryer and spatula.
There should be no folds or air bubbles left under the film. So, gradually, the entire headlight is covered with protection.
The final operation will be trimming the excess remaining around the edges. After that, the film is folded inward with a slight overlap, forming boundaries using a hairdryer. After the parts have cooled, the headlight is installed on the car in the reverse order of removal, with the electrical connectors connected.
Video “Simple instructions for applying protection stickers to headlights”
This video demonstrates how to stick a protective film on the headlights of your car with your own hands (the author of the video is VAPILA).
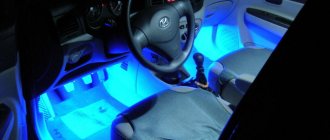
A tuning product such as headlight tint film helps give your car an original appearance. It will help to slightly change the shade of the lighting color of car optics, highlighting the car in the traffic.
Quite often, when installing tinting on headlights, it turns out that the car already has factory tinting. It typically has a very high light transmittance (about 95% or higher) and is spray-applied at the manufacturer, which ensures certification. With such minor tinting, you definitely won’t get a fine. But if you want to put a protective coating on your optics yourself, the first thing you need to consider is whether the light transmission coefficient meets legal standards.
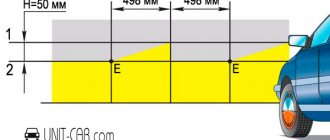
You can safely apply a protective coating to prevent scratching and clouding of the lamp glasses as long as the light transmittance is at least 85%.
Today, materials for protecting automotive optics differ depending on colors and manufacturers. You need to choose such products based on three main parameters:
- thickness. It determines how well the material will protect the glass of the optics from sand, gravel and other abrasives, as well as exposure to moisture and chemicals;
- light transmittance. Typically depends on the thickness. Before purchasing, be sure to find out the factory light transmittance of your optics so as not to violate domestic legislation;
- percent elongation. Allows you to determine the required amount of consumables.
What to do and why this happens
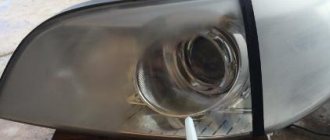
It's no secret that every year manufacturers are trying to reduce costs when producing cars. So how does this affect the optics? Modern front fog lights are equipped with durable, but very thin glass, which leads to cracks due to temperature changes.
As for plastic headlights, everything is more complicated: a plastic headlight has a protective layer, which should prevent the appearance of small scratches and prevent clouding of the glass. Of course, it doesn't last forever, and after a while it stops coping. Solving this problem is simple; just polish the headlights at a service center and they will sparkle like new again. Unfortunately, modern plastic has a very thin protective layer and after 2–3 polishings it can be completely erased. And if there is no protective layer on the optics, then the headlight will become cloudy in a matter of days, and simply polishing will not get rid of it.
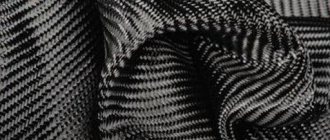
Just as dynamically as saving on materials, a young but already well-known direction in the auto industry - auto vinyl - was developing. Among the many films, there are three types that can protect your optics from the destructive effects of our roads)))
Let's go in order. Let's start with protecting PTF with glass. Here, in fact, there is only one option - a special film for glass headlights. It is quite thick (about 2-3 mm), it has a special glue that can withstand high temperatures. As a result, when the PTF is turned on, the film heats up and becomes elastic, like a rubber ball, and the pebbles simply bounce off without harming the optics. By slowing down heat transfer, the film protects the glass from destruction when water enters.
With plastic headlights the situation is a little different. Here you can choose polyurethane film or regular vinyl. Both films have the same thickness, but vinyl film is less resistant to damage. Vinyl film is cheaper, although it will do an excellent job of protecting the plastic from sandblasting. Vinyl film is also capable of self-healing when heated and small scratches will be less noticeable. Polyurethane is more reliable and durable, although it is not able to protect against brick.
Most often, applying film to headlights is not an easy task and, given the complex shapes of the front lights on a modern car, it is recommended to contact a specialist.
When choosing a film, pay attention to well-known manufacturers: 3M, Venture, KPMF, Oracal. It is in their arsenal that there are films that will not become cloudy, whose adhesive layer will not turn yellow over time, and when dismantled, the optics will retain its original appearance
Be careful and don’t try to save too much on film: if you save 500 rubles, you may regret it after a while.
If you calculate the costs of the film and its application and compare it with the price of polishing or replacing a headlight, then you can confidently say that such an investment will help save not only money, but also your time. To summarize, we can say that modern films can protect your optics for many years, and even after 7 years the headlights will shine like new, and your budget will hardly suffer.
Advantages and disadvantages
The obvious advantages of gluing the film with your own hands include:
- saving money when gluing the product;
- excellent protective properties of tuning, preventing the occurrence of cracks and scratches;
- restoration of the original appearance of the headlight glass;
- uniformity of light transmission;
- the ability to choose a product of any color for gluing;
- carrying out polishing work (for some types of coatings);
- no wear or fading of color during use;
- perfectly smooth glass surface.
Despite the numerous advantages, pay attention to some of the disadvantages present in the material:
- when the side lights are turned off, the car will become almost invisible;
- the material is expensive.
Advantages and disadvantages of covering headlights with film
What is reservation of car headlights?
The procedure for booking headlights, as well as booking a car as a whole, are somewhat similar. At least for the purpose pursued by car owners. The procedure is also quite similar. The only thing that differs is the materials and technology. Indeed, in the second case, the car is strengthened with the help of special additional materials in case of an explosion or shooting, to protect passengers and the driver. With optics, the meaning remains almost the same. They only protect the headlights from stones that can harm both the headlight itself and the lamps in it.
Until recently, special gratings were used for such purposes. But as practice has shown, they turned out to be not so effective as to be widely used. In addition, they significantly spoiled the appearance of the car. Therefore, thanks to modern technologies, special vinyl films were developed, which began to serve as additional protection for headlights. The thickness of films presented on the domestic market ranges from 0.6 to 2 mm.
There are also polyurethane films used for these purposes. But they are more expensive and less commonly used by ordinary car enthusiasts. The way they are used mainly for armoring complex and intricately designed headlights. But the principles, as well as the essence of the process, are similar to vinyl materials.
Headlight with protective film
Necessary materials
To do the gluing yourself you will need:
- stationery knife;
- squeegee made of rubber or plastic coated with felt (felt);
- spray;
- car shampoo (detergent);
- clean rags;
- construction hair dryer;
- degreaser (alcohol, white spirit, window cleaner).
Before you start working, familiarize yourself with the characteristics of the material and decide whether its color matches the color of the cars.
Also, decide how exactly you will apply the film. As a rule, it is glued evenly, occupying the entire area of the glass of automotive optics. However, if you wish, you can tint only the “eyelashes on the headlights” or combine several colors of the material.
How to glue removable silicone tint to a windshield with your own hands
How to tint rear and front headlights with film and varnish
https://youtube.com/watch?v=rWywJ-EgVcM
Window tinting is done not only to hide the interior of the car. This includes image, internal thermoregulation of the cabin, and additional protection of glass from chips and scratches.
The very first of all possible methods of tinting glass was spraying a special composition. The advantage of this method was its extremely low cost. Disadvantages: the coating “mirrored”, did not protect the glass from scratches, it was impossible to restore.
Modern tinting methods:
- electronic;
- automatic;
- athermal;
- film
The most affordable way is to cover glass with special tinting films. The main advantage of removable silicone tint is the possibility of its repeated use. At the same time, applying it yourself will not be difficult. A minimal set of tools and a desire to make your car unique will allow you to complete the entire procedure in an hour and a half.
According to the size of the windshield, a template is cut out of the film 5-7 mm larger than the size of the glass itself
To tint your car glass yourself with silicone film you will need:
- silicone film;
- plastic spatula;
- liquid soap or shampoo;
- spray;
- stationery knife;
- window cleaner;
- napkins made of non-woven material;
- pure water.
According to the size of the windshield, a template is cut out of the film 5-7 mm larger than the size of the glass itself. The glass is thoroughly washed, degreased and wiped dry. Both the glass and the inner surface of the film are generously wetted with a soap solution. The film is applied to the glass and, using a rubber spatula, carefully, using smoothing movements from the center of the glass to its edges, foam and air bubbles are removed. The resulting excess film is cut off with a knife. The procedure is completed.
Tinting can also be removed without any problems, but due to the elasticity of the material, the thickness of which is only 0.1 mm, there is a possibility of damage. The disadvantages of using silicone films include a reduction in transparency by 15-20%.
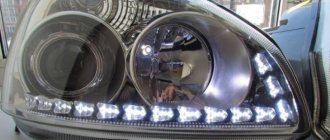
Car Sticker HeadLight Vinyl Film Tint Film for Headlights and Taillights
The purpose of this review is to point out mistakes that can be made when applying this film and to show the differences between tinted and non-tinted headlights. I don’t encourage anyone to buy this film, but personally, I’m happy with the trial purchase and bought the same film cheaper elsewhere in a quantity sufficient to cover headlights and lanterns. “The Chukchi is not a writer, the Chukchi is a reader,” so the rating is not important to me, and I am writing a review solely due to the lack of information on this issue. So, the film was bought on Ali, it lasted for a record 107 days (that’s why the next batch was ordered on eBay and is now on its way). Film in “Light black” color. How “light” it was, one could only guess, because photos of cars with heavily tinted headlights were posted on the Internet (acceptable for show cars, but not for everyday driving). The film consists of 3 layers, 2 of which are protective. Middle layer with adhesive side. The gluing technique can be easily found on the Internet, so there is no point in describing it. And now the main thing: photos of the differences and my mistakes that I don’t recommend repeating: General view
DRL
Near
From the car near
further
On another surface near
further
and now “advice from experienced people” 1 I really don’t recommend gluing the film “in the cold”. The temperature was probably -2 when I glued it, but my hands were itching and since I stupidly screwed up and ordered less than needed, I knew that if something didn’t work out, I would re-glue it anyway :). At low temperatures, the film “tans” and it is very difficult to spread it across the headlight. 2. It is better to use a rubber spatula. Not “water distiller” and not plastic. Water distiller is not convenient, and the plastic one leaves creases when smoothed. 3 Use a hair dryer, not an ordinary one. Sometimes they write that it’s possible with a regular one... in principle it’s possible, but in the morning it’s better to glue 4 together. One heats, the other pulls. One is not comfortable. Typically, headlights are convex and need to be pulled in both directions. A hair dryer between your legs is not very convenient. 5 Some people recommend gluing “dry.” It sticks very well, but you can’t get rid of the bubbles. I glued it “wet”, but if you wet it too much, the film simply doesn’t stick and slides off. At the edges of the headlight, excess water prevents the crease from being smoothed out and glued. Heating it with a hairdryer does not shrink it like heat shrink (well, maybe a little) but makes it more flexible. In this case, the fold does not stick immediately, but appears again. In short, not much with water... 6 I recommend protecting the edges of the body or bumper, since cutting the edges can scratch them. (you can use a strip of the same film) The wallpaper knife was dull and rough, cutting with the blade is difficult to control, it bends. I think the optimal tool is a short scalpel for modelers. (I need to buy one too) There is no cat. Apparently that's all. I'll add if I remember anything. Anticipating shit, I’ll note that on my previous VAZ 2114 the slamp light was +30% worse than on this one with toner...
UPD: Addition at the request of user drawde
:
“After polishing, the headlights must be varnished” (new headlights have a factory varnish that is not visible...) Varnish options: Cheap but good “More expensive” polyurethane, sold in Chip and Dip and in Quartz :)
The discussion went far beyond the scope of the review. Comments are disabled. artist