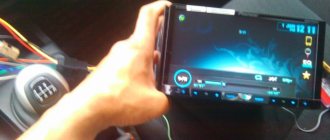
Setting up music in a car can be done even by a beginner if you spend a little time and figure it out. Understanding the principles and operation of acoustic equipment in a car will save you money and effort. Any driver will be pleased to just get into the car and drive in comfort, without being distracted by the audio system every time.
adjusting the sound in the car
If you want the same, you only need to spend time once on high-quality car audio setup. Music in a car is so voluminous and pleasant for those inside mainly due to the correct placement of the speakers. If they are not there, then the sound will more likely resemble a radio, but not the result of a full-fledged audio system.
Setting up music in a car is easy with your own hands
You can handle the settings on your own, even if this is your first time working with audio systems in a car. First, you need to understand your needs. If you listen to music in the car exclusively for yourself and don’t like the bass rattling meters away from the car.
car audio system
There’s no need for an expensive Car Audio, the basic components are enough:
- The radio itself is built into the car. All you need to do is connect it with the rest of the elements and check the maximum power.
- Front acoustics - sound from the front.
- Rear acoustics - sound from behind.
- Frontal acoustics - peripheral sound.
All these devices must match in power, otherwise the “lagging” equipment will simply burn out. There is nothing complicated about how to connect speakers in a car correctly. No more than an hour of work will give you pleasure from music for years to come.
Acoustic system
Tracks for setting up car audio
It is almost impossible for one speaker to reproduce the entire range of sounds recognizable by the human ear. For this purpose, high-quality car audio systems are equipped with separate components, each of which is assigned the task of reproducing its own frequency range. For cars there are two speaker systems:
- coaxial acoustics - characterized by such advantages as compactness at low cost and ease of installation. Its disadvantages are possible errors during sounding.
Note: But this depends on the device being installed correctly.
- component (installation of speakers is carried out separately) - its advantages are flexible sound settings and large layout capabilities. The device is expensive, but its setup or installation is difficult.
Acoustic installation locations
Setting up car acoustics using discs
Installation of acoustics can be done in the following places:
- The doors are in standard places, which helps save time and money. Also, the design of the car will remain untouched.
- On the acoustic podium in the door, it is possible to install larger speakers and select the optimal listening angle.
- In specially prepared places - this will provide an opportunity to configure the best sound and original appearance.
Front speaker system
This system needs special attention. If the front speakers are installed correctly, no additional adjustments to the audio system components will be required, otherwise all improvement efforts will be simply pointless. It is due to these front acoustics that the sound of the audio system is formed. In order to improve the quality of front acoustics, two-component, sometimes three-component systems are used for each band with separate speakers and crossovers (separation filters).
How to set up car audio correctly
Note: In case of difficulty in installing component acoustics and when high demands are not placed on sound, install coaxial (combined) front speakers.
Rear acoustics
The purpose of rear acoustics in standard systems is to provide comfort for rear passengers. And therefore, the requirements are not so high and, most often, coaxial acoustics are used as rear ones. How to choose acoustics:
- choose the character of the sound;
- understand the sensitivity of the model;
- understand the size and depth of the acoustics, compare with the sizes of the selected seats.
Acoustic sound
To choose the right acoustics, you should choose the musical accompaniment in the car:
- for lovers of soft sound, it is suggested to use acoustics with silk tweeters;
- For lovers of assertive and detailed sound, choose acoustics with metal tweeters.
Of course, these offers are conditional and it is proposed to listen to the selected acoustics right at the stand. The sound in the store will be almost the same as in the car.
Power and sensitivity
How to properly set up car audio
The designation of sensitive acoustics is in decibels. The higher the decibels, the more sensitive the speaker becomes. It has already been proven that speakers with a low cut-off frequency have worse sensitivity compared to less “bass” ones, and a small speaker turns out to be less sensitive than a large one. Sensitivity affects the power that will need to be supplied to the speaker to achieve the required volume. The higher the sensitivity, the less power is required. That is, this will determine how good the performance of the speakers depending on the head unit will be and whether an additional amplifier will be required. At the same time, do not forget that operating the speakers at maximum power means tormenting your ears with squealing and wheezing.
Note. The power indicated on the speaker is not the power that the amplifier should provide, but the power that will not harm them. Therefore, it is not recommended to use the speakers “to the fullest.”
Car Audio Basics
If you have already decided what you want from the sound, then setting up the audio system in your car has already begun. You, as a customizer, are required to achieve the highest possible quality combination of all system elements.
Advice to all beginners - if you are starting to set up for the first time, you should not buy expensive speakers in large quantities.
For good sound, it is better to have up to three good speakers than 5-6 - the sound “at odds” will not please anyone.
Equalizer
An equalizer allows you to make the sound more even - raise or lower the bass, mid and high frequencies. This is a rather fine adjustment of the audio system. It is not the entire sound range that is regulated at once, as in other menu items, but specific frequency bands. Different models have different numbers of them, depending on the class of equipment. There are five of them in Pioneer radios: 80 Hz, 250 Hz, 800 Hz, 2.5 kHz and 8 kHz.
The equalizer is located in the “Audio” section of the settings menu, EQ item. In it you can select one of the preset standard settings. For those who are not satisfied with these options, there are two sets of user settings (Custom). You can switch between them both from the menu and the EQ button next to the joystick.
- if heavy music is played, it is worth increasing the bass - 80 Hz (but not too much, +2–+3 is enough). Percussion instruments sound around 250 Hz;
- for music with vocals, frequencies of approximately 250-800+ Hz are needed (male voices are lower, female voices are higher);
- for electronic music you will need high frequencies - 2.5-5 kHz.
Setting the equalizer is a very important step. Using this tool, you can improve the sound quality many times over. Even if the acoustics are not very expensive and of high quality.
Taking into account the size of the car
Unfortunately, large systems with a variety of bass are only relevant for large cars - SUVs, crossovers, etc. It's not about the model and status, but about the size of the interior.
For beginners, installing an extensive and complex audio system in a small salon is not an easy task.
The installation will most likely end up like this:
- the sound will be too loud for the enclosed space of the cabin and driving with music will be uncomfortable (especially for passengers in the back seat, where the bass set is mostly present);
- in a small cabin there simply isn’t enough space to accommodate all the elements of the audio system, so the balance will be broken.
For a small car, it is better and more practical to get by with a basic set - a radio, a front speaker and two rear ones.
Settings
How to set up a pioneer radio in a car
Setting up GPS on car radios
So, the correct setting of such a car radio is already a guarantee of normal operation. To carry it out, you just need to have the instructions at hand. Below is the setup process:
The car radio connects to the network
When connecting, it is recommended to pay special attention to the gray wire marked BRAKE. It is responsible for disabling protection from watching TV and DVD programs while the car is moving; The next wire is also very important
It is marked AMP-CON. This very wire is responsible for connecting and controlling external sources.
Car radios with GPS navigator
- The required software is written to the SD card. If, for example, it is IGO8, a popular software today, then the resolution in the car radio is set through the menu to 480x234 pixels. After that, insert the map and open the main GPS menu. Select "options".
- Once in the settings, you need to select a navigation program. But for this you will need to specify the path to the SD card to be launched. Only after this will it be possible to turn on the navigation program.
We understand the basic settings of the radio
Not all drivers consider it necessary to understand the technical settings of radio tape recorders. Considering that they work fine on their own after factory settings or the previous owner. It is not always so. Even if minimal sound is provided. Either a powerful or otherwise individual sound that suits you, you will have to do it yourself.
You can balance the sound of the speakers using the radio. This only applies to modern models. After connecting, the device will “see” all the speakers that you have connected and will offer to configure their interaction. This cannot be done without practical testing.
Be prepared to play comparison music even after very minor changes.
The main task is to make sure that all speakers play in unison. Of course, they have different roles and sounds. But you don’t need to have an ear for music to detect desynchronization.
Step-by-step verification instructions:
- Sit in the driver's seat, this is the place where the sound should be optimal. Since you are there most of the time.
- We set the bass to 0 Db - it is in the low frequencies that the causes of discomfort from sound usually lie.
- Let's switch to balance mode; you will find it on any modern radio. And using any melody we adjust the sound in real time.
- You can stop tuning when you are completely satisfied with the sound.
Sometimes the opinion about the sound changes - after tuning, you can drive for several days. And then want to make additional changes. For a more objective look at the state of the audio system, you can try different types of music. For example, very different from each other in the number of bass or high sounds.
Working with frequencies
Music consists of several types of frequencies. The higher the frequency, the louder the sound. Thanks to the capabilities of modern radio tape recorders, the driver can independently select music at those frequencies that suit him best. Emphasis on high and mid frequencies is the simplest and cheapest. A way to make the music sound as loud as possible.
The thing is that low frequencies themselves are not loud, this does not mean that they are not needed. But a large number of them makes the composition generally quieter, even if you have excellent acoustics. Manual tuning of car audio through frequencies has long existed. Using the radio - frequency cutoff mode.
This mode allows you to “prohibit” the device from reproducing frequencies below a certain minimum that you set. We recommend setting the lower threshold to 125 Hz (or frequency 78). In this way, the resources of the speaker system are redistributed. And the overall sound volume increases significantly.
Turning off Demo mode
Immediately after purchasing and connecting the radio, you should figure out how to disable the demo mode, intended for displaying the device in the store. It is possible to use the radio in this mode, but it is inconvenient, since when you turn it off, the backlight does not go out, and inscriptions with various information run across the display.
Disabling demo mode is very simple:
- We go to the hidden menu by turning off the radio and holding down the SRC button.
- In the menu, turn the wheel to reach the DEMO item.
- Switch demo mode from ON to OFF.
- Exit the menu using the BAND button.
You can also set the date and time in the hidden menu by going to the System section. The time display is switched here (12/24 hour mode). Then open the “Clock Settings” item and turn the wheel to set the time. In the System section there is also a language setting (English/Russian).
Thus, after purchasing a modern Pioneer model, you can easily set up the radio yourself. By correctly adjusting the audio parameters, you can achieve very high-quality sound even from a simple audio system and get a good sound picture at minimal cost.
Vibration isolation - what is it and how to install it?
All lovers of loud music have a problem in their car - vibration. Loud music, especially with a lot of bass, makes the car literally shake from the inside. The driver is faced with the choice of turning down the volume or continuing to pick up objects that have fallen due to shaking.
Noise-vibration insulation as a procedure is an additional lining of your car from the inside - such
“Rattling” sound and other unpleasant effects appear on top of the original sound. Because vibration from sound transfers to the materials of the machine - metal, plastic, etc., without encountering any obstacle. This can be corrected by purchasing a soundproofing layer for the car, which will not only improve the quality of the music sounding in the car. But it won’t allow extraneous noise from the street to interrupt it.
Possible reasons for a bad signal
You can easily figure out why the radio does not pick up the radio. Poor reception is most often caused by problems with the antenna. If the cable shield is damaged, the reception will be accompanied by severe interference. If the antenna wire breaks or breaks, or the plug that is inserted into the radio itself comes off, then the radio does not work at all. If an active antenna is used, the receiver does not pick up the radio well due to the fact that power is not connected to the amplifier, or the receiving dipoles are in poor contact with the amplifier module due to oxidation or damage.
Another reason for a poor signal is the distance of the repeater or radio tower from the receiving location and the presence of natural or artificial obstacles standing in the way of the radio channel. Noise penetrating into the radio air from the atmosphere, power lines, trolleybus and tram wires degrades the quality of reception, which is why the timbre on some radios is floating and an unpleasant hiss appears, which hurts the ear. Devices made in Japan have poor radio reception due to their range, which differs from that used in Russia.
On cheap Chinese radios, radio interference can occur from various electronic devices, for example, DVRs. Another reason why the radio in the car does not work is a malfunction of the tuner itself. You should also check the speakers, malfunctions of which cause wheezing and crackling noises that make tuning difficult.
Tools
Mixing of instruments is done by skilled sound engineers. Each instrument has such a rich sound that it can be incredibly difficult to capture it completely naturally from a close microphone.
Let's look at the frequency ranges, what they do to the sound of the phonogram, and how we feel:
- 1-50 Hz - gives music power.
- 80-125 Hz - excessive gain creates a boom effect
- 160-250 Hz - excess deprives the music of power, but they are necessary for the sound of the phonogram; The sound basis of bass instruments is located at 160 hertz
- 300-500 Hz - the sound basis of percussion and string instruments is located here
- 400-1000 Hz - create natural sound; excess frequencies produce a trumpet-like sound
- 800-4000 Hz - highlight each individual instrument; Excessiveness tires the ear
- 10-20 kHz - their amplification thins out the sound
- 4-10 kHz - adjust percussion intelligibility
- 5 kHz - adds transparency to the sound, creates the effect of distance
- 80-20 kHz - recording quality is associated with them; Excess leads to brittle sound.
You always need to control the emphasis of a particular instrument in relation to the vocals.
Radio setup
Even your favorite music recorded on a flash drive or USB drive can get boring over time. Therefore, many car enthusiasts like to listen to the radio while driving. Setting up the radio correctly on the Pioneer radio is not difficult and can be done in just a few steps - you just need to select a band, find and save stations.
There are three ways to configure the radio:
Automatic search for stations. To do this, you need to find the BSM item in the settings menu and run a search. The car radio will find the station with the highest frequency in the radio range and stop - it can be saved by pressing the button with the number 1-6. Next, the search for stations will continue in the direction of decreasing frequency. If nothing is found, in the hidden settings menu you can change the search step from 100 kHz to 50 kHz. Semi-automatic search. While in radio mode, you need to hold down the “right” button. A range scan will start and a search will occur, the same as in automatic mode. Manual setting. By short pressing the right button in radio mode, you can switch to a specific frequency. The station is then stored in memory.
When all 6 preset stations are full, you can switch to the next memory section. There are 3 of them in total. In this way, you can save up to 18 radio stations.
Why do you need to set up a subwoofer?
First of all, tuning the acoustics is necessary to enhance the required frequencies and increase the “drive” of the music. Theoretically, this process can be avoided by using factory presets (i.e. settings). However, not everyone is satisfied with their quality. Firstly, the factory does not take into account the features of your car's interior. Secondly, equipment manufacturers are completely unaware of your musical preferences.
Many car owners believe that having a large and powerful subwoofer guarantees excellent music sound quality.
Enabling and adjusting the system equalizer
Windows has a system equalizer, changing the parameters of which affects the playback of all sounds - be it system notifications, or, for example, the sound of a running game.
To open and configure it, you need to do the following:
Place the mouse cursor on the Start button, then right-click. In the context menu that appears, you will need to select Control Panel.
It should be noted that in Windows 7, to open the Control Panel, you need to open the Start menu itself, and then find and click on the item of the same name.
In the Control Panel system window that opens, follow the path and open the final item Hardware and Sound -> Sound.
The Sound system window will open. In the Playback tab, double-click on the Speakers item.
In the additional Dynamics properties window that appears, go to the Enhancements tab. There, check the Equalizer item, and at the bottom, select either a preset option for sound equalizer settings, or by clicking on the button with three dots, adjust the frequency range of the sound to your own taste.
You can also check the Loudness box, this will slightly raise the low frequencies, thereby enhancing the bass.
After adjusting the equalizer, click OK to close the window and save the settings.