Article on the topic: How to challenge an erroneous traffic fine
An alternative method for adjusting the reach is to select the desired resistor value for the maximum extended state. The value of the resistors is selected experimentally, but for many VAZ models you can easily find ready-made solutions on the Internet. In this case, it is not at all necessary to use SMD components.
Types, design and principle of operation of headlight range control
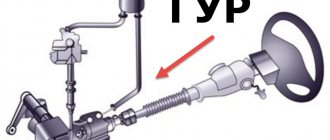
The low beam of car headlights has an established cut-off line, the position of which is regulated by international rules and standards. This is a conditional line of transition of light into shadow, which must be chosen in such a way as not to blind other road users. On the other hand, it must provide an acceptable level of road illumination. If the position of the car body changes due to some reason, then the position of the cut-off line also changes. In order for the driver to be able to adjust the direction of the low beam, i.e. cut-off line and the headlight range control is applied.
- Purpose of the headlight range control
- Mechanical
- Pneumatic
- Hydraulic
- Electromechanical
- Automatic headlight leveling
- Corrector installation
- How to check functionality
Types of headlight correctors
Purpose of the headlight range control
Initially, the correct headlights are adjusted on an unloaded vehicle, when its longitudinal axis is in a horizontal position. If the front or rear is loaded (for example, with passengers or cargo), the position of the body changes. An assistant in such a situation is the headlight range control. In Europe, all cars since 1999 must be equipped with a similar system.
Headlight position for normal and heavy loads
Types of headlight correctors
Headlight correctors are divided according to the principle of operation into two types:
- forced (manual) action;
- auto.
Manual adjustment of the light is carried out by the driver himself from the cabin using various drives. By type of action, drives are divided into:
- mechanical;
- pneumatic;
- hydraulic;
- electromechanical.
Mechanical
Mechanical adjustment of the light beam is made not from the interior, but directly on the headlight. This is a primitive mechanism based on an adjusting screw. Typically used in older car models. The level of the light beam is adjusted by turning the screw in one direction or another.
Pneumatic
Pneumatic adjustment is not widely used due to the complexity of the mechanism. It can be adjusted automatically or manually. In case of manual pneumatic adjustment, the driver must set the n-position switch on the panel. This type is used in conjunction with halogen lighting.
In automatic mode, body position sensors, mechanisms and a system control unit are used. The reflector regulates the air pressure in the lines that are connected to the lighting system.
Hydraulic
The principle of operation is similar to mechanical, only in this case the position is adjusted using a special liquid in sealed lines. The driver adjusts the lighting position by turning the dial in the cabin. In this case, mechanical work is performed. The system is connected to the main hydraulic cylinder. Turning the wheel increases the pressure. The cylinders move, and the mechanism turns the rod and reflectors in the headlights. The tightness of the system allows you to adjust the position of the light in both directions.
The system is considered not very reliable, since over time the tightness at the junction of the cuffs and tubes is lost. The fluid flows out, allowing air into the system.
Headlight hydrocorrector
Electromechanical
The electromechanical drive is the most common and popular option for adjusting low beam in many cars. It is adjusted by the driver rotating a wheel with divisions inside the car on the dashboard. There are usually 4 positions.
Geared motor
The actuating mechanism is a gear motor. It consists of an electric motor, an electronic board and a worm gearbox. The electronic board processes the command, and the electric motor rotates the shaft and rod. The rod changes the position of the reflector.
Automatic headlight leveling
If the car has an automatic low beam correction system, then the driver does not need to adjust or turn anything himself. Automation is responsible for this. The system usually includes:
- Control block;
- body position sensors;
- actuators.
Sensors analyze the vehicle's ground clearance. If there are changes, a signal is sent to the control unit and the actuators adjust the headlight positions. Often this system is integrated with other body position systems.
The automatic system also operates in dynamic mode. Lighting, especially xenon lighting, can instantly blind the driver. This can happen when there is a sudden change in ground clearance off-road, when braking and suddenly moving forward. The dynamic corrector instantly adjusts the light output, preventing bright light from blinding drivers.
According to regulatory requirements, cars with xenon headlights must have automatic low beam level control.
Corrector installation
If your car does not have such a system, you can install it yourself. There are various sets available on the market (from electromechanical to automatic) at very different prices. The main thing is that the device matches the lighting system of your car. If you have special skills and tools, you can install the system yourself.
After installation, you need to make adjustments and adjust the luminous flux. To do this, you need to draw a special diagram on the wall or shield, which indicates the points of deflection of the beam. Each headlight is individually adjustable.
Headlight adjustment
How to check functionality
Body position sensors may be different. For example, the service life of potentiometric sensors is 10-15 years. The electromechanical drive may also fail. If there is automatic adjustment, you can hear the characteristic buzzing of the adjustment drive when you turn on the ignition and low beam. If you cannot hear it, then this is a malfunction signal.
The performance of the system can also be checked by mechanically changing the position of the car body. If the luminous flux changes, then the system works. The cause of the breakdown may be electrical wiring. In this case, service diagnostics are necessary.
Headlight range control is an important safety element. Many drivers do not attach much importance to this. But you need to understand that the wrong or blinding light can lead to dire consequences. This is especially true for cars with xenon headlights. You shouldn't put others in danger.
Trouble-shooting
Repairing a corrector yourself is not an easy task. In the case of an automatic device, the instrument panel will display an error, which can be considered a scanner and can be used to detect a breakdown.
Repairing the headlight hydraulic corrector will require replacing the fluid tubes that are connected to the handle on the control panel. If, when adjusting the position of the rod, only one headlight changes the angle, then diagnostics and replacement of one of the pistons transmitting force is required.
If the electrically controlled headlight range control does not work, the instrument panel will also show an error, reading which you can understand the reason.
To avoid causing damage to equipment and units, diagnostics should be carried out only with a certified device.
Hydrocorrector of headlights: how it works and how to use it
The headlight leveler is an inconspicuous and rarely used device. But sometimes without its work it is impossible to move at night on busy roads.
A typical situation that requires the use of this device: a combination of a heavily loaded trunk and a trip in the dark.
When the trunk is overloaded, the rear part of the car lowers, and the front part “lifts up”. In this case, the “low beam” from a certain distance from the car automatically becomes “high beam”.
At first, the driver is perplexed why all oncoming drivers begin to “blink” and demand to switch the lights. If the driver guesses what happened, then he has to reload bags of potatoes into the cabin and onto the front seat in the dark. If the seats are occupied by passengers, then you have to either turn off the low beams and drive on the lights, or create an emergency situation on the road.
But there is a third way out: use a corrector and adjust the tilt of the light beam, lowering it down.
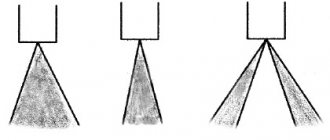
The opposite situation may also occur: if the hydraulic corrector is adjusted to the maximum load, and the machine is empty, then, on the contrary, it is necessary to raise the beam of light upward. In this case, the driver no longer blinds others, but illuminates the road “in front of his nose,” which is also fraught. Figure 1 illustrates these situations. The normal position of the light beam is shown in yellow.
- How to use the corrector?
- How does the headlight hydrocorrector work?
- How does headlight range control work?
How to use the corrector?
The corrector has knob A on the dashboard of the VAZ 2107 to the right of the steering wheel, next to knob B for adjusting the brightness of the dashboard lighting. If you rotate knob B counterclockwise, the brightness of the light decreases.
As they say, the control knob of the device has an “intuitive interface.” To change the direction of the light flow, with the trunk loaded and the headlights on low beam, you need to align the mark shown on the regulator with one of the marks marked on the unit body so that the beam of light does not blind oncoming drivers.
The VAZ 2107 hydraulic corrector has four switching options (in order from large point to small point):
I - minimum load, the front of the car is slightly lowered: one driver, or there is a passenger in front;
II - driver and four passengers, the body sags evenly downwards;
III - the same as II, with an additional load of up to 75 kg in the trunk:
IV - driver and maximum trunk load: the “nose up” the most.
In order to see how the angle of inclination of the light beam changes during operation of the corrector, it is better to place the car perpendicular to the wall. Let us recall the standard requirements for the location of the low beam.
How does the headlight hydrocorrector work?
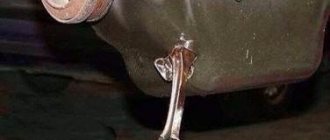
Below is shown the headlight hydraulic corrector without a control knob on a VAZ 2107.
The corrector structurally includes:
- adjustment knob and master cylinder (on the dashboard);
- two pipelines and clamps (to each block - headlight);
- two actuator cylinders, installed on the VAZ 2107 headlight block;
- frost-resistant working fluid (brake) in a closed circuit.
For VAZ 2107 models, a hydraulic corrector model “2105-3718010” is used.
How does headlight range control work?
The cylinder system is manufactured hermetically, with:
- The highest (basic) fluid pressure corresponds to switch position I;
- when switching sequentially to positions II, III and IV, a vacuum is created in the system;
- pistons are retracted in the actuating cylinders and the optics are turned down;
- when returning to position I, the pressure in the system increases to the base one, the pistons protrude and turn the optics upward.
Since the system is under pressure almost all the time, except when the trunk is heavily loaded, seals often leak. The reason may be the fragility of domestic rubber on the VAZ 2107 during winter temperature changes. Due to a leak of working fluid, the piston in the working cylinder becomes stuck in one position.
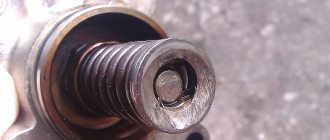
A working hydraulic corrector must ensure free play of the piston and must be at least 7 mm.
Due to the manufacturing features (tightness), the hydraulic headlight angle correction on the “classic” in general, and on the VAZ 2107 in particular, is non-removable and cannot be repaired. Its cost is low, so it is advisable to replace the entire set if it fails.
Let us remind you that before removing the old cylinders from the headlight housings, the main thing is not to forget to tighten the clamps on the working cylinders and turn them counterclockwise
In conclusion, let us remind you that there are no trifles on the road, and the topic of the corrector is a vivid example of this. Drivers who do not monitor the condition of this small but important device sometimes argue that they do not drive with a full trunk, especially at night. But according to traffic rules, outside populated areas you need to drive with your low beams on, even during daylight hours. And then an incorrectly adjusted corrector can blind road users even during the day and cause an accident.
Removing the standard system
Dismantling the standard hydraulic corrector begins with cutting through the pipelines and draining the liquid from them. They are usually located near the battery. This is followed by the operation of removing the main working cylinder. To do this, you will need a screwdriver, which you need to press the latch that secures the cylinder body. To pull it out, first turn the body counterclockwise until it stops and pull it towards you.
At the next stage of installing the automatic headlight leveler, you can go into the interior to remove the handle from the hydraulic leveler unit, held by a nut. And after the control unit is removed along with the pipelines, you can proceed to dismantling the rubber plug of the engine shield.
After this, all that remains is to prepare the electrical wiring by selecting wires of the required cross-section and length. From one edge of the wiring you need to solder the terminals to the control unit connection block. After this, the wires are laid through the hole in the engine shield where the pipeline was previously. Solder the other edge of the wires to the drive connection block. Typically, the automatic corrector comes with rubber protective covers for the pads. But in their absence, you can use sealant or heat-shrinkable tubes.
For power supply, there are two thick wires and 4 female terminals (one of them is wide, and the other three are narrow). Automatic headlight leveling works effectively when power is supplied and the low beam headlights are turned on. To do this you need to connect to:
- terminal No. 10;
- switch No. 64;
- rear fog light power supply.
The ground can be connected using the free terminal of the wire going to the ignition relay. Then install the drives in their standard location and secure with gaskets.
Headlights corrector
- What is a proofreader for?
- Where is the headlight range control located?
- The principle of operation of the headlight range control
- Kinds
- Manual type device
- Automatic device
- Installing headlight corrector
Strong headlights from oncoming cars at night can blind the driver. In order to reduce the number of accidents, engineers thought about adjusting the headlights. Correction devices have been installed on all cars since 1990. Fashion originated in Germany as the flagship country of the automotive industry - only 8 years later it became the norm for other European countries. The only exceptions were cars with active suspensions.
What is a proofreader for?
Probably every driver has found himself in a situation where an oncoming car is blinding and it is impossible to see anything. Vision is restored only after some time. To prevent this from happening, headlight spotters are installed on cars. The device maintains the position of the optical axis during changes in the position of the vehicle body. The light generated by the optics should be adjusted when the machine is not yet loaded. After loading, the light flux changes direction, moving relative to the optical axis. To correct the situation, a correction system is needed.
If the trunk of the car is heavily loaded, the front part of the body necessarily rises a little. The light from the headlights goes up and can blind the driver of an oncoming car. The auto-corrector adjusts the tilt of the light - the beam remains at the same level when the trunk of the car is overloaded or for some reason its front part is raised.
Where is the headlight range control located?
Control is carried out from the dashboard - using a switch. As a rule, it is placed on the left side of the steering column. The mechanism itself is located under the reflector. After pressing the button, the rod moves the headlight, which is mounted on hinges. The design is equipped with three connectors:
- for sensors;
- for power supply;
- for electronic adjustment of the reflector angle.
The principle of operation of the headlight range control
The purpose of the mechanism is to adjust the degree of illumination limit in low beam. When the far mode is turned on, this option is not necessary to use, because the device is not able to accurately indicate the line of light and shadow. Headlights must create high-quality illumination of the road, without blinding oncoming drivers.
The shadow line depends on how the reflector is positioned. The tilt needs to be adjusted, because it depends on how loaded the car is and which parts of it have the greatest load pressure. The headlights of an unloaded car emit a luminous flux that illuminates the area of the road in front of the car. If the tilt angle is adjusted as a result of loading, the direction of the light flux also changes. Using a spotter allows you to maintain the direction of light rays after changing the angle of the car body.
All correctors work on approximately the same principle. They differ only in the type of setting, which can be manual or automatic. The first type of device is equipped with a regulator, which is located inside the car. The driver rotates it manually, thus adjusting the degree of inclination of the reflector. In the second case, the system adjusts to the angle of inclination of the car automatically.
Correctors of different types are designed approximately the same. They include:
- road clearance sensor;
- control device;
- mechanical part - motor and gearbox.
Manual type device
This type of corrector is familiar to many drivers. These are usually installed on budget cars. The device is activated manually by turning a special switch made in the form of a small wheel. The position of the headlights on it is indicated using markings (graphics or numbers). The driver makes adjustments when necessary, depending on the change in the center of gravity of the car and, accordingly, its angle of inclination. He simply turns the wheel and the light beam changes direction.
After turning the wheel, a command is sent to the worm gearbox. The gearbox converts the movement of the motor into the translational movement of the kinematic element, which changes the angle of inclination of the light element. The design is quite simple - the headlight is mounted on hinges on top. It is touched from below by a rod, which, moving forward or backward, changes the vertical angle of inclination.
This is a very simple electromechanical device, which is its main advantage. But it has one significant drawback - drivers often simply forget to use it.
Automatic device
Here the driver does not need to do anything; regulation occurs automatically, according to sensor readings. The devices are installed on cars with halogen light-emitting devices or xenon ones. Xenon shines brightly, so having a spotter on it is a must. It is simply unsafe to drive with xenon without a corrector.
To measure the clearance, 2-3 non-contact Hall sensors are used. The device includes a rotor with built-in magnets and a stator. The sensor is attached to the bottom of the body and is combined with the suspension through a rod. The suspension “walks”, and information about this is sent to the rotor. The rotor turns, the magnetic flux changes. These changes are detected by the sensor. A control unit is connected, which recalculates them into the desired angle of rotation of the light elements. The signal is sent to the actuator. The control unit transmits not only the degree of inclination of the machine, but also the speed mode.
Installing headlight corrector
First, remove the right rear wheel. Next, we dismantle the mudguard and locker. We pull the cable through the rubber seal into the cabin, leaving a reserve under the arch. In the area of the right seat trim, unscrew the bolt securing the luggage net and seat belt. We take out the threshold trim and the pistons securing it. We remove the decorative threshold under the front door.
Next we proceed like this:
- Now we prepare the sensor.
- Bend the plate on it at an angle of 90 degrees.
- We insert a pin into the mounting hole on the sensor lever, which is located on the trailing arm of the right rear wheel. Screw a suitable size nut onto the stud. To strengthen this connection we use a lock nut.
- We position the device so that it is coaxial with the trailing arm. The mounting plate must be in tight contact with the body. The device lever should point down.
- We select a convenient place to fix the device on the body and secure it.
- We lay the cable to the sensor and secure it. It is desirable that it passes through a corrugated pipe.
- We install the wheel, mudguard and locker. We stretch the cable along the sills to the front pillar - as a result, it should be brought out in the area of the ignition switch. After laying the cable, we put the threshold pads in place.
The electrical corrector connection diagram looks like this (the Lada Kalina diagram is shown as an example):
We connect the wiring to the connector. We insert the connector into the autocorrector socket. This must be done according to the instructions for the device. After this, the installation can be considered complete.
The headlight leveler is not the most important part in a car, but traffic safety largely depends on how it works. It is especially important to use a corrector with xenon - otherwise you can get into an accident in no time.
Selecting and purchasing an installation kit
Minimum installation kit:
Nowadays, it is very difficult to find a car that is not equipped with headlight range control from the factory. Therefore, you can assemble all the necessary elements from new or used parts. For many cars, there are unified installation kits on sale (for example, EMKF 11 for VAZ 2110, 2111, 2112).
For installation, you can select parts from another car. The only important parameter is the overhang of the servo rod. Each headlight model has a certain range of adjustment of the reflector angle, so a “non-original” servo drive with a large rod overhang can damage the headlight. In some cases, the extension of the rod can be adjusted by selecting resistors of a certain value, so everything depends on the design features of the control unit.
Unlike a manual corrector, not every car is equipped with a system for automatically adjusting the cut-off line of low beam headlights. By and large, systems are classified according to the type of body position sensor, which allows the autocorrector to automatically change the angle of the headlight unit.
Automatic headlight leveling
Main types of systems:
- using one tilt angle sensor. Similar sensors are used in smartphones to determine the position of the device in space. The sensor is installed on a horizontal surface at the rear of the car. The system is the easiest to install, so it is often included in kits for self-installation of xenon together with a headlight washer. Autocorrectors with an ultrasonic tilt angle sensor, which is installed on a hinged suspension in the rear part of the body, are the best solution among similar systems. If an electric corrector is already installed on your car, then you can implement automatic control by purchasing a kit consisting only of a control unit, a sensor, an adjustment device, the necessary connectors and wires (for example, automatic headlight corrector ALS-1);
- using several ride height sensors based on the Hall effect. The sensor consists of a moving part, in which a permanent magnet is built, and a stationary part - a Hall sensor. One part of the meter is installed on a stationary part of the body, the second is attached to the suspension elements. The change in body position is transmitted to the sensor through the rod. This is exactly the system that cars are equipped with at the factory. If an automatic headlight leveler is installed on your car model in expensive configurations, then most likely there will be ready-made holes in the body for mounting sensors, which greatly simplifies installing the system yourself. If desired, you can install a universal automatic corrector of this type on each car.
Electromechanical system instead of hydraulic corrector
Let's consider installing a standard electromechanical corrector instead of a hydraulic corrector using the example of a VAZ 2110.
- Disconnect the negative terminal of the battery. Remove the headlight hydraulic corrector. The removal procedure is described in detail in the article “Why the headlight range control does not work.”
- Instead of hydraulic corrector actuators, install gearmotors.
- Connect the connectors of the servo drives, lay the wiring along the places where the hydraulic corrector tubes run. The tubes enter the interior through a special seal. After cutting off the tubes, make a hole in it of sufficient diameter for the passage of the wiring harness.
- Instead of the main cylinder of the hydraulic corrector, install an electronic control unit for the electric headlight corrector. Connect the positive wire of the ECU to the pin on which “+” appears after turning on the low beam headlights (in the VAZ 2110 mounting block this is pin 20 of the Ш2 block). The negative terminal can be secured with a bolt terminal to one of the body studs under the instrument panel.
What number should the headlight range control be set to make them shine better?
Not all drivers know how to properly adjust headlight range control. For this reason, many never touch it at all, for fear of ruining something. But this device is in every car and you just need to know how to use it, especially if you have to drive with a jam-packed interior. Let's figure out how to configure this thing.
Why do you need a headlight range control?
Most often, the headlight angle adjustment unit is located on the left side of the driver under the steering column. It is an adjustment wheel that can take one of the specified positions, mainly from 0 to 3. Depending on the load of the car, the driver must select one of the proposed options. The more the car is loaded, the more it sags downwards, which leads to a shift in the headlight illumination line. To restore the correct setting of the headlights, it is necessary to raise the beam of light above the road, and for this you need a headlight range control.
How to properly adjust headlights
You can’t just move the corrector handle to some universal position and forget about it forever. This will lead to the fact that the loaded car will blind oncoming drivers with its headlights. You should set the value on the corrector, focusing specifically on the degree of vehicle load.
Let's say you were going to the dacha, loaded all the necessary things into the trunk, what didn't fit there was safely tied to the roof rack. The whole family is seated in the cabin, and you can hit the road. But there is no need to rush; when loaded in this way, the rear part of the machine goes down, lifting the front part up. This will dazzle oncoming drivers. Therefore, it is necessary to lower the headlights a little, and to do this we switch the corrector knob to position “3”.
The numbers on the regulator can be perceived as the degree of load of the car, where “0” is an empty car with a driver behind the wheel, and “3” is a fully loaded car. In many modern cars, the corrector is completely automatic; the driver does not have to adjust anything on his own. On the one hand, this is very convenient, but on the other, not entirely, since this system does not always adequately respond to the loading of the machine.
Do-it-yourself repair and connection of headlight corrector
High-quality lighting of the road surface largely ensures the safety of driving a car at night. The main requirement for the operation of optics is the quality of lighting, and to adjust the light beam, car owners must use a headlight range control. You can learn more about what this device is and what its operating principle is from this material.
Description of the headlight range control
The headlight leveler is a device used to ensure that the position of the headlight axis remains unchanged. Thanks to the correct operation of the device, the position of the optical axis remains unchanged even when loads or vehicle movement conditions change.
Any car has the ability to change the light flux from the car's interior (if you don't take old cars into account). When the load on the car changes, that is, passengers sit in the cabin or cargo is placed in the trunk, the light beam will be shifted upward. Accordingly, this can lead to blinding of oncoming drivers. To prevent such a situation, the car owner can always change the direction of the light flux using a corrector.
Changing the luminous flux of optics depending on the load
Types and principle of operation
The operating principle may vary depending on the type of device:
- Manual regulator. Such a headlight range control sensor is usually installed on more budget car models. In this case, the headlight range control works as a result of its control by the driver. To adjust the luminous flux, a special wheel and switch installed in the cabin are used. This wheel has digital or graphic markings that allow you to ensure the position of the lights. As a result of turning the regulator, a signal is transmitted to the system motor, as a result of which the gearbox changes the position of the headlight. The motor itself is a worm gearbox, thanks to which the movement of the electric motor is converted into translational movement of the rod. The latter directly affects the optics. An electromechanical headlight range control is a fairly simple and useful device, which has one drawback - often our compatriots simply do not use it, thus causing inconvenience to other motorists.
- Automatic headlight leveling is a more technological device, since it works in automatic mode, and the driver does not need to perform any actions. The process of adjusting the optics with a motor occurs as a result of receiving signals from the controllers. The use of such a system is allowed on all vehicles with xenon or halogen bulbs installed in the headlights. Moreover, in the case of xenon, its use is mandatory, since the luminous flux emitted by gas-discharge lamps can seriously affect road safety. The device itself consists of an actuator (motor), a control module, as well as controllers used to measure ground clearance at different points of the car body. The controller itself is fixed on the bottom of the car, it interacts with the suspension using traction. When the suspension stroke changes, force is transmitted to the rotor through this rod, after which the latter rotates, resulting in a change in the magnetic flux. Subsequently, the change value is calculated by the control module at a certain angle of rotation of the optics, after which the pulse is transmitted to the actuator. The control module, calculating the angle of rotation, is based not only on the angle of inclination of the machine, but also on the speed of its movement (video author - Aleks B).
Typical malfunctions and methods for their elimination
If the device does not work, the reasons may be the following:
- Sensor failure. Such a malfunction may be accompanied by the appearance of a corresponding malfunction icon on the dashboard. As a rule, this problem is caused by a breakdown of the device bracket, as a result of which the controller can transmit incorrect information to the control module.
- Poor contact between the device and the system. Such a malfunction is usually associated with souring of the contacts, as a result of which the current conductivity is noticeably reduced. Accordingly, this leads to the node being inoperable.
- Failure of the tuning mechanism. This problem is most relevant for domestically produced cars (the author of the video is Konstantin Napolov).
Instructions for installing headlight range control yourself
If the system breaks down, the device must be removed and repaired. If the mechanism cannot be repaired, it may need to be replaced.
Brief instructions on how to install an automatic corrector with dismantling the electromechanical device (using the Halla model as an example):
- First of all, the electromechanical corrector is removed and removed.
- Next, you will need to slightly enlarge the technological hole for installing an automatic device, if the dimensions do not match and this is necessary.
- The new socket for fixing the device should be secured with glue or sealant.
- After this, the device is installed in the mounting location.
- The connection diagram for the headlight range control involves the use of ground clearance controllers; we mount them on the rear of the underbody.
- Now all you have to do is install the wiring from the sensor; for this you can use existing tubes. The control module is mounted in any convenient place and connected to the battery.
Auto correction systems
Modern cars are equipped primarily with one of two lighting correction systems: dynamic and quasi-static.
Which is better to choose: xenon 4300k or 5000k
In a quasi-static device, the sensor works by directly determining the angle of inclination of the machine under the influence of a load or high speed. The response rate of such devices is low. The devices are equipped with two sensors connected to the car axles. The auto-corrector duplicates the manual headlight leveler, the handle of which is located on the instrument panel of the car.
The headlight angle in automatic mode is changed by the corrector according to a command received from the control unit, which processes data on the angle of inclination from the mentioned sensors and on the speed of movement from the ABS sensors.
Dynamic automatic headlight leveling is associated with the appearance of xenon and an increase in the level of danger. Such a system is able to respond to changes in speed, height or tilt of the vehicle much faster than the previous one. The corrector works so quickly that it allows you to keep the headlight beam on the road surface almost without hesitation. This reduces the likelihood of blinding oncoming cars.
- The connecting wire between the sensor and the unit is routed along the bottom and firmly fixed;
The unit must be located in the engine compartment so that no moisture gets on it;
- It is necessary to provide free access to the place where the magnet is applied for programming the device.
After this, a connection is made to electric motors that change the position of the optics depending on the situation. The last stage is programming the position of the headlights depending on the signals from the auto-corrector sensor. This procedure is performed using a special magnet; instructions are included in the kit.
The installation procedure is quite complex and requires the participation of specialists, so it is strongly recommended to use the services of professionals for this.
Installing auto-corrector for xenon headlights is one of the areas of work of our service center. Our company employs experienced craftsmen who are familiar with the technology of installing automatic correctors, performing installation in compliance with the current manufacturer’s recommendations, standards and traffic regulations. For additional advice and to submit an application for installation of autocorrectors, please contact our specialists by phone.