Any car owner treats his vehicle with care and caution. This is why many motorists are trying to find a lot of ways to care for their car. Most often they are interested in how to polish headlights at home. For this purpose, both cheap improvised and rather expensive purchased means can be used. The result of such actions is not only an aesthetic function, but also increases the degree of traffic safety, since headlights are an indispensable device at night.
Features of headlight polishing
For anyone who is looking for an answer to the question of how to polish headlights with their own hands, it will be useful information about what general rules exist for performing this work and the specifics of the impact of certain types of headlights on certain substances and materials. Depending on this, one or another polishing effect will be achieved.
Despite the fact that at first glance it seems that polishing headlights is a complex process, it is not. Most often, some kind of abrasive material is used for this, as well as polishing paste. These materials can be purchased at a regular auto supply store, which is found in every city. Many people recommend using a grinder, but even without it in certain cases you can get by quite easily.
First of all, before grinding the headlights, you need to protect the surrounding parts of the car from this process. The hood, fenders or bumper can often suffer damage if they are not secured. Sanding them can remove both the top layer of varnish and the chrome plating.
If it is impossible to remove the headlight from the car, it is best to stick masking tape around its perimeter. For greater reliability, you can use several layers of this material.
You can see how to protect your car before polishing in this video:
Various amounts of substances are used as polishing materials, among which the most popular are the following:
- abrasive pastes;
- protective sprays;
- microfiber wipes;
- sandpaper of various fractions;
- regular toothpaste;
- diamond paste;
- grinder, etc.
Before work, you should also assess the extent of damage to the headlight. The choice of method for eliminating it will directly depend on this. Scratches, dullness, stains and chips can be repaired in a variety of ways, each of which is most effective only in a specific case. The question of how to polish all types of headlights cannot be answered unequivocally, since, for example, plastic is significantly different from glass.
For glass headlights, it is best to use diamond paste; plastic can be polished well with sandpaper and alternative substances. You can also use sandpaper on glass, but this should be done as carefully as possible.
This is interesting:
Parktronic what is it How to properly connect a car radio Memory card for DVR how to choose
GOI pastes
GOI pastes are small bars, the color of which ranges from light to dark green. The main components of such pastes are usually chromium oxide powder and organic components. GOI polishing products are fine, medium and coarse. Polishing with a fine paste gives the surface a mirror shine, a medium one helps to achieve an even shine, and with the help of a coarse GOI, scratches remaining after grinding are removed. Thus, when choosing a GOI for polishing headlights yourself, you need to rely on the current state of their surface: if there are scratches, then you will have to use a rough GOI, if there are none, a medium one will suffice. GOI is also used for polishing the body with your own hands - thanks to the fine paste, the exterior of the car takes on a well-groomed appearance. This product is no more difficult to use than toothpaste. Place a little GOI on a soft cloth moistened with gasoline. Gasoline is needed to ensure that the product is applied more evenly, and the preferred fabrics are wool and cotton. Remember that under no circumstances should GOI be applied to the polished surface itself - only to the fabric. Next, just calmly rub the product into the headlight or body, after which all that remains is to rinse thoroughly with water, and the car will be as good as new.
Polishing with purchased auto chemicals
One of the easiest ways to polish headlights with your own hands is to carry out this work using certain store-bought chemicals, for example: PlastX, Mothers Nulens, Turtle Wax. They work best against problems such as cloudiness or yellow discoloration. In most cases, retail kits for this type of polishing consist of a special cleaning abrasive paste, a protective spray and a special microfiber sponge.
The subsequent list of actions is as follows:
- Insulating the surrounding elements of the vehicle with masking tape.
- Cleaning the surface of the headlight from dust and dirt. A large speck can leave marks on glass or plastic.
- Apply the purchased paste and lightly wipe the entire surface with it. It is best to perform this action using a napkin. The substance in the paste has a restorative effect. As the work progresses, you can increase the pressure a little. The headlights should be wiped in this way for 10 to 20 minutes.
- After the plastic has become more transparent, use a napkin or a stream of water to clean it of the paste.
After all the above steps, the headlights should look much newer in appearance. It is best to use a special protective spray after this and rub the surface with microfiber. You should choose a cleaning agent with a weak effect so that its components cannot damage the headlight.
Abrasive polishes
This polishing material contains abrasive substances and is usually used to remove paint defects. The use of abrasive polishes is accompanied by grinding the surface to remove a microlayer of varnish. Using an abrasive it is quite possible to get rid of old stains, scratches and abrasions. This type of polish is used exclusively in extreme cases when other means fail to cope with the task. Even service center specialists do not risk using abrasives to polish the body again, so it is especially not worth doing it yourself - you can seriously damage the body. But with the headlights, if they are in a completely unsatisfactory condition, you can try it yourself. The abrasive polish is applied with smooth, calm circular movements using a soft cloth. Be prepared for the fact that the procedure will be quite lengthy, because everything needs to be done extremely carefully so as not to damage the surface even more. You may find it more convenient and easier if you remove the headlights. This is not the most interesting or fun activity, but it is better to be patient a little than to buy new headlights. At the end, do not forget to rinse the cleaned headlights with water.
Polishing with sandpaper
If the damage to the surface of the vehicle headlights is deep enough, then they should be polished using sandpaper.
By hand
You should select several different types of it with different fraction sizes. You will need paper from P600 to P2500. The work must be carried out in the following order:
- It is best to remove the top polycarbonate layer of the headlight surface using the coarsest sandpaper - P600. It will be enough to remove only a few microns.
- The surface of the headlight or the sandpaper itself must be constantly treated with water. This is necessary to prevent microcracks from forming due to overheating. If this happens, you will need to buy a new spare part.
- The abraded material in the form of a pulp should be constantly removed from the surface. This will allow you to immediately evaluate the work performed, and also prevent the occurrence of new damage from remnants of the headlight surface.
- When the top layer is removed, you need to mark the sandpaper with the one with the smaller grain fraction. Continue changing the material as you clean the surface of the headlight up to paper B2500 - the finest grain.
- After sanding, be sure to move on to polishing. To do this, it is best to use the highest quality store-bought paste; if it is not available, use toothpaste.
It is important to remember that sandpaper is a fairly rough polishing agent and is used to remove damage. Therefore, after it, work should still be carried out with other substances. To complete the polishing, you can use various polishes, cleaning agents, etc.
Sanding machine
Using a grinder, you can polish your headlights at home in exactly the same way as you would by hand using sandpaper. All stages of work are similar to each other. The only difference is the polishing speed.
The grinder should be adjusted in a special way so that it does not damage the headlight. It is necessary to select the minimum rotation speed. First, you need to use sanding material P1000, which has a larger grain fraction, then switch to P2000 and finish the job with P4000.
Each stage of working with separate sandpaper should often not exceed 2-4 minutes. After this, be sure to use paste and various protective sprays to clean and protect the surface of the headlights. After them, you can use regular polishes and shine products.
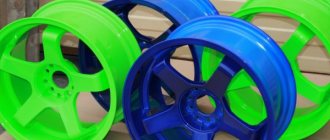
How and with what to polish plastic headlights
The main task of preparing for the process is to analyze the condition of the plastic surface. This is an important factor, since the list of further work depends on it. In this case, the need for roughing using coarse abrasive grinding is determined. When choosing abrasive paper, the depth of damage is revealed. They may be insignificant, then it is enough to use only polishing paste.
First stage
The procedure can be carried out directly on the car, or by first removing the headlight. In the latter case, you need to dismantle it, according to the car manual, and in the first case, it is enough to protect the edges of the body paint with masking tape.
It is important to know!
Professionals most often carry out the polishing procedure only on dismantled optics.
It is inconvenient to polish the optics yourself with a grinding machine, since it requires a mounting device.
Roughing
After cleaning the lighting device, level the surface with sandpaper. It is pre-soaked for a few minutes. Roughing can be completed if the scratches have disappeared and the entire surface has become matte.
There are some nuances in this work:
- If there are shallow defects on the surface, it is better to first treat it with P 1500 sandpaper. This will preserve the protective coating of the plastic.
- If the damage is serious, then clean it completely, starting with P80 sandpaper. Next, the grain of the paper is gradually reduced.
Independent work consists of progressive movements. Sanding is done longitudinally with one type of sandpaper, and crosswise with another. In this case, be sure to wet the sandpaper with water.
Some craftsmen use a polishing machine for this procedure, which makes the work easier. But this requires care not to overheat the plastic. Grinding is carried out at 600 rpm, constantly wetting the sandpaper with water and moving the tool progressively.
Attention! Do not keep the sander in one place, as the plastic will become cloudy and overheat.
Finishing
The list of works at this stage is associated with the results of rough processing. If the protective layer is completely cleaned, then the surface is varnished, otherwise it will quickly turn yellow. If the protection remains, then it is enough to polish and finish the job.
Varnish coating
First you need to choose a varnish; experts advise buying the “2K” brand. Varnishing is carried out after sanding P1500. Application is carried out by spray, as the solvent may react with the plastic. When purchasing a branded kit, you can use a special varnish that is applied manually.
Final polishing
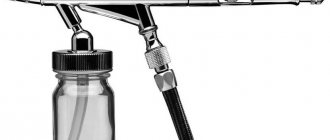
A final polish will be required to achieve the factory-intended clarity of the headlight. It is carried out using a foam rubber circle, a sponge applicator and polishing pastes. The operation can be performed after varnishing, as well as without it.
Procedure:
- Moisten the polishing wheel with water and squeeze well.
- Apply a pea-sized amount of paste.
- Rotating the circle at low speeds, apply the paste to the headlight.
- Dry the surface.
- Polish in a circular motion.
If you use 3M brand pastes, then first take No. 74, then No. 75.
Polishing headlights with toothpaste
The most popular means of polishing car headlights, if financial resources are quite limited, is regular toothpaste. There is no need to choose any special products - you can simply use the one that is in the driver’s bathroom.
Despite the fact that the paste is intended for cleaning enamel, it is well suited for both plastic and glass headlights. Its restorative function has been known for many years, so there is no point in arguing with the effects it brings. However, there are certain features of the use of this substance.
In case of serious damage in the form of deep scratches, toothpaste will not help. The effect of this oral hygiene product on glass is minimal, but it is also present. Since the paste is quite cheap, it can be applied before other polishing methods.
The most effective toothpaste is in the fight against clouding and yellowing of the plastic surfaces of car headlights. The way it works is quite simple:
- Buy a paste and squeeze its contents onto the surface of the headlight, wiping it first.
- Rub the substance onto plastic or glass.
- Rub with a napkin.
- Wash off the paste after the appearance improves.
There is no simpler or cheaper way to deal with minimal damage to headlights.
For an example of polishing a headlight with toothpaste, watch this video:
Cause of cloudiness
A decrease in the intensity of illumination provided by car headlights is due to the negative impact of the following factors:
- mechanical damage to glass in the form of scratches, cracks, chips that occur when stones fall from under the wheels, impacts from bush branches while driving;
- contamination by dust, splashes from puddles;
- yellowing characteristic of polycarbonate headlights as a result of prolonged exposure to direct sunlight;
- loss of shine due to freezing ice;
- cloudiness after using chemical cleansers.
When the first signs of damage appear, polishing should be carried out using available means.
Polishing glass headlights with diamond paste
Working with glass headlights is more difficult. A layer of polycarbonate is much easier to remove than one millimeter of glass. Conventional polishing agents cannot help in such cases. It is best to use diamond paste. Its name is due to the fact that it contains small grains of diamonds, no more than 2-3 microns.
Glass can be polished either manually or using power tools. It is also necessary to monitor surface overheating. Before using diamond paste, you should try using sandpaper or regular toothpaste. They can also repair some glass defects, which is much easier and cheaper.
Working with diamond paste should be carried out after cleaning the surface from dirt. Apply the product to the surface of the headlight and begin to rub it with a sponge. Gradually you can notice an improvement in the appearance of this part of the machine. You should polish until there are no traces of any damage left on the headlight.
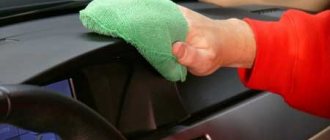
Primary cleaning of headlights
Before starting work, you need to clean the headlights from dirt and dust. There is nothing complicated or special about this process. Purchase a simple glass cleaner and rags. You need to spray the liquid onto the headlight, then wipe it. If you don’t want to spend money at this stage or don’t have time to go to the store, there is a way out.
Use available tools that can serve as substitutes. A simple dishwashing gel would be a great option. Soap, shampoo and any detergent will also work. You should not use toxic powders for the washing machine; they can simply damage the plastic glass of the headlight.
Why do the headlights shine worse?
If you purchased a new car, then the headlights will please you for several years. When the car is used. The problem may arise from the very beginning. And often it involves maintaining the vehicle. If the car was kept in a dirty place, it is not surprising that the headlights became in such a state. But even with ideal care, sooner or later they will begin to fade.
How to increase the service life? Take care of them all the time, wipe them and check their condition. Even cars with modern systems, lens optics and xenon are falling into disrepair. Time does not spare anyone, you can only delay the inevitable. There are several main reasons that adversely affect headlights:
- The plastic glass begins to become cloudy. The problem almost always lies in prolonged exposure to sunlight. If you do not park the car in the garage, and it is located on the street. The sun's rays make plastic glass cloudy within a few years. If you live in a warm region, then even a year is enough.
- Dampness and moisture. If you keep your car in a garage with high humidity or live in a region where there is a lot of rain. Dampness and moisture have a very detrimental effect on headlights. The result is the same as with the sun's rays.
- Dust. Another dangerous enemy of any headlights, which negatively affects their condition. Dust is everywhere, so this factor is simply impossible to avoid. Enterprises use special products that create a small film on your headlights. It protects them from dust and other aggressive environments. But it cannot guarantee security all the time; sooner or later, its influence will weaken.
What is important to know
It's no secret that some even use sandpaper to restore the surface of the head or rear optics of a car. On Drive2 you can find many similar stories and instructions.
Car optics need constant protection from negative influences from the environment, roads and other road users. The outer surface is constantly exposed to dust, dirt, mechanical damage, chemicals, etc. To clean it and restore its previous transparency and light transmittance, you need to take an appropriate care and restoration kit. The market range is huge, which is why many cannot decide what is best for them to use.
Some people buy a special 3M type kit, which already contains everything needed for polishing. Others use toothpaste, others use goyim toothpaste, and still others buy branded products that have received the most positive reviews.
The price of pastes varies, as does their composition. It’s quite difficult to say unequivocally which one is the best. Some believe that only abrasive, and diamond, paste is suitable for such tasks. Others categorically refuse the idea of using any abrasive for fear of damaging the headlight material.
To make the right choice, you need to consider several points:
The polishing process itself is done with your own hands or with a grinder. In the latter case, it is better to use a device in which the speed is regulated.
You can process glass headlights yourself without fear of any special consequences. But when working with plastic, it is better to contact a car service. The only downside is that the price of the service is quite high. Both in Minsk and in Moscow. But there is a minimum risk of harming the car. What do you think about this? Leave feedback.