The functional components of a car are constantly subject to wear and tear, which is a consequence of long-term use or excessively high loads during travel. The serviceability of the brake system is considered a guarantee of safe driving. Therefore, it is advisable to know how to check these vehicle components, as well as how to replace parts in a timely manner.
Dismantling
Before installing disc brakes, you need to dismantle the old rear brake mechanisms of the VAZ 2114.
This is done like this:
- Remove the wheel;
- Remove the brake drum;
- Remove the pads;
- Remove the hub from the wheel, having first unscrewed the brake pipe.
You should prepare for the fact that dismantling will not be easy. Not only do the brakes have the unpleasant tendency to stick during operation, but the bolts are also “welded” by corrosion. Therefore, it is advisable to treat the nuts and bolts themselves with a special agent (for example WD 40) so as not to tear off their edges.
It is important to plug the removed pipe with something so that brake fluid does not leak out and air is not sucked into the system. After that - knock down the hub
This works best if you attach a board or lath to the back of the support disk and hit it with a hammer, moving the blows: one from below, the other from above. This will prevent you from causing serious damage to the disk.
Drum brake disc VAZ 2115
We install the rear drum discs in the same way as the front ones. Fixing the disk on two slots clamped with screws. Before removing the drum, gently tap the body. This is necessary in case rust or layers have formed inside the “cap”.
Tips for servicing VAZ 2115
We comply with the technical inspection (TO) deadlines. We carry out maintenance every 15,000 km, as indicated in the instructions.
After long trips on muddy or snowy roads, rinse the calipers with running water. This will remove chemicals from the surface and reduce the likelihood of deformation and corrosion. If you have a covered area, leave the car in a non-ventilated box.
Avoid overheating of the wheel bearing and caliper, as this reduces braking efficiency.
Which type of disk is better?
- Stock;
- Ventilated;
- With notches.
The first type is the simplest with minimal efficiency, frequent deformation against the background of increasing operating temperature. At high speeds, the operating temperature rises, which has nowhere to go, which leads to disk jamming. Since 2000, most automakers have increasingly installed ventilated discs in production models.
The second type is the most in demand in terms of price-quality ratio. The main advantage of the ventilated type is the presence of multiple through holes on the plane of the disk. This facilitates the rapid removal of excess heat, preventing overheating.
A disc with notches is the most effective, but at the same time expensive product. Notches can be combined with or without holes. In the first case, cooling, removal of moisture and condensate will be several times faster, which will increase the overall service life of the equipment.
Replacing brake discs VAZ 2114 - ventilated or conventional
Recently, ventilated wheels have become very popular among car tuning enthusiasts. Their main difference from conventional ones is the presence of holes and grooves (grooves) on the working surface of the parts. This design allows you to significantly reduce heating during intense braking. Such discs cost from 2500 rubles per set.
Is it worth installing them? If you are not a supporter of sporty driving and sharp braking, there is no need to overpay. Feel free to install standard parts. If you participate in racing or are simply used to aggressive driving, the best solution would be to install ventilated discs. Installing them, of course, is more hassle, but you will immediately feel the difference with regular ones.
How to replace a brake disc on a VAZ 2113-VAZ 2115?
Note! Before changing discs (And you only need to change them in pairs, do not skimp on this, because this will lead to uneven braking and more force will be applied to the new disc, because of this, rapid wear will result and the need for an early replacement), think about buying brake pads, consult with a consultant, they will tell you which pads are best combined with these brake discs; if the pads were replaced recently, then you don’t have to change them to new ones!
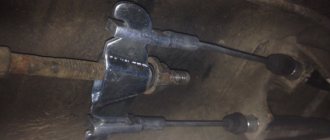
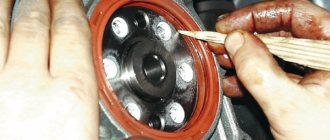
1. First, jack up the car and remove the wheel from it, place stops (Rocks, shoes, etc.) under the rear wheels and apply penetrating lubricant to the pins that secure the brake disc (Indicated by red arrows), then take the key and unscrew the pins beyond their edges, they are unscrewed counterclockwise; if the pins suddenly become very acidic, then a hammer will help you, from the vibrations of which all the rust will fall off and the pins will unscrew without much effort.
2. Now you will need to remove the brake caliper from the disc, it would be more correct to do this from the very beginning, after removing the wheel, but even after turning out the pins, the disc will sit very well, just don’t make sudden movements (don’t pull the disc) so that it doesn’t flew off the hub, otherwise the brake hose that is connected to the caliper may break (You will find more detailed information on how to remove the brake caliper in the article entitled: “Replacing the caliper on a VAZ”).
Note! When the caliper is removed from the brake disc, you do not need to unscrew the brake hose from it and completely remove the caliper, because in this case all the brake fluid will leak out and the brake system will become airy, the easiest way to do this is this, or hang the caliper from the spring by a wire, only make sure that it does not fall down and the brake hose does not break, or the second option, place the caliper carefully on a lever of some kind and also make sure that it does not fall and most importantly, do not leave the caliper hanging purely on the brake hose, the hose may not withstand and tear, be careful!
3. Completion, grab the back side of the disk with your hands and remove it from the hub with sharp movements (If that doesn’t work, then gently tap the back side of the disk with a hammer in different places and it will come off the hub), sometimes the disk sticks to its seat and for it To remove it, you will need a hammer, you need to hit it with a hammer in the very center, as close as possible to the seat of the disk (see photo below), thereby the rust will disappear and it can be easily removed, if the disk is still used in the future, then in this case it will not damage replace it with a metal hammer, replace it with a rubber one, or just bring a spacer when you hit the brake disc.
4. The disc is installed in the reverse order, on the hub, or more precisely, on the seat where the brake disc sits, grease is smeared (Indicated by the arrow), but before applying it, using a metal brush, clean the seat from rust and dirt (This is mandatory) and then there will be no problems with installation, and if you ever decide to remove the brake disc, then thanks to the grease, there will be no special problems with removal.
Note! When everything is installed, at first avoid sharp braking, there is no need to check how the car will brake on new brake discs, because this can lead to their overheating, for the first time, for 250-300 kilometers, drive calmly, brake calmly, and in general, sharply We do not recommend braking, only in emergency cases, since heavily worn discs or discs made of weak metal (Fake) may crack, which will lead to their immediate replacement!
Additional video: On most cars, discs are changed completely identically, so look at the replacement process using the VAZ 2109 as an example.
How to replace brake discs on a VAZ-2114 yourself
The functional components of a car are constantly subject to wear and tear, which is a consequence of long-term use or excessively high loads during travel. The serviceability of the brake system is considered a guarantee of safe driving. Therefore, it is advisable to know how to check these vehicle components, as well as how to replace parts in a timely manner.
We determine the degree of wear of brake discs and pads
The VAZ-2114 brake system requires at least 3 pad replacements during operation of one disc. However, the rate of wear also depends on the following points:
- The material from which the friction linings are made.
- Correct operation of the brake system as a whole. If any unit functions with deviations, the pads will lose their properties noticeably faster.
- Load intensity. The more, the faster parts will need to be replaced.
On the dashboard of the VAZ-2114 there is a brake pad wear indicator. If you notice continuous lighting, this is a signal that it is time to replace these components. However, in practice everything is far from so simple. You shouldn't always trust electronics.
It is recommended to check the degree of wear yourself every 10,000 km.
To inspect the components of the brake system, you need to handcuff the car and put stops under the rear wheels. Next, loosen the nuts that secure the wheels and jack up the car. Unscrew and remove the wheels, clean the surface of the brakes from accumulated dirt.
Using a caliper, take measurements and compare them with the following values:
- disc thickness – at least 10.8 mm;
- friction linings – at least one and a half millimeters thick;
- the rear drum brake must comply with the value of 201.5 mm.
If any parameter is less than the figures described above, then parts should be replaced as quickly as possible.
An additional signal to replace brake system components may be the presence of chips, cracks and other troubles.
The process of replacing brake discs on a VAZ-2114
In practice, repairing the brake system is not difficult. To do this you will need only 3 hours of time and the following tool:
- Screwdriver.
- Keys for 13, 17 and 8.
- Jack.
- Balloon wrench.
- Rubber hammer.
Step-by-step replacement of brake discs:
- Park the car on a flat surface (in a garage on a concrete floor or on a street where there is asphalt). Place wheel chocks under the wheels.
- If the wheels have not been removed for a long time, treat the fixation points with a special product - WD-40. After this, wait 15 minutes. This will make the wheel removal process as simple as possible.
- Take the wheel wrench and unscrew the nuts that secure the wheels. Perform this step before jacking up the vehicle.
- After the fastenings have been loosened, place the jack in place and lift the vehicle.
- Remove the wheel.
- Now you need to remove the brake pad. Unscrew the fixing caliper using a 17mm wrench. Remove the brake pipe fasteners (use a 13mm wrench). Drain the brake fluid into a prepared container.
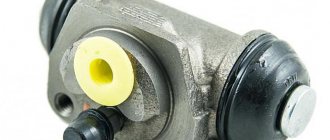
- The next step is to remove the brake cylinder. The part is secured with two size 13 bolts.
- At this point, you have already gained access to the disk. This component is secured with two studs (pins). You can unscrew them using a 8mm wrench.
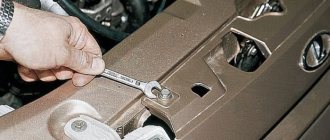
- Next, use a rubber hammer to tap the back of the disc until it comes off the hub. If you don't have such a hammer, use a regular tool and a wooden block. Be especially careful during this step.
- Now you can install the new disc on the wheel. Installation of the component occurs in the reverse order. Before installing the part, lubricate the joint with the hub with high-temperature grease. Copper grease is well suited for these purposes.
If you set out to replace the discs, you may also need to replace the brake pads. This is done as follows:
- Once you have removed the wheels and cleaned the brake system of dirt, disconnect the brake fluid supply pipe from the bracket.
- Using a 17mm wrench, unscrew the top bolt that secures the caliper. First move the counter curtain, which prevents the bolt from turning while driving. Use a regular screwdriver for this.
- Loosen the lower caliper bolt - there is no need to unscrew it completely.
- The bracket that covers the pads should be moved aside.
- Now you can pull out the pads and put new elements in the same place.
- The final step is to tighten all the caliper bolts back. Secure the brake hose and reinstall the wheel.
Using these step-by-step instructions, you can easily replace brake discs and pads on your VAZ-2114. All work will take approximately 3 hours.
To summarize, we note that all work on replacing discs and pads on domestic cars is not complicated. But if you feel that you cannot cope with the task and have not done anything like this before, it makes sense to contact the service. In this case, you will be able to clearly see the whole process, and next time you will be able to complete all the work yourself.
pros
Let's look at why disc brakes are better than drum brakes:
Braking becomes more reliable, braking distance is reduced; Braking forces are distributed more evenly, given that the VAZ 2114 is a front-wheel drive car; There is an effect of faster response after pressing the pedal; Unsprung masses are reduced; Heat dissipation occurs better, which is especially important when driving on a mountain road or during active acceleration/braking. For this reason, the brake system is cooled better; Disk ones are much easier to dismantle and replace; There is no need to adjust the handbrake after each repair of the rear brakes, although this will have to be done the first time; They do not freeze in winter after washing, like drum ones; Rear disc brakes installed on the VAZ 2114 are much more convenient to control and promptly notice pad wear.. https://www.youtube.com/embed/6ZnhyJAeQSY
The cost of this repair at a car service
If you want to have your car serviced at a car service center, then in addition to the budget spent on purchasing new parts, you will also have to spend money on paying for the work of the technician. On average, technicians charge 1,000 rubles for replacing a brake disc, and 500 rubles for replacing brake pads.
This means that when a car is serviced, the cost of repairs increases by about a third. Of course, an experienced technician will be able to check all components of the brake system in the car and point out additional faults - this is definitely a plus of contacting a car service center.
But if you have all the necessary tools, a place where you can carry out repairs and even a little experience, replacing brake discs yourself will not be so difficult. This will help you save on servicing your car.
When buying spare parts, you should definitely look at the reviews and check the quality of workmanship in the store. This will help detect a defect. After repairs, be sure to check that the brake system is working properly without immediately driving onto the roadway. The first presses on the pedal may be ineffective, and in any case, a little grinding in of the mechanism is required.
Removal and installation of brake discs on VAZ 2114 and 2115
First, we will need to complete some preparatory steps, namely:
- Raise the car with a jack
- Unscrew and remove the front wheel
- Remove the caliper assembly with pads
Now you can proceed directly to the disc removal procedure itself. To do this, use a 7 key to unscrew the two guide pins.
Then, from the reverse side, we try to knock down the VAZ 2114 brake disc with a hammer, and you can use a wooden spacer so as not to damage the surface. Although, if you change them anyway, then you don’t have to worry too much about it.
Usually, after several blows, it is still possible to knock this part off the hub. If everything sits quite tightly, then you will have to look for a special puller with rotary grips. You can see this repair more clearly in the video below.
Video instructions for replacing front brake discs of Lada Samara
Everything was filmed on the example of a front-wheel drive VAZ car, so this will be an excellent guide for all similar cars.
When installing new ones, everything is done in the reverse order and it is advisable to use a spacer during installation so as not to damage the disk. This will be clearly shown in the photo below.
The price of new brake discs produced by AvtoVAZ starts from 700 rubles per piece. The kit, of course, will cost about 1,400 rubles. Although, you can consider more expensive options, but then you will have to pay more than 2000 rubles. for such pleasure.
Replacement
Today, many people prefer to install ventilated brake discs on the VAZ 2114. This is a largely justified decision, since a special system allows them to be additionally cooled by air flows. Relevant for fans of fast driving and sharp braking. These systems are effective and durable, so it won’t hurt to spend money on them.
As for the replacement procedure, the main task here is to dismantle the old disks. Installing new ones later won’t be too difficult. Just be sure to remember or even write down which unit was located where and in what position, so that, by analogy, you can then assemble the “constructor” in the reverse order.
The brake discs on each wheel are removed in the same way. Therefore, follow the instructions.
- Place the car on as level a surface as possible, turn on the handbrake, and place supports under the wheels. This way you minimize the risk of the machine moving and causing injury to you.
- Raise one of the wheels using a jack and begin removing it. We think you know perfectly well how wheels are removed on a VAZ 2114.
- Next, loosen the brake cylinder a little.
- Using a screwdriver, pry the boot off the upper guide of the brake pad.
- Now you need to remove the caliper and pads. To remove the caliper, use a 17 mm wrench. Before unscrewing the caliper itself, be sure to remove the brake hose fastener.
- Removal of the pads is carried out in a special way. We have prepared a separate special material for you about this.
- To prevent brake fluid from leaking out of the system, place a container under the hose. Anything that leaks out can be poured back in after replacing the disks.
- Proceed with a thorough cleaning of the work site. You will have to clean off all traces of dirt and remove rust on the brake surfaces. Just don't pick anything there. Use special highly effective washes.
- When using chemicals, be sure to think about your own protection. Wear gloves and avoid contact with skin and eyes.
- Treat all brake system components with the almighty WD40. Take special care under the hub bearings.
- The wheel pins are removed using a 8mm wrench. Just make sure that during this operation the disk does not move from its current position.
- Before removing the brake disc, lightly tap the surface of the unit. Just don't ram on the work surface.
- Remove the disc.
- Insert the new unit and proceed in the reverse order of dismantling.
- All elements must be thoroughly lubricated beforehand, especially the hubs. Treat the working surface of the new brake disc with a special product. This will degrease the unit.
- If the brake cylinders were replaced at the same time, bleeding the brake pedal will become a mandatory measure, without which it is strictly not recommended to operate the car.
- In a similar way, change the second front brake disc on your VAZ 2114.
We recommend: How to install bi-xenon H4 with your own hands: diagrams and connection sequence
This procedure has its own difficulties. Therefore, get ready for the fact that you, as a beginner, will have to spend not 5, but 6-8 hours.
When to Replace Discs
It is necessary to replace the front brake discs on a VAZ 2114 if the following symptoms occur:
- The thickness turned out to be less than the permissible level. The discs were simply erased;
- The linings are oily;
- A gap has formed between the base and the overlay;
- When braking there is a squeaking noise;
- There is beating in the brake pedal;
- As for the rear drums, they sometimes stick to the pads, which leads to serious repair work and financial losses;
- The brake cylinders are stuck. This can be temporarily fixed by treating them with WD40. The measure is temporary and will allow you to get to the garage or the nearest service station.
If you are faced with one of these problems, or all of them in a heap, be sure to immediately begin replacing the brake discs on your VAZ 2114.
Today, many people prefer to install ventilated brake discs on the VAZ 2114. This is a largely justified decision, since a special system allows them to be additionally cooled by air flows. Relevant for fans of fast driving and sharp braking. These systems are effective and durable, so it won’t hurt to spend money on them.
As for the replacement procedure, the main task here is to dismantle the old disks. Installing new ones later won’t be too difficult. Just be sure to remember or even write down which unit was located where and in what position, so that, by analogy, you can then assemble the “constructor” in the reverse order.
The brake discs on each wheel are removed in the same way. Therefore, follow the instructions.
- Place the car on as level a surface as possible, turn on the handbrake, and place supports under the wheels. This way you minimize the risk of the machine moving and causing injury to you.
- Raise one of the wheels using a jack and begin removing it. We think you know perfectly well how wheels are removed on a VAZ 2114.
- Next, loosen the brake cylinder a little.
- Using a screwdriver, pry the boot off the upper guide of the brake pad.
- Now you need to remove the caliper and pads. To remove the caliper, use a 17 mm wrench. Before unscrewing the caliper itself, be sure to remove the brake hose fastener.
- Removal of the pads is carried out in a special way. We have prepared a separate special material for you about this.
- To prevent brake fluid from leaking out of the system, place a container under the hose. Anything that leaks out can be poured back in after replacing the disks.
- Proceed with a thorough cleaning of the work site. You will have to clean off all traces of dirt and remove rust on the brake surfaces. Just don't pick anything there. Use special highly effective washes.
- When using chemicals, be sure to think about your own protection. Wear gloves and avoid contact with skin and eyes.
- Treat all brake system components with the almighty WD40. Take special care under the hub bearings.
- The wheel pins are removed using a 8mm wrench. Just make sure that during this operation the disk does not move from its current position.
- Before removing the brake disc, lightly tap the surface of the unit. Just don't ram on the work surface.
- Remove the disc.
- Insert the new unit and proceed in the reverse order of dismantling.
- All elements must be thoroughly lubricated beforehand, especially the hubs. Treat the working surface of the new brake disc with a special product. This will degrease the unit.
- If the brake cylinders were replaced at the same time, bleeding the brake pedal will become a mandatory measure, without which it is strictly not recommended to operate the car.
- In a similar way, change the second front brake disc on your VAZ 2114.
This procedure has its own difficulties. Therefore, get ready for the fact that you, as a beginner, will have to spend not 5, but 6-8 hours.
Installation of ventilated brake discs on a VAZ 2114
In fact, replacing brake discs on a VAZ 2114 is not a very complicated process. This work can be done with your own hands. This will take you about 5 hours with a competent and careful approach. There is no need to rush, as this can lead to more serious consequences.
In addition to replacing discs, we recommend paying attention to the current condition of the pads. Usually they are changed at the same time.
Signs and causes of the problem
You can feel that the brake discs are already at the limit of their professional suitability by the beating of the pedal. She will, as they say, be naughty. This is easy to determine at high speeds when braking.
Don't think that "tired" disks will be able to work for some time. Such frivolity often leads to a hospital bed. And that's the best case scenario. We don’t want to scare anyone, but brakes are still an incredibly important safety system.
There may be several reasons why the pedal does not behave naturally.
- The brake disc is deformed. This can happen due to temperature changes, sudden braking and normal wear and tear. If only one disk is damaged, the second one is replaced at the same time as the first. This is a rule that should be followed always and everywhere.
- Broken front pads. It is impossible to restore their functionality, therefore they must be replaced.
- The rear drums have failed. The VAZ 2114 has drums at the rear, although some install disc brakes. Think for yourself how justified such a decision is.
Checking for wear
This table will allow you to figure out below what wear marks the operation of brake system elements should not be allowed.
| Unit | Maximum permissible dimensions |
| Brake disc thickness | Not less than 10.8 millimeters |
| Axial runout on surface | Not less than 0.15 millimeters |
| Overlay on the block | Not less than 1.5 millimeters |
| Drum brake diameter | Not less than 201.5 millimeters |
It is not possible to determine the dimensions visually, so the car will have to be jacked up, the brakes cleaned, the wheels removed and the appropriate manipulations performed to determine the dimensions using a caliper.
Runout check
Compare the data obtained with the data from the table, and you will understand whether it is time for you to change the brake discs or pads or not.
Another important point is checking the movement of the pads. Pry them out with a screwdriver. If the movement is heavy, they will pinch the disc, and over time the pads will simply collapse along with the disc.
When to Replace Discs
It is necessary to replace the front brake discs on a VAZ 2114 if the following symptoms occur:
- The thickness turned out to be less than the permissible level. The discs were simply erased;
- The linings are oily;
- A gap has formed between the base and the overlay;
- When braking there is a squeaking noise;
- There is beating in the brake pedal;
- As for the rear drums, they sometimes stick to the pads, which leads to serious repair work and financial losses;
- The brake cylinders are stuck. This can be temporarily fixed by treating them with WD40. The measure is temporary and will allow you to get to the garage or the nearest service station.
If you are faced with one of these problems, or all of them in a heap, be sure to immediately begin replacing the brake discs on your VAZ 2114.
Replacement
Today, many people prefer to install ventilated brake discs on the VAZ 2114. This is a largely justified decision, since a special system allows them to be additionally cooled by air flows. Relevant for fans of fast driving and sharp braking. These systems are effective and durable, so it won’t hurt to spend money on them.
As for the replacement procedure, the main task here is to dismantle the old disks. Installing new ones later won’t be too difficult. Just be sure to remember or even write down which unit was located where and in what position, so that, by analogy, you can then assemble the “constructor” in the reverse order.
The brake discs on each wheel are removed in the same way. Therefore, follow the instructions.
- Place the car on as level a surface as possible, turn on the handbrake, and place supports under the wheels. This way you minimize the risk of the machine moving and causing injury to you.
- Raise one of the wheels using a jack and begin removing it. We think you know perfectly well how wheels are removed on a VAZ 2114.
- Next, loosen the brake cylinder a little.
- Using a screwdriver, pry the boot off the upper guide of the brake pad.
- Now you need to remove the caliper and pads. To remove the caliper, use a 17 mm wrench. Before unscrewing the caliper itself, be sure to remove the brake hose fastener.
- Removal of the pads is carried out in a special way. We have prepared a separate special material for you about this.
- To prevent brake fluid from leaking out of the system, place a container under the hose. Anything that leaks out can be poured back in after replacing the disks.
- Proceed with a thorough cleaning of the work site. You will have to clean off all traces of dirt and remove rust on the brake surfaces. Just don't pick anything there. Use special highly effective washes.
- When using chemicals, be sure to think about your own protection. Wear gloves and avoid contact with skin and eyes.
- Treat all brake system components with the almighty WD40. Take special care under the hub bearings.
- The wheel pins are removed using a 8mm wrench. Just make sure that during this operation the disk does not move from its current position.
- Before removing the brake disc, lightly tap the surface of the unit. Just don't ram on the work surface.
- Remove the disc.
- Insert the new unit and proceed in the reverse order of dismantling.
- All elements must be thoroughly lubricated beforehand, especially the hubs. Treat the working surface of the new brake disc with a special product. This will degrease the unit.
- If the brake cylinders were replaced at the same time, bleeding the brake pedal will become a mandatory measure, without which it is strictly not recommended to operate the car.
- In a similar way, change the second front brake disc on your VAZ 2114.
This procedure has its own difficulties. Therefore, get ready for the fact that you, as a beginner, will have to spend not 5, but 6-8 hours.
Is it financially profitable?
When the owner of the car imagines how much work he has to do, willy-nilly he begins to calculate whether it makes sense to change the brake discs himself, or whether it is easier to take the car to a service station.
Depending on the manufacturer and the place where you purchase new brake discs, their price can range from 1 to 2 thousand rubles. Add to this minor expenses on consumables. Surely you have tools, a jack, and the same WD40 in your garage. That is, additional costs, in addition to the purchase of brake discs themselves, are minimal.
Now we invite you to familiarize yourself with the cost of services of professional service centers for the repair and replacement of various components of the brake system.
| Service | average price |
| Remove and install brake drum | from 300 rubles |
| Remove and install rear brake disc | from 800 rubles |
| Remove and install front brake disc | from 1000 rubles (they change more often, hence the markup) |
| Replacing drum pads | from 800 rubles |
| Replacing disc pads | from 500 rubles |
From this it becomes obvious that from a financial point of view, replacing it yourself allows you to save a decent amount of money. Plus, do not forget that not all service stations really perform their duties efficiently. Well, it’s up to you to decide for yourself.
Installation
It's time to install disc brakes instead of the removed rear drum brakes.
Having knocked off the hub, we will put it back, but in a different way:
It should be installed through the plate into which the caliper is already mounted. Carefully ensure that all holes line up
Particular attention to alignment; Next, use a hammer to straighten the corner of the beam so that the caliper does not rest against it; Now you can put the brake disc on the hub, placing spacers between these parts, and secure the disc with a bracket; We install brake pads from VAZ 2114; First, carefully and securely attach the brake hose to the caliper, and then to the tube; To reduce the braking force of the rear brakes compared to the front, you need to partially grind off the friction material of the pads.
Causes of wear on brake discs and pads
Together with the brake discs, as a rule, attention is paid to the condition of the brake pads, which should preferably be replaced together. There are a thousand and one reasons for replacement, however, a special sign indicating the need for replacement is the beating (or knocking) of the brake pedal during braking
Pedal beating is a kind of shock that is clearly felt during sudden braking at high speed. If you think that the discs will last a little longer, or you wait for the car to just stop, then you are making a huge mistake. Such expectations can lead you straight to intensive care.
If the brake pedal is acting up, there may be several reasons for the breakdown:
- A damaged brake disc is the most common fault. This happens to it as a result of temperature changes - sudden heating and cooling during braking, natural wear. This unit should be replaced, and without fail together with another, even when the second one is still in good condition.
- The front pads may fail - you can’t revive them either.
- Most often, there are drum brakes at the rear (because it is front-wheel drive and it is not entirely reasonable to spend money on discs at the rear), and they break.
It is important to know that all manufacturers producing brake discs for the VAZ 2114 are not able to guarantee their specific shelf life. Failure of an important element of the brake mechanism is almost always an unexpected situation.
This is due to the fact that their health is directly affected by the quality of components and the quality of roads. Therefore, the best thing a car owner can do is to systematically look at their condition.
So, there are three reasons that affect the wear rate of brake discs and pads:
- Material of manufacture.
- Correct functioning of the braking system.
- Driving style.
Replacing brake discs on a VAZ 2114
Replacing brake discs VAZ 2114
Usually, together with the brake units, they look at the condition of the pads, which they also try to change together with them. There may be a thousand and one reasons for replacement, but a special symptom indicating the replacement is in effect is the knocking (or beating) of the brake pedal when you actually brake.
The beating of the pedal is a kind of pranking, jolting. Feels good at high speed (during hard braking). If you suddenly decide that the brake discs will last a little longer, or wait for the fourteenth to simply stand up, you are making a big mistake! Such expectations will lead you straight to the emergency room.
If the pedal is acting up, there may be several reasons for the breakdown:
- The brake disc of the VAZ 2114 is warped - this is the most common fault. Such a misfortune happens to it due to temperature changes: sudden heating and cooling when braking, natural wear. The unit needs to be replaced, and it must be paired with another, even if the second one feels fine.
- Most often there are drum brakes at the rear (since it is front-wheel drive, it is not entirely reasonable to shell out for discs at the rear), and they fail.
The front pads may break, which also cannot be restored.
It is important to understand that all manufacturers who make brake discs for the VAZ 2114 cannot guarantee a certain shelf life. Failure of an important part of the brake mechanism is almost always an unexpected situation. Their health directly depends on the quality of components and the quality of roads. The best thing you can do is to check their condition periodically.
Checking the wear of discs and pads in the brake system
There are certain dimensions below which it is unacceptable to drive on existing brake units:
- Brake disc thickness – 10.8 mm
- Axial runout on the surface – 0.15 mm
- Overlay on the block – 1.5 mm
- Brake drum diameter – 201.5 mm
You cannot determine such dimensions by eye. Therefore, we jack up the fourteenth wheel, clean the entire unit from dirt, after removing the wheel, of course, and use a simple caliper to measure the thickness of the disc, pads and drum brake at the rear (if you have them). We compare all indicators with acceptable numbers.
Another important step is to check how the pads move: poke them with a screwdriver, if they move too hard, then they can clamp the disk, you need to change them, otherwise you will ruin them.
In general, it is good to remember the following parameters that require replacing the brake disc on a VAZ 2114:
- Invalid thickness value (erased)
- The pad linings are oily
- There is a gap between the pads and the base
- You hear a squeaking sound when you brake
- Hit the brake pedal
- If you have drum brakes at the rear, they can stick to the pads, which can lead to double replacement and expense.
- The brake cylinders (front and rear) may become damaged - there is an option to revive them with a WD tool, but this will only temporarily delay the replacement
As soon as any of the above happens, the brake discs need to be replaced.
It also happens that all the main brake components have been changed, including the brake pads, but the situation has not changed for the better. Then look at the accompanying components and adjacent spare parts: hub bearing, front wheel arms (they are also called daisies). It is not necessary, but it is very advisable to do a wheel alignment.
Replacing disks
Now let's talk about how to change brake discs on a VAZ 2114. The removal and installation process are directly proportional to each other. The main thing in this whole event is to take into account the human factor - inattention. Remember what went where and check yourself carefully.
How to remove a brake disc:
- We place the car on a flat surface, having previously put the handbrake on
- Jack up and remove the wheel
- Loosen the brake cylinder fasteners
- Use a screwdriver to pry out the boot from the upper guide of the brake pad
- We remove the pads and caliper (for the caliper you will need a 17mm wrench; before unscrewing it, you need to remove the brake hose fasteners. But the pads are a separate matter, if you don’t know how to remove them, there is a separate material for enlightenment)
- To prevent the brake fluid from escaping, place a container under the hose (when you put everything back together, don’t forget to add the leaked fluid back into place!)
- Next, we do some general cleaning - we remove dirt and traces of rust on the surface of the brake disc (don’t even think about scratching its working surface!)
- Then everything needs to be treated with WD (pay special attention to the hub bearing)
- Using a size 8 wrench, you need to unscrew all the wheel pins, but the disk should not turn during this action.
- Before removing the disk itself, knock on it (knock on the plane, not on the working surface)
- Let's take it off.
As already mentioned, we put everything in reverse order. The main thing is that before installing all parts of the brake system, lubricate the hub itself, and the working surface of the disc must be lubricated with a special product that will degrease it. Another point, if you have replaced the brake cylinders, you must bleed the brake pedal.
Price
If we talk about the current price of VAZ 2114 brake discs, then we need to estimate the region of the country. On average, from 1000 to 2000 rubles. Having found out how much brake discs cost on a VAZ 2114, it would be logical to take into account the average cost of installing them, as well as a summary of prices for installing components (by the way, do not forget a simple regularity: installing a spare part on the fourteenth is almost always equal to or slightly less than the cost of the spare part itself parts). This understanding will be the most justified argument to figure it out yourself and save money.
How to replace front and rear brake discs yourself
Before starting work, we carry out comprehensive diagnostics; for these purposes, we visit a service station. However, the instruction manual does not prohibit servicing the machine at home. If you have no experience, it is still better to turn to the experts.
There are frequent cases of worsening damage after unprofessional intervention. For some VAZ owners, the factory warranty is a fundamental factor. Although the design of most units is simple, and the principle of operation is intuitive.
We carry out visual diagnostics from under the bottom of the car, inspect the hub mechanism for obvious, visible defects. Next, we hang the car with a hydraulic lift; if the latter is not available, then we will use a mechanical jack.
We lift the side of the car, remove the wheel, and carry out troubleshooting. We carefully inspect the disc, pads, and anti-vibration plates. If there are signs of wear or mechanical damage, replace them with new ones.
Sequence of actions when replacing disks yourself
- We place the car within the perimeter of the repair area, block the wheels with wheel chocks, and squeeze the parking brake;
- We engage first gear to prevent arbitrary rotation of the rear wheels;
- Unscrew the bolts and remove the wheel;
- We unscrew the nuts from the back side and remove the caliper from its seat;
- Use a clamp to compress the working cylinder as far as it will go, so that it relieves the pressure on the disc and pads;
- We remove the anti-vibration springs and caliper.
The dismantling is completed, then we inspect adjacent parts and mechanisms, carry out troubleshooting, and replace the elements with new ones.
We carefully inspect the hub, bearing, rod end, and ball joint.
Minuses
Replacing brakes with disc brakes was not without the famous “fly in the ointment,” although it rather concerns precisely those problems that their installation can cause.
What might this entail?
Following:
Fine when passing a technical inspection; You can be simply wrong in a controversial accident if traffic police officers emphasize that you have “wrong” brakes; And the insurance company may also consider this a reason for non-payment of insurance.
Secondly, the handbrake will additionally need to be modified - or replaced with a hydraulic handbrake, although the latter weakens over time.
Thirdly, it is necessary to refine or carefully adjust the sorcerer so that on the VAZ 2114 the rear wheels do not brake more than the front ones, as this will certainly cause a skid, especially on ice or wet asphalt. To do this, sometimes you even have to grind down the pads by a quarter, or even more.
Price
If we talk about the current price of VAZ 2114 brake discs, then we need to estimate the region of the country. On average, from 1000 to 2000 rubles. Having found out how much brake discs cost on a VAZ 2114, it would be logical to take into account the average cost of installing them, as well as a summary of prices for installing components (by the way, do not forget a simple regularity: installing a spare part on the fourteenth is almost always equal to or slightly less than the cost of the spare part itself parts). This understanding will be the most justified argument to figure it out yourself and save money.
Service professionals are ready to take on work at the following prices (on average):
- Removing and installing a brake drum - from 300 rubles
- Removing and installing rear brake disc – from 800 rubles
- Removing and installing the front brake disc – from 1000 rubles (they change it more often, that’s where the cost comes from)
- Replacement of drum pads – from 800 rubles
- Replacement of disc pads – from 500 rubles
Bleeding and adjustment
After any manipulations with the brake system (it doesn’t matter whether you repaired the rear, front or parking), on the VAZ 2114 it is vitally important to bleed the brakes so that an air plug does not form anywhere in them, which can negate the ability to brake at the right moment. It is convenient to do this together, but you can do it yourself, although this requires some additional equipment
Many people know how to bleed the brakes on a VAZ 2114. The main thing is not to forget to do this diagonally, always starting with the front wheels, and pump the right one first
It is convenient to do this together, but you can do it yourself, although this requires some additional equipment. Many people know how to bleed the brakes on a VAZ 2114. The main thing is not to forget to do this diagonally, always starting with the front wheels, and pump the right one first.
After bleeding, you still need to check the braking forces. This requires an outside observer. You accelerate and brake sharply, and he watches as the brakes apply. The front ones should work first, then (with a small gap) the rear ones, and the braking force should be greater for the front ones.
Didn't find the information you are looking for? on our forum.
We recommend reading:
Fuel system VAZ 2110 injector 8
Which gear oil is best for the VAZ 2107, oil change, how often should it be changed
How to fix VAZ 2107 bridge humming
The signal on the VAZ 2110 is lost: reasons
VAZ 2114 how to install an armrest on a car
Rotating axle VAZ 2107
Replacing thresholds on a VAZ 2107
VAZ 2114 instrument brightness control. Dismantling and replacing lamps
We change brake discs (TD) and pads with our own hands
Replacing brake discs on a VAZ 2114 is a fairly simple process that, if you have the necessary equipment and 2-3 hours of free time, you can easily do it yourself.
To replace the disks yourself, you will need the following tools:
- Jack;
- Screwdriver;
- Keys at 17, 8 and 13;
- Balloon key.
- Rubber hammer.
Rubber hammer at work
We replace disks in the following sequence:
- We place the fourteenth on a flat surface, preferably asphalt. We install wheel chocks under the wheels;
- If the car wheels have not been removed for a long time, it makes sense to treat all threaded connections with WD-40 and wait 10-15 minutes - this will greatly facilitate the removal process;
- We tear off the nuts securing the wheel from a dead point using a wheel wrench. Since this can cause the car to sway violently, this should be done before lifting the car on a jack;
- After the fastenings are loosened, install the jack in the place of the special stop and raise the car;
- We twist all the fixing nuts with a wheel wrench and remove the wheel;
- We remove the block; to do this, you need to unscrew the caliper that secures it. This is done with a 17 key. You must first remove the brake hose fasteners (with a 13 key) and drain the leaking fluid into a prepared container;
- Remove the brake cylinder. It is secured with two bolts that can be unscrewed with a 13mm wrench;
- Now we have free access to the disk. It is secured with two guide pins (pins), which we need to unscrew with an 8 key;
- After removing the clamps, use a rubber hammer to tap the back side of the disc so that it comes off the hub. To do this, you can use a regular hammer and a block of wood as a backing, but everything must be done extremely carefully;
- Once the dismantling is complete, the disk is installed. Installation of a new part is carried out according to the same algorithm as the removal of a VAZ brake disc, only in the reverse order. Before installation, the connection point with the hub must be lubricated with a special high-temperature lubricant; the so-called “copper” lubricant is well suited.
Often, along with replacing the discs, it is also necessary to replace the front brake pads on the VAZ 2114.
This is done as follows:
- After removing the wheel and cleaning the parts from dirt, remove the brake fluid supply hose from the bracket;
- Using a 17mm wrench, unscrew the upper caliper mounting bolt. To unscrew this bolt, you need to bend the counter curtain, which prevents the bolt from turning when driving; this can be done with a regular flat-head screwdriver;
- Similarly, loosen (no need to unscrew completely) the lower caliper mounting bolt;
- Move the bracket covering the brake pads up (it will be held on by the loosened bolt);
- We remove the worn out pads and install new ones in their place;
- We screw the caliper back, attach the fluid supply hose back to the bracket and install the wheel.
Knowing how to replace front brake discs and pads. You can complete all the work in 2-2.5 hours - there’s nothing complicated about it. However, if you have never done this before, then it makes sense to contact a car service and carefully monitor how everything is done, and the next time you take on the work yourself.
CHECKING BRAKE DISCS AND PADS FOR WEAR
In the VAZ 2114 brake system, the parts most susceptible to wear are the pads; as a rule, for 1 replacement of discs there are 2-3 replacements of pads. The rate at which they wear out is influenced by three factors:
- Friction lining material;
- Correct functioning of the brake system - if the brake cylinders are not working properly, or the discs are damaged, the pads will wear unevenly;
- Driving style - the more intensely the system elements are loaded, the faster they wear out.
On the instrument panel number fourteen there is a brake pad wear indicator. The fact that they need to be changed is indicated by a continuous glow of the indicator. However, you should not completely trust electronics. It is necessary to check the degree of wear of the unit regularly, every 10 thousand kilometers.
To check the wear of the brake disc and pads, you need to put the fourteenth on the handbrake and install shoes (stops) under the rear wheels. Next, loosen the nuts securing the wheels and jack up the car. We completely unscrew and remove the wheels, clean the brake system elements from dirt.
Now we take a caliper and take measurements. Below is the critical minimum thickness of the main aggregates. If measurements show that the wear of the front brake columns or discs exceeds these indicators, they must be changed urgently:
- The minimum permissible disc thickness is 10.8 mm;
- The thickness of the friction linings on the pads is 1.5 mm;
- The diameter of the rear drum brake is 201.5 mm.
Also, replacement of components is necessary if a visual inspection shows the presence of any mechanical damage to the units - cracks, potholes, chips, bends, or play in the connections.
We check wear and decide whether to replace the disc and pads
Problems and their causes
Before changing the front brake pads on a VAZ 2114, you should determine what happened to them. There are several telltale signs that your pads are worn out. And their reasons may be different.
We invite you to familiarize yourself with the symptoms and potential causes of their occurrence in the table.
| Symptoms of a problem | Causes |
| The brakes do not work effectively |
|
| When braking, the car skids to the side | Friction linings are clogged or oily |
| When braking, vibration occurs and a squeaking sound comes from the wheels. | Oil or other liquid has come into contact with the brake pad linings. |
Before you start replacing the front pads on a VAZ 2114, be sure to make sure that the reason lies in this particular unit. It is not uncommon after replacing the pads that it turns out that the car behaved unstable not because of them. Sometimes the symptoms do not correspond to problems in the brake system at all.
Monitoring the condition of the pads is not difficult. The caliper has a special viewing window. If the friction linings are worn down to 1.5 millimeters or less, they need to be replaced. It is recommended to carry out such monitoring at every seasonal replacement of wheels.
Replacing rear discs
- We fix the front wheels with wheel chocks for safety purposes;
- Jack up the rear wheel and remove it;
- We unscrew the two mounting bolts and carefully remove the drum from its seat. If necessary, tap along the perimeter to loosen the fixation;
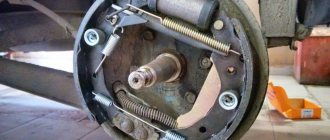
- We carry out troubleshooting of the cavity, friction linings, spacer bar, pressure spring, hand brake cable.
We complete the repair by installing a new drum. Subsequent maintenance after 30,000 km. If you have any difficulties with installation, read the instructions and watch the video on the Internet.
Required materials and tools
To work you will need such a set.
| Element | Quantity |
| Brake calipers | 1 standard set for model 2114 |
| Brake pads | 1 set from a trusted manufacturer |
| Brake hoses | 1 set of front brake hoses (standard metal ones are too short) |
| Grovers and bolts | 12 pieces |
| Distance washers | 8 pieces |
| Standard diameter brake discs | 1 kit |
| Faceplates | 2 pieces (non-standard part) |
Rear and front disc brakes must necessarily differ in diameter, and the rear ones will definitely be smaller. Otherwise, travel will turn into a big risk.
Brakes
What types of brake discs are there on the VAZ 2114?
It is worth noting that initially VAZ 2114 cars were produced only with 8-valve engines. Accordingly, there were no increased requirements for the braking system. But after they began to mass-produce 16-cl. engines, of course, the braking system had to be slightly modernized. Below we will look at what kind of wheels were generally installed on cars of the Samar family.
- Unventilated under R13
- Ventilated under R13
- Ventilated under R14
Of course, the first and second options are standard wheels, where there was a standard 8-cl. engine. As for 16-class. then only R14 ventilated brake discs were installed on them.
Replacing brake discs on VAZ 2113, VAZ 2114, VAZ 2115
Welcome! Brake discs - they are replaced in pairs and they must be installed identically (so that the manufacturer is the same) and after installation, when braking, the car will not pull to the side and the discs will wear out equally, at the moment there are a lot of underground companies that are engaged in the manufacture of counterfeit parts, The brake system is counterfeited very often and most often these are brake pads, so when purchasing parts related to the brake system, take into account everything from the availability of the box to the place where you purchased the auto parts.
Note! To replace the brake discs, you will need: Socket wrenches and wrenches, as well as a couple of screwdrivers and be sure to stock up on WD-40 fluid or some kind of penetrating lubricant like it, and you will also need to use tools to remove the wheels, such tools include a jack and a balloon wrench!
Summary:
When should you change a brake disc? If mechanical damage appears on the disk (Mechanical damage includes chips, cracks and scuffs) or if the thickness of the disk is less than the minimum permissible thickness (And the minimum permissible thickness is 10.8 mm for a non-ventilated disk and 17 mm for a ventilated one), the thickness should be checked as in at least three places), then the disc must be replaced; if this is neglected, the disc may split in half or the pistons will be pushed out of the brake cylinders, and therefore the wheel will immediately stop braking, and if the pistons are pushed out and all the brake fluid will leak out , then the car will be left without brakes at all, so be careful and remove the wheels from time to time and check the thickness of the brake discs using a ruler.
Note! If chips, cracks and similar damage were found on the surface of the disc, but the thickness of the disc is even greater, then you can not change it, but turn it on a lathe, but only skilled people should do this, after turning, the thickness of the brake disc should not become less minimum acceptable, if this is the case, then the disk can be reused!
Condition monitoring
In order to identify malfunctions in time and determine the wear of the pads, they require periodic preventive inspection.
Front brake
The estimated time for replacing the front brake pads is 15 thousand kilometers. But this period can be significantly reduced if:
- The quality of the roads on which the car is driven leaves much to be desired;
- The driver has an aggressive driving style;
- The roads are very busy, you have to press the brake pedal regularly;
- The quality of the previous pads is far from the highest, etc.
In practice, replacing the front pads on a VAZ 2114 is carried out more often than in the case of the rear ones. The fact is that the drums are installed at the rear, and the load on them is less than on the front disk devices. Plus, don’t forget that the VAZ 2114 is a front-wheel drive car.
Checking disc wear
Experienced technicians can determine by eye that the front brake disc on a VAZ 2114 needs to be replaced, but there are several points by which you can diagnose the problem yourself:
- The thickness of one of the disks is less than 10.8 mm;
- The part is deformed due to mechanical damage;
- Chips and grooves are visible on the working surface.
According to the manufacturer, the service life of the discs is 100,000 kilometers, but car enthusiasts say that they can rarely go more than 70,000 kilometers. Moreover, for such a service life, you have to change the brake pads on time and carry out independent diagnostics at least once every 3 months.
If you do not take precautions when operating a car, then due to poor performance of the brake mechanism, you can create an emergency situation on the road.
Signs and causes of the problem
You can feel that the brake discs are already at the limit of their professional suitability by the beating of the pedal. She will, as they say, be naughty. This is easy to determine at high speeds when braking.
Don't think that "tired" disks will be able to work for some time. Such frivolity often leads to a hospital bed. And that's the best case scenario. We don’t want to scare anyone, but brakes are still an incredibly important safety system.
There may be several reasons why the pedal does not behave naturally.
- The brake disc is deformed. This can happen due to temperature changes, sudden braking and normal wear and tear. If only one disk is damaged, the second one is replaced at the same time as the first. This is a rule that should be followed always and everywhere.
- Broken front pads. It is impossible to restore their functionality, therefore they must be replaced.
- The rear drums have failed. The VAZ 2114 has drums at the rear, although some install disc brakes. Think for yourself how justified such a decision is.
Checking the wear of discs and pads in the brake system
There are certain dimensions below which it is unacceptable to drive on existing brake units:
- Brake disc thickness – 10.8 mm
- Axial runout on the surface – 0.15 mm
- Overlay on the block – 1.5 mm
- Brake drum diameter – 201.5 mm
You cannot determine such dimensions by eye. Therefore, we jack up the fourteenth wheel, clean the entire unit from dirt, after removing the wheel, of course, and use a simple caliper to measure the thickness of the disc, pads and drum brake at the rear (if you have them). We compare all indicators with acceptable numbers.
Another important step is to check how the pads move: poke them with a screwdriver, if they move too hard, then they can clamp the disk, you need to change them, otherwise you will ruin them.
In general, it is good to remember the following parameters that require replacing the brake disc on a VAZ 2114:
- Invalid thickness value (erased)
- The pad linings are oily
- There is a gap between the pads and the base
- You hear a squeaking sound when you brake
- Hit the brake pedal
- If you have drum brakes at the rear, they can stick to the pads, which can lead to double replacement and expense.
- The brake cylinders (front and rear) may become damaged - there is an option to revive them with a WD tool, but this will only temporarily delay the replacement
As soon as any of the above happens, the brake discs need to be replaced.
It also happens that all the main brake components have been changed, including the brake pads, but the situation has not changed for the better. Then look at the accompanying components and adjacent spare parts: hub bearing, front wheel arms (they are also called daisies). It is not necessary, but it is very advisable to do a wheel alignment.
Wear of brake discs and pads, how to check wear with your own hands (step-by-step instructions)
- To check the wear of the brake discs and pads, you should put the VAZ 2114 on the parking brake and install special stops (shoes) under the rear wheels.
- Then loosen the nuts that secure the wheels and jack up the vehicle.
- Next, we unscrew and completely dismantle the wheels, and clean the brake system elements from dirt.
- Now we take measurements using a caliper. If they show that the brake pads and discs have worn to a critical minimum, they must be urgently replaced.
Also, replacement of components is required if visual diagnostics show the presence of any mechanical damage - bending, cracks, potholes, chips or play in connections.
We determine the degree of wear of brake discs and pads
The VAZ-2114 brake system requires at least 3 pad replacements during operation of one disc. However, the rate of wear also depends on the following points:
- The material from which the friction linings are made.
- Correct operation of the brake system as a whole. If any unit functions with deviations, the pads will lose their properties noticeably faster.
- Load intensity. The more, the faster parts will need to be replaced.
On the dashboard of the VAZ-2114 there is a brake pad wear indicator. If you notice continuous lighting, this is a signal that it is time to replace these components. However, in practice everything is far from so simple. You shouldn't always trust electronics.
It is recommended to check the degree of wear yourself every 10,000 km.
To inspect the components of the brake system, you need to handcuff the car and put stops under the rear wheels. Next, loosen the nuts that secure the wheels and jack up the car. Unscrew and remove the wheels, clean the surface of the brakes from accumulated dirt.
Using a caliper, take measurements and compare them with the following values:
- disc thickness – at least 10.8 mm;
- friction linings – at least one and a half millimeters thick;
- the rear drum brake must comply with the value of 201.5 mm.
If any parameter is less than the figures described above, then parts should be replaced as quickly as possible.
An additional signal to replace brake system components may be the presence of chips, cracks and other troubles.