Heating the engine sump with your own hands for 500 rubles. What happened?
Heating the engine sump is one of the budget analogues of autostart. The system is easy to use and install, and according to its design should significantly facilitate the start of the power unit at low temperatures. In this article we will talk about what features heating the tray has, and whether it gives a noticeable effect. I will also talk about a method for making a system yourself using available funds.
Will the article be useful? Don't forget to give a "thumbs up"
and
subscribe to the channel
!
The essence of the device's operation is simple. As we know, when the engine is not running, engine oil is in the sump. A small part of the lubricant covers the engine components with a film, but also drains off during long stops. The load on the power unit and the warm-up time depend on the oil temperature. If you first bring the material to a relatively high temperature, you can achieve certain advantages
.
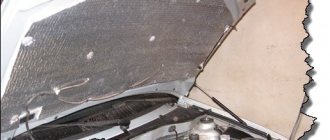
The heating tray is attached from the outside, heat is transferred through the metal. In general, the system has shown its effectiveness, but I want to talk about a method for making the device yourself
. If you have the knowledge, making the design will not be difficult.
I’d like to point out right away that it’s worth doing any manual modifications to the car in terms of electrical systems wisely. Even small manufacturing errors can have serious consequences.
, up to the appearance of an open source of fire.
To make our own engine sump heating, we need a number of “ingredients”. The main element of the system is the heating surface itself. Motorists often use heating pads designed for 3D printers
. They are inexpensive, waterproof, and you can buy them in well-known Chinese online stores. Sellers offer a large selection of heating pads, varying in power. A 200V product with a size of 200*200 mm is perfect. It will cost about 300 rubles.
You will also need a thermal switch that will operate when a certain temperature is reached, for example, 70°C. It can be purchased at stores that sell electrical supplies. Here you can buy everything you need to connect to a power source. An additional fuse is a mandatory element of the system.
, it is recommended to take a product rated for 15A, but the exact parameters depend on the cable. All together it costs motorists 200 rubles.
Next, all that remains is to install all the elements on the car. It is recommended to protect the wiring with corrugation. For convenience, you can bring the system activation button into the cabin or even make it remote control. In 30-40 minutes of warming up at an air temperature of -25°C, the engine oil heats up to 0°C, which significantly lightens the load on the engine
. Such a system adequately replaces autostart and is much cheaper.
Source
12 volt antifreeze heater, electric antifreeze heater
To prevent the antifreeze in your car from freezing during the cold season, you can use preheating. A description of this device earlier ; it was made using homemade heating elements, the voltage is 12 Volts. However, it is possible to make a more powerful and faster device with your own hands that will heat the antifreeze and protect it from freezing.
In this case, instead of heating elements, glow plugs will be used, preferably from a foreign car, designed for a voltage of 11.5 Volts. Three spark plugs need to be installed in the heat exchanger, in its body. You can buy the simplest candles, for example: 2 pieces SWAG10919223 and 1 piece NipponDenso DG010.
You still need to buy nuts. The total cost will be relatively small. Nuts and candles will cost 1,300 rubles, solder - 600, and two machines - only 100.
Battery powered
This type of heater includes heat accumulators. While the engine is running, the coolant heats up to a temperature of 95-100 degrees and circulates through the engine channels. The heat accumulator is a well-insulated reservoir (vacuum thermos) with a capacity of up to 15 liters, through which the coolant passes before entering the radiator.
Such devices include the popular Gulfstream system, which is produced in modifications for 2.5 and 4 liter engines. The differences between the models are in the volume of the thermos - 10 and 15 liters. This thermos keeps the coolant hot for up to 2 days. After power is supplied to the electric motor, hot liquid begins to circulate through the cooling system, heating the engine. The engine warm-up time takes 5-15 minutes depending on the air temperature.
In addition to the heat accumulator, stores sell various devices that, according to the manufacturer, heat the oil and make it easier to start a cold engine. But in reality, the only effect from these devices is a completely dead battery, which is unable to crank the engine shaft. The reasons for this are obvious - it is necessary to warm up not only the oil, but also the coolant, and this requires a lot of energy. Battery life is not infinite. To warm up the engine to normal temperature, 0.5-1 kWh of energy is required. At a voltage of 12 volts, this will require from 40 to 80 Ampere hours. And the capacity of a car battery is 55-75 Ampere hours. As a result, there is no energy left to start the engine.
The spark plugs are connected as follows
– two spark plugs are connected together with their pluses using a jumper;
– the remaining spark plug is connected separately.
With this connection, it will be possible to use different degrees of heating: on one candle, on two candles or on all three candles (in severe frost).
To connect candles, you can use automatic machines that are placed in electrical panels (220 Volts).
To connect one candle, you need to use a double wire (each 1.5 sq. mm) and a 16 Ampere circuit breaker. To connect two spark plugs, the thickness of the wires should be 2.5 square meters. mm, and the machine should be 25 Ampere. Also double wire of 2.5 sq. mm. used to connect both machines and ground. The circuit breakers used will perform the functions of both a switch and a fuse.
Installing an antifreeze heater
- installation location – lower pipe (located in the heater radiator);
- When installing the heater itself, it is advisable to also install a pump (12 Volt), which will make the device operate more efficiently.
An additional pump is also installed in the lower pipe. True, in this case there will be a need for additional pipes, for example 16 mm. Such pipes can be taken from the VAZ-2106 stove.
The frame of the device is made of a pipe 1 mm thick. The housing must be soldered using copper solder and a gas torch; instead of a torch, you can also use a welding machine.
The result is a device similar to an expansion flow tank into which spark plugs will be inserted (precisely those three glow plugs that were described above).
The candles are attached using fum tape, sealant - either auto or threaded.
The device is ready! All you have to do is install it on the car. It is not necessary to heat it to a high temperature; zero degrees will be enough. This temperature is just enough to start the car engine. When the engine is already running, you don’t have to turn off the heater. While the engine is running, you just need to turn off the spark plugs one by one, thereby reducing the heat.
We also recommend that you familiarize yourself with the methods of warming the engine and heating the steering wheel , and the car interior in general.
Good luck on the roads.
Author: Vinogradov Victor. Ufa
NECESSARILY .
Connect devices whose actions and properties are little known to you, especially homemade ones, using fuses.
Source
How to install and connect an engine heater yourself
Do-it-yourself oil pre-heater
Heaters (with the exception of those that operate on the principle of natural circulation of liquid) are connected to a break in the lower (return) hose of the heater. Connecting to the top (supply) hose is not only less efficient, but may damage the heater. The reason for this is the low level of coolant in the cylinder head. For the heater, it is necessary to prepare a mount that will allow it to be clearly fixed. There should be free space around the heater, this will protect the body from damage while driving on uneven roads. All electrical wires must be laid by tying them into a single bundle and attaching it to the engine and body using clamps that are sold at any auto store. This will avoid chafing or broken wires. To connect the autonomous heater to the fuel tank, you will have to lay a separate fuel line. This will avoid serious interference with the operation of the vehicle's fuel system, and will also ensure that the heater operates if the fuel pump located in the tank is turned off.
- Roll the car onto a pit or lift and carefully inspect the engine compartment. Find and equip a place to install the heater. Put it there, but don't plug it in. Make sure the fuel line, wires and hoses fit properly and are not in contact with other parts.
- Then check and replace the thermostat if necessary. If you do not do this, the heated coolant will circulate not through the inner circle (cylinder block, cylinder head, heater), but through the outer circle (inner circle + radiator). Because of this, the efficiency of the heater will decrease several times. If you are installing an autonomous heater, first lay the fuel line. Make sure that it will not be damaged when the bottom of the car hits an unexpected bump. Make sure the connection to the fuel tank is tight.
- Drain the coolant. If it was not possible to locate the heater next to the lower hose of the heater, then prepare a hose of a suitable internal diameter (on most cars it is 16 mm). Unscrew the heater hose clamps and remove it.
- Prepare sections of suitable length from the engine to the heater and from it to the stove. Install them and secure with clamps.
- Connect and route all wires through the engine compartment. After this, fill the cooling system with antifreeze or antifreeze (take into account the increased volume of the system), start the engine and make sure that there are no leaks anywhere. And only then connect the fuel line. After connecting it, apply power to the fuel pump and make sure that no fuel leaks appear anywhere within 15 minutes.
Detailed instructions for making engine heaters with your own hands
You can make an electric engine heater for your car with your own hands by heating the oil or antifreeze. For a diesel engine, it is most effective to heat individual elements of the fuel system, for example, a fine filter or separator configuration. It will not be possible to develop an autonomous device at home that runs on gas, gasoline or diesel fuel due to the complexity of the process and the high fire hazard of a homemade unit.
How to make a 220V antifreeze heater
12V antifreeze heater
Installing a homemade heater
Homemade engine heater with pump
Installing a homemade heater
12V oil heating
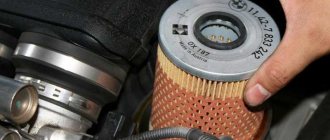
Fuel filter heater for diesel engine separator configuration
Video: features of the use of fuel heaters
Heating the fine fuel filter of a diesel engine
Video: development of a pre-heater for VAZ
Comments and Reviews
Autonomous
DIY car blanket dimensions, materials and sewing method
Heaters that operate autonomously from external power sources are, in turn, divided into air and liquid. The first ones serve to access the warm flow into the cabin, but the second ones only serve to heat the engine.
You can read separate articles on this topic:
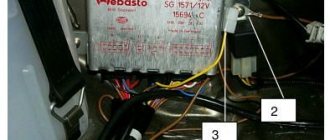
- Webasto engine preheater;
- Eberspacher engine preheater;
- BINAR engine pre-heater.
Their installation is much more complicated than installing a “modified boiler”, but there are also many more functions. Thus, heaters of these types are usually equipped with remote-controlled key fobs, or can be in contact with mobile gadgets. The price for such “goodies” is also appropriate.
A distinctive feature of autonomous preheaters is the ability to install them in the place where it is convenient. Essentially, these are modified internal combustion engines that have their own fuel and water pumps, glow plug, combustion chamber and sensors.
On the other hand, one can understand car enthusiasts who are trying to save money and do what they can do themselves. This is evidenced by numerous videos on the Internet, where car enthusiasts share their experiences.
How to make a 220V antifreeze heater
To ensure the circulation of refrigerant through the system when developing a 220 V automobile electric engine heater, it is best to use a pump. If there is no pumping device, heating equipment must be installed at the lowest point of the cooling system.
What will you need?
To develop an electric heater for a gasoline or diesel engine you will need:
- metal cauldron or barrel;
- distribution unit (the box can be purchased at an electronics store or at a radio market);
- heating component (for example, a heating element from a kettle);
- fittings for connection (use of plumbing products is allowed).
Algorithm of actions
| Image | Step |
| At the first stage, it is necessary to improve the tank lid; to do this, glass is squeezed out of it. The required shape is cut out of a sheet of textolite (recommended thickness 6 mm), after which the material is glued into the lid using epoxy glue. This will ensure maximum tightness and prevent leakage. | |
| Two fittings are installed at the bottom of the tank | |
| Then a heating component is glued into the lid using epoxy glue, in this case it is a heating element from an electric kettle | |
| The distribution mechanism is installed in such a way that the electrical wiring can be covered in it. Then a socket for connecting the conductor is installed in the lid of the box. | |
| This is what the completed tank and lid look like | |
| The tank is fixed using clamps. One of the fastening elements will not allow the cover to fly off due to pressure when the power unit is running. | |
| A fitting with a valve is installed, which is used to bleed air from the tank |
Functionality
Coolant heaters can be controlled over a long distance using GSM control. This is especially typical for devices that operate on a 12 (24) V power supply.
You can use smartphones, tablets and other similar devices for this. The duration of the heater operation can be adjusted by setting the necessary parameters to the mini-timer.
Manufacturers
Among them it is very difficult to single out anyone specifically. Nevertheless, according to observations, antifreeze heaters from the following manufacturers are installed on cars and trucks: Eberspache, Webasto and Hotstart, as well as the domestic manufacturer Alliance.
Homemade engine heater with pump
When manufacturing an engine heater with a pump for passenger cars, the following nuances must be taken into account:
- To ensure good heating of the soldering area, you can use a powerful soldering iron. However, it will be much better if you use spot or gas welding.
- To ensure high-quality electrical insulation, asbestos sheets should be used.
What will you need?
To complete the task you will need:
- a piece of thick-walled pipe 8 cm long;
- two pipes 2 cm each;
- piece of sheet metal;
- pump from a Gazelle car;
- nichrome spiral, which will serve as a heating element.
Algorithm of actions
- At the first stage, you need to process a piece of thick-walled pipe so that its appearance and dimensions correspond to what is required.
- Then, two disks must be cut from sheet metal 1 mm thick, the diameter of which must correspond to the internal diameters of thick-walled pipes.
- To ensure maximum heat transfer and high-quality heating, one additional plate is welded to the disks.
- To make a heat exchanger, the seams are sealed with a soldering iron. When performing the task, it is necessary to check the tightness of the heat exchanger, otherwise water may drip from the device during operation.
- During assembly, the heating components are laid in spirals downwards, and the entire device is lined with a sheet of asbestos. To ensure maximum thermal insulation, the structure must be wrapped in heat-insulating material. As the latter, it is recommended to use foam film.
Installing a homemade heater
The device is installed as follows:
- The lower pipe for supplying refrigerant to the heating unit of the machine is cut.
- A heat exchanger with a water pump from the Gazelle is installed in the resulting gap. A pump is required to circulate the consumable material in a small circle.
- To connect the entire structure to the electrical circuit, it is recommended to use a separate switch with an actuator relay. If you plan to organize a timed shutdown of the heating system, then you will additionally need to install another relay.
- All contact elements are connected.
- The pipes and lines are checked for leaks. The initial start-up of the heating installation is carried out and its operation is tested.
Installation of a heater with a pump
12V oil heating
The main condition for do-it-yourself oil heating of the engine is that the device must be in the sump. To do this, there is no need to make additional holes in it, since the design is used instead of a drain plug.
What will you need?
To complete the task you will need:
- small pipe;
- nichrome wire 0.6 mm, length should be 2 meters (you must use the product in the form of a spiral);
- insulators made of ceramics;
- textolite washers and bushings;
- drain plug;
- bolts with nuts (as connecting components).
Algorithm of actions
Step-by-step assembly instructions:
- First, take the drain plug and make a hole in it using a drill. It should not be through; there will be about 5 mm left to the end. The hole diameter should be 13 mm. After this, an M14 thread is cut into it.
- After this, a through hole with a diameter of 8 mm is made. A textolite tube of the required size is installed in it.
- Then take a piece of tube measuring 120 mm, its outer diameter should be 1.4 cm. An M14 external thread must be applied to one part.
- After this, the car owner needs to tighten a long bolt and nut to the nichrome spiral. A textolite washer is installed on it, the product is inserted into the hole of the drain plug. A washer is mounted on the other side, after which the entire structure is secured with a nut. This part will serve as the positive terminal, so you need to make sure that the located screw does not touch the body of the plug.
- Insulators made of ceramic are installed on top of the spiral. A screw with a nut is also screwed on the other side.
- A spiral with insulating elements is installed into the tube. Then the resulting structure is screwed into a threaded hole made in the cork.
- The opposite end of the pipe is capped. At this stage, you need to make sure that the screw at the end of the spiral is always in contact with the plug; for this, the element can be soldered.
- Then the product is sealed. To complete the task, it is recommended to solder the connection point of the pipe.
- After assembly, you need to install and connect the pan heater. The heater is screwed in instead of the standard drain plug, but when the latter is removed, some of the engine fluid will come out of the system. After installing the heating device, the volume of lubricant must be replenished.
- To provide power, you need to lay the cable from the battery. For this, only the positive conductor is used, since the grounding function is performed by the pallet itself. Additionally, a switch and a 10 amp safety device can be added to the circuit.
see also
- DIY stainless steel exhaust system
- DIY steering damper
How to restore a car's paintwork with your own hands- DIY installation of bi-xenon lenses in h4 headlights
DIY gazelle wheel chains- How to get rid of rust on a car body with your own hands
- Making your own bumper
- DIY angel eyes viburnum
- How to check an electronic speedometer with your own hands
- DIY air compressor for car painting
- DIY spacers
Fuel filter heater for diesel engine separator configuration
To manufacture a fuel filter heater for a separator configuration of a diesel engine, you will need a lathe.
Before installation, it should also be taken into account that the drain unit in diesel engines is used to remove liquid from the sump. Accordingly, if this device is to be removed, it is necessary to use only proven high-quality fuel.
What will you need?
Tools and materials required for installation:
- set of wrenches;
- a piece of metal pipe for making a bushing;
- wires for connection;
- a lathe that will be used to cut threads.
Algorithm of actions
You can install a diesel fuel filter heater of a separator configuration as follows:
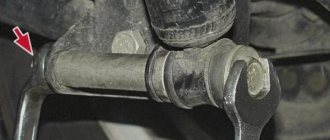
- A metal sleeve of the required size is made. The outer circuit of the device must match the drain valve of the system.
- Using a drill, drill a central hole.
- Internal and external threads are cut. The outer pitch should correspond to the drain element, and the inner pitch should correspond to the thread for the glow plugs.
- The completed structure is assembled from candles. The resulting mechanism is screwed into the body of the separator device. The shape of the part itself needs to be corrected - a pin should be made on the hexagon. To do this, a screw or bolt is welded on the side.
- After installation, the wiring is laid. On the positive line you need to install a switch button and a four-pin relay. The entire electrical circuit must be protected by a safety device to prevent voltage surges and short circuits.
- After installation, it remains to connect two terminals. Grounding or “ground” goes to the bushing, and the positive contact must be connected to the glow plug. The installed device is being tested.
Video: features of the use of fuel heaters
Roman Romanov in his video spoke about the nuances of using heating devices for fuel filters of separator design.
Heating the fine fuel filter of a diesel engine
The manufactured fuel filter heater is non-removable and must be assembled on a filter that will be directly installed on the vehicle.
If you do not have the necessary knowledge and skills, you should entrust the connection of the fuel heater to a professional electrician. Improper modifications to the vehicle's electrical circuit may cause a fire.
First way
The main goal of this method is to create a heating field around the outer contour of the filter device.
What will you need?
To complete the task you will need:
- from 7 to 10 meters of copper wire with a cross-section of up to 1 mm (nichrome material can be used);
- four-pin relay;
- 10 amp safety device;
- heat-resistant sealant or fiberglass;
- two couplers or plumbing clamps;
- device activation and deactivation button;
- connecting electrical circuits of appropriate length;
- elements for soldering cables - rosin, tin and soldering iron.
Algorithm of actions
Independent work on installing and connecting a liquid heater is done as follows:
- At the first stage, you need to lubricate the fiberglass with sealant, and then glue the material to the outside of the filter device housing.
- Then this structure is dried for 24 hours.
- The body element is wrapped with wire, and the ends are fixed with clamps.
- Then the made coil, coated with sealant, is wrapped in fiberglass.
- The resulting structure is dried.
- Terminal clamps are soldered onto the ends of the wire to connect power lines.
- The device is assembled in accordance with the diagram shown.
Connection diagram for bandage filter heater
Second way
The main difference compared to the first method is that in this case ready-made heating equipment is used. Such a device uses a heating system for side mirrors or a special flexible heater.
What will you need?
To complete the task you will need:
- insulation;
- conductors of appropriate length;
- button to activate and deactivate equipment;
- four-pin relay;
- foil thermal insulation 0.5 mm thick;
- 10 amp fuse;
- plumbing or plastic clamps or a piece of wire.
Algorithm of actions
Installation of the electric fuel filter heater is carried out as follows:
- A heating thread or special material is wound around the filter device. Fixation is performed using insulation.
- The wiring is being connected and laid.
- The thermal insulation material is attached on top of the heating device.
- The resulting structure is fixed using clamps or wire.
- The resulting device is connected to the battery.