Problems in the operation of the car's main headlights become immediately noticeable - when the lights are turned on during the dark period of the day, one of the two lights is on. Common causes are a burnt-out lamp or fuse, and less commonly, a lack of contact in the electrical circuit. To replace the low beam light bulb, you do not need to make a special trip to a service station - read the instructions and perform the simple operation yourself.
Changing the low beam bulb yourself
The main aspect of safe road traffic at night is good lighting, which, to some extent, is provided by low beam lamps. A characteristic feature of such lamps is their low glow, which allows you to see in detail the road ahead of the vehicle and part of the roadside. Since the illumination area is quite small, the speed of the car is limited, and the owners of oncoming cars are not blinded by such light, that is, conditions of maximum safety are created.
If the headlights shine dimly or do not shine at all, then the driver risks getting into a serious accident. Therefore, replacing a low beam light bulb is a necessary skill for every car owner, given that such a breakdown happens quite often.
We replace the lamp in the headlight with our own hands
It happens that the warranty period for your favorite car does not include low and high beam lamps and dimensions. If they burn out, you will have to change them yourself. Replacing the lamps yourself will be much cheaper than at a service station. Changing a car headlight bulb does not seem to be something difficult or inaccessible. Everything is done easily and simply.
Replacing low beam lamps
There is a certain procedure for changing lamps. In some cars, the lamp is difficult to reach due to the location of the reservoirs and other parts under the hood.
Replacement procedure:
- Disconnect the negative terminal from the battery (ground).
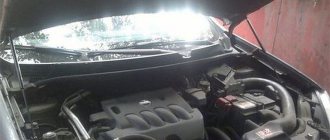
- Remove the headlight covers. Some expensive cars are vulnerable to thieves because of how easy it is to remove the headlights on these cars. For example, on a Land Rover, Land Cruiser, Volkswagen Touareg, Volvo, BMW, a passing thief hits the headlight in a certain place and the headlight cover falls off. Headlights for such cars are expensive, up to 250 thousand rubles. The cooler the horse, the more expensive its headlights. Watch the video at the end of the article.
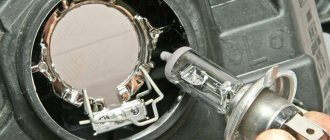
- Remove the lamp. To do this, remove the rubber plug, grab the contact block and disconnect the plug from the lamp. Press the lamp, turn it and pull it out of the block.
- Take a new lamp with a clean rag and insert it into the socket. It is not recommended to touch the glass with your fingers, because greasy marks will remain, and this, although not significant, will deteriorate the lighting.
- Secure the flask with clamps and put on the rubber plug.
- Connect the battery and check.
Replacement is always done by finding the cause from easy to difficult. If the light does not light, the first thing you need to do is check the fuse. The location of the fuse varies from car to car.
When do you need to replace headlight bulbs?
The performance of head optics depends on several factors:
- the serviceability of the light bulbs themselves;
- fuse integrity;
- wiring condition.
Often the headlight unit loses its seal over time, which allows moisture to get inside. If there is a lot of it and it is present in the contact group, a short circuit cannot be ruled out. In this case, the fuse blows, and the situation can be corrected by replacing the fuse and drying the optics, followed by replacing the sealant.
A standard halogen lamp has a lifespan of two to five years, the service life depends both on the overall quality of the lamp and on the material of the filament itself. A burnt-out lamp cannot be restored; it must be replaced with a new one.
It is not for nothing that a car is called movable property. Considering the inherent quality of Russian roads, it is not surprising that the contact group of the optics is subject to increased shaking and vibration, so over time, cases of deterioration of contacts in connectors cannot be ruled out. This may manifest itself as short-term loss of light when driving over uneven surfaces, and then you need to carefully check the reliability of the contacts and the integrity of the connecting wires at the point where they enter the connectors.
There are signs that your lights will stop working in the short term and you will need to replace your headlight bulbs:
- if you have xenon headlights installed and, after turning them on, they begin to burn brightly, as expected, but a few tens of seconds after the lamps warm up, a pink tint appears;
- too bright or, conversely, dimmed light from halogens indicates their possible imminent demise;
- If there are LED lamps, then a sign of their failure is periodic blinking.
You can immediately go to the store if the described symptoms occur, without waiting until you are left without light at the most inopportune moment.
When the pink spectrum of xenon lamps appears, you have approximately 2-3 days before complete failure.
The increased glow of the halogen ramp can be explained by the thinning of the filament, which causes it to heat up to temperatures noticeably higher than the nominal one. In this case, the lamp begins to shine noticeably stronger, but this state of affairs does not last long. Usually, either during a trip or the next time you turn it on, the thinned thread burns out.
But the opposite scenario also happens. When the filament burns, it contaminates the flask with combustion products from the inside, which leads to dimming of the light of the head optics. Such a lamp can shine for a long time, but with a significant decrease in luminosity and blurring or complete disappearance of the cut-off band.
If LED bulbs start to flicker, this is a clear sign of their imminent demise, and if you don't take the necessary measures, you may end up with a blown fuse. In addition, if the control electronics of the LED optics (board or stabilizer) fail, overheating of the electrical wiring and short circuit of the relay contacts may occur.
Tips for choosing headlight bulbs
When choosing a replacement lamp for low beam headlights, the following criteria must be taken into account:
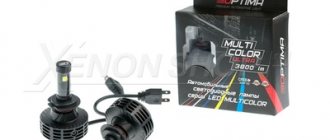
- View. The new light bulb must be the same as the previously installed one, or correspond to the control parameters. For example, xenon and LEDs require a luminous flux controller. Otherwise, equipping headlights with such lamps will be contrary to the rules and will impede the passage of technical inspection.
- Design. Lamps are divided into single-filament lamps - only low beam H7, and double-filament lamps - H4 - low beam and high beam. The choice depends on the headlight itself. They can have one mounting slot (for one lamp) or two compartments – for two lighting devices.
- Power. According to this indicator, when replacing lamps, they must comply with the factory standard, otherwise, in an effort to increase the illumination of the highway, you can blind an oncoming traffic participant and provoke an accident.
- Base. When replacing a lamp, it is best to take the old one with you to the auto shop and use it to compare the dimensions of the seat of the new model.
- Number of copies. With good quality, warranty and reliability of the manufacturer, it is better to buy several copies with a reserve than to be left without low beam in an emergency situation.
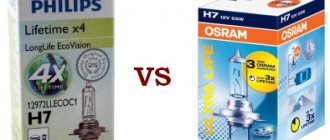
- Brand. The most well-known manufacturers with good quality products today are Bosch, Philips, Osram, Koito and others.
Changing side lights
Next to the low and high beam lamps there is a headlight bulb. It is also installed in the headlight reflector. To replace it, just pull the cartridge and it will come out.
It is not uncommon for him to not want to get out. Therefore, until the low beam lamp is installed in place, we put our finger into its hole in the reflector and use it to push out the oversized bulb from the inside.
To replace the lamp, turn its base in the socket 90 degrees, it is removed from it. We perform assembly in reverse order.
How to replace brake light bulbs?
To replace the brake light bulbs, you will need a set of wrenches and a Phillips screwdriver. Work order:
- Open the trunk lid of the car.
- We dismantle the decorative panel of the rack; it is secured with four clips. This will give you access to the wing nut.
- To gain access to the wing nut located at the bottom, remove the lid from the secret drawer located where the decorative panel is.
- Next, unscrew the lower and upper wing nuts. There will be no problems with the top one, but you will have to tinker with the bottom one, since it is in an inconvenient place. To easily unscrew the nut, put the socket on it at “22”.
- Once the wing nuts are removed, begin removing the taillight. It is very important that the bottom and top come out at the same time, otherwise the headlight will be pushed apart. An assistant will be required for this operation.
- Next, unscrew the three screws on the headlight. Now you have access to the light bulb. Unscrew the old lamp and install a new one in its place.
- We perform assembly in reverse order.
- Press the brake pedal to check the operation of the brake light.
Features of replacing low beam bulbs on budget cars
Most modern drivers of budget cars will prefer to change the low beam bulb themselves without the help of specialists. This will cost much less than any other replacement options, so it’s worth learning how to change a light bulb once in order to carry out this process in the future without extra costs for service services.
Replacing a light bulb in budget cars is almost always done the same way. There is only one point - on some cars you will have to completely dismantle the headlight, while on others it is enough to remove the back cover. However, both the first and second processes cause many difficulties. If you need to replace the low beam bulb, you need to follow this algorithm:
- we gain access to the rear cover fastenings or to the headlight fastenings by opening and securely fastening the hood;
- unscrew these fasteners and remove the rear plastic headlight protection or the entire optics element of the rear sights;
- You must first disconnect the electrical connection so as not to damage multiple contacts;
- Next, follow the instructions to look at the type of fastening of the light bulbs and the unit with the low beam lamp;
- Based on the data obtained, remove the entire unit with the low beam lamp and dismantle the non-working element;
- carefully take the new lamp without touching it with your bare hands (usually use clean gloves or a rag);
- insert the lamp into the slot and make sure that it is properly secured in the place where the element will work;
- perform the reverse steps for assembling the headlight and test the new lighting element.
Required Tools
Replacing low beam elements differs on different cars. A simple option is open access to the back of the lantern to remove the burnt part and install a new one. In this case, you only need a 10 or 12 key to disconnect the car battery.
On some models, replacement will require removing the bumper, headlight or front wheel to access a special mounting hole. In this case, you should prepare:
- set of wrenches;
- textile;
- several screwdrivers of different sizes.
Replacing LED marker lamp
The side light bulb is located in the outer corner of the headlight unit. After removing the wheel arch protection, you can get to the base of the lamp. It should be turned counterclockwise, remove the lamp from the housing and replace it with a new one.
Pressing the lamp, turn it counterclockwise until it stops and remove the lamp from the socket. Install the new turn signal lamp in the reverse order.
Do headlights need to be adjusted after replacing bulbs?
Since the filament in car lamps, as a rule, is not always located in the same place (even in expensive H7 halogen lamps, which are more precisely manufactured), your car may need to adjust its headlights after replacing them. You understand that tuning or adjustment of car headlights should be carried out in a specialized technical class=”aligncenter” width=”530″ height=”530″[/img]
e using special instruments or a special stand, where the technician will first check whether the optics require adjustment after replacing defective lamps.
Recommendations for selection
When choosing light bulbs for low or high beam, you should not skimp on their quality, since cheap products may not only not differ in the quality of road lighting, but also have a service life of no more than 1000 hours (for inexpensive xenon). It has been noted that various manufacturers produce lamps that not only differ in their characteristics, but also in the shade of light. For example, Osram has a pronounced cool white spectrum, but Bosch often turns yellow, which is more typical for high-quality halogen.
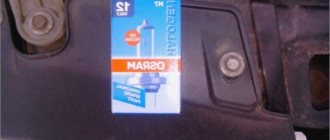
Products from manufacturers Bosch, Philips, Osram have proven themselves to be the best. The advantage of domestic brands is their low price. Of the low beam bulbs from Russian manufacturers, Dialuch and Mayak are noted. Such emitters are produced in a wide range and have an affordable price, but you should not expect outstanding characteristics from them.
You can also find products from premium brands from Japan on sale. However, such lamps have a high cost and are beyond the means of most domestic car owners.
Below is a video testing the most popular halogen lamps: