The headlights of domestic cars, low and high, do not suit most car enthusiasts. In one case it is very dim, in another case the headlights shine very low. The last problem can be solved using a simple modification method, which will take no more than five minutes, but the effect will be amazing.
To raise the main beam of the headlights, you will need to slip small pieces of wire under the “high beam” lamp, as shown in the figure. The thicker it is, the higher the headlight will illuminate the main beam. Example on headlights. It should be noted that this modification does not require disassembling the headlight.
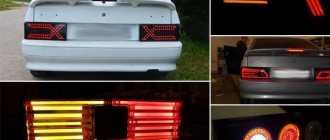
Test of high beam headlights after modification, sequence in the photo:
Fog lights and low beam headlights;
Fog lights, low and high beams.
The second method is to bend the leg of the farthest paw.
By the way, it is possible to raise the low beam of the headlights either by conventional modification or by a set of measures. If you don’t need high beams in a car, then it is possible to make 2 low beam headlights.
You need to understand and find out the reasons why the headlights on the VAZ 2110 and 2114 shine poorly as quickly as possible. Light on the road is the key to your well-being after sunset, and especially in winter, when it gets dark early (and dawn comes late). If bad weather conditions in the form of rain or snow are added to the general theme, then the lack of lighting becomes literally dangerous.
Driving almost by touch means, first of all, risking the integrity of your iron horse: an undetected hole can seriously damage the chassis, or even cause a skid, which is fraught with injuries not only for your car, but also for oncoming/passing people.
Why the headlights on the VAZ 2110 and 2114 shine poorly, you need to look for the reasons until you are completely sure that it is this factor that interferes with proper functioning. Simply changing lamps to more powerful ones does not always solve the problem and may turn out to be an unnecessary waste of money.
Glass
The simplest reasons are usually the most likely.
Dirty headlights
reduce illumination by 50%. Wiping them with a dry cloth is not a good idea. With this approach, you also scratch the glass, which over time will make their dim glow permanent. If you don’t want to regularly wash your headlights by hand, install a washer. By the way, the unit from Volga is perfect for the “ten”. Moreover, the installation is quite simple and can be done on your own.
The glass may break. If you notice a crack on the surface, you will have to remove the headlight unit and replace it with a new one.
If your car has been well-used, the glass may naturally become cloudy from age. Since it is in the forefront when moving, dust, grains of sand and small debris, hitting the headlight at speed, leave microscopic scratches on the glass. Most of them are so small that they are not even visualized, but at the same time they refract and scatter light according to the principle of a prism. The glass will have to be replaced; and so that the next replacement moves as far away as possible, you can cover it with a protective film.
Preparatory work (selection of a location for adjustment, construction of a screen)
Having selected a completely level area, position the vehicle. The site must be checked with a level to avoid distortion, otherwise it will not be possible to adjust the headlights correctly. You should also build a so-called shield screen at a distance of five meters from the car, where you can draw. It is very good if you have a flat area in front of the garage door. It is unlikely that they will suffer much from the chalk.
Reflector
If everything is in order with the glass, a possible reason for the dim glow may be a peeling reflector. No matter how powerful the lamp you screw into the headlight, you will not get the proper brightness of light. On most foreign cars, in this case, you have to change the entire headlight; On VAZs, only the reflector can be replaced. Moreover, the procedure is very simple:
- The headlight unit is dismantled with the battery disconnected;
- The glass is removed from it. It is placed on a sealant, which is softened by heating using a hair dryer. Then the glass is pryed up and carefully removed;
- The light bulb is unscrewed;
- The shabby reflector is dismantled, a new one is installed, and the headlight is assembled in the reverse order.
Before installing the glass, do not forget to clean both it and the body of the old sealant and degrease it before applying a new layer.
Voltage problems:
Especially typical for cars with halogen lamps. A lack of voltage can be caused by a malfunctioning generator or oxidation/breakage of the contact. Normal light is produced at a voltage of 13.8-14.2 V, and the same should be at the ends of the working lamp. A drop on it of no more than 0.2-0.3 V at 2000 rpm is acceptable.
A lower voltage indicates that there is a faulty contact in the circuit. It is required to detect and eliminate the defect; Installing stronger lamps before repair is strictly prohibited: it can lead to overheating and even ignition of the faulty contact.
Causes of poor headlights
This is what we should strive for
You need to look for the reason:
- Faulty lamp.
- Dirty glass.
- damaged or peeling reflector.
- Insufficient voltage.
- The direction of the light flow is not adjusted.
Replacing a dim lamp
The lamp is replaced with a screwdriver (thin) or an awl. The protection box is removed by unscrewing the screws on the headlight unit. Under the cover you can see the holder mechanism and the three-pin block.
Changing the lamp
The procedure begins by disconnecting the terminal block . Next, pressing on the fastening spring, the lamp is removed and then replaced. At the same time, condensation is removed from the reflector block. The presence of this disables the lighting device. Moisture is removed through the drainage duct, after preliminary cleaning. Installation of the lamp, assembly is carried out in the reverse order.
Dirty headlights and cloudy windows
Dirty headlights reduce road illumination by 50%! Moreover, glass ages and becomes cloudy over time. Wiping with a dirty cloth contributes to this, which causes microscopic scratches.
The brightness of the car light is 50%! Depends on the condition of the headlight glass
We recommend: Is it possible to flush the cooling system with Coca-Cola or citric acid?
It is possible that there are cracks that allow dust particles and water to pass through (during washing). They settle on the outer and inner surface of the glass, the reflector and lead to low transmission of light rays.
An irreparable mark on the glass is left by specks of dust, grains of sand, and pebbles flying out from under the wheels of oncoming or passing cars. Scratches and microcracks refract and scatter light in different directions , as a result of which the direction of the beam is lost.
Replacing glass in headlights
The option of gluing with transparent film is not a technical solution. The obvious solution is to replace the glass.
Lamps and glass cannot produce any effect if the reflector has peeled off due to prolonged use. On domestic VAZ-2114 cars, it is possible to replace the reflector, for which you should:
- Disconnect the battery and remove the headlight unit (see “Removing the headlight on a VAZ-2114”).
Front view, headlight mounts
- Remove the glass from the sealant, having previously heated it with a household heating element, if there is no construction heating element.
Unfasten the fastening latches and, cutting off the layer of sealant, remove the glass
- Unscrew the lamp, remove the defective reflector, replacing it with a new one. Fresh sealant is applied to the grease-free ends of the glass and the assembled headlight is mounted in place.
We mount the assembled headlight in place
Lamp voltage low
Low voltage at headlight terminals can cause dim light
Low voltage occurs due to a malfunction of the current generator, oxidation or broken contacts . When checking this unit, you need to ensure that the voltage, including at the lamp contacts, is 13.8÷14.2 V. Low voltage can be detected by ringing the circuit and finding a defect and eliminating it.
A typical cause of dim headlights is often the xenon lamps used on the car.
Distorted headlight position
The wrong direction of the beams is due to the distorted position of the headlights.
This happens as a result of a minor impact, even a light touch of the bumper, for example, with a wall when parking, a tree or a curb.
Adjusting the headlights is accompanied by placing the car on a flat area in front of a smooth wall at a distance of 7–10 meters. The accuracy of the direction of the rays can be obtained provided that the tank is filled (more than 50%!) and tires are inflated to the required standard. The machine is loaded as it is normally used.
Two headlight adjustment screws
On the wall, draw with chalk the center of one headlight (the other is covered, for example, with a piece of cardboard) and the center of the body. A second line is made 12 cm lower. The third line is drawn 22 cm below the first. Based on these three projections, a vertical line is drawn covering the center of the headlight and the body. One of the two screws located inside the headlight adjusts the tilt of the light, and the second forms a directed beam .
Turning on the low beam will result in a projection on the second line. Having completed the procedure with the second headlight, you get an adjusted low beam. In this case, the high beam will also be adjusted.
Light direction
Insufficient lighting may be caused by unadjusted headlights. Moreover, at one time the adjustment could be correct, but due to an accidental shock (for example, a bumper catching a curb) it was disrupted. You can correct the position yourself, without optical instruments.
- A flat wall is selected, the car is installed at a distance of 5 m from it and loaded as standard: the tank must be full, and someone must be sitting in the driver’s seat.
- Markings are made on the wall: the central vertical line should coincide with the center of the car, the side lines should coincide with the center of the headlights.
- Horizontal is carried out at the level of the lamps. The border of the light spot is marked 6.5 cm below.
- The glass is removed from the headlight to access the adjustment screw, the second one is covered with any cardboard. The direction is adjusted to exactly hit the point of intersection of the lines. The adjustment is carried out with the low beam on: then the high beam will also be adjusted correctly.
A little about the features of headlights
These cars were equipped, as mentioned earlier, with headlights from the Russian JSC Avtosvet and manufactured by German manufacturers. They represent several devices in one housing. In addition to low and high beams, the housing contains side lights and turn signals. The design of lighting devices from different manufacturers has some differences.
In the headlight with low beam of JSC "Avtosvet" there are lenses and a flat screen between the lamps and lenses; in the block headlight it is glued to the body. The light bulb that indicates the side light is located in the high beam headlights. The German manufacturer offers a slightly different design for such a product. For low beam, no lenses are installed, and the screen, in the form of a cap, is located on the glass bulb of the device. Because of such differences, experts do not recommend installing headlights on cars from different manufacturers.
Refinement of Kirzhach headlights on VAZ 2110. Improving illumination and comfort
Many owners of this car complain about poor light, so upgrading the Kirzhach headlights on the VAZ 2110 will be an opportunity for them to improve it. There are many complaints from drivers about it; they note the poor light of products from Germany, a narrow luminous flux and some other shortcomings. The situation cannot be corrected by installing more powerful lamps, so owners are forced to resort to various tricks.
If there are problems with optics, alternative proposals appear, but their cost is high.
Modification of Kirzhach headlights on VAZ 2110
is a real proposal for a way out of this situation. If you take the time to search for suggestions on how to improve the lighting on this car, you will find many suggestions. With our advice, we will try to help drivers improve the illumination of the road, and therefore increase the safety of themselves and other road users.
About affordable lighting equipment for dozens
Today, the automotive market is filled with lighting equipment from various manufacturers, with the help of which you can not only improve the illumination of the roadway, but also transform the appearance of the car thanks to their updated appearance. Most owners choose products from two companies. This is domestic, Kirzhach optics from this company receives good reviews, and German branded from Bosch.
No one can say for sure which one is better, but some features of these products should be mentioned. The optics are expensive, but have a built-in lens for the low beam lamp. Its presence allows you to focus the light flux, which means improving your visibility of the roadway. These headlights lend themselves well to numerous tuning options. Also for these products there is a legal installation of xenon.
If, to improve illumination, we take original products from Bosch as a basis, then it does not have all of the above features and advantages. Manufacturers do not produce modifications of these products, but their price is somewhat lower than domestic products. Bosch optics are more susceptible to contamination, since their glazing area is larger than that of a domestic headlight.
Let's talk about remodeling
For those who decide to upgrade their lighting, products from the Kirzhach brand are the most suitable option. They allow several modification options, and there is also the possibility of installing xenon. Thanks to such modifications, the efficiency of the headlight and its light output increases. Having the skills to work with various plumbing tools, you can perform such alterations yourself.
In order to begin upgrading these products, you must first remove the headlights from the car. Next, you will need to completely disassemble the removed optical elements. First of all, you need to carefully separate the glass from the headlight housing. It is attached to the body using a special sealant. This work must be done carefully so as not to damage the glass, otherwise you will have to buy a new one.
After completely separating the glass from the body, the procedure will be something like this:
- We begin to remove the reflector; to do this, we need to unscrew several screws;
- Now you can remove the connectors and remove all the wires from the rear of the headlight;
- The spring near the hydraulic corrector is removed to make it possible to remove the frame from the body;
- Using a screwdriver, remove the low beam module from the housing and completely disassemble it.
A little about the improvement
The purpose of such an operation can be only one, improving the illumination of the roadway. Experts break it down into several stages, they can be like this.
- Work to move the lens closer to the reflectors;
- Refinement of curtains;
- Changing the shape for the reflector.
Only carrying out all stages of refinement can lead to achieving the desired results in improving Kirzhach optics. We need to talk about these stages separately
How to move the lens?
This operation is carried out to move the lens to reduce its area that receives illumination from the lamp. This achieves a decrease in the curvature of the lens. This can be done this way:
- It is necessary to completely disassemble the module and remove the lenses from it. Cuttings must be made at the proposed new location for installing the module. At this time, it is necessary to carefully monitor the position of the curtain; it should always be at a distance of 50 mm;
- In the marked place, you need to saw off the module and strengthen the lens; for this, previously made cuts are used, and the module becomes somewhat shorter. It is important to take this point into account; the lens heats up, so the optimal approximation size will be 10 mm.
About altering the curtains
It is needed to prevent blinding of drivers ahead. To do this, the curtain is made straight. First, a template is cut out of cardboard, then a metal product is made from it. The finished product is installed on the module, before which it can be covered with foil for better dispersion of the light flux.
If desired, you can find several more additions to this modification in different sources. Do-it-yourself modification of Kirzhach headlights on a VAZ 2110 also brings moral satisfaction for the owners. Therefore, be careful and prudent, and everything will work out for you.
- Do-it-yourself modification of the VAZ 2109 and 2110 stove. There is never enough warmth
- How to install lenses in headlights? Guide and review
- Which fog lights are best? An objective view from the outside
Simple ways to improve your headlights. No complications
Choosing a headlight manufacturer
Drivers, first of all, always need a good low beam. Kirzhach headlights are equipped with a lens for low beam and, accordingly, a reflector for high beam. Bosch uses reflectors in both cases. Unlike a reflector, the lens has a much clearer light line; in addition, Kirzhach lighting devices can be legally “equipped” with xenon, which is not provided for Bosch. However, if we compare the results of the review of experts and the opinions of car owners, it is worth noting that they are somewhat different. Bosch headlights have weak flare from the side in the low beam, but besides this, they are the ones that cause preference. In addition, they have a large surface for low beam due to the reflector. This has the best effect on the quality of automobile road lighting in cloudy weather.
In order for lighting to be as productive as possible at night, choosing high-quality optics is not enough. The headlights should be adjusted correctly, and the glass should be clean (the glass should be secured with a sealant, but on Bosch they are held on by sealants. This makes the process of replacing glass easier). However, the best option would be to use bright halogen lamps for car lighting.
Lada 2110 › Logbook › Refinement of lens modules of “Kirzhach” headlights
Hello, today I decided to talk about how I modified the Kirzhach headlight modules so that you could see where you were going at night.
I did the alteration almost a year ago, but the photo report remains. The main part of the information was taken from the website lada2111.rf/. but, as always, I had to figure something out myself.
From the moment I started driving the 10, I really didn’t like the low beam. The situation got better after installing Philips BlueVision 55w H1 lamps, but still not so great. There was no desire to splurge on Bosch headlights, and I really wanted to add “angel eyes” to these lenses. And then, one day, in one auto store I saw LED rings that I really liked and decided that it was time to change everything for the better in these headlights (in mine).
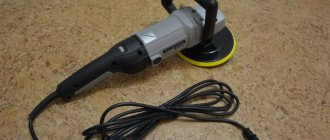
On New Year's weekend (which was in 2014) I went to the garage, took off the bumper, took off the headlights, brought them home and washed them off the dirt. I was very worried about the glass, but in vain. After a “hot shower,” the glass, although lazily but pliable, peeled off from the headlight with the help of a thin knife.
Headlights love hot showers too =)
After that, we disassemble the headlight, remove the headlight mask (that shiny piece of garbage) and unscrew the modules. Since we also need beautiful headlights, we paint the mask as desired. I painted it gloss black. It’s better not to skimp on paint, otherwise the high temperature inside the headlight may cause cheap paint to crack or even fly off.
Well, while the paint dries, let's return to the modules. Let's analyze them completely. We remove the lens, the shutter, drill out the brass rivets to disconnect the body and the reflector.
Rivets. They need to be drilled out.
Next, we go to the garage, taking with us a part of the module (the one that is NOT the reflector), set up our favorite grinder there and cut the tin approximately in half. Of course, you need to mark everything out first. You need to make marks on the sides with a marker or any other writing/scratching object. Then, using these marks, we also make cuts so that we can later assemble and configure the module with their help. I just made a hole on one part.
There in the garage, we grind off the edge of the module at the place where the lens is attached. The main thing is not to overdo it.
I can also say about the ring, I think that not all modules have them. On the module that was my first, the experimental one, so to speak, it was not there. That is, as if, “everything has already been ground down before us.”
Since the lens moves closer to the reflector, but its focal length does not change, the curtain also needs to be changed. We find the case of the old power supply from the computer, use an awl/nail to trace the reflector on it and cut it out with metal scissors. We sharpen it using sandpaper and smooth it with a file.
The upper limit is a little more complicated. It should be perfectly smooth. Well, of course, it won’t work out perfectly, but we must strive for it. We finish it with a file and sandpaper as a finishing touch.
The border of the curtain should be smooth
Old and new curtains.
You need to attach the curtain to the reflector exactly in the middle in order to get the highest concentration of light right near the STG (light-shadow boundary). I recommend using a caliper.
To accurately and reliably fix the curtain for drilling holes in it, I glued it to the reflector with superglue.
An evenly installed high-quality curtain is the key to success for high-quality light
After this, we assemble the modules with bolts instead of rivets. The rim of the module lens was also painted black.
Pre-assembled module
We connect the assembled module to the power supply/battery and set the focus on the wall further away. This is done using the part of the module with the lens that we sawed off. We move it back and forth until the border of the light becomes clear. Then tighten the nuts.
Since I also wanted to get rid of this yellowish tint in the headlights, I covered the entire module with self-adhesive foil. It helped a lot.
We install the module into the headlight using elongated bolts with spacers, since we shortened the module itself.
“Eyes” I attached the headlights to the mask with the same superglue, I drove for almost a year until they fell off.
Before placing the glass on the sealant, it is better to check that the modules on the spacers are level, otherwise it is unlikely that the headlights will be adjusted properly.
We put the headlights on the car, wait for the night, and set them up. And here it is, the “wow” effect. After modifications, the light began to please.
Headlight modernization
Despite the slightly higher performance indicators for the 2110 model, many car enthusiasts want to improve its equipment. The improvement requires disassembling the headlights, which occurs as follows:
- Remove the glass from the headlight, which is attached using sealant. Use the utility knife;
- remove the reflector. To do this you will have to unscrew a few bolts;
- on the back side of the headlight, remove all the wires, as well as the spring that secures the hydraulic corrector;
- remove the module from the headlight by pulling it towards you.
The most popular ways to improve headlights on a VAZ 2110 are:
- shifting the lens closer to the reflector. This is done to reduce the area of the lens on which the light stream is located, which avoids dazzling drivers who are driving in front (through their rear-view windows);
- modernization of curtains. Provides better light distribution;
- changing the shape of the reflector. This is done to change the width of the light stream. Since the reflector is made of sheet metal, it can easily be given, for example, an oval shape;
- adjusting the light flow. It can be done by tightening several screws on the headlight housing, which will change the angle of inclination of the optics of your car and its horizontal and vertical location.
Disassembling headlights
Before you start modifying the headlights in a VAZ 2110 car, you need to perform the following simple steps:
- Their removal and disassembly. Using a utility knife, the glass is carefully removed from the headlight, and since it is secured using a special sealant, extreme caution is required so as not to break it. But if it breaks, then this is not a problem, you can buy it separately;
- Next, the reflector is removed, unscrewing several bolts.
- The next step is to remove all the wires from the back of the headlight and the spring from the place where the hydraulic corrector is inserted, and only then is it possible to remove the frame with the module itself from the headlight housing.
- Remove the low beam module using a screwdriver and disassemble it completely.
Tuning headlights VAZ 2110
Introduction
The existing optics on VAZ cars hardly satisfy the needs of most drivers. Some are not satisfied with the reliability, others with the luminosity, and some may consider the stock headlights to be unnecessarily tacky. Therefore, if there is demand, there will be supply, which is why optics on the VAZ 2110 exist in a large number of alternative modifications.
Replacing optics on a VAZ 2110 is not a cheap pleasure. A new set of good headlights will cost at least 2500-3000 rubles. This is why very often a motorist has to sift through a huge amount of information on his own in search of answers about which optics are really better and how he can independently modify the existing VAZ 2110 (2112) lighting system.
As you know, whoever seeks will certainly find. Today it seems possible to paint a fairly clear picture of the advantages of headlights from a particular manufacturer thanks to the rich and long experience accumulated by our motorists over many years of operating the VAZ 2110 (2112). And the secrets of effective modifications of this kind of products have long been available to the general public, which is undoubtedly a great advantage for you personally.
Review of lighting market offers for VAZ 2110-2112
If you also agree with the opinion that the existing VAZ lighting system could work better, then you will probably be interested in the next section of the article, dedicated to specific offers that exist today in the automotive lighting market for the VAZ 2110. It is also interesting that the large assortment Alternative headlights allow you not only to modify the lighting system, but also to emphasize the expressiveness of your car thanks to its stylish design.
Wanting to buy original headlights for a VAZ 2110-2112, a motorist comes across branded offers from the domestic Avtosvet plant, known under the Kirzhach brand, as well as imported optics from Bosch. There is no clear answer as to which manufacturer is better for VAZ 2110-2112 cars. But the main advantages of the proposed product items can really be considered.
Headlights KIRZHACH (AUTOSVET)
Let's start with Kirzhach headlights from the Avtosvet plant. They cost about 2,500 rubles for VAZ 2110-2112 cars and differ in that they have a built-in lens for low beam, which significantly improves the focusing of the light flux. Kirzhach headlights lend themselves perfectly to all sorts of tuning and modification options. A big plus can also be considered the possibility of legal installation of xenon lamps in this optics.
Stock headlights from Bosch for the VAZ 2110 (2112) do not have all the above-mentioned advantages. There are practically no possible modifications of this optics for the general public. But they are somewhat cheaper (the difference in price can be up to 400 rubles). If you are not planning on further modification of the optics, they will turn out to be a more rational choice.
Bosch headlights
In addition, the “Bosch” headlights of the VAZ 2110 (2112) are more resistant to pollution, since the working area of the low beam reflector is much larger than that of the Kirzhach headlights. The headlight lens glass from Bosch is mounted on seals, while Avtosvet's is mounted on silicone. Obviously, the first option is much more convenient to maintain. We suggest you make your own conclusion about which headlights are interesting to you.
Review of offers of alternative (tuned) optics for VAZ 2110-2112 from ProSport and Hella
It’s worth mentioning right away that such exotics are quite expensive. On average, this kind of offer will cost 2 or 3 times more than the original optics. But all this pays off with the many design delights and sophistication of tuning offered. With alternative headlights from ProSport and Hella, your VAZ 2110 (2112) will look truly impressive and expressive.
Hella 2110 headlights
The problem is that this kind of optics on the VAZ 2110 often does not have better lighting characteristics and does not guarantee high reliability. Therefore, such headlights for the VAZ 2110 (2112) are good only from an aesthetic point of view. The headlights from the ProSport Aggressor and Hella series have proven themselves best in terms of durability.
If you like the idea of installing tuned optics on your VAZ 2110 (2112), you should also take into account the fact that it is compatible with different modifications of the car. For example, the optics on the VAZ 2112 from ProSport are not installed on coupe-type bodies, and the ProSport series is not suitable for the VAZ 2110 M series.
ProSport Aggressor headlights
Due to the highly controversial advantages of alternative optics on VAZ 2110-2112 cars and its high price, most motorists do not consider purchasing ready-made headlight modifications, preferring to independently tune the original VAZ lighting equipment. In this regard, undoubtedly, TM Kirzhach headlights remain the leader.
Comprehensive modification of stock optics from the Avtosvet plant (Kirzhach headlights) on VAZ 2110 (2112) cars
If you are interested in how you can get the most out of the optics available on your VAZ 2110 (2112), then TM Kirzhach headlights will be your choice. In addition to rich tuning options, they also allow the installation of xenon lamps. This significantly increases the efficiency of the lamp and light output.
First, remove the installed optics from your car. Then you will need to disassemble the headlight. In Kirzhazh optics for VAZ 2110 (2112), the front glass, which scatters light, is tightly attached to the lampshade with a sealant. Carefully cut off the silicone seal to remove the glass, since there is a high risk of breaking it when trying to forcefully remove it from the lampshade.
The headlight reflector is easily removed from the lampshade after removing the glass. At the next stage, you need to unscrew three bolts and remove the low beam module, which we will further modify. The module is also completely disassembled, after which you can proceed directly to the tuning process.
Adjusting the luminous flux
In order for the VAZ 2110 to be driven comfortably, all the rules of correct light supply must be followed so as not to blind oncoming drivers. There are special screws on the headlamp housing that are used to adjust the light supply.
When you turn the left screw, the angle of inclination of the optics changes vertically, respectively, turning the right screw changes the optics horizontally.
To correctly set the luminous flux, a horizontal line is drawn from the ground to the center of the headlights and another similar horizontal line is drawn 65 cm below it. After all the preparation has been completed, you can proceed directly to the adjustment:
- the right headlight of the car is covered with cardboard paper and the low beam is turned on;
- Using the adjusting screws, the center of the light beam of the left headlight is set, which is done in the same way with the right one.
Kirzhach 2110, make the light brighter, how to improve the Kirzhach headlights with your own hands (details)
First, you should remove the headlight, then disassemble it in the following sequence:
- Using a hairdryer, you need to remove the glass from Kirzhach. They need to heat the sealant, then separate the glass with a sharp knife.
- Remove the reflective pad.
- Only low beam units will be improved. They need to be unscrewed.
- Now you have a choice. You can make the modular ring shorter by grinding it down, or move the lens ten millimeters towards the reflector, which will improve the luminous flux of the Kirzhach, raise it and make it wider.
Alternative option
If the driver of a VAZ 2110 car seems that simple Kirzhach headlights do not provide good road lighting, then a bi-xenon module can be installed in them if desired.
The Kirzhach headlight module and the bi-xenon module are not very different, but this will not be an obstacle to replacing them.
Installing a bi-xenon module consists of several stages:
- Removing the module seat in the headlight to install a new part in its place;
- The next step is to connect the xenon lamp wiring to the standard wiring.
Installation of xenon lamps is very simple, because it occurs without changing the wiring. After the alteration, the lighting will be completely different from what it was before. After changing the modules, the ignition unit is attached to any point, there are many places for this, it is installed anywhere at the driver’s request.
Afterwards, everything is put back in its place and the glow at night is checked in practice.
After modernization, modifications and various alterations, at the request of the driver, the Kirzhach headlight must be mounted back on the VAZ 2110 using a sealant or a special construction sealant.
Prerequisites for revision
Experienced drivers have repeatedly noticed that the luminous flux on a VAZ car has poor lighting, but they would like it to be brighter and wider. This can be corrected by refining and improving the headlights of the Kirzhach VAZ 2110. Their effectiveness lies in a convenient design that allows for modification and modernization, as a result of which the glow will improve many times over.
Left headlight Kirzhach for VAZ 2110 assembled