Author: Krap
08 May 2021 19:30
Tags: auto tuning headlights
303
7
Most modern motorists treat their vehicles as a kind of brainchild, which they are ready to protect and constantly improve, causing admiring glances from their colleagues.
0
See all photos in the gallery
One of the most common methods of tuning is modification of lighting equipment. Due to this, it is possible to radically change the basic characteristics of the vehicle, make the lighting spectrum more pleasant and convenient for the human eye, and also improve the vehicle’s performance in the evening and even in pitch darkness. At the same time, tuning studios, as well as specialized workshops, offer a huge selection of the types of headlight modifications themselves. Let's look at the most popular and effective ones.
Headlight tinting
0
This option is one of the most budget-friendly and can be performed not only by an experienced craftsman, but also by a simple amateur, following the instructions. A special feature of this tuning method is the budget category of materials that will be needed to complete the work. Tinting the optics will give the spectrum a new shade, which may be more pleasant to the human eye, or will be able to illuminate the space in the dark much better. In order to tint, you will need special aerosols with a dye aimed at car headlights. Choose products carefully, taking into account the material from which the structure is made (glass or plastic).
Advantages of our company
Among the main advantages we can safely highlight:
- Our craftsmen have extensive experience – more than ten years in this field.
- Our craftsmen continue to develop their skills by attending various trainings and working with new materials on the market.
- The presence of a large workshop, divided into several departments with their own specifications.
- Each compartment is equipped with modern equipment and all the necessary tools, and for your convenience, components and spare parts for the most popular models are always available.
- You get comprehensive work - from start to finish - to guarantee you the best results and service for up to 2 years.
Eyelashes for headlights
0
This type of modification of lighting technology is more of a stylistic nature than a practical one. The essence of this tuning is to cover part of the optical device in order to make the shape of the lighting equipment narrower. Due to the modification of the lining itself for optics, tuning received the name “cilia”. Many vehicle owners use even commonplace double-sided tape to attach additional parts.
How does the LED optics control system work?
The systems used by automotive dinosaurs are not of purely hypothetical interest to us, but of more than practical interest. Because implementing such systems is easier than ever. Of course, to manufacture complex adaptive optics, which allows you to do without foglights, high and low beams and daytime running lights, you need to have knowledge in the field of control systems for LED light sources, but nothing is impossible.
In a nutshell, the LED headlight control system works like this. The adaptive headlight is capable of reconfiguring the beam of light depending not only on speed. The system receives signals from both the front and rear surveillance cameras. This is done so as not to mock the eyes of an oncoming driver or a passing one. The system detects an oncoming beam of light and in the blink of an eye turns off those sections of diodes that could potentially blind or even cause discomfort in the control of other road users.
Xenon installation
0
This lighting technology is fundamentally different from traditional halogen light bulbs. The design is a sealed housing, inside of which there are two cathodes, and the space is filled with xenon. After voltage is applied to the cathodes, the gas begins to glow due to a physicochemical reaction. If you replace halogen lamps with xenon, you can significantly increase the lighting power in complete darkness. It is very important to determine in advance whether specific xenon lamps are suitable for the type of headlights installed in the vehicle. It is better to trust the installation of lighting equipment to professionals, since any violation of the installation can lead to failure of the structure.
Selecting a workplace
Before a person starts tuning Gazelle headlights with his own hands, it is necessary to find a spacious place where he can work quietly.
For such a purpose, you can even rent a well-lit and large garage (after all, the Gazelle is larger than passenger cars in size). This room should also be clean (to the extent possible).To be on the safe side, you can use a water spray bottle.
Installing additional stop lights
0
Modern tuned cars usually differ from factory modifications by the presence of additional brake lights. As a rule, additional warning signals are installed at the bottom or top of the rear window. It is necessary to place the LED strip in a special housing so that when it is activated, the interior space itself is not illuminated, and the spectrum is directed strictly at the roadway. Notably, additional brake lights are not only stylistic, but can actually make warning signs more effective and visible. In particular, traffic enthusiasts will always be visible in the flow of vehicles and their maneuvers will be visible from afar, which will significantly reduce the risk of a traffic accident.
DIY 3D fog lights
Hi all! The idea is not new, but this is my version of placing the sow of the “seventh miracle”. On my car there were plugs next to the standard fogs, in the car’s homeland (Japan) “tuners” put second fogs in the plugs... In general, the idea of making 3D fogs struck me, and why not?
We take plexiglass, mirror tinting, diode tape (60Led) and preferably not the cheapest one for 75 rubles, and I took it for between the layers where the PVC tape or whatever it is is attached (from the covering of plastic windows there is a slope 0.8 cm thick, just like the diode tape itself), super glue, sealant, 2-sided 3M tape.
Tools: cutting knife, angle grinder, soldering iron.
Further in the pictures it should be clear.
Let's make this sandwich.
I also ended up tinting the third glass so that the tape would not be visible. Glue the tint from the inside (the back wall to the tape, and the two outside walls to each other)
Rear wall, tinting and PVC layer for tape, glue with 2-sided tape
We glue the diode tape
The rear outer wall is spray painted
Checking for work
Glue with super glue dots to make it easier to change the tape later
Let's see how it shines
Cutting out the plug for the new decor
Trying it on, cutting it...
The second one is also going for glasses
We glue moisture sealant around the perimeter of the fog itself, secure it and connect it
Static
The light is interesting
In general, I'm happy)))
Author; Alexey Likunov, Barnaul
Source
Installation of angel eyes
0
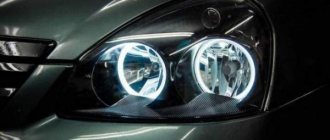
This specific and very gentle name was given to non-standard car headlights. This tuning is a complex technical process and is therefore performed exclusively by professionals. This is a special type of lighting technology that looks very stylish and original due to the rounded modification of several illuminated blocks. There are various versions of angel eyes on sale, which may have turn signal modes and even a wi-fi module for remote control. If just a few years ago such headlights were illegal, now luminous rings can be installed in lighting equipment absolutely legally. The main thing is that the structure itself fits the chosen solution, and during the installation process all elements are correctly connected and the housing remains sealed.
GAZ 24 Volga Vseslavyevna › Logbook › Homemade headlights are ready. A little video test!
But let's get down to business, we need to remove this from Volga's face. This is OSVAR under H4 with a reflector that has begun to bloom
and glass from... but here’s the dilemma, I want the FG-105, but in theory I need the FG-140, and there are both
Place a paper towel in the optics to prevent splinters from cutting the reflector
Into the bag and hit the center with a hammer!
Then the large pieces are discarded, the edge of the reflector is placed in boiling water, and the remaining glass and original glue are removed.
I wash the reflector in soapy water and detergent and then rinse with distilled water.
Here is the dilemma of what to choose.
FG 105 with American light distribution, without “daw”. There is more light on the side of the road (convenient in the city) than in the distance. It has a perfect retro look, which is important for the GAZ-24. In theory, it will dazzle oncoming people a little more (but not a fact, especially if the left headlight is lowered a little lower... I was driving an ErAZ with these from Minsk to Grodno - no one blinked and on the highway it’s perfect - on the near side there is no such a sharp transition between light and shadow for the eyes nice and relaxed)
FG-140 - gives a “crystal look”, will shine more strongly on the far ahead and less on the side of the road. There will be no retro look - just an ordinary, very ordinary headlight in our time for domestic technology. A smart choice for everyday wear. Perhaps a little more crystal than usual, due to the Japanese reflector.
Homemade LED light bulbs for cars and motorcycles
If you have a desire to install LED lamps instead of standard incandescent lamps in the dimensions or rear signals of a car or motorcycle, then it is not at all necessary to buy them in a store and, moreover, it is not a fact that you will come across LEDs from factory China and, as a result, their service life will be very short , then spontaneous blistering will begin and soon they will go out completely. It’s a completely different matter if you make such light bulbs yourself, using well-tested and personally time-tested LEDs from suitable donors, these can be room lamps, LED strips, strips, etc. Such LEDs can work for a very long time and brightly, and the number of elements in the donor is always large and enough to make any homemade lamps for all the needs in your car, and the price of the resulting finished device will be miserable compared to a purchased one.
To make most car lamps, the following kit will be sufficient:
1. LED lamp or tape or strip for 12-220V.
2. Amateur radio textolite (preferably double-sided). 3. Grinder or hacksaw for metal. 4. Soldering supplies and a minimum of amateur radio tools.
Point 1. Preparation.
First, let's decide what, where and how many homemade lamps we need. To do this, we visit your car or motor vehicle, look and remove the required standard lamps. Now we are studying what the bases of these lamps look like, at the same time we are coming up with what to make them from, or we can even use these. In my case, the base turned out to be glass, so it won’t be possible to use it, but its shape and contacts can be replicated very simply using a regular copper-plated PCB. We also find at home or buy in a store a suitable multi-LED donor lamp, but you just need to look at what elements (cells) it consists of, usually these are rectangles of three diodes with a resistor, such elements are easy to dismantle and use for your own purposes. Each such cell is usually 12 volts, even in 220 volt lamps, only a power converter driver is installed there, which we do not need.
