Comments: no Published: 07/24/2017
Rating:
One of the most spectacular and controversial types of car lighting tuning is neon underbody lighting. Properly executed lighting design of the underbody part can attract admiring glances of drivers, passengers or passers-by even to domestic cars and not very prestigious foreign cars. The inconsistency of such an upgrade in the exterior design is associated with the legality of introducing such innovations into the design of the vehicle. Although there is no direct ban on highlighting elements of the car body, there are many nuances that can be found fault with in order to fine the car owner and even deprive him of his driver’s license.
See also:
LED lighting when opening car doors
A little theory
Fans of auto tuning go to a variety of steps to distinguish their own vehicle from the general stream, to make the car bright, noticeable and memorable.
At the same time, it is not at all necessary to completely redo the body, install massive aerodynamic elements or repaint the car in a poisonous color.
There is a much simpler, but at the same time extremely effective way to stand out and emphasize the attractiveness of the car. This is the underbody lighting.
You can implement such a system yourself. To do this, you will need the lighting element itself, as well as standard tools and auxiliary consumables.
There are two ways to implement illumination of the underbody of a car. The first involves purchasing a ready-made set of lamps with all the necessary fittings. The average price of a set of four lamps is 5,000 rubles. Plus the cost of connection is 1000-2000 rubles (depending on the complexity). At the same time, there is no guarantee that a Chinese luminous tube with LEDs inside will work for more than a year.
The second way involves selecting all the lighting details separately, based on your own preferences. As a result, costs are reduced several times. In both cases, you will have to tinker with installing the lamps and connecting them to the on-board network. But the second path is more interesting and exciting, since it involves getting to know your four-wheeled friend more closely.
Allowed or not
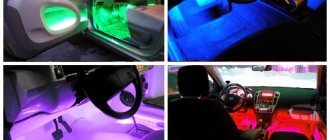
If you look at various photos and videos, then objectively the neon or LED lighting located in the underbody area of the car looks gorgeous. These are a variety of color solutions, most noticeable in the dark.
It is important to immediately understand that we are not talking about any practical advantages here. There is no particular benefit from such modifications to the car. But if you dropped something under the car at night, then with the backlight it will be much easier to find this item. Although there is nothing difficult to take a flashlight or turn on the backlight on your phone.
The main reason for installing backlighting is precisely for the visual effect.
But there is also a certain drawback. For some reason, law enforcement officers react very strongly to cars with such tuning and stop the driver at every opportunity. But whether there will be anything to present to the motorist directly depends on how the backlight is implemented.
If you follow all the installation rules, the traffic police officer will not have any grounds for a fine or deprivation of rights.
Basically, the valiant representatives of the traffic police refer to paragraph 3.1 of the current traffic rules relevant in the Russian Federation. It is indicated here that the backlight is a special light signal. This is potentially a threat to a serious fine or even deprivation of rights for a period of 1–1.5 years.
The most important thing here is that the installed lighting does not in any way interfere with other traffic participants. That is, the devices should not dazzle drivers of oncoming cars or interfere with the visibility of those moving behind.
Fans of tuning with experience note that it is better to provide a brightness control in advance to illuminate the underbody. Under normal conditions, the backlight can be turned off completely or adjusted to minimum brightness. Then no one will have any complaints. And already at rallies, shows, and some competitions, you can give out maximum brightness. No one will be fined here.
According to GOST number 8769-75, underbody lighting cannot be classified as external lighting devices of a vehicle.
As for traffic regulations, there are restrictions regarding light sources and their placement on cars. The driver will not face any sanctions if:
- in the front of the car there are lighting devices and reflectors made in yellow, orange or white;
- A backlight for the license plate must be installed at the rear;
- the backlight or reversing lamp must be strictly white;
- rear lights can be red, yellow and orange;
- rear reflectors must be red.
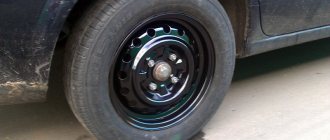
If the backlight is installed on the bottom of the car, the light should be directed strictly downwards.
Installation of such equipment will not be considered a reason for a fine and will be classified as an offense if only the bottom of the car is illuminated, and other external attributes are not affected by the lighting.
In fact, an additional lamp is installed. And it simply illuminates the asphalt under the car.
Types of lighting – which one to choose?
There are quite a lot of lighting options today. The differences are visual and the choice depends on the tastes of the motorist. In general, the difference lies in the operating principle. This can be an LED (RGB) strip or a neon lamp. LED strip is easier to install and more practical. New lamps are more difficult to install, but they look more solid and brighter.
But despite all the “richness” of neon lighting, it is practically not used. Its presence as such implies additional protective elements at the bottom of the car. In addition, such a system can easily fail during vehicle operation. In other words, not in Russian.
We illuminate the underside of the car ourselves
Neon lamp kits are easy to find in specialized stores. You can always choose not only the usual neon lighting, but also additional special effects.
Each kit contains not only the lamps themselves, but also fastening elements. Neon differs from other types of lighting in that it uses a gas-discharge lamp. Its quality determines how effective a result can be achieved.
Types of illumination of the bottom of the car
The very first lighting was created from neon lamps. That is why this type of lighting is called “neon”. Such lighting can make even the most inconspicuous car visible on the streets of the city at night. But, alas, among all these advantages, there are also some disadvantages. For example, the fact that neon lighting is not long-lasting and its bulbs break quite often, and then they should be replaced. In addition, neon light bulbs are not resistant to various impacts and damage. And the price of neon lamps is not small. Today, fortunately, completely different technologies and methods have emerged that are cooler than light bulbs, which are more resistant to impacts of varying degrees. For example, there are factory samples, the components of which have a complete set for complete installation. The driver only needs to attach it and connect it to the car's electronic network. Next, you just need to turn on the underbody lighting from the control unit and enjoy what you've done.
In general, everything now depends on financial capabilities and various ideas. Modern factory lighting can either blink or change color, change the lighting angle, and so on. Also, many car enthusiasts decorate not only the bottom of the car, but also wheel arches, trunks, and radiator grilles. In general, everything that can be decorated and diversified. There are other ways to illuminate the bottom with your own hands. But you don’t need to make a light monster or a Christmas tree out of your car. For a stunning effect and in order not to disturb nearby drivers, it is worth planning well in advance and then illuminating the underbody. It is then that the car will attract attention and arouse admiration, both from other drivers and passers-by. But, for this you need to adhere to some installation rules and regulations.
Neon lighting on cars, its types, advantages and disadvantages
The modern type of tuning, called neon lighting, gets its name from the cold glow neon fluorescent lamps originally used for this purpose. It is an additionally installed system consisting of lighting elements with auxiliary devices that are responsible for its correct functioning. Today, the light source for such car design can be not only neon. There are the following types of lighting design for the exterior and interior of a car:
- neon lamps, which are ordinary fluorescent lamps in which the working gas is inert neon;
Neon is usually used to illuminate the underside of a car.
- gas-filled flexible tubes filled with neon, the surface of which is coated with phosphor;
- LEDs in the form of individual plates or LED strips in silicone insulation.
Depending on the installation method, light tuning can be spot-based, in which the emphasis is placed on highlighting individual elements of the car, or continuous, performed along the entire contour. The following car elements can be subject to aesthetic upgrade :
- bottom, when lighting devices are placed under the car;
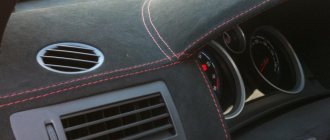
- interior, most often illuminated by the floor or dashboard;
- luggage compartment;
- individual elements of the car, for example, wheels or a radiator grille.
The advantages of colored lighting on neon lamps or tubes are:
- even diffused light;
- a brighter glow, which, with the right choice of color, can not only be aesthetically pleasing, but also improve the illumination of the road;
Neon components have their advantages and disadvantages
- no heating of lamps or tubes;
- long service life up to 15 years;
- lower cost compared to LED lighting.
The disadvantages of this type of lighting tuning include:
- susceptibility to mechanical stress when using fluorescent lamps;
- the need for additional installation of reflectors made of mirrors or foil to give direction to the light flux;
- inability to change color (this will require installing new tubes or lamps with a different phosphor composition).
Car illumination with LEDs is free of such disadvantages, and allows you not only to change color, but also to make the glow flash, including in time with music, which is especially often used in the car interior.
See also:
Car door light with logo
Illumination using LED strip
Our technical center carries out various types of work on installing LED strips.
| Installation location | Installation time | Single color tape installation cost | Cost of installing an RGB strip with a controller |
| Floor | from 2 hours | from 900 rub. | from 1,350 rub. |
| Trunk | from 1 hour | from 1,500 rub. | from 2,250 rub. |
| Bottom | from 6 hours | from 7,500 rub. | from 11,250 rub. |
The tape will be installed in a hidden way, that is, only the light emitted by it will be visible. After installation it will last for a long time. When installing an RGB strip with a controller, you can accurately select the desired glow color that will match the body color or ideally match the interior.
The operating principle of the backlight can be one of the following:
- connecting lighting elements directly to the car's electrical circuit;
- backlight controlled on the dashboard or using a remote control;
- installation of flashing backlight (thanks to special functions in the controller);
- Autonomous lighting (without connecting to the car).
All this can be combined with each other, installing multi-color schemes that work, for example, as light music.
Backlight design options
The motorist himself must choose which lighting option, based on its operating principle, is best installed on the bottom of his own vehicle.
In total, the following options can be distinguished:
- Direct connection. This is the simplest and most elementary connection. Here, additional lighting fixtures are directly connected to the machine’s electrical network.
- On remote control. The control element can be a button installed on the dashboard, or a remote control.
- Flashing backlight. Here you will need a special controller with the appropriate function.
- Autonomous work. The point is that the backlight will not depend on the machine's electrical network. The lamps have their own power source.
Systems can be complicated and simplified by choosing only one option, or combining them.
The backlight can have only one color, or several lamps of different colors. If you wish, you can even make a system that will adjust and work to the beat of the music you turn on. A kind of light show under the car. Looks impressive.
What neon can do for a car
Neon light will not affect the technical component of the car in any way. This is understandable even to a schoolchild. But the lighting can completely transform the appearance of the car, complementing it with an incredibly attractive design. But besides this, neon light can also provide practical help.
The video shows how you can use the neon electric lighting of a car as a light music:
So, if you install a light at the bottom of the car, then when driving at night the road will be better illuminated.
Based on the point of view of experts and professional designers, you understand that installing neon electric lighting is most suitable for sports cars. Such light is able to highlight certain parts of the vehicle, show it in all its glory, add value to it, etc. This is a kind of business card, a means of promoting the “iron horse” among similar cars. And if the vehicle does not have anything special, is equipped with a low-power engine and does not have any special differences, it is most likely not worth filling it with lighting.
Cost of equipment and installation
As has already been said, the price of the equipment will depend on your desire and ability to afford the money, the minimum set will cost the buyer 1,500 rubles, the set will include an LED strip, a control unit, control buttons and in some cases a remote control.
If we talk about expensive lights and better ones, then their cost will cost 7,500 rubles. The set will contain not just an LED strip, but a special long capsule inside which contains an LED strip, protected from moisture, dirt and other damage. The kit will also contain all the necessary wires, a high-quality control unit and a remote control.
It will all depend on your car, how big it is or how well you want the lighting to be done. As for the installation work, in case you are afraid to install it yourself, it will cost you from 2000 rubles, since the process is labor-intensive and cannot be completed in 30 minutes.
LEDs
Let's now look at LED lighting. I would like to note that this is a kind of tape encased in silicone. If in the neon modification the inner part was protected by the walls of the tube, then in this case silicone takes on the role of the shield. LED lighting can also be used under the bottom of the car, or can be installed on the license plate, trunk or headlights. The brightness of LED backlight, service life and power are significantly superior to neon, but the price does not allow you to fully enjoy it. LED lighting devices are expensive. And finding them in stores is not so easy.
In addition, LED lighting provides directional lighting and does not require the installation of a diffuser. And this type of electric backlight has a significant advantage, which lies in the design component - LED backlight allows you to use up to 256 different color shades simultaneously. Agree, this is more than just beauty. To control all these shades, an RGB controller is installed along with the LED backlighting, which controls and provides a number of decorative special effects.
Durability is another advantage of LED lighting. In addition, this type of illumination is considered more reliable and resistant to various mechanical damage. Even with the strongest shaking, stable lighting is provided, which cannot be said about neon electric lighting.
Installation materials
Since neon lighting is not practical, we will consider installing an LED strip. We still live in the digital age - our lighting will have a remote control. You will need the following components:
- LED strip with a degree of protection of at least IP65;
- control unit with remote control;
- perforated construction L-shaped profile, aluminum corner and beacon for leveling the floor;
- couplers 2.5*100 mm;
- metal screws;
- stranded copper wires with double insulation 0.75–1.00 mm;
- silicone tube;
- heat shrink tube;
- tools - drill, soldering iron and screwdrivers.
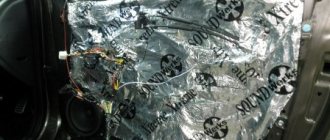
Installation procedure
It is quite possible to handle the installation of lighting on the underbody of a car with your own hands.
The main thing here is to follow the instructions and observe basic safety precautions.
Before you make your own lighting for the underbody of your car, you need to take into account the following recommendations:
- for work it is better to use an inspection hole or a lift;
- high-quality and bright lighting is required;
- gloves and goggles are used for protection during work;
- It would be a good idea to pre-rinse the bottom and dry it;
- improve skills in working with electronics and electrical equipment if there are problems with this.
Now you can get to work.
The step-by-step process of installing the backlight can be divided into the following steps:
- First, you need to assemble the circuit without installation, making sure it works. If, upon completion of installation, it turns out that the backlight is not functioning, you will have to remove it and look for the cause of the problem. Therefore, a preliminary check will save you from a number of problems in the future.
- One of two connection options is selected - serial or parallel. When connected in series, the entire bottom is illuminated. You will need to connect 2 wires to the power source. That's all. In the case of a parallel connection, you can put together several sections that highlight the bottom of the car. They are connected in parallel, and a common additional wire is supplied to the power source.
- It is extremely important that when using single-sided power supply, the length of the LED strip is no more than 5 meters.
- If pieces of tape are used, it must be cut strictly along the line specified by the manufacturer. The required number of elements is cut out. The length is selected taking into account preliminary calculations, plus you need to leave a margin of 20 cm.
- You also need to prepare the wires that will connect different sections. In the places where they are connected, the tape must be tinned. By observing the polarity, the union is performed.
- The prepared layout is connected to a power source. The soldering area is insulated using heat-shrinkable tubing. In this case, experienced specialists do not recommend using ready-made connectors. Otherwise, there is a risk that with constant vibrations of the machine, the system will at some point stop working.
- To secure the tape to the profile, you can use nylon ties. But tape and adhesive tapes will not work. Over time they will probably disappear. A distance of about 10 cm is maintained between the ties.
- The profile for fastening is cut into pieces, leaving a margin of about 3–5 cm in length. This length is needed to ensure a tight connection at the soldering points. Otherwise the circuit may become loose.
- You need to make sure that the tape does not sag anywhere and is not stretched too much. Otherwise, a break is inevitable.
- You should select in advance a place to place the control unit and RGB controller (LED controller). This will be a seat in the cabin. Subject to the principles of comfort and safety, the backlight is connected to a power source.
- It is important not to forget about the fuse. It is mounted in the gap of the positive wire. Moreover, the location is chosen so that, if necessary, it is easy to get to it, check and replace it.
- The stabilization scheme is optional, but desirable. This will allow the backlight not to burn out due to possible overloads of the RGB LED strip.
Upon completion of work, final testing is required. If all is well, you can hit the road and demonstrate the result of your own labor.
LED illumination of the underbody of the car.
The LED lighting system itself, in general, will consist of 4 elements, one under each side of the car and one shorter one under its front and rear. Each lighting element is a transparent hose, which can be purchased at any construction or garden market, with LEDs located in its depths. On average, we will need about one LED for every 4-5 cm of hose length. But here, of course, it’s a matter of taste and the brightness of the LEDs themselves.
By the way, as an option, you can stretch a ready-made LED strip into a plastic transparent hose; this, of course, will reduce installation time, but will increase the total cost of the device. For this reason, we will consider a cheaper method.
Installation of LED car lighting.
So, having a hose and a couple of handfuls of LEDs, we begin installation. There are two options.
First: to two wires, on areas previously cleared of insulation, parallel to each other, remember the school physics course, solder our LEDs. Having completed this procedure, we understand that when installing LEDs in parallel, the supply voltage should be no more than 3.4 V, and the standard voltage in a car is much higher - 14 V. To solve this problem, you can install a step-down resistance in series in the resulting circuit, but keep in mind that that this resistance will become very hot during operation, so it is worth choosing resistances that can withstand about 10 W. The advantages of this connection scheme include the fact that if one of the diodes fails, all the others will continue to burn. The disadvantages include the already indicated fact of heating the resistance, which means this is extra power consumption.
The second connection scheme will be more labor-intensive, but will eliminate significant heating of the additional resistance. To implement it, we will no longer solder the LEDs in parallel, but in series, into groups of 4 pieces. In this case, the supply voltage of such a group will be slightly less than 14 V. These groups of LEDs will need to be pulled into the hose one after another, while connecting each group to each other in parallel. As a result, we will get a circuit of groups with a voltage of about 14 V. Such a circuit can already be connected to the car’s network, however, in order for the LEDs to last longer, it is still necessary to include additional resistance in series in the circuit. Well, the best option would be to install such resistance in each group. For such purposes, a small low-power resistance will be sufficient.
After solving the issue of installing the LEDs and pulling them inside the plastic tube, fill its ends, bringing out only the power wire, which can be connected parallel to the circuit of the car's side lights or even have its own separate switch, it's up to you to decide here.
Is underbody lighting allowed in the Russian Federation?
Unauthorized improvement of the appearance of a car is a rather controversial action from a legal point of view. Especially when it comes to external lighting fixtures. Sometimes you can avoid punishment here or even get away with a verbal warning from a traffic police officer. In another situation, the driver risks receiving a fine or losing his license.
Is it possible to drive with underbody lighting? Formally, LED strip refers to decorative lighting elements. There is no direct prohibition here. If the car had an unlit rear license plate, this could be interpreted as a violation according to clause 3.3 of the List of Faults GOST R 51709-2001. However, the underbody lighting is not officially designated anywhere. And since there is no prohibition, it would be logical to assume that such installation of lighting devices does not contradict the law.
At the same time, the traffic police inspector may call the illumination of the underbody of the car dangerous for other road users or interfering with the normal operation of the vehicle. And here the driver will face at least a warning or a fine. And in the worst case, you can even lose your license for a year.
So, is it possible to drive with LED headlights? If the car owner does not want to have problems with the traffic police, then when installing the backlight you need to follow these rules:
- the light from under the bottom of the car should not be directed exclusively downward, but not to the side, back or forward of the car;
- You cannot install lighting devices (any color except white) in the false radiator grille;
- Only red lighting can be installed in the rear bumper.
LIGHTING THE BOTTOM OF A CAR WITH YOUR HANDS
Not a single tuner will seriously think about the question of why illumination of the underbody of a car is needed. Of course, it will not affect the speed in any way, but it will give the car a cooler look. In this case, of all LEDs, neon (fluorescent) tubes are the most suitable; however, they are expensive, fragile and difficult to install. Therefore, we have to abandon them in search of another option. Let the LEDs be located perpendicular to the floor surface in small housings, which, in turn, are fixed on the thresholds and under the bumper. In this case, you will spend very little money on materials that can easily be purchased at a building materials store. Some of the LEDs you can pick out from Chinese lighters, some you can buy on the radio market. So, in order to make the backlight with your own hands, you will have to stock up on the following materials: a thin-walled plastic pipe 40 - 50 cm in diameter, plexiglass (plex), LEDs (extra bright), resistor (500 Ohm), Moment glue, transparent silicone, thin two-core copper wire, the necessary tools that can be found in any garage. All that remains is to start manufacturing. First of all, make the housings - you need twelve of them, three of them will be located on front, three - not the rear bumper and three - on each threshold. Cut small pieces from the pipe - they should have a cylindrical shape and resemble sleeves 60-70 mm in length. After this, saw the resulting cylinders lengthwise. Make cuts on the resulting half-cylinders at an angle of approximately 300. Heat the edge until soft and bend it to form a boat. Saw off the edges of this boat and sand them down to make it easier to tape the seams later. Congratulations. The buildings are ready. All that remains is to drill holes for the fasteners and diodes. Try the diodes into the housings, wash them under the reflector sticker. Make a reflector from thick foil and glue it with Moment glue.
Wait for the glue to dry and carefully trim off any excess foil that extends beyond the edges of the case. Using a drill, make holes in the foil. Now it's time to turn your attention to the electrical part. We have already prepared the housings and a bunch of LED resistors
As a result of experiments, it was proven that a diode, the luminous flux of which represents a directed beam of light, is not suitable for our purpose. But this problem will be solved if you file down the end of the LED and then polish it. You will achieve a striking shape-changing effect, transforming the glow into a diffuse and smooth one. You can achieve transparency when polishing by thoroughly rubbing the diode on a woolen carpet. After preparing the LEDs, check what you got. Are you convinced of their good glow? Proceed to the tedious work - soldering. As a result of soldering, the resistor and diodes stick to the plastic of the case, so you will not need subsequent gluing, however, for tightness it is better to glue electrical tape on top. Check the functionality of all flashlights and glue in protective glass. At the same time, take the glass size with a margin - it should fit with an allowance. Generously coat the gap, previously cleaned and degreased, with transparent silicone. Make a simple fastener by screwing strips of galvanized sheet metal with self-tapping screws. All that remains is to install the backlight. Install it in such a way that the housings are not visible, and the glow appears as if from nowhere. Let the curious lean in harder, trying to see what glows there. Position the flashlights so that they are not subsequently damaged or come off completely. For example, when installing lighting on a VAZ-2112, which has not only voluminous bumpers and plastic sills, but also a bottom that is not the same everywhere, you can connect all the flashlights with a common circuit through a fuse and a toggle switch on the panel.
Nuances during operation
During operation, misunderstandings may arise with law enforcement officers, since the traffic rules contain the nuances described above that can link the backlight with a violation. In order to prevent incidents, it is worth preparing by studying the rules. It would not be superfluous to install a backlight with adjustable brightness.
Penalty for underbody lighting
When giving your car a glamorous look, you shouldn’t get too carried away and forget about the standards provided for by the interstate standard GOST 8769-75. Despite the fact that this regulatory document was revised in July 2021, the LED strip is not included in the list of external lighting devices installed under the bottom of the car. So, if the inspector is in a bad mood, then you can safely count on a fine. In order to attract less attention from traffic police workers and not provoke accidents on the road, during installation of the lighting you should adhere to some rules provided for by GOST 8769-75:
- use only LEDs emitting white or yellow light for front lighting;
- Do not use white LEDs for backlighting;
- do not allow the light flux to spread beyond the vehicle.
For violation of one of the points in Article 12.5 of the Code of Administrative Offenses of the Russian Federation, punishment is provided in the form of deprivation of the right to drive a vehicle (vehicle) for a period of 1–1.5 years with confiscation of illegally installed lighting devices. If during the arrest the motorist encounters a more loyal inspector, then the LED underbody lighting can be argued as an unauthorized change in the design of the vehicle. In this case, an administrative fine of 500 rubles is provided.
The risk of being fined for driving with LED lights on is very high. Therefore, it is better to show the beauty of LED lights in quiet areas away from the eyes of a traffic inspector.
How exactly to install neon on a car?
- Using a cold flexible variety of material is probably the simplest option. Neon lighting is also suitable for decorating the interior, including the perimeter of the cabin, pedals and dashboard. As a backlight for the bottom, neon shows good results due to its moisture resistance.
- Neon lighting is easy to install on a surface of any shape, since this material bends easily. For fastening, you can use regular superglue. A special adhesive strip is already included in some cords. These types of products are most often installed inside the cabin. Just spread it out and glue the cord where necessary. And bring him to food. It is usually organized using the car's electrics or conventional batteries.
- Using an inverter to connect the backlight to the cigarette lighter is one of the most affordable solutions in this case. Five meters of neon cord can easily be powered by one 12 V inverter. You need to solder a connector to the wire, and the cord itself is connected to it. In general, you can create almost any design from a flexible cord. You can even create combinations of several colors, and they will still have the same connection location.
- The interior of the car or the underbody can be illuminated using special tubes. Their color and size can be completely different. Therefore, everyone can choose exactly what will decorate this particular car. First we need to decide on the places where these tubes will be fixed. You will need to make the necessary measurements. Next, you will have to purchase a set of tools and insulating material, wires, a transformer, clamps and screws.
- The tubes are fixed according to the markings created in advance. During fastening, clamps or self-tapping screws will become indispensable assistants. The wires are connected in series, the main thing is to maintain the polarity as accurately as possible. The high-voltage transformer is secured with screws under the hood. It is connected to the battery; high-voltage wires will help us with this. The switch is drawn into the interior from the negative wire; the wires coming from the neon tubes must be connected to the high-voltage block.
- Neon lighting inside the car is connected to the general system in much the same way. You need to start from the back of the car. We need, again, to connect the wires in the correct sequence. Neon lighting tubes are fixed strictly to the casing. The wire comes from the positive terminal on the battery. He is taken to the salon where the switch will be installed. Using this device, the wire is connected to the pipes. The negative contact is connected directly to the body.
Operation and some nuances Many are interested in the question of whether neon lighting is allowed, according to traffic regulations.
There are a number of regions where employees have a negative attitude towards this phenomenon. Some of them believe that for installing such equipment a fine of up to 3,000 rubles can be removed from a person. Allegedly, such an action falls under Article 12.4 of the Code of Administrative Offenses, Part 1. And also, as punishment, the lighting devices themselves are confiscated.
But there is another article - 12.5 of the Code of Administrative Offenses, part 3. It says that you can lose your license for a period of six months to a year for driving with an incorrectly installed backlight. It’s better to leave such decorations for places where it will be appreciated by others and will not be a serious violation of the rules.
How to challenge a punishment
Most traffic cops do not fine citizens who use lights on the bottom of their cars.
Especially if they are installed in accordance with the rules described above. It is difficult to challenge a fine of 500 rubles (making changes to the design of a car without registration). The use of additional equipment in this case is an offense prescribed by law.
If the traffic cop wants to use a more severe punishment (deprivation of rights, increased fine), it is necessary to insist that the installed lighting fully complies with the GOST rules.
Wrongful fines can be challenged in court, but this only applies to cases where there has been an incorrect classification of the offense.