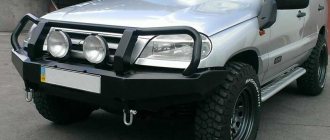
Correct adjustment of VAZ 2114 headlights is important for safe driving. When the optics are not adjusted, there is a risk of not noticing a pedestrian at night, blinding oncoming drivers, or vice versa, having insufficient visibility. Irresponsible car enthusiasts often ignore offers at service stations regarding the maintenance of lighting devices in order to save money, and subsequently operate the car in poor condition. How to adjust the headlights of a VAZ 2114?
Useful video on adjustment:
Why do you adjust headlights?
The ability to drive cars at night is ensured by optical elements that are equipped on the front of the car - headlights.
The main task of these headlights is to illuminate the path ahead and partly to the side of the car.
Many modern models also include additional lighting devices - turn signals, daytime running lights. Although initially all headlights included only the main light and side lights.
The main light provided illumination of the road, and it comes in two types: high beam and low beam.
In high beam lighting, the beam of light travels horizontally, providing the best possible illumination of the road ahead.
However, this light can harm oncoming drivers, as it can blind them.
To eliminate the possibility of dazzling, low beam headlights are used.
The light beam with such lighting goes at an angle to the axis of the car, that is, it shines downwards.
At the same time, the illumination range is reduced, but oncoming drivers are not blinded.
The procedure for moving from high beam to low beam and back is prescribed in the traffic rules.
And it seems that everything is simple - the high beam provides illumination of the road as far forward as possible, and the low beam shines “under your feet,” but in this matter there is also such a factor as weather conditions.
The wrong direction of the light beam, which from the outside seems correct, in both modes of operation of the headlights can lead to the fact that in conditions of fog or precipitation, the effect of shielding the light beam will occur, and it will not only blind oncoming drivers, but also the car owner himself.
Therefore, the headlights must be adjusted accordingly, for which there is the possibility of adjusting the light.
When do you need to do this kind of work?
All cars leave the factory with the headlights already adjusted. And if the car is operated in normal mode, then no intervention in the position of the headlights is required.
However, it should be borne in mind that the factory adjustment is made with an average vehicle load.
If the car is often used with maximum load, which usually falls on the rear axle, then the front of the car naturally lifts up, changing the direction of the light - it begins to shine upward.
Replacing a burnt-out main light bulb can also affect the position of the light beam.
This applies even more to the headlight itself - replacing the glass or the light fixture itself if the standard ones were damaged.
In general, not only damage to the headlight, but even overloading the car leads to the need to adjust the headlights.
These works boil down to changing the position of the optical element of the headlight, including a lamp and a reflector, in the horizontal and vertical directions.
Additional lighting devices are not included in the optical element, so adjustment does not affect them in any way.
At specialized service stations, the position of the headlights is adjusted using special mobile optical devices.
This operation is not particularly expensive, but not all service stations have such devices available.
How to check voltage with a multimeter
4 DIY ways to restore the mirror coating of a headlight reflector
Low voltage may result from problems with the contacts or the generator. If the light of the lamps is poor due to the contacts, there is no need to change them to more powerful ones, as the contact area may overheat. You can check the voltage using a special device - a multimeter. Based on its results, it will become clear where the breakdown occurred and which part needs to be replaced.
In addition, it is worth saying that if the reflector coating has peeled off, dirt and dust will get into the headlight. As a result of dust entering, the light is scattered. In this case, replacing the lamp with a more powerful one will not give any result. This requires a complete replacement of the headlight, although such an operation is not cheap.
What will be required to complete the work?
It is also possible to independently adjust the position of the light, and no special equipment is required. It is enough to place the car on a flat area in front of the wall - the so-called screen adjustment.
The peculiarity of this adjustment comes down to proper preparation of the machine and adherence to a certain technology.
It is not so difficult to prepare a car for this operation - you just need to provide the workload on the axles of the latter.
It needs to be refilled, and the tank should be more than half full.
You should also check the tire pressure - it should be the same in all wheels and correspond to the norm.
If the car is loaded most of the time, then you need to provide additional weight in the trunk.
It is also necessary to have someone behind the wheel, or to ensure that the weight in the driver's seat is approximately equal to the weight of the driver himself.
As for the platform on which the adjustment will be made, it must be level.
You can check this in the simplest way - put the car on a platform, and then measure the height from the floor to the lower edge of the headlights - if there is no significant difference, the platform will do.
The wall in front of the car must be strictly vertical. If the unevenness of the wall is very obvious, then you can put a sheet of plywood on it.
In our case, no special tool is required.
But there are exceptions, for example, on the Grant fret, a 6-point hex wrench is used to adjust the headlights.
On other models, a smaller screwdriver may be needed.
Such troubles can occur frequently, so please read the instruction manual first.
Adjusting the headlights of the VAZ-2107
Next, we will consider the possibility of adjusting the headlights on different cars. Let's start with the domestic classic model VAZ-2107.
This model has two screws for adjusting the light beam on the inside of the headlight, that is, in the engine compartment - in the horizontal and vertical directions.
These screws are located at the top of the headlight.
The only equipment you need is:
- A sheet of plywood measuring at least 2 m wide and 1 m high;
- Tape measure at least 5 m;
- Marker;
- A flat wooden plank 2 m long.
So, the machine is placed on the platform and is located horizontally relative to the floor, the distance to the wall should be 5 m.
- A plywood sheet is placed against the wall, and then markings are made on it;
- First, apply a horizontal line along the entire length of the sheet at a height corresponding to the height of the center of the headlights above the floor. That is, use a tape measure to measure the distance from the floor to the center of the headlight and this must be done on both headlights.
- Next, you need to mark this distance on a sheet of plywood, make marks, and then use a wooden plank to draw a line connecting the marks along the entire width of the sheet.
- Then you need to draw another horizontal line across the entire width - 75 mm lower from the first.
- Then three vertical lines are applied. The most difficult thing to apply is the central one - it must correspond to the center of the car.
This can be done using a tape measure - measure the width of the front of the VAZ 2107, divide it by two, then mark the distance to the center on the floor.
Based on the resulting center, draw a line with a tape measure to a sheet of plywood and make a mark, and then draw a vertical line with a marker and a wooden strip.
The other two vertical lines should correspond to the centers of the headlights. In order not to carry out additional measurements, we note that the distance between the centers of the headlights of the VAZ-2107 is 936 mm, that is, set aside 468 mm from the center line on both sides of it, make marks through which then draw vertical lines.
At this point all preparatory work is completed.
If the VAZ-2107 is equipped with a hydraulic headlight leveler, you should move it to the extreme right position, but if there is none, you can immediately begin adjusting.
The car's ignition and low beam headlights are turned on, and there should be an assistant or just some kind of weight on the seat.
The headlights are adjusted one at a time - when adjusting one headlight, the second one must be covered so that it does not shine on the screen. This can be done with a sheet of thick cardboard, which is secured with construction tape.
Using the adjusting screws, you need to ensure that the upper boundary of the light beam coincides with the lower horizontal line on the plywood screen, and the center of this beam coincides with the point of intersection of the side vertical line with the lower horizontal one.
After adjusting one headlight, you can move on to the other. In this case, the adjusted one will need to be covered with a sheet of cardboard. The adjustment steps are completely identical.
The main task with such an adjustment is to achieve the correct direction of the light beam when the low beam is on.
It should illuminate the road ahead well without blinding oncoming drivers.
Therefore, the adjustment is carried out with the low beam, the high beam is not subject to any adjustments.
How to remove the headlights yourself and adjust them if the device has defects?
In some cases, the VAZ 2110 headlights cannot be adjusted. This is due to damage to the hydraulic corrector or defects on the reflectors or glass. In this case, you can try to disassemble the unit and replace unusable parts.
How to disassemble the headlight?
Sequence of disassembling the VAZ 2110 headlight:
- Remove the part from the car, remove all lamps from the housing.
- Heat the glass evenly with a hair dryer, melting the sealant layer. Separate the lens from the headlight housing using a flat object. When disassembling a Bosch headlight, you need to unfasten the glass mounting brackets.
- Unscrew the three reflector mounting points.
- Remove the corrector spring through the hole for installing the actuator.
- Remove the reflector from the housing by turning the angle adjusters.
- Wash the headlight components, replace faulty parts and reassemble the assembly. The sealant used is a silicone compound used for installing car windows.
Removed headlight
Cleaned reflector
Node components
Reflector guide
Headlight assembly
Applied sealant
Features of removing and adjusting the headlight
Headlight removal procedure:
- Disconnect the battery terminal.
- Remove the upper decorative radiator grille, which is mounted on two bolts.
- Remove the power supply plugs for the headlight.
- Remove the actuators of the correctors. The part is secured with a latch and a rotary lock.
- Unscrew the three bolts securing the headlight and recess it a little deeper.
- Slide the decorative strip (“eyelash”) and remove it from its seat on the bumper. To facilitate dismantling, loosen the upper bumper mount located between the headlights.
- Unscrew the fourth mounting point of the headlight and remove it from the socket.
- Install a new part (the procedure is performed in reverse order).
A removed VAZ 2110 headlight can be cleaned of dirt and repaired; the design does not provide for any adjustments.
Adjusting the direction of the light beam on the VAZ-2114
The sequence for self-adjusting headlights is identical for many cars. But the overall dimensions of the vehicle models themselves affect the markings applied to the plywood sheet.
So, on the VAZ-2114 model the sequence of work is the same - the car is placed on a flat platform in front of a wall with a plywood sheet leaning against it.
Drawing the first horizontal line and the central vertical line is done in exactly the same way as on the VAZ-2107. But the lower horizontal line for this car is applied at a distance of 65 mm.
Also, the distance between the centers of the headlights of the VAZ-2114 is 964 mm, so the two side vertical lines are drawn at a distance of 481 mm from the central one.
These are all the nuances that should be taken into account when adjusting the headlights on a VAZ-2114.
All adjustment work on this model is also carried out using adjusting screws located on the back of the headlight.
Kinds
If we are talking about the “fourteenth” model, then you should know that today for this car produced by the domestic auto giant AvtoVAZ there are about 20 headlights unique in design and execution, designed specifically for 2114.
But for some reason the Taiwanese manufacturer Pro Sport has gained particular popularity. Two series of its headlights have LED turn signals or reflectors of classic dimensions and shapes. The first option allows you to achieve a certain similarity between the 2114 and the German beauty Audi A5.
Of course, the market offers a much wider range than these two options. Therefore, the first thing you should start with is to decide which bulbs to put in the headlights of your VAZ 2114. These can be regular bulbs, xenon, halogen or even modern LEDs. Although there may be problems with the latter, since now only the most expensive cars have LEDs as the main source of head light.
One way or another, the choice is yours. Think, analyze the market, choose among the available options the one that most attracts you.
Chevrolet Lacetti
Let's consider self-adjustment of headlights on a foreign-made car - Chevrolet Lacetti.
The adjustment sequence for this machine remains the same. All the nuances again come down to the correct application of markings on the plywood screen.
This car is also placed on a flat area in front of the wall at a distance of 5 m from it.
Chevrolet Lacetti must be equipped, with a filled tank and an assistant in the driver's seat.
The headlight range control must be moved to position “0”, corresponding to an unloaded car.
Next, a vertical center line and a horizontal line corresponding to the level of the horizontal position of the headlights are applied to the plywood.
Another line is also drawn from the horizontal line below, at a distance of 65 mm. But the side vertical lines are drawn at a distance of 637 mm from the central one.
In general, the distance between the centers of the Lacetti's headlights is 1275 mm, but special precision is not needed when adjusting.
The rest of the work is carried out identically - first, one headlight is adjusted by aligning the boundaries and center of the light launch with the lines and their intersections on the plywood screen, and then the second.
A special feature of this model is the position of the adjusting screws - they are located not on the back side of the headlight, but on the top.
Approximate price
On average, a major overhaul of a VAZ-2114 engine costs from 22,000 rubles. Engine repair cost broken down:
- Dismantling – 500 rubles .
- Installation – 600 rubles .
- Replacing oil scraper caps - 2000-4000 rubles .
- Pulling the engine sump - about 490 rubles .
- Crankshaft grinding - from 900 rubles .
- Replacing the crankshaft bearing - about 330 rubles .
- Honing and boring on a standard block - from 1000 rubles .
- Replacing the valve cover - 420-620 rubles .
- Replacement of the engine mount - from 540 rubles .
Granta, Priora
In modern domestic cars VAZ Granta and VAZ Priora, the procedure for adjusting headlights is no different. One of the nuances to note is the distance between the horizontal lines; for these cars it is 75 mm.
Also, the adjusting screws of the Grant can be reached through special holes, and the screws themselves are located at an angle.
Adjustment is carried out using a 6mm hex key.
In Priora, the screws are located at the top of the headlight.
In general, headlight adjustment for all cars is done in the same way; only certain dimensional characteristics of the model itself and the location of the adjustment screws should be taken into account.
Features of the 2111 (1.5i) engine power system
Location of elements of the 2111 (1.5i) engine power supply system in the engine compartment:
1 - receiver; 2 — vacuum supply hose to the fuel pressure regulator; 3 — throttle assembly; 4 - fuel rail; 5 — fuel pressure regulator; 6 — air supply hose to the throttle valve; 7 - adsorber; 8 — air filter; 9, 10 and 11 — hoses of the crankcase ventilation system; 12 — throttle valve drive cable; 13 — diagnostic fitting
Read more: Resistances for 12V LED
combined with the fuel level indicator sensor into a single unit - fuel module
(often called an electric fuel pump). The pressure pump delivers fuel from the tank through the fuel filter to the fuel rail.
Engine Fuel Module 2111 (1.5i):
1 — fuel level indicator sensor; 2 — connecting block; 3 — inlet pipe; 4 - outlet (discharge) pipe; 5 — module cover; 6 — module cover guide; 7 - electric fuel pump in a plastic casing; 8 - intake chamber
Fuel rail for engine 2111 (1.5i) complete with injectors:
1 — diagnostic fitting; 2 - fuel rail; 3 — fuel supply tube to the fuel rail; 4 — fuel pressure regulator; 5 — tube for draining (draining) fuel into the tank; 6, 7, 8 and 9 - injectors
Fuel pressure control
installed on the fuel rail. Excess fuel is returned to the tank through the fuel return line.
Engine power supply system diagram 2111 (1.5i):
1 - nozzle; 2 - fuel rail; 3 — diagnostic fitting; 4 - adsorber; 5 - check valve; 6 — throttle assembly; 7 - gravity valve; 8 — safety (two-way) valve; 9 - separator; 10 - filler pipe; 11 — fuel filter; 12 — fuel drain line; 13 — fuel line hose connecting the outlet pipe of the fuel module to the fuel filter; 14 — fuel module; 15 — fuel tank; 16 — fuel line connecting the fuel filter to the fuel rail; 17 - fuel pressure regulator