Date of publication: November 04, 2021. Category: Automotive equipment.
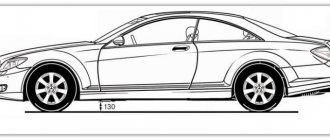
One of the characteristics of a vehicle is ground clearance (or ground clearance), that is, the distance from the surface of the roadway to the element of the car located below all the others. Its size largely determines what obstacles (in the form of bumps or holes) you can overcome without damaging (to one degree or another) parts of the machine. Is it possible to make the ground clearance larger (compared to its original design value)? The answer is clear - yes! There are several basic ways to solve this problem. We will talk about the pros and cons of this modification in our review article.
Clearance is...
Clearance is a gap (from the English word clearance). In the automotive industry, this term defines ground clearance, namely, the distance between the conditional surface of the road surface and the same conditional lowest point of the car. This definition will probably mislead many, so it is worth considering in more detail.
The conditional surface of the road surface is an imaginary plane, which is formed by four points. They are located where the car's wheels come into contact with the real road surface. That is, if at some point there are holes or bumps under the car, then they are not taken into account. In addition, if the car, say, with one wheel standing on a hill, visually the ground clearance increases. However, this also does not count, since an imaginary flat plane passing through all four contact spots is taken.
The conditional lowest point of the car is the part of the car closest to the road surface, but with the exception of the wheels and elements protruding from their inner side at a distance of up to 100 mm. From this definition it follows that some parts of the chassis and braking system are not taken into account. Moreover, when measuring ground clearance, mudguards, buffer pads on bumpers, and any additional decorative elements are not taken into account.
We will return to how to technically correctly measure ground clearance.
What are spacers made of?
Manufacturers of auto parts and accessories have already noticed that spacers are in demand, so they have already started producing them.
Moreover, different materials are used for their manufacture:
- Polyurethane;
- Rubber;
- Aluminum;
- Plastic.
Polyurethane and rubber are elastic materials themselves, so they can compress during use, which allows vibrations to be dampened to a greater extent.
At the same time, polyurethane is very resistant to negative environmental influences, so it can last for a long time.
But the design of such spacers often uses metal bushings in the bolt holes, and this is their disadvantage.
When compressed, these bushings come into contact with the body, and corrosion may appear at the point of contact.
Although rubber is subject to “aging,” such spacers do not contain any metal elements, so they do not have any negative effects on the body.
On a Suzuki Escudo it looks like this:
Aluminum spacers are highly durable, but since they are metal, corrosion may occur at the point of contact with the body.
Plastic is better in this regard. It is also durable, but will not rust. Therefore, rubber and plastic spacers are optimal for installation on cars.
Moreover, it is noted that it is advisable to use spacers made of durable materials on the front suspension, and elastic ones on the rear suspension.
In addition, you cannot increase the ground clearance indefinitely using spacers.
Their thickness should not exceed 3-5 cm; the use of thicker substrates will lead to a significant deterioration in the car's handling.
The influence of ground clearance and other parameters on the vehicle’s maneuverability
It is very useful to understand that ground clearance itself only partially affects the vehicle's maneuverability. This parameter is always supplemented by other factors depending on the road situation. Let's take a closer look at their interaction.
The distance between the axles (wheelbase) - the larger it is, the less passable the car. That is, if you take two passenger cars with identical ground clearances and different wheelbases, the one with the shorter distance between the axles will have the best cross-country ability. This is due to the fact that the conventional plane described above on a longer car will more often intersect with real irregularities.
The distance between the wheels of one axle works similarly to the wheelbase. That is, the wider the car, the potentially less passable it is. However, this parameter should not be confused with stability or a tendency to capsize. It is clear that a narrower car is less stable when driving on slopes. But, since we are considering the issue of ground clearance, cross-country ability in this factor should be identified, first of all, with the conditional plane between the wheels.
Suspension stiffness - in terms of cross-country ability, it works in close conjunction with ground clearance. So, if it is too soft and the ground clearance is small, then under the influence of inertial forces the car will more often touch the smallest irregularities with the bottom. The stiffer the suspension, the less this parameter affects cross-country ability in conjunction with ground clearance. By the way, excessively high ground clearance and soft springs also negatively affect the car’s ability to overcome certain off-road conditions.
Movement speed - affects cross-country ability in conjunction with ground clearance. So, if it is higher, aerodynamics work. The car is pressed against the road surface, and the ground clearance is automatically reduced. It is clear that the stiffness of the suspension in this case is also involved in the process. If the speed is low, then the ground clearance can change sharply after passing a local obstacle. For example, when driving over a bump with sharp edges, the car squats under the influence of inertial forces and its own weight. This often leads to the bottom clinging to the real road surface, since our imaginary plane intersects with it.
Car load - it would seem that this is an obvious factor that, in conjunction with ground clearance, affects cross-country ability. But it is often forgotten. The level of fuel in the tank, the number of passengers, useful (and useless) luggage can significantly reduce ground clearance. Accordingly, in order to temporarily increase ground clearance if necessary, it is enough to simply disembark passengers or even empty the trunk of heavy items.
Other factors - these include such things as tire pressure, the health of the chassis, visual tuning and even the driving skills of a particular driver. It is useful to know about all this because increasing the ground clearance is not always a panacea, and in many life situations you can do without such modifications. We will return to this issue later, but for now we will continue to develop the main theme of the material.
Adjustable air suspension
The most expensive way to not only increase ground clearance, but also adjust it depending on road conditions and driving style, is to completely replace the standard suspension with a pneumatic system. Until recently, only luxury cars were equipped with such devices. Currently, a wide variety of vehicles (even so-called budget vehicles) can be equipped with air suspension. A fully ready-to-install kit usually consists of:
- two front struts (assembled);
- two rear shock absorbers;
- compressor;
- receiver;
- pressure gauge (or several depending on the type);
- valve block;
- control keys;
- dehumidifier;
- pneumatic line tubes;
- connecting fittings;
- bypass valves;
- installation wires and necessary fasteners.
The main “working” elastic element in the air suspension is compressed air. Hence all the ensuing advantages (compared to traditional types). This is first of all:
- increasing the smoothness of the ride, and as a result, the comfort of movement;
- the ability to adjust the ride height (including automatic, if a special controller is installed);
- significant reduction in driving noise.
The only disadvantage of such an upgrade, in our opinion, is the high cost of both the kit itself and the work required to install it (if you do not have sufficient skills to carry out the installation yourself).
For information! A completely ready-to-install air suspension kit (for front-wheel drive VAZ cars) today costs about 53,000÷55,000 rubles. You will have to spend another 20,000÷30,000 rubles to install such a device at a service station.
Ground clearance of your car
There are only two convenient ways to find out the ground clearance of a particular car. The first one is to find the numbers of interest in the specifications provided by the manufacturer. These are found in manuals, instruction manuals, summary tables and special reference books. Finding any of this is not a problem for any, even the rarest car model.
The problem is something else. Namely, the optional correspondence of the characteristics given by the manufacturer to reality. For example, if a car is driven with sagging springs, looking at such numbers is pointless. The same applies to cars with non-original wheels and non-standard tires. In fact, you can safely rely on the manufacturer’s clearance only if the car is completely new. Or, as often happens, it is deliberately maintained by the owner in the so-called stock condition.
In other cases, the ground clearance will only have to be measured. This is not difficult to do, although there are many rules for this procedure. All of them are described in the algorithm further.
Algorithm and rules for measuring vehicle clearance:
- Remove everything unnecessary - leave only those things that are supposed to be carried in the car at all times (spare tire, fire extinguisher, first aid kit, warning triangle, jack, a minimum set of running tools).
- Fill the tank full with fuel.
- Adjust tire pressure.
- Place the machine on as level a surface as possible.
- The slope of the surface also plays a role and ideally should not exist.
- There should be no passengers or driver in the car.
- Do not take into account mudguards, buffer pads on bumpers and parts that protrude from the inside of the wheels by less than 10 cm.
- Determine (visually or using the “shooting” method), taking into account all of the above, the lowest point on the car.
- Measure the distance from the found point to the surface of the site on which the car is installed.
- If there are irregularities under the car, then they need to be subtracted from the result obtained.
In addition to ground clearance, it is also customary to measure the so-called departure angles. These are parameters that geometrically depend on the distance between the lower points of the wheels and the corresponding bumpers. To measure them, you need a special tool. It is similar in appearance to a building level, but “can” show angular dimensions with an accuracy of degrees and minutes.
Material characteristics
This model is a cylinder shape that is mounted under shock absorbers and suspension springs. Different materials of manufacture, density and dimensions of spacers for increasing ground clearance are determined by the purpose of installation on the front or rear of the car body. As a rule, the choice of one spacer or another does not depend on the make of the car: most parts are universal.
The material used to make parts can be divided into metal (steel or aluminum) and non-metal (polyurethane, plastic). Metal spacers are mounted under the spring, and non-metal spacers are mounted above the spring.
To have a clear idea of the subject, you can watch the installation of a spacer to increase ground clearance with your own hands in the video.
Advantages and disadvantages of different clearances
Increasing clearance is a procedure aimed at improving patency. However, it should be understood that high ground clearance is not only an advantage. There are also quite significant disadvantages. It is useful to familiarize yourself with them before the car is artificially raised using one of the methods suggested below.
Advantages of low ground clearance
The advantages of low ground clearance include the following:
- better aerodynamics;
- sustainability;
- less roll when entering turns;
- more “obedient” control;
- minimum fuel consumption;
- more stylish appearance of the car.
By the way, in pursuit of the last of these advantages, many cars, on the contrary, are undervalued. The rest of the advantages come with such tuning as bonuses.
Disadvantages of low ground clearance
Most likely, you already know the main drawback, since you are interested in increasing the ground clearance. However, for the sake of completeness, let’s talk about them too:
- poor cross-country ability;
- the lower the car, the stiffer it is, as a rule;
- frequent bumper repairs;
- after tuning with excessive enthusiasm - the front wheels cling to the arches at full turn;
- increased risk of dangerous engine damage.
By the way, having reduced the ground clearance, do not forget to find out which jack to choose for your car later.
Benefits of high ground clearance
To be fair, let's look at the other side of the coin. The advantages of increased ground clearance include the following:
- increased cross-country ability;
- sometimes large load capacity;
- no problems with bumpers;
- the engine does not need protection;
- full rotation of the wheels without clinging to the arches.
Although by and large, cross-country ability is sufficient.
Disadvantages of high ground clearance
As with any other business, there are also disadvantages to increasing ground clearance:
- poorer aerodynamics;
- increased fuel consumption;
- low lateral stability;
- increased tendency to tip over;
- roll when cornering;
- tendency to rock the car with an overly soft suspension.
To be fair, most of these shortcomings should not bother you if the increase in ground clearance is done without undue fanaticism and wisely. The remaining ones, which cannot be avoided, will have to be ignored. Actually, those for whom cross-country ability is more important do so.
The most inexpensive way to lift a car
One of the easiest ways to lift your car is to install slightly larger tires than stock.
For example, instead of standard 195/60R15 tires, we install 195/65R15 tires. In the marking of this tire size, the tire profile (its height) is specified as a percentage of the width (195 mm) and is the following values:
- Tires size 195/60/R15 have a height of 117mm (60% of 195mm);
- 195/65 tires have a height of 126.7 mm (65% of 195 mm);
Here the difference in the height of these two tires is 1 cm, that is, by simply changing the size of the tires you can raise your car by 1-2 cm. If you experiment with the selection of not only tires, but also wheels, then you can add 1-2 more to the standard ground clearance cm.
Disadvantages: Installing larger non-standard tires on a car entails not only an increase in ground clearance, but also a number of disadvantages:
- The car will become more reluctant to accelerate (the diameter of the wheel becomes larger, it is more difficult for the engine to spin the wheel);
- Fuel consumption may increase noticeably (it is more difficult for the engine to spin larger wheels, the more dynamic the ride with such wheels, the more noticeable is the excess fuel consumption);
- The speedometer will show a speed lower than it actually is (the speedometer sensor reads the speed of the wheel; with a larger wheel diameter, the car travels a longer distance than the one the speedometer is set to);
- The car's odometer will show less mileage (the odometer sensor counts the number of wheel revolutions, with a larger diameter the car will travel a longer distance)
It also needs to be said that you shouldn’t get too carried away and choose tires several sizes larger than the standard ones at once, since wheels that are too large can harm the car itself. For example, they may begin to rub against the wheel arches on uneven roads or cling to the front fenders when cornering, not to mention the increased load on the car’s suspension. At most, you should take wheels 1-2 “sizes” larger than the standard ones.
This method is the most optimal if the car owner needs to lift the car temporarily, for example, only for the winter. Then in the summer, having installed standard-sized tires, the car owner again returns the car to its standard parameters.
Increased clearance
As promised at the very beginning, 7 ways to increase ground clearance will be discussed here. These may not be all possible technologies. But they are the most popular, and therefore it’s worth starting with them. There will be no special technical details. The task is to identify each of the common methods, as well as pay attention to its advantages and disadvantages. Well, if possible, there will also be visual images.
Method number 1. Replacing sagging springs
This is the most “legal” way to increase ground clearance. If the springs are really sagging, and the clearance needs to be raised a little, then there is no better approach. From a technical point of view, it is completely devoid of disadvantages. There are, of course, financial ones - you will have to buy new springs, and for some cars they are not very cheap. Especially when it comes to original spare parts.
How do you know if the springs are sagging? There are two ways. The simplest, but not always accessible, is comparison. That is, we take our car and a similar one (you can even take a high-quality photograph from the appropriate angle), and measure the distance between the top points of the wheels and the nearest points on the arches. If the difference is a whole palm placed edge-on on the tire, then there is no need to measure anything - and so everything is clear.
The second method is more complicated, but always accessible. It consists of measuring the height of the springs and comparing the resulting dimensions with those indicated in the specifications for a particular car. The only drawback is that it is ideally possible to correctly measure the height of the existing springs only in the removed state. On a car, they are either compressed (when it is on wheels) or stretched (in a suspended position).
It is also a good idea to make sure that the springs are intact. There have been cases in life when one of these parts burst into two parts, but this was not noticeable from the appearance of the car.
Method number 2. Replacing tires
In this case, we mean replacing the tires with a different profile. Although, if the tires are bald, that is, they lack a 6-mm tread, then installing a new set is quite capable of raising the ground clearance. A little, of course, but... As for installing tires with a different profile, in this case, with a competent approach, the ground clearance can be increased so noticeably that no other methods (more technically complex, moreover) will not be needed.
This method also has some disadvantages. In particular, when replacing tires with non-standard ones, the speedometer and odometer will immediately begin to lie, the car’s dynamics will suffer slightly, and there will also be increased fuel consumption. There may also be problems with the arches, into which the new “sneakers” will hardly fit. Particular attention should be paid to the front wheels installed in the full turn position.
Method number 3. Replacing disks
Installing disks with a larger diameter than standard ones is often a visual tuning. However, along the way, this also has a positive effect on increasing the vehicle’s ground clearance. How much it will rise is easy to calculate. To do this, you need to take the diameter of the new disks, subtract the diameter of the standard ones from them, and divide the resulting difference in half. That is, if the wheels were 15”, and you install them at 17”, the ground clearance will increase by (17-15)/2=1 inch, that is, a little more than 25 mm.
The disadvantages of this method are known. Firstly, it will not be possible to increase the ground clearance by any amount. Secondly, there is a possibility of colliding with wheels that touch the arches. In addition, any change in wheel diameter leads to a violation of the accuracy of the speedometer and odometer, an increase in fuel consumption and a deterioration in vehicle dynamics. The problem with low arches can be partially solved by using this method in conjunction with replacing the springs.
Method number 4. Replacing body kit
If your car has visual tuning in the form of a custom body kit, and ground clearance is important to you, then this is the first thing you need to pay attention to. Often, beautiful bumpers with buffer pads hide up to 100 mm of ground clearance, or even more. In any case, removing such a body kit is much simpler and technically more correct than installing spacers or non-original springs. In addition, a low body kit on a tall car looks ridiculous and loses all meaning.
Method No. 5. Installing springs from another car
A common method that is possible due to the compatibility of car parts from different models and even brands. The first option that is worth exploring is to search for springs from the same model, but in a station wagon. They are usually not only longer, but also much stiffer. The second factor will solve a number of side effects from this kind of tuning.
The second option is to select springs from other cars altogether. In particular, foreign cars often have higher, but suitable in other respects, springs from domestic brands. It should also be taken into account that it is not always necessary to look for parts in accordance with the axes. That is, in some cases, the front springs from another become like a glove on the rear axle of one car.
By the way, for many cars there are original (and not so original) springs of different stiffness. Their height, as a rule, is different, and therefore there is always a chance to find something that will allow “little cost” to increase the clearance. Oh yes! Before you bother searching for non-original springs, it’s a good idea to make sure that the parts on your car have not been subjected to brutal tuning by the previous owner (cut off springs).
There is one important nuance with non-standard springs. It concerns the axle that is the driving one in your car. If the axis is driving, then there are joints of equal angular velocities. They are designed for a certain bend angle, and can easily survive artificially raising the suspension. However, do not rush to rejoice. Firstly, hinges operating in a constant fracture wear out faster. Secondly, you will have to replace torn anthers more often. Thirdly, when driving into good holes, sometimes the broken joints are torn out “with meat”, since they do not have an endless supply of tension. Tested in practice.
Method number 6. Increasing ground clearance by installing spacers above (below) the springs
Perhaps the most popular way to increase ground clearance. Spacers can be found for almost any car. If you really want to, you can install them without the help of guys from a service station. There are even advantages. Firstly, they are not very expensive. Secondly, there is no need to change, cut or cook anything. Thirdly, the ground clearance can be raised “to the skies”. Fourthly, if you don’t like the result, you can remove it at any time. Again, everything will cost “little blood.”
The disadvantages are the same as in the previous methods. We won't repeat it.
Method No. 7. Installing interturn spacers in springs
The last of the noteworthy ways to increase the ground clearance of your favorite car. It’s worth saying right away that he is the last one on this list. Among fans of such tuning, he is probably one of the first. The essence of the method is simple and clear - suitable interturn spacers are purchased, installed, and you're done. The advantages are the same as with the previous method.
Actually, so are the disadvantages. But in this case there are still additional ones. Firstly, it is not always possible to find suitable spacers on a whim. Secondly, the suspension with them becomes more rigid with all the ensuing consequences. Thirdly, raising the clearance “to the skies” will not work, since it is technically impossible to push spacers into the springs with too large a pitch.
Replacing springs and shock absorbers
This method of increasing ground clearance, such as replacing standard springs (with longer-stroke products) and shock absorbers (with “long-stroke” ones), is quite expensive. The fact is that manufacturers do not offer tuning specialists ready-made sets of such spare parts. Knowing the installation dimensions, you can independently select the necessary parts for a specific car brand. It would also be a good idea to consult with professionals who have experience in such upgrades. Naturally, this will require not only time, but also significant financial costs.
Tips for operating a car with low ground clearance
In conclusion, I would like to say a few words to those who think that they have a car with low ground clearance. Or rather, give some practical advice on how to live with it. Perhaps these recommendations will seem obvious to many. But let’s not forget about novice car enthusiasts, for whom any information can be new and very useful.
So, what if increasing the ground clearance is scary (lazy, expensive, seems like a collective farm, and so on):
- Do not use the machine for purposes other than its intended purpose. We bought an ordinary sedan, there is no point in driving it into an impassable swamp. Even with high ground clearance, thoughtless off-road driving can result in serious and expensive problems.
- Overcome obstacles wisely. It is much more correct to drive through wide holes and hillocks not “head-on”, but diagonally. That is, allowing each wheel to overcome the unevenness separately from its brothers along the axle.
- Be careful with potholes. Remember that parts protruding from the inside of the wheel are not included in the clearance size. Therefore, when driving into a hole, point your wheels away from its edge.
- Choose the right speed. If your car's undercarriage is in good condition, some small potholes are better to drive over at a higher speed than to crawl over. On what principle this works, read the article on how to check shock absorbers.
- Deep track = maximum machine unloading. If you need to drive on a track that is too deep for your clearance, it often makes sense to temporarily lighten the car. For example, when going on a picnic in the forest, the most effective way to disembark passengers is that there are a lot of passengers in the cabin anyway.
- Curb = 160 mm. If a curb or curb is installed in full compliance with GOST, then its height should be exactly this. But we must take into account that not everything in our country is done according to the standard, and when encountering obstacles of this kind, the main role is played not by ground clearance, but by the departure angles mentioned above.
- Install protection on the engine. Sometimes this is enough to go fishing or any other type of recreation away from civilization a couple of times a year without unpleasant consequences.
- Monitor the technical condition of parts under the car. As a rule, the exhaust pipe is the lowest under the car. It hangs on rubber hangers that like to stretch, crack, burst, tear, or even get lost. Also, the engine, gearbox and gearbox “lie” on rubber cushions if the car is rear-wheel drive. The rubber shrinks and shrinks, and along with it the ground clearance suffers. There shouldn’t be any hanging tubes, pipes, cables or wiring either. It’s all easy to secure it somewhere higher.
In general, if you love off-roading so much, and buying a car is still in your plans, think about the amount of ground clearance in advance. Of course, you can increase it later. But, whatever one may say, this is a gross interference in the design of the car. For a new model, this means loss of warranty, and for an old model, this means unpredictable consequences and additional costs.
DIY front suspension upgrade
The procedure for replacing springs and adding spacers is divided into several stages:
- Preparation of tools.
- Disassembling the suspension with removing the front strut.
- Selection and purchase of parts for tuning.
- Installation of springs and spacers, reassembly.
- Correction of camber angles - wheel toe-in.
If you purchased a car second-hand, it is recommended that you follow this sequence. You should not purchase parts without disassembling the suspension mechanism and seeing what is currently there. The previous owner of the car could also have added body-raising elements so as not to have to change the sagging springs, then the pre-purchased parts will be unnecessary and you will waste your money.
Standard spacers under the springs are about 2 cm high
It’s another matter when the car was purchased at a showroom and you know that there was no outside interference in the design. Then buy a set of spacers in advance.
What tool do you need to make high ground clearance?
Among the special devices, you will need a puller designed for squeezing out the ball pins of the steering rods, and spring ties in the form of pins with grips. Both are sold for little money and will be quite useful in the future if you are used to repairing your car with your own hands. The list of other tools looks like this:
- a set of open-end wrenches and sockets with a handle equipped with a ratchet;
- wheel wrench and jack for removing wheels;
- wheel chocks;
- ordinary plumbing tools - a hammer, various screwdrivers, bronze attachments and pliers;
- cloth gloves and rags.
Types of pullers for pressing out ball pins
Advice. Do not ignore gloves and work with bare hands when disassembling the chassis of a car. It’s not scary to get them dirty with dirt and grease; it’s much more unpleasant to knock your hands loose when loosening the nuts and breaking off the keys.
Spring compression ties
Disassembly procedure
First of all, place stands under the rear wheels of the car, open the hood and install a jack. Then unscrew and remove one of the front wheels, and then proceed according to the following algorithm:
- Loosen the nuts securing the upper part of the shock absorber, located in a circle from the protruding rod (usually 3 pieces), but do not unscrew them completely. If the latter is covered with a protective cap, remove it.
- Holding the rod by the edges at the end, unscrew the main nut holding it to the glass.
- Disassemble the mounting assembly of the strut to the steering knuckle by unscrewing the nuts and knocking out the bolts through the bronze adapter.
- Unscrew the nut holding the tie rod ball pin, having first pulled out the locking pin (if there is one). Put on the puller and press the rod end out of the socket.
- The stand is now hanging by the 3 top nuts that you loosened initially. Unscrew them and pull out the entire assembly.
First of all, unscrew the bolts of the upper strut support
Note. If a tube with brake fluid is attached to the rack, as is done on Russian front-wheel drive VAZs, then it also needs to be carefully disconnected and moved to the side.
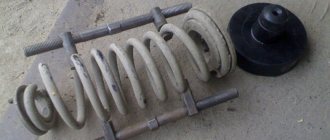
After dismantling, all that remains is to release the spring, to do this, compress it with ties and unscrew the nut holding the support bearing. After this, remove the spring with the standard fittings to take it with you to the store for comparison with the new parts.
To disassemble the unit, you need to tighten the spring
We recommend: How to install disc brakes on a UAZ
If the front suspension design of your car is multi-link, then the disassembly algorithm changes. There is no need to press out the tie rod end; the first step is to unscrew the lower shock absorber mount. Then proceed like this:
- Place a wooden block or other support under the lower arm and lower the jack.
- Unscrew the pin of the lower ball joint and press it out of the eye on the hub with a puller. Raise the jack if necessary.
- Disconnect the end of the anti-roll bar from the lower arm.
- Use zip ties to compress the spring, lift the jack and pull it out of the glass. From there, remove the standard spacer.
Front suspension diagram with 2 arms
Photo of front suspension disassembly
The ball pin is squeezed out with a puller The strut is removed along with the spring The tie rod ball pin nut After unscrewing the lower bolts, the hub is separated from the strut The upper fastening nut must be twisted, holding the rod The strut is held at the bottom by 2 bolts
Selecting elements for lifting a car
As a rule, to increase ground clearance, repair springs are selected whose height is 1 turn greater. This will give an increase in ground clearance of 3-5 cm, which is quite enough for a passenger car. There are other options:
- choose springs of increased rigidity so that the machine does not “sit down” when loading, plus spacers 30 mm high;
- buy a set of spacers along with reinforced upper supports;
- use a standard spring with interturn and lifting spacers.
Rubber spacer kit
You can use each option individually or in combination, the main thing is not to go beyond 50 mm. And for some cars, whose clearance above the road is already quite good, a rise of 30 mm is enough. The spacers themselves are made from the following materials:
- Rubber parts are low in price, but their service life is limited, so the attachments will have to be changed periodically.
- Polyurethane products are stronger than rubber ones, but they are also more expensive.
- Lightweight aluminum spacers are practically eternal, they will last for the entire service life of the car.
Polyurethane inserts
Important point. Along with the spring reinforcement elements, do not forget to purchase devices for lengthening the shock absorbers, otherwise their working stroke will not be enough to dampen vibrations of the raised body. Constantly being in the extreme open position, the rod breaks the upper part of the shock absorber body, causing the latter to fail.
Aluminum spacers
How to increase: installation of new parts and assembly
To install the elements that you purchased to increase the vehicle's ground clearance, you need to proceed in the reverse order. Move the ties to the new spring, compress it and assemble the rack, installing reinforced spacers instead of the standard ones. If necessary, install devices to extend the shock absorbers. Try to insert the parts into their places clearly and without distortions, so that the height of the body above the ground remains the same at different points and there are no creaks from rubber bands that are incorrectly rotated in the sockets.
Assembling the front strut with spacers
Advice. Before installation, tighten the new spring with tools, focusing on the length of the old element. Then she will freely fall into place.
Assembly with aluminum extension
We recommend: Front strut brace
Taking this moment while the assembly is disassembled, check the technical condition of the remaining parts - bearings, rubber bushings and ball joint pins or tie rod ends. It is recommended to lubricate the upper support bearing of the strut before installation. There are no tricks here, just reassemble the car in reverse order. When finished, be sure to visit a service station and adjust the camber, otherwise lateral wear of the ramps is inevitable.
Using spacers - video
Consequences of installing spacers
The only advantage that the use of spacers gives is accompanied by a considerable number of disadvantages, here are the main ones:
- a change in castor (the angle of inclination of the front shock absorber strut) worsens the car’s handling;
- an increase in the rotation angle of the CV joint (constant velocity joint, “grenade”) leads to a sharp acceleration of its wear and a reduction in mileage by 2-5 times;
- increasing the distance from the gearbox to the axle of a rear-wheel drive vehicle, this increases wear on the driveshaft support bearing;
- changes in wheel camber and toe-in, which increases fuel consumption and tire wear, and also decreases controllability;
- problems with passing technical inspection and the insurance company. Installing spacers is a modification to the design of the vehicle, which is prohibited by traffic regulations. As a result, there is a high chance of denial of insurance compensation after an accident.
Examples of spacers for different cars
And now about installing spacers on different models. The first will be the VAZ-2121 Niva.
To increase the ground clearance in it, you will have to make spacers for almost all suspension elements; those that are installed at the top under the springs and shock absorber look like this:
Additionally, in the Niva they can be installed under the ball joints, the levers, at the bottom under the spring, etc.
But the Ford Focus 2 uses MacPherson strut suspension, so it is possible to install a pad in front between the pillar and the body.
The dimensions of the spacer are:
The situation is the same with the Kia Sid 2. The backing of this car looks like this:
Factory spacers for Daewoo Nexia look like this:
But having made the necessary measurements on the upper support, you can easily cut the same ones at home.
You can use this option for the rear support of Nexia.
But for UAZ the situation is the same as for Niva. The front spacers for this car look like this:
As you can see, their shape is quite complex and it will be impossible to make them at home.
But the rear spacers for the springs will not be difficult to make. Their factory version looks like this:
And here is a set of spacers for the front and rear suspension of the Chevrolet Lacetti. If it’s still possible to cut the back substrates at home, then to make the front ones you will need the services of an experienced turner:
For Renault Logan, it is better to buy spacers to increase ground clearance, since it is almost impossible to make them in a garage:
But on the Suzuki SH4, the front pads can be machined to increase ground clearance. They look like this:
An important condition in the manufacture of spacers is compliance with all dimensions.
Therefore, if they are made based on measurements of the suspension elements, then it is better to first make patterns from cardboard, and then make substrates according to the dimensions of these patterns.
And yet, during installation, you will almost always need to replace the mounting bolts with longer ones.
And here it is very important to approach the quality of hardware. It is better to take high-strength bolts with fine threads.
Video - homemade spacers to increase ground clearance.
