The external car antenna of most popular cars often breaks down and gets damaged. There are frequent cases of theft or vandalism when parking a car in a yard. Finding a factory antenna is problematic; car manufacturers rarely produce simple devices as spare parts. If the receiving device on your car of an outdated design is broken or stolen, there is often no other choice but to make an antenna for the car radio with your own hands. Most drivers prefer to listen to FM radio broadcasts, which do not require long flexible or telescopic antennas for stable reception.
Types and principles of operation of antennas
Antennas pick up electromagnetic waves that travel everywhere. A weak electromotive force of alternating radio frequency current is induced in the antenna conductor. It is sent to the receiving device. After this, amplification, detection and selection of the required information occurs.
Antennas are divided into active and passive. The first ones are distinguished by the presence of an amplifier that increases the signal from the car antenna. Active receiving devices provide stable reception of radio stations at a distance of more than 60 km from the transmitter.
Passive antennas do not have an amplifier. They are easier to assemble with your own hands. A passive car antenna is most often installed on the roof of a vehicle and provides reliable signal reception at a distance of up to 15 km, for example, within city limits.
How to choose an amplification module
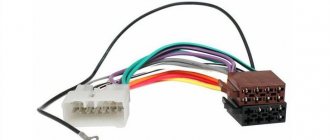
The first criterion by which an FM signal amplifier for a car radio is selected is its power supply type. There are two types of devices on the market today.
- With external power supply. Such an amplifier has a tap, one wire for connecting to the vehicle’s on-board network.
- Powered by antenna cable. Such devices connect only to a certain class of radio tape recorders. The latter must have the option of power supply via an antenna cable.
Regardless of the technical solution, connecting the antenna amplifier to the car radio is not difficult. However, the main thing is to buy a device with the right characteristics. The criteria for choosing the optimal model are as follows.
- The frequency band is selected depending on the type of radio and the radio tuner installed in it. If this is an old cassette model that receives short, medium and fm waves, a wideband amplifier will be required. For modern radio tape recorders, a narrowband model operating only in the FM range is sufficient.
- Type of antenna to be connected. For conventional pin models, a conventional amplifier is used. When using directional (also called dipole) antennas on a car, a more complex device will be required. The circuit solution includes a matching module.
- The gain should be between 10 and 30 dB. Today you can buy models with a higher indicator. However, it is not recommended to do this in a large number of cases.
It is worth talking in more detail about choosing the optimal gain. It is determined not only by the desired reception range. The fact is that the maximum power of the car radio amplifier determines the final signal level at the device input. However, there is a technical limit to its increase.
If the installed antenna amplification module is very powerful, and the car is located in an area of reliable reception, in a large city, the radio will simply stop receiving the radio. The protection system will work. The amplification device, generating an excessively strong signal, will take its value beyond the technical limit. As a result, in order to protect the primary reception circuits, roughly speaking, the antenna input will be blocked.
Advice! Practice shows that with average radio parameters, and if you want to receive FM radio at a distance of up to 100 km from the city, an amplifier with a coefficient of 10-15 dB is sufficient. If the car is outside the city most of the time, you can purchase a model with a more impressive indicator.
When the actual use of the car involves both its movement in the city and travel far beyond its borders, it is recommended to install an amplifier blocker. This is a circuit that turns it off if necessary, making a bypass to the main cable channel of the antenna. You can buy an amplifier that turns itself off when a certain limit signal is reached at the output.
Assembly instructions
You can make an antenna for a car radio with your own hands at home from materials and tools that are available in your garage or workshop. Rigid steel or aluminum wire is suitable for the pin. The housing can be made of wood or plastic that does not interfere with the reception of radio waves.
To attach a homemade antenna for a radio with your own hands on the roof of a car, you will need a magnet from a faulty speaker. A cut-to-shape piece of plastic film or lint-free cloth is glued to the side that will be in contact with the car body to protect the paintwork from damage.
Inactive
To make a car antenna with your own hands, you will need:
To make a pin, unwind the wire and cut a piece from 20 to 50 cm long. Then it should be straightened, and the lower end should be bent at a right angle and rolled into a ring to put a bolt on the pin, with which the radio cable will be connected. The lower part of the vibrator can be twisted into a spiral.
After this, the body is prepared. A hole is made at its bottom for a mounting magnet, which is attached with glue. The central core of the radio cable is connected to the pin via a bolt. The screen braid is moved back and insulated so that it does not short-circuit to the vibrator. Otherwise, the radio in the car will not work.
The next step is to install the FM antenna for the car into the housing. To do this, make a hole in it in the shape of a bolt, which is then inserted and fixed by pouring cold welding, other hardening resin or plastic. This part should be shaped into a cone and sanded after curing for a neater appearance.
You can also make a car radio antenna with your own hands at home in the form of a shark fin. To do this, you will need an anchor bolt with a length of 10 to 25 cm, in both ends of which holes must be drilled. Flexible copper wire should be wound on it in 2 layers as tightly as possible. Its ends must be inserted into the previously drilled holes. The upper end should be securely soldered, and a nut with a lock nut should be screwed onto the lower end.
Then the outer layer of insulation should be made from epoxy resin or thermoplastic and shaped into the desired shape.
Vinyl or carbon fiber should not be used as they interfere with radio reception.
When the body has hardened, the surface should be processed on a lathe or by hand sanding to give the product a neat appearance.
To complete the work on making a radio antenna in the form of a shark fin for a car, you should paint it yourself in the color of the body, if the color of the material used for the body differs from black. Installation of the receiving device on the roof is carried out through a special bracket, which will not allow the pin to come into contact with the body. This design will well receive a useful FM signal in large cities with powerful transmitters, distinguishing it from the background interference.
Active
To make an active car antenna with your own hands, you will need an amplifier from a television antenna, rated for 12 V, along with the supplied power injector and casing, and 2 telescopic antennas from household radios. In their lower parts, holes should be drilled that are suitable in diameter to the amplifier inputs. For more reliable fastening, a washer should be placed between these parts and the amplifier board. The entire structure is placed in a sealed casing, to the bottom of which a fixation magnet is attached.
You can supply power to the amplifier not only through the injector, but also in this way. A capacitor with a capacity of 20-50 pF is connected to the gap in the central core of the radio frequency cable. The blue and white stripe wire from the car radio is extended and connected to the capacitor terminal facing the amplifier. In the gap of this wire you need to include a choke, consisting of 100 turns of thin wire and wound on a ferrite core.
This antenna will provide reliable reception not only of radio stations, but also of analog and digital TV channels in the car. You can also make a car antenna with an amplifier based on a KT 368 A transistor or similar.
To make a GPS antenna for a car, you will need a piece of wire 2.5 mm thick, a housing made of plastic, and a cable. You can also use a Bosch radio antenna adhesive to the windshield as a receiving device for the navigator if you remove the radio signal amplifier module for the car receiver.
Do it yourself!
If a car enthusiast is a jack of all trades, then he can easily assemble a homemade antenna from components and connect a car antenna. Everything you need can be purchased in markets and stores. It will be much cheaper than purchasing ready-made ones in salons.
https://youtube.com/watch?v=xFmYoFwPZeE
You need to assemble the antenna so that:
- was located in the car interior and did not interfere with the view;
- there were no questions from traffic police officers;
- no inconvenience was created for passengers;
- ensured stable and high-quality signal reception.
When the car moves, it constantly vibrates. This negatively affects the reception of the broadcast signal. During the trip, signals are supplied from different directions, so this must be taken into account during assembly.
A conventional quarter-wave vibrator is not a very good choice, since it is large in size, complex in mounting and manufacturing, and will create inconvenience for the driver and passengers. This is where the production of a frame structure will come to the rescue. It will be perfectly located on the rear window, under the seal. The design should be slightly narrowed at the top, with a capacitor located in the middle. It will tune the antenna to different frequencies. There are two of them:
- 27 and 65 MHz
- 28.2 and 68 MHz
The upper resonance always occurs in the lower broadcast range.
There is nothing complicated in the scheme. So how do you make a car antenna?
It is required to stretch the wire modification MGTF 0.5. It must be positioned in the form of a trapezoid around the perimeter. The dimensions should be as follows:
- The top edge is sixty-five and a half centimeters long (plus 65.5);
- Sixty-six and a half centimeters (plus 66.5 cm) - bottom edge;
- The side edges are forty-five centimeters.
- Arrange the pluses in such a way that it is as convenient as possible to add wires for the matching capacitor. They will pick up the signal.
- Pull two wires towards the center, strictly vertically. Attach the trimmer capacitor exactly in the middle. The wires will be long (45 cm), so they need to be rolled in a zigzag shape and carefully hidden under the insulating pipe.
- In the place where the wire is cut in half, solder the cable. On the other hand, gaps must be excluded.
We advise you to study Short Circuit Current
The hardest job is done! Now, using communication equipment, it is easy to connect the car antenna through the connector to the receiver. Take the cable of the optimal length, without strong sagging, but it should not be stretched too much.
Since this is a passive antenna, the signal will drop out periodically. It is recommended to connect an amplifier.
You already have experience working with a soldering iron, so you can also do it yourself. But this process is more complex and time-consuming. For this you will need:
- amplifier circuit;
- printed circuit board;
- transistor;
- inductor.
All parts must be carefully soldered. Then check everything by connecting it to the antenna. Can be powered via a fuse. If the process is very complex, then it is better to buy a ready-made amplifier.
For a more visual example of how to make a car antenna, you can watch the video.
Advantages and disadvantages of homemade devices
One of the advantages of a homemade car antenna is the ability to more accurately adjust to reception conditions by choosing the length of the receiving pin and the installation location on or inside the vehicle body. With careful and correct assembly, the sensitivity and bandwidth of a homemade receiving device will be no worse than that of a factory one.
One of the disadvantages of homemade antennas is the need to drill into the car body. Over time, the hole may rust. Some homemade antennas may not comply in their dimensions with the Road Traffic Regulations.
Best models
There are practically no popular models among amplifiers. Such devices are installed extremely rarely, since a modern multimedia system allows you to play music from various media. When determining a popular model, the following points are taken into account:
- Device cost. A proposal of domestic origin costs 1000 rubles. Do not forget that the price determines the basic properties of the device.
- Length of service life. Installing an amplifier involves changing the receiver connection circuit. Therefore, you should connect a device that can last for several years.
- Reliability. The device must operate under various operating conditions: voltage changes, temperatures, humidity and other situations.
- Signal level. This indicator can vary over a wide range.
There are models of domestic and foreign origin on sale. Models of foreign origin are more popular; domestic ones are several times cheaper.
Triad 304
A domestic car antenna amplifier called “Triad 304” costs 650 rubles. There are various reviews on the Internet, many of them negative. The positive points are the following:
- Low price.
- Good build quality.
- It is possible to turn off the device if the signal is strong.
- Optimal functionality.
Such an amplifier does not last for a long period. Therefore, they often give preference to other models from foreign manufacturers.
Prology TFB-100
An antenna amplifier of foreign origin is more popular due to its attractive performance characteristics. The Prology tfb-100 model has the following features:
- The device can simultaneously operate with several antennas.
- High-quality signal amplification is carried out in the digital and analog range.
The device in question is small in size, so installation does not pose any problems.
Master kit
When looking for a universal version, the Master Kit car antenna amplifier is selected. It has the following features:
- The applied scheme is two-stage.
- There are special kits that are easy to assemble. To do this, it is enough to have a soldering iron and the required consumables.
The cost of such sets is relatively low. Therefore, they are chosen to improve the quality of radio signal reception in various bands.
Connection and setup
Before connecting a homemade antenna for a car radio, you need to make sure that the cable is not damaged. It is then routed under the car's dashboard to the radio. If the cable is inserted into the cabin through a hole in the roof, then all holes are carefully sealed. The cable plug is inserted into the car receiver.
If the receiving device is assembled correctly, then all available stations should be received clearly and reliably without on-air debris. The power wire of the active antenna is connected to the blue and white stripe wire of the car radio or directly to the battery via a switch.
Source
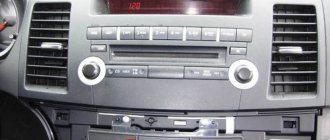
Connection to radio
The installed equipment for receiving radio waves must be correctly connected to the head unit. The sensitivity of the radio receiver and the quality of playback depend on the correct installation. When driving, vibration occurs in the car antenna plug in the mounting socket.
If the installation is loose, interruptions in signal reception occur, which lead to failures in radio reception or the appearance of noise or interference.
Outdoor
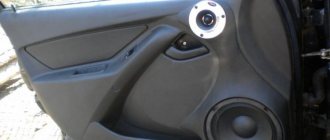
To install an external antenna, fix it through a hole or with a magnet. The cable from the magnetically supported equipment is routed into the interior through the door seals. Because of this, the insulation of the cord is frayed, which leads to interference. In addition, a deformed seal allows water to enter the vehicle interior.
To install the antenna on the roof, you need to drill a mounting hole and a channel for introducing the wiring harness into the cabin. The connecting cable must be shielded with a design resistance of 75 Ohms. To place the equipment on the roof, you will need to remove some of the pads located on the racks, and then move the one-piece molded headliner a little. The element is removed carefully, since the deformation will be visible on the flat surface of the panel.
After drilling holes, it is necessary to apply a protective mastic, which will reduce the risk of corrosion. The antenna housing is mounted on the roof through a rubber gasket, additionally lubricated with sealant for external use.
We advise you to study Vacuum circuit breakers
The signal cable is attached to the active element through a set of plates made of copper and fluoroplastic.
Some cars have holes for mounting the pin of a conventional passive antenna on the roof or fender, closed with a plastic or rubber plug.
On some cars, you will have to install an additional cable connecting the antenna output to the radio. The cord is pulled under the interior decoration elements and under the carpet laid on the floor. After this, you need to install the antenna, which is secured with a standard nut.
Internal
If the car owner does not want to cut the body or does not have the proper skills, then it is permissible to install an antenna for the car radio in the vehicle interior. The device is placed on the instrument panel or rear shelf. Then you need to lay the connecting cable and connect the antenna connector to the head unit plug. The disadvantage of using a passive internal receiving device is interference and a short reception range of radio stations.
To improve the quality of reception, a separate signal amplifier is used, which is embedded in the connecting cable. The electrical connection diagram of the device includes positive and negative wires. The negative signal comes from the car body or the metal power frame of the instrument panel. The positive cable is connected to the nearest switch. But when the ignition is turned off, the antenna does not work, so it is recommended to connect the wire directly to the radio plug.
Active
Before connecting the active antenna, you need to select a location for mounting the housing on the previously degreased surface of the windshield. The whiskers extend along the top and side edges to maintain visibility for the driver. The elements are fixed using a standard adhesive layer (protected with a transparent film) or pieces of double-sided tape. It is also possible to place the antenna pin on a metal roof panel. In this case, the quality of reception deteriorates, since the body acts as an additional screen for radio waves.
To supply voltage to the amplifier, use the power plug on the radio, which has a separate cord with blue insulation. The corresponding wire is pulled inside the instrument panel, the connection is made by soldering, followed by protecting the joint with insulating tape.
The negative wire, covered with black insulation, is installed on the car body.
If the head unit is not equipped with a separate power output, then the device can be connected to the connectors of the backlight lamps of buttons or switches located on the instrument panel. It is recommended to protect the circuit with a standard or additional fuse.
DIY car antenna
Car antennas today differ in purpose. In combat conditions they receive communications, in peaceful conditions they receive broadcasting channels and navigation information. The car antenna is a quarter-wave vibrator, supplemented with matching devices. The signal line, the ground, will be the body of the car. Due to these two components, signal reception becomes possible. Due to the simplicity of the design, they make a car antenna with their own hands. First determine the purpose of the device, wave range, and modulation type. Three main components laid down by the design.
The best car radio antennas
A reliable and high-quality radio antenna allows the driver to keep abreast of the latest news and listen to music on his favorite radio stations while passing the time on the road.
The best car radio antennas on the market today are highly technologically advanced and have a modern design.
Bosch Autofun Pro
4.8
★★★★★ editorial assessment
91% of buyers recommend this product
The Bosch Autofun Pro car interior antenna is highly sensitive and is designed for placement on the inside of the car windshield. The product provides high-quality signal reception in the AM/FM range and costs an average of 1050 rubles.
Advantages:
- easy installation;
- thoughtful design;
- high-quality assembly;
- compactness;
- neat appearance.
Flaws:
decreased performance when tinting windows with certain materials.
The Bosch Autofun Pro antenna has a self-adhesive base and allows you to listen to the radio in places quite distant from the repeater. The product can be a good alternative to standard antennas for domestic and imported cars.
Prology RA-204
4.7
★★★★★ editorial assessment
88% of buyers recommend this product
The active type antenna has a monolithic design and is mounted using a self-adhesive base. The device receives radio waves at AM/FM/VHF frequencies. The cost of the model is only 325 rubles.
Advantages:
- LED power indicator;
- quick and easy installation;
- Suitable for any radio;
- low price.
Flaws:
- short cable;
- The rubber seal does not always provide a tight seal.
The antenna allows you to receive a radio signal within a radius of up to 80 km. The product is equipped with a 2.5 m cable. Prology RA-204 optimally combines high quality and affordable price.
Supra SAF-3
4.6
★★★★★ editorial assessment
84% of buyers recommend this product
The internal amplifier of the Supra SAF-3 car antenna allows you to listen to the radio in the most unfavorable conditions - far from the repeater or in a city with a lot of interference. The average cost of such an antenna is 250 rubles.
Advantages:
- wide range of received frequencies - LW, MW, HF, VHF;
- Ease of use;
- installation kit included;
- low price.
Flaws:
- unshielded cable;
- small gain.
Supra SAF-3 provides reliable reception of radio stations broadcasting in different ranges - from ultra-short to long waves. The antenna is powered by a 12-volt network and is connected to the universal connector of the radio.
Types of car antennas
We mentioned the types of car antennas, but here is a redundant classification:
Connection diagram for a car antenna under the rear fender
Surely an experienced car enthusiast will be able to add a couple of signs, but we will limit ourselves to the specified classification. FM antennas fit inside the cabin. Hobbyists make accessories with their own hands, using pieces of cable with a characteristic impedance of 50 Ohms. The braid is electrically connected to the car body (ground). Be careful of catching lightning while driving through a field. The thunderstorm chooses the point closest to the sky.
The size of the car antenna depends on the range. Communications (walkie-talkies with a frequency of 27 MHz) are large. Powerful varieties reach a length of 2 meters (they are placed on trucks); according to science, they should be made 50 cm higher. To reconcile the differences between the actual size, a quarter of the wavelength is an “extension” coil at the base. For use, the car antenna for communication is installed vertically. Determined by the type of polarization. The communication antenna can be tilted by means of a thumb or lever, so as not to break it when driving through a forest or overcoming the spans of a low bridge. Communication antennas are mostly used by drivers of large trucks. It is allowed to equip jeeps and civilian cars, but at times the appearance will be unsightly.
Note. Factory antennas are tuned to the wavelength. The mustache is shortened, equipped with a protective cap at the end. The operation is carried out according to the instructions. The guide includes a chart of recommended sizes. The violation causes a decrease in reception sensitivity.
The digital car TV antenna looks like a police flasher and is made in a different color scheme. The device is devoid of unnecessary bells and whistles and accepts a frequency of hundreds of MHz. The first multiplex in Moscow chose 559 MHz. The digital car antenna on a magnet is placed on the top (roof), the wire passes over the door without any modifications. A horizontal polarization signal; the device’s task is to receive an arbitrary azimuth.
Broadcasting antennas are rarely boasted of being large, since the wavelength is higher and the dimensions are larger. Small height pins, like those decorating portable radios. Beware of accidentally buying a car radio antenna intended by the manufacturer to decorate a television receiver. For fear of making a mistake, read the technical specifications in the store:
Sometimes dealers forget to indicate the antenna capabilities. The range of 400 – 530 MHz is given, it is mentioned that “the option of receiving GPS signals is available.” One can only guess what the copy can do; the first Moscow multiplex passes by. Frequencies above 400 MHz are used by portable radios and departmental communications of the Ministry of Internal Affairs.
It remains to pay attention to the connector. It matches the vast majority of devices for which it is intended; it would be useful to check the compatibility issue. They say that an external car antenna provides better reception; the question concerns mainly urban reception. While racing along the highway, the windows of a typical passenger car will not create serious obstacles to the passage of electromagnetic radiation. Installation of interior car antennas is simpler. Accessories are lower than external ones, hence the worse quality.
The store will provide all sorts of hybrid models, including options a la All in One. You can switch reception from city to highway. It is distinguished by sensitivity and interference suppression features. The suburban reception range increases to 80 km. They sell unique tandems. A pair of similar looking pins are laid out, one of which picks up television broadcasts, the other – radio, communications. Using the delights of the set requires the purchase of appropriate receiving equipment.
What to look for when purchasing
Antennas for car radios are also small, but they are slightly larger than television antennas because the wavelength is longer. For this purpose, short pins are suitable, reminiscent of devices for receiving walkie-talkie signals, but their length will be shorter than that of police flashing lights. To avoid accidentally buying an antenna for a TV receiver instead of a special model for a radio, study its technical characteristics:
- the antenna for the radio is designated as FM or AM (frequencies 70-108 MHz);
- for television - DVB - T (frequency up to 900 MHz);
- for navigation - GPS (400 MHz);
- for radio communications - CB (27 MHz).
Also remember to pay attention to the antenna connectors . Most often, they should match your device, but it won’t hurt to check this before purchasing. It is believed that an external type car antenna provides better reception, but this only applies to work in urban environments. However, devices for installation inside a car interior are easier to install, but at the same time they are cheaper, and accordingly, they will work worse than external ones.
Today, you can find all kinds of hybrid products on sale that can be used for all of the above needs - watching programs, listening to FM radio stations, and navigation. There are also models with the function of switching reception from highway to city and vice versa. Such techniques differ from each other in sensitivity and interference suppression features. So, on the highway, the reception range can increase to 80 km.
Tandem models are common , equipped with a pair of pins, one of which is intended for watching TV programs, and the second for listening to radio broadcasts. Of course, to use such devices for their intended purpose, you will need special equipment.
Making a car antenna with your own hands
The only difficulty is that the body of the car is constantly moving. Traditional terrestrial household antennas in this case will form reception dead zones. There will be long periods of time when maneuvering when there is no reception. Applies to horizontal polarization, not vertical! In the latter case, the antenna does not care about the azimuth of the signal arrival. The mast stands vertically! This was discussed by ordinary frame biquad antennas and quarter-wave vertical vibrators. Let's see what else is useful to nature.
A brief overview of some models of TV antennas for cars
The CL/CC25 satellite television antenna is designed to receive signals in the range from 10.7 to 12.7 GigaHertz.
Its tracking speed is 100 arc degrees per second. This speed is achieved through the use of phased array antenna technologies with mechanical drives.
The antenna has a high cost (from 2,000 USD) and is used to serve bus excursion groups at great distances from large populated areas and special facilities.
The active television antenna Orion A-72 is designed for installation inside the cabin. This is not entirely optimal in terms of reception range, however, such an antenna is protected from vandalism. The antenna is also operational in the FM radio signal range. Has a gain of 20dB.
The GSTAR GS-NV 003-5V antenna with a gain of 39 dB is installed using a powerful magnet on the roof of the car. Great for occasional trips to the country. Has a circular radiation pattern. Powered by a DVB receiver. Cannot work in analog format.
The Prology TVA-100 TV antenna is designed to receive digital and analogue broadcasting signals, powered from the vehicle’s on-board network. Installed inside the cabin. Gain 30 dB. Installed in budget cars.
With the introduction of digital television broadcasting standards, the use of televisions in cars becomes relevant. Modern standard multimedia complexes allow you to reproduce a television signal with high quality. By installing a DVB receiver and a TV antenna, you can get another benefit of civilization in your car.
However, the specifics of vehicle operation should be taken into account. If trips are made at a short distance from a large city (within 70 kilometers), then the reception will be quite reliable. In the case of long-distance commercial trips, monitoring television transmitting stations yourself becomes problematic.
Video - installation of a car TV antenna B3TV (Ozar) for a digital DVBT2 signal:
May be of interest:
Scanner for self-diagnosis of a car
How to quickly get rid of scratches on a car body
How to check a used car before buying
How to apply for an MTPL policy online in 7 minutes
Advantages of a homemade loop car antenna
See the advantage. It is unlikely that our DIY car antenna will have too long a range or show miracles of reception, but it is competitive with some factory models that are mounted on the roof and have a height greater than that of a passenger car. Plus, in the forest, the city won't hurt. In addition, there is no need to wind the matching device. This is not easy; in addition to the exact number and pitch of turns, you will need to find the desired thickness of the wire. The structure will have to be sealed; the event will require the purchase of a number of additional materials.
Anyone who once held a walkie-talkie with their hands will understand the meaning. The antenna is covered with a thick sealant; the devices will allow you to broadcast, at best, for a couple of kilometers. If the terrain is not rough. In our case, ease of installation, ease of design, and accessibility for the average user are achieved.
A capacitor is required: the circuit is shortened. According to the author of the idea, the coefficient is 0.3. The middle cables are used to electrically extend the frame to the desired size; the capacitor dampens the reactance to match the RK-50 cable and will allow the system to be tuned to resonance. The author claims that the antenna is broadband. In most cases, it is possible to install it on the rear window of any car without major changes to the design. The setting is carried out to the minimum standing wave ratio.
In some cases, buying an antenna for a car and installing it will be more expensive, more complicated and will provide poorer reception quality. There is nothing difficult in the above design, and every car enthusiast can try the accessory at his leisure. A two-meter mast is not suitable for a passenger car; it would be more appropriate for a tank! Which, as you know, are not afraid of dirt.
Source
The best outdoor antennas for cars
External type devices are often included with the vehicle. Their appearance is combined with the design of the vehicle, and their technical characteristics have the best parameters. This allows you to receive high-frequency radio signals from repeaters that are located at long distances. However, installation is often associated with a number of difficulties. The owner needs to cut a hole in the machine body and constantly remove the retaining magnets. Data from comparative tests made it possible to select 4 best outdoor car antennas from 10 nominees.
Elko Ep AN-E
An external radio receiver from a Czech manufacturer is used to activate switching performers RFGSM-220M, eLAN-RF-003, eLAN-RF-Wi-003, RFDA-73 / RGB,RFSA-61M, RFSA-66M, EMDC-64M, RFDEL-71M. They provide wireless control of electrical devices. Drivers use them to turn on garage or entrance gates and barriers. The operating frequency of the antenna is 868 MHz. You can attach it to the roof or car body.
Advantages
- Range of action – 100 m;
- Light weight;
- Metal rod;
- Long cable;
- Operates at temperatures from -40 C to +50 C;
- Compact dimensions;
- Average price.
Flaws
Low resistance to weathering.
The model has good sensitivity, so users note good perception and signal transmission by the antenna. The advantages include the possibility of use in harsh climatic conditions.
Sirio T3-27
The passive type device is made in the form of a pin. Receives radio signals from the CB range at a frequency of 26.9-27.5 MHz. Attached to the roof or car body using a bracket. However, in the second case, the setting gets a little lost. The length of the model is 62 cm, with a rubber cap with the company logo attached to the top. Below it there is an adjusting screw with a lock nut, which is used to adjust the antenna. The kit includes foil for fixing the magnetic sole.
Advantages
- High-quality materials and assembly;
- Omnidirectional;
- Good gain;
- Long cable.
Flaws
- Heavy;
- Possible fakes.
Most users advise buying an antenna for a car radio. It is easy to install and audibility in city conditions is good.
Anli Aw-6 Vhf
The design and type of model are identical to the previous nominee. At the same time, the length of the rod is increased to 133 cm, and the operating frequency range is from 136 to 172 MHz. The VHF radio signal standard has a longer communication range, so walkie-talkies with such an antenna work well outside the city, in rough terrain. The device is secured using a magnet, which is included in the kit. The radiating pin is made of high-alloy stainless steel.
Advantages
- Lightweight;
- Durable;
- High resistance to weather conditions and UV rays;
- Easy to set up;
- Suitable for most cars;
- Light weight.
Flaws
- There is no vibration absorption spring;
- Build quality.
Users note good connection, but low resistance to mechanical stress. The coil is weak to shock and breaks quickly. There is also no way to fold the antenna on the roof; you have to remove it.
Optim UNION CB RU
The model is not equipped with a magnet or a mortise base, so it is used only in Man, Scania, and Volvo trucks. Installation is carried out in a standard factory base with external thread. It operates in the CB frequency range. The height of the spiral pin is 62 cm, the diameter of the emitter is 0.1 cm. The standing wave coefficient does not exceed 1.2, so the signal loss is about 1%.
Advantages
- Convenient setting of the minimum SWR value;
- A rubber cap at the top of the case protects it from water;
- Average price;
- Good gain.
Flaws
Small range of operating frequencies.
Experts have found that the nominee has high-quality signal reception. The power loss is almost unnoticeable. The main disadvantage is the inability to use in passenger cars.
Making a passive antenna for a car radio with your own hands
The simplest FM antenna, made by yourself, increases the power of the radio signal by 60-100%. Modernizing car radios and radios allows you to get rid of a large number of different problems associated with the poor quality of signals received by the device. It is extremely simple to make such a design, and even a person who does not have extensive knowledge in the field of radio engineering can cope with the work. In this article we will talk in detail about how to make an FM antenna with your own hands.
P O P U L A R N O E:
A satellite television system is equipment for receiving television and radio programs via satellites located above the equator in special geostationary orbits. A simple satellite television system consists of one satellite antenna (often called a dish), a converter mounted on it (also called a head) and a satellite receiver (tuner or receiver).
We advise you to study How to change a switch
A simple DIY passive GSM antenna for a mobile 3G/4G modem
Many who use a mobile modem to access the Internet have encountered a situation where the received signal strength is not enough. To do this, you need to buy a USB extension cable and try to lift the modem higher towards the window.
But sometimes this is not enough, then you have to make an antenna. In the article below we will look at a simple option for making an antenna, which can be made in just a few minutes!
Features of radio wave propagation
Before you start making your own antenna, you should understand the basic principle of transmitting signals in the FM range (88-108 MHz). The main features of this radiophysical process include:
Increasing the sensitivity of the receiver, as well as the quality of the signal it receives, is achieved by installing the antenna vertically. The structure associated with the device falls within the range of radio waves transmitted by broadcasting stations. The result of such modernization is the disappearance of many problems associated with frequent interference and low quality of radio signals received by the device.
When should you buy an amplifier?
A radio signal amplifier for a car radio will be needed in cases where there are obvious signs of poor reception. For example:
- the signal is briefly interrupted, the volume drops;
- there is a characteristic hiss, the so-called white noise, when the car is far outside the city;
- the signal freezes and disappears completely;
- the number of received stations becomes smaller, or there is no signal in the list of previously found stations for some positions;
- the radio is not received at all;
- analogue television channels are received with low quality, poor scanning and synchronization, and noise in the image;
- The digital television picture freezes, disappears, the radio displays the message “No signal” or the image crumbles into squares.
All these signs mean that it is necessary to strengthen the radio signal in the car radio by connecting an external module. Today there are many devices on the market that solve this problem. An FM amplifier for a classic type car radio can be connected to any model. And some - only to modern multimedia stations that have certain connector characteristics for using an external antenna.
What types of antennas are there?
There are quite a lot of devices for receiving signals in stores. They can be divided according to several criteria:
Purpose
What exactly are you going to take? It can be:
Important! If there are several devices in the cabin, there is no point in purchasing a separate antenna for receiving navigation data. It’s better to choose a universal one that picks up radio, television, and GPS. It will, of course, cost more, but you will have to buy only one, not two, or three.
It is very useful to know the communication parameters, that is, the oscillation frequency that a particular device receives:
type of instalation
There are different ways to attach the antenna to the car. Depending on the type of fastening, it can be classified as one of the following types:
The simplest ones are on suction cups and magnetic; even a child can install them in a car. The most difficult option is built-in.
Important! In some car models they are installed immediately at the factory. The advantage of this method is that no wires or pins interfere with passengers, so there is no fear that someone might accidentally touch it.
However, any other antenna can be installed conveniently and reliably.
Placement
Where will your antenna be located? Outside the car or inside? There are options. Antennas are:
Important! Since the car body is most often made of metal and is opaque to radio waves, preference should always be given to external antennas. Some modern cars have plastic bodies. This is the exceptional case when the use of an internal antenna is justified.
Gain type
According to this parameter, devices are divided into two categories:
Important! The passive one only catches the signal, the active one also amplifies it. The second option is preferable, since it makes it possible to receive radio transmissions even in unfavorable conditions.
In what cases is it advisable to make it yourself?
p, blockquote 5,0,0,0,0 —>
A whip antenna for radio reception usually does not contain any electronic components. In its production, mechanical processes are used (stamping, casting, metalwork). In everyday life, individual operations are quite difficult to perform using conventional tools. Therefore, it is better to purchase simple antennas ready-made.
p, blockquote 6,0,0,0,0 —>
More complex antenna devices for long-distance radio reception, television broadcasting and radio communications, interior antenna devices are products that include high-frequency matching systems, amplification units, and galvanic power supply isolation. With certain skills and experience, these expensive devices can be easily made independently, spending little money. In their manufacture, you can use ready-made components from factory antennas and other devices.
p, blockquote 7,0,0,0,0 —> adsp-pro-1 —>
Homemade devices can be used at the stage of testing receiving equipment. For example, when deciding to install a television receiver in a car, you can design a homemade antenna of a certain type (prototype). Then, in a real situation, analyze its effectiveness. If the reception quality is satisfactory, then purchase a good quality factory device. This method will avoid the cost of an unnecessary device. It should be taken into account that after connecting to the car’s equipment, the seller usually does not accept the antenna back, even if it does not satisfy the buyer in terms of characteristics.
p, blockquote 8,0,0,0,0 —>
Antenna manufacturing options
An antenna is a small radio engineering structure used in conjunction with a receiver to increase the quality of the signal received by the device. The main characteristics of a good homemade radio antenna include:
Designs of various types can ensure the presence of all the necessary characteristics.
DIY rod antenna
The rod radio antenna is a highly directional design that allows you to save the receiver from the problems associated with classic city noise and interference. The manufacture of such equipment does not require specialized skills from the master. Making a rod antenna is somewhat more difficult compared to a classic foil antenna.
A DIY car FM rod antenna consists of a conductor (a small metal pin or tube) attached to an insulator, and several counterweights. The range of waves received by the device is set by determining the length of the conductor itself.
Please note: the length of the pin is one-fourth of the received wavelength. A design made in accordance with this rule is the best option for a signal amplifier. Increasing or decreasing the length of the pin will have the most negative impact on the performance of the antenna.
Foil antenna
A foil radio antenna is an extremely simple design that allows you to enhance the quality of the broadcast radio signal for its subsequent processing by the receiver. In order to make such equipment with your own hands, you will need the following materials and tools:
Despite the fact that the foil antenna circuit looks quite complicated, at the first glance at such a device it becomes clear that even an inexperienced craftsman can handle its manufacture.
A cut sheet of foil paper is glued to a pre-prepared square board. You need to glue with a shift to the right side of the central slot (by 2.5 mm). The inner rod and braid are soldered 2.5 cm apart to a square of foil paper. Making a radio antenna with your own hands is very simple; you can cope with such work without much difficulty.
Please note: in some cases, a standard antenna wrapped with a small amount of copper wire can be used to amplify a weak radio signal.
The free end of this design is led out into the window.
FM antenna made from coaxial cable
A coaxial cable antenna is a device that allows you to use a radio receiver even in conditions of strong and frequent interference. To make the design you will need:
Making an antenna for a radio with your own hands is very simple. Make a cut on the insulating wire of the TV cord. Remove the insulation from the braid and unfold the foil screen to the place where the cut was made. Secure the prepared structure inside the plastic pipe, then secure everything with a lath.
Wire antenna
A wire radio antenna is another simple design that allows you to modernize a classic radio. Before you start making your own equipment, pay attention to the following formula for calculating the wavelength: 300 / Frequency, MHz.
A DIY car antenna amplifier has extremely high performance. This device will save you from all the problems associated with poor signal quality.
Device classification
Before choosing a car antenna, you should understand what they are and how they differ from each other. This is a key question that directly relates to the final quality with which the device will function.
The range has expanded significantly, new developments and new ideas from leading manufacturers have appeared. This complicates the choice somewhat, although the car antenna is not one of the most advanced developments. To choose a device wisely, you should consider what result you want to get.
The classification provides for the division of signal receivers for cars into 2 large categories.
- External. Such antennas are mounted externally, that is, on the vehicle body. Moreover, many are mistaken that remote or external structures are necessarily something like long sticks. They are also extremely compact, while providing a high level of operating efficiency.
- Internal. Such devices are designed for installation inside a car. Basically, they are attached to the windshield or installed on the dashboard. Compact, simple and convenient.
But even the disclosure of the classification does not answer the question of which car antenna will be better, and in which case the device catches a better signal.
When choosing between external and external devices, a motorist must largely rely on priority advantages, sacrificing certain disadvantages.
If you buy an outdoor signal receiver, then the efficiency of such a device will be higher in comparison with competitors of indoor type. But here one significant drawback may appear in the form of the influence of weather factors, due to which the device can fail faster. Don’t forget about the problems of vandalism, when someone just wants to come up and rip the antenna off the car. Even with a high-quality mount, this will not be so difficult.
As for internal car antennas, there are no problems with weather factors. But the efficiency of receiving radio and television signals decreases. In return, the motorist receives a long service life and protection from damage, vandalism, etc.
Practice clearly shows that within populated areas there are practically no problems with signal reception due to the close proximity of stations and towers
If it is important to you which antenna catches better directly outside the city, then the advantage will be on the side of outdoor structures. When operating the machine within the city or close to it, often both types of products can work equally efficiently
The closer the car antenna is to the radio signal source, the better it displays the signal and converts it into image or sound.
It is generally accepted that you have to pay more for quality and change the receiver more often. But don't forget what year it is.
Modern developments have surpassed their predecessors in quality and efficiency. Therefore, really good antennas, even indoor ones, can provide excellent signal reception and guarantee excellent performance. You just need to know which models deserve attention and are considered the best by consumers at the moment.
The process of making a homemade antenna
Flexible and telescopic antennas for manufacturing require the selection of special antenna materials and additional radio components. Plus, they break just as easily as your car's previous antennas.
A stationary solid antenna that imitates the fashionable “shark fin” receiving device is easy to manufacture. To make such a homemade antenna for a car radio with your own hands, you will need simple materials and tools:
The main element of the antenna is a metal pin, the thread of which is selected according to the size of the standard location of the antenna or the mounting bracket you have chosen. Standard pre-threaded anchor bolts work well for the antenna base. At the opposite ends of the pin, you need to drill two holes for attaching the copper wire of the antenna vibrator. Unshielded wire is wound in two layers along the entire length of the pin.
The wound wire is clamped with fixing bolts and sealed in the upper hole of the antenna. For the outer layer of insulation, amateurs use various materials: Cold Welding glue, epoxy resin, polymorphus, thermoplastics. Melted vinyl and carbon fiber have proven themselves to be bad, causing interference with radio wave reception.
After manually molding thermoplastic or epoxy, the antenna will look inconspicuous.
After trying on the antenna at the installation site and checking its performance, the outer surface is processed on a lathe and finished by hand.
Depending on the color of the material used, the finished antenna can be left black or painted with waterproof acrylic paint to match the body color.
You can watch the video on how to make an antenna for a car radio with your own hands for outdoor trips:
Every car enthusiast can make an antenna for a car radio with his own hands. This mechanism will help you better catch radio signals. It can be made to fit the body of any vehicle.
A little about FM antennas
Those receivers that can be found in auto supply stores today support a fairly narrow frequency range. They are focused on world standards, so you won’t be able to “squeeze” the maximum out of an antenna for a car radio.
Before you start making a dipole with your own hands, decide on the purpose of the antenna:
- Active. This is a signal receiver version with a built-in amplifier. It can pick up signals at greater distances than passive ones. If you use the car radio only in the city, make do with a simpler option.
- Passive. Such antennas allow you to receive broadcasts from local radio stations with sufficient power. They work without an amplifier and are easier to make with your own hands than active ones.
You can also distinguish between signal catchers based on the installation principle:
- Internal. They are usually located inside the car. If you need an active dipole, it is better to make it internal.
- External. These traps are usually located on the outside of the car body. This makes it possible to compensate for the low power of passive antennas.
Connection and setup
The connection and configuration process plays an important role in the process of upgrading a home radio. Even the best DIY FM radio antenna will simply not work if it is installed incorrectly. When installing the structure, pay attention to the following conditions:
An antenna that is installed in accordance with all the rules will help you get rid of all sorts of problems associated with a weak signal and interference on the air.
Source
Correct installation
The installation process must be approached responsibly to ensure maximum signal quality. The car owner selects the design himself so that it matches the parameters for the built-in TV.
The advantage of the built-in antenna is maximum protection from external negative influences on the device. A disadvantage is the difficulty in dismantling the active receiving device without deforming it.
As an alternative, motorists use a mortise design. The main part of the antenna will be located inside, and only the receiving rod extends out.
Installation conditions must be observed:
- Reliable installation and fastening to the car body. If there is a carbon coating inside, the signal will be weakened. After installation, maximum protection of metal external elements is carried out from possible future corrosion.
- Protection can be done using silicone sealant. It is not advisable to use electrical tape or plastic over the joint. Such procedures ensure the appearance of condensation under the insulation, as well as weakening of the signal.
It is advisable to use high-quality metal parts coated.
Installing an antenna on a car
Installing a radio antenna cannot be called a labor-intensive process. If there are manufacturer's installation papers available, please use them carefully to find useful tips. It will be difficult to attach a radio antenna with an auto drive, which is classified as telescopic.
When installing an external car antenna, you need to look at the peculiarities of its fastening. If installed at the highest place in the car, it will not greatly enhance signal reception. The most important thing in mounting an outdoor car antenna is to place it on a conductive surface, for example over any flat surface like a trunk or mounted on a roof.
External antenna mounts for cars are classified into:
- Pin fasteners, which are usually installed in place above the glass of the door - a drain. During installation, you can scratch the glass, so you should be careful.
- Magnetic mounts are installed directly on the glass, usually inside the car. The most important aspect when attaching is preparing a place for mounting on the glass in order to install the antenna. For good processing, degreasers are best.
There is one more main feature of auto antennas that you should definitely recognize when purchasing. The confident reception zone is an important feature that the seller must tell the buyer. Perhaps, when selling a car antenna, the seller will talk about the brand of the product being sold, but the brand will not provide accurate reception data.
When a car drives around the city, the radio signal is received everywhere and in high quality, covering many channels. When the car leaves the city for about 70-80 km, you can still hear powerful radio stations. Further 130 km, perhaps closer, the channels of another city will catch.
Let's look at examples from some manufacturers.
Among Russian manufacturers there are high-quality auto antennas, for example “Triad”. They differ from foreign ones in the high-quality reception of MV 1-3. Internal such antennas always have a built-in amplifier, with improved UHF reception as well. There is some listening noise due to the ignition system, but these antennas have an advanced power filter. There are two antenna reception operating modes. The first mode is optimized for work in the city, against industrial interference. Another mode is intended for stronger reception, for trips out of town.
If we take “Scat” for example, these antennas also have their own properties. They have one of the easiest installations in a car, which is facilitated by the minimum configuration for sale. These antennas have a “telefunken” board, a knowledgeable person understands this brand and the quality of this device. Just like the triad, it has two reception modes - city and highway. The board in the device is designed to be moisture resistant, which means the operating time will be longer. For normal power supply of the car antenna, only 7 volts are required.
Foreign analogues also deserve the attention of car enthusiasts. If you take the Bosch antenna, it has a number of features. The active elements in it are transistors. There are original channels to improve CB and VHF. There is also protection from external factors, that is, it will work stably for many years.
Modern manufacturers are now already trying to make all antennas active and in-cabin. Combined antennas will take the place of their predecessors, and it is better to immediately buy more expensive useful ones than to buy them again later.
AUGRA installation options
Installation of automatic control gear must comply with the following requirements:
- ensuring reliable fastening of the radio receiver to the car, preventing movement when exposed to various mechanical loads (wind, bending, etc.);
- ensuring tight contact with the body, which acts as a mass, which significantly reduces the level of interference and improves signal quality.
All options for installing a receiving radio antenna come down to three main methods for fixing the automatic control gear on a vehicle:
- mortise mounting using a through hole drilled in the roof or other part of the body;
- magnetic mount using a magnetic antenna base;
- a pin mount, which is a mechanical fixation of the antenna rod for a car radio on a special clamp-type bracket.
APRA mortise mount
The mounting pin of the radio antenna base is inserted into the through hole, and a nut is screwed onto it from inside the passenger compartment. The advantages of the “mortise fastening” method include:
- the strength of the device, reducing the likelihood of it being stolen;
- stability of the operating parameters of the antenna-feeder system after installation.
Among the disadvantages, the following circumstance is noted: the edges of the drilled hole are centers of corrosion of the metal body, therefore it is recommended to use standard technological holes.
Important! In the fastening area, it is necessary to strip the metal of paint to ensure reliable conductive contact of the nut, as an element of the antenna, with the metal of the car body. On rice
Below is the antenna base with a pin and a hole in the roof of the car prepared for installing the AUGRA
In Fig. Below is an antenna base with a pin and a hole in the roof of the car prepared for installing the AUGRA.
Magnetic mount APRA
The magnetic fastening of the antenna is provided by magnets located at its base - the sole. Magnets can be purchased separately from the antenna device. The most popular magnets are with diameters from 90 to 170 mm. The stability of the automatic control gear directly depends on the diameter of the magnet.
The antenna is attached to the magnet through two types of connectors:
- The DV connector is adapted to most antenna systems and allows for adjustment of the installation angle;
- The PL connector is more reliable in terms of maintaining strict vertical installation.
In Fig. Magnetic antenna mounts with DV and PL bases are shown below.
The advantages of the magnetic fastening method include the following points:
- ease of installation or dismantling;
- relatively high stability of the automatic control gear is ensured while maintaining the optimal size of the magnetic base;
- capacitive coupling of the magnetic base with the metal of the body creates a kind of imitation of “mass” necessary for the operation of the receiving antenna;
- the ability to move when setting up equipment.
Disadvantages include:
- low strength of fixation on the body;
- ease of abduction;
- the possibility of shifting, which leads to the need for additional adjustments.