Home » Household appliances » Batteries » Step-by-step replacement of car batteries
The service life of a good car battery is 4-7 years. Naturally, it is possible to wear out the battery before the guaranteed period. But, we give you an example of operating a battery in ideal conditions. And we’ll tell you about the main manifestations of battery wear and talk about how they can be avoided. Wear usually occurs in the winter, this is caused by high loads and a decrease in battery power due to low temperatures. To avoid an unpleasant situation at the most crucial moment, you need to change it in a timely manner, without waiting for the battery to fail. We will tell you how to replace a car battery in this article.
How to replace a car battery
We immediately bring to your attention that this article is intended for beginners, and not for experienced drivers; it is for those who have recently gotten behind the wheel that this information will be useful. In general, the entire process of replacing the battery can be divided into two stages:
- Preparatory.
- Battery replacement.
We will focus on them in more detail so that you can step by step replace your car battery without any problems.
Initially, we recommend watching this video, it was prepared by real experts. If you look carefully, then you won’t need to read the entire article. But if you still have questions, you will find all the answers to them in this article.
Need for dismantling
This operation may be required not only due to battery failure. The reasons why a car owner has to remove the battery can be different. The most common among them are:
- Scheduled charging.
- During repair or maintenance, the battery blocks access to other components.
- Replacement of a failed battery.
- To carry out repair work, it is necessary to turn off the power to the on-board electrical network.
It is quite obvious that when replacing a worn-out battery, you cannot do without dismantling it. Even if the battery just needs to be charged, it is also worth removing it. If you have problems with this, then you need to at least disconnect the terminals. This is necessary to eliminate the negative impact on the on-board network.
Preparatory stage for replacing the battery
The first thing to do is find the battery. For inexperienced motorists, this may seem like a big problem. The bottom line is that the car battery is probably hidden under the seat, so that the naked eye would not notice it. It can also be in the engine compartment or trunk. Find out what kinds of batteries there are for mobile phones.
The layout is considered standard when the battery is installed between the engine compartment and the interior partition. Most often, this niche is covered with a plastic protective panel. If this is difficult for you, just use the instruction manual.
Secondly, we study the fasteners, there can be many different options here. We will tell you about the most used battery mounting options.
- The first is a special clamp at the bottom of the battery, which is a metal plate with a hole for a bolt.
- The second is a metal strip that is secured to the top of the battery using two threaded rods.
The third thing we have to do is check the terminal designs. In most cases, the terminals are located at the top of the battery. To disconnect the wires from them, we can also use two methods:
- The simplest is to unscrew the nut on the terminal,
- It is more difficult to rid the circuit of the spring clamp.
In the first case, it will be enough to use a socket wrench (10), in the second, you will have to use standard pliers.
Fourth step. Here we determine the main parameters of our battery. It is worth carefully inspecting the battery to determine where the markings are.
The final step is worth remembering, or better yet, write down the audio system code, which you will need to enter when connecting a new car battery. This code will help prevent theft of your CD player. Learn how to charge your battery without a charger.
Note! If you lose such a code, it can only be restored at a specialized service station. Several dozen people have already made a serious mistake at this stage.
LED indicator colors and their meaning
Depending on which application is sending you the notification message, the light may light up:
- Green.
- Yellow.
- Red.
- Orange.
- Violet.
- White.
This factor also depends on the battery charge. When you connect your phone to a power outlet, you will notice a light on the top, near the front camera, which will indicate the remaining battery:
- Red – charge less than 10%. If the phone does not turn on and the red indicator is on, then connect it to a power outlet to recharge.
- Flashing red - less than four percent.
- Green indicates almost full charge.
- Orange or yellow – 10-90%.
What is needed to replace the battery
In order to replace the battery you need a small set of tools and materials. Namely:
- Socket wrenches for 10, with the help of them we will remove the metal holder.
- Sandpaper or a special brush, which is designed to clean the terminals from oxide.
- A small rag to wipe the surface of the battery.
- Rubber gloves for safety while working. After all, the battery contains acid, which can significantly damage your health.
- An aerosol like “WD 40”, we use it if something won’t come off.
Security measures
To ensure that replacing the battery does not lead to damage to important components of the car or injury to the owner, you need to properly prepare for the job.
To do this, perform the following actions:
- Choose an open area. The place should be at a sufficient distance from other cars.
- Turn off the engine. The car is put on the handbrake. You cannot leave the key in the ignition.
- Purchase protective equipment. Gloves will help prevent electrolyte from coming into contact with your skin. If the battery case is damaged, acid may leak through the cracks. Upon contact with the substance, a person receives a chemical burn.
- Special tools are used for dismantling.
How to quickly replace a battery within 20 minutes
If you have all the necessary tools nearby, this will not be difficult and will take no more than 20 minutes of your precious time, let’s move on directly to replacing the battery:
Disconnect the negative terminal, then disconnect the positive wire
You need to unscrew the battery mounting nuts or loosen them in order to remove the battery. We take out the battery.
Be sure to clean all joint surfaces with a wire brush or sandpaper.
Now you need to perform all the steps in reverse order, excluding the previous point.
Trying to start the car, if the car starts, then you have completed the task
If you encounter any difficulties, do not try to resolve them yourself. It is possible that a dead battery may not be the only cause of problems with starting the engine. If you don't get the desired result, just contact a professional.
Installing a new battery
Once the old battery has been safely removed, you can begin installing the new battery.
- It is recommended to first inspect the battery area, removing dirt and debris with a soft cloth.
- Clean the inner surfaces of the wire tips with sandpaper - this will ensure good contact with the terminals. The wires can also be treated with a water-repellent liquid.
- The terminals themselves, which may have oxidized over a long period of time, are cleaned with a toothbrush dipped in a baking soda solution.
After this, you should install the new battery in place, fixing it and checking how tightly the battery fits into the groove. The battery terminals are connected in the same order: first “plus”, then “minus”. Finally, you can use lithium grease to prevent contact oxidation.
Polarity Determination
It is very important not to reverse the polarity when installing a new battery, otherwise you may encounter serious problems - malfunction of the on-board computer, short circuit and fire. To prevent such troubles from happening and replacing the battery is painless, it is important to be extremely careful
To prevent such troubles from happening and to replace the battery painlessly, it is important to be extremely careful. The most common layouts of current leads are direct and reverse polarity
The most common layouts of current leads are direct and reverse polarity.
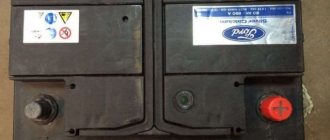
- Direct polarity of the battery is also called Russian. Indicated by the symbol “1”. With this type of polarity, the positive current lead is placed on the left, and the negative lead on the right.
- Reverse polarity is called European and is designated as “0”. In this case, the positive current terminal is on the right, and the negative one is on the left.
Some batteries may not have polarity markings. In this case, you can use one of the listed methods to make the correct determination.
Diameter of current leads. Measuring the diameter of the battery leads can help determine polarity
It is important to remember that positive findings in diameter are always larger than negative ones.
Raw potatoes. After cutting the potatoes in half, insert the bare wires from the battery into one of the parts at a distance of 5-10 mm from each other.
After a few minutes, a green circle will form around the positive terminal.
Tap water. Pour regular tap water into the mug. Attach two multi-colored wires to the battery terminals, and lower the bare ends of them into a container of water. As a result of electrolysis, increased gas formation will begin at the negative terminal.
How to tighten terminals correctly?
When tightening the terminals, do not use excessive force. A terminal that is too tightly tightened can lead to the appearance of microcracks around the current leads, through which the electrolyte will subsequently evaporate. This means that the terminals will face inevitable oxidation.
At the same time, simply throwing terminals onto the current terminals, as motorists sometimes do, is also not enough. In this case, the contact between the current lead and the terminal will be unreliable. This will lead to heating of poorly contacted elements. And when driving on an uneven road, a poorly tightened terminal can jump off and short to ground.
Therefore, the terminals should be tightened using only moderate amounts of force to ensure secure but not excessive tightening.
Watch this video on YouTube
Installing a new battery
After removing the worn-out battery, a new one is installed. A place is first prepared for it, from which the garbage is removed. The ends of the wires (their internal parts) are treated with sandpaper. This is necessary to achieve contact with the electrical terminals. It is advisable to treat the tips with a water-repellent liquid.
The terminals are cleaned with a toothbrush moistened with a soda solution. The battery is firmly inserted into the socket and secured. The positive wire is connected to the positive terminal, then the negative wire from the side of the car is connected to the negative terminal. The contacts can be lubricated with protective grease.
Polarity Determination
Incorrect connection of the battery can lead to a short circuit, failure of the on-board computer and fire of the vehicle. On Russian-made cars, straight polarity is used. The positive contact is on the left, the negative contact is on the right. European cars have reverse polarity with opposite conductor placement. Direct polarity is indicated on the battery case by the number 1, reverse polarity by the number 0.
Determining battery polarity.
Numbers indicating polarity are not always on the case. In this case, the polarity can be calculated by measuring the diameter of the wires. The diameter of the positive wire is always larger than the negative one.
There are other ways to determine polarity:
- using raw potatoes;
- tap water.
Raw potatoes are cut in half. Bare wires connected to the battery are stuck into one half. The distance between them is left 5-10 mm. After a few minutes, a green circle appears around the positive wire.
The negative wire will begin to emit strong gases.
To avoid polarity confusion, manufacturers often mark terminals with minus and plus signs. Sometimes they are marked with paint: red indicates a positive terminal, black or blue indicates a negative one.
How to tighten terminals correctly
Do not tighten the terminals too tightly. Cracks may appear around them, through which the electrolyte will begin to evaporate, which will lead to oxidation of the terminals. Some car owners simply throw wires over the terminals. In this case, the terminals get hot, the contact is not reliable, and on an uneven route the terminal may suddenly jump off and cause a short circuit. Tightening is done with moderate effort.
Replacing the battery is not very difficult. The main thing is to properly prepare for this operation. The used battery can be returned to a collection point.
Installing a new battery
The process of installing a new battery includes the following steps:
- Inspection of the landing nest. If there is dust and dirt, clean the area with a soft cloth.
- Stripping wires. The tips are treated with sandpaper. This improves the contact of cables with current terminals. The wires are coated with a waterproof compound.
- Cleaning the terminals. Over time, elements oxidize. You can remove remaining electrolyte with a baking soda solution, which is applied with a toothbrush.
- Battery installation. The device is fixed in the mounting socket and the tight fit of the housing to the casing is checked. First connect the positive terminal, then the negative terminal. The contacts are treated with lithium grease.
Polarity Determination
In the first case, the positive terminal is on the left, the negative terminal on the right. The battery is marked with the number 1. Batteries with reverse polarity are marked with the symbol 0. The positive terminal is located on the right, the negative terminal on the left.
In the absence of appropriate markings, the following methods can be used:
- Measuring the diameter of current leads. The positive pole is large.
- Using potatoes. The fresh vegetable is cut, and the stripped battery wires are inserted into one half. After a few minutes, a dark circle appears near the positive terminal.
- Use of water. The liquid is poured into a glass, wires of different colors are attached to the battery terminals, and the stripped ends are immersed in water. Electrolysis at the negative contact is accompanied by the formation of gas bubbles.
How to tighten terminals correctly
Do not tighten the terminals too much. The current leads are covered with cracks through which electrolyte is released. This means that the contacts will oxidize and conduct current poorly. You can’t just throw on the terminals either: the connection becomes unreliable, and electronic devices will not receive enough power.
Poorly connected elements will become hot. When exposed to vibration, the terminal falls off and causes a short circuit. When tightening, it is recommended to use moderate force.
How to change the battery
Below are simple step-by-step instructions:
First, turn off the phone. Using a pentalob screwdriver, unscrew two screws in sequence, which are located to the right and left in relation to the charging connector.
Attach a suction cup to the display and pull it towards you, prying it up with a spatula. There are latches on the side ends and bottom; they need to be forced to “click” as carefully as possible. During this process, we do not touch the end at the top for now; we disconnect it last, so as not to damage the other latches. After all the latches have been safely removed, you can detach the screen - just at the top end, since this is where there are elements of the phone that can be easily damaged. Now we look up, to the right of the battery. There you need to use a Phillips screwdriver to unscrew the metal gasket that holds the cables. You need to carefully lift the gasket and disconnect all three cables in series
Proceed with caution. Damage to the cables will result in the phone simply not turning on after replacing the battery.
We remove the screen and put it aside for now.
After disconnecting all the cables, remove the old battery from the compartment. Removing it may not seem so easy due to the secure fixation with glue
Carefully pry off the battery using a plastic spatula. Once the old power supply is removed, the battery compartment can be cleaned of any old adhesive.
Next, you need to insert a new battery into the compartment and do everything in the reverse order: arrange the three cables in the required order, connect the case and the screen using latches and screw in the detachable screws. After replacing the battery, turn on the gadget, and if the new battery is not defective, the phone should turn on and work as always. The new battery is charged as usual. Read more about charging lithium-ion batteries →
All “fifth” gadgets are similar in design, and this scheme can be used both for the iPhone 5 and iPhone 5 C and 5 S.
As you can see, replacing the battery on iPhone 5 is not that difficult. Especially if you have the desire and incentive to do it yourself, without resorting to the help of a service center. Since the article consistently reflects all the steps of the process and talks about which tools are best to use, you can decide for yourself whether you are capable of such work. If you are interested in electronics and want to learn how to make things yourself, you will find the process not only educational, but also interesting.
How to save settings
There are many ways to avoid messing up your car's electronics.
Manufacturers of automobile accessories quickly took stock of the situation. Systems have appeared that allow electronics to “not die” when the battery is disconnected. They are used through the cigarette lighter socket, are compact, lightweight, and easy to use. Installing such a gadget will not allow you to start the engine, but you won’t have to worry about the performance of the electronics. True, such assistants have one serious drawback - their cost.
You can use another battery - small but powerful. It is also connected to the car's cigarette lighter. But this option is not cheap either.
Experienced car enthusiasts found a budget solution to the problem. To the wire from any device that previously operated from the cigarette lighter, you need to attach a Krona battery and insert it into the cigarette lighter socket. The electronics will remain operational for a couple of days. This time is enough to replace the old battery with a new one.
Another popular method is to use wires for “lighting” and a donor car. The cigarette lighter wires are secured above the terminals of the battery to be removed, after which you can safely remove the battery.
Replacing the battery
July 12, 2011
All car owners sooner or later face the problem of a discharged battery (hereinafter referred to as the battery). Agree that it is not pleasant, for example, to go out into the cold in winter and find that the engine does not start, because... There is not enough voltage to crank the starter. Some people use jump-start chargers, others take the battery home for stationary charging. All these actions take time, and are not very beneficial for the battery, because... After the first complete discharge of the battery, it gradually loses its capacity. In any case, either partial or complete dismantling of the battery is required. True, not many people know how to disassemble this engine compartment assembly, especially if it is a foreign car.
I propose to consider the removal of the battery using the example of a Peugeot 308 car.
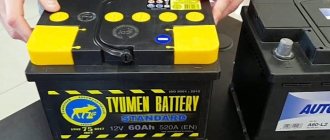
Materials used: Battery: BOSCH S5 005 Silver Plus Capacity: 63 A/h Polarity: reverse Size: 242x175x190 mm Cold cranking current: 610 A
Tools used:1. Ratchet wrench 3/8″ 2. Socket head 6g. 3/8″ 10mm 3. Extension 3/8″ length 250 mm 4. Flat screwdriver
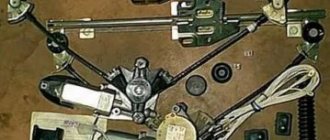
The process itself is not very complicated, despite the apparent clutter of devices. We dismantle all the overhead plastic casings according to the diagram:
Remove the cover of the power fuse box by unbending the 3 latches around the perimeter.
We remove the power fuse block, separating it from the battery casing.
Disconnect the “+” terminal from the battery by lifting the clamp up.
Remove the cover of the intake tract resonator, release the throttle pipe clamp and move the resonator towards the engine.
We directly remove the battery protective casing. We take our hands on both sides of the casing and pull it towards us and slightly upward, in a direction of approximately 45 degrees to the horizontal.
Disconnect the “–” terminal from the battery by lifting the clamp up.
To dismantle the battery, you need to unscrew the retaining plate with a 10mm nut.
We remove the discharged battery.
We install a new battery and mounting plate.
Connect the negative terminal of the battery.
We install the casing in place, make sure that all the casing guides are in place, and close the latches until they click.
We install the power fuse block and close it with a protective cover.
Connect the positive terminal of the battery.
We install the intake tract resonator in place and tighten the throttle pipe clamp.
We check that everything is installed and secured, and start the engine.
We check the indicators on the instrument panel. It may be necessary to reset the clock on the on-board computer. There are also cases when it was necessary to re-register the remote unlocking control (hereinafter referred to as RE) of the car. If after replacing the battery it is impossible to open the car using the remote control, perform the following procedure.
To initialize the remote control DO:
- Turn off the ignition
- Turn the key to position 2 (middle vertical position)
- Immediately press the lock button for a few seconds
- Turn off the ignition and remove the key from the ignition
The article was published based on materials from Amper (www.308-club.ru)
Categories: Electrics Peugeot, battery, electrics
Battery and ECU
For any machines and mechanisms there is a “golden rule”, which sounds like this: before removing the battery, be sure to stop the engine! Unfortunately, not all car owners understand this. The result is burnout of individual machine components, or complete failure of all electrical and electronics. First of all, this concerns the ECU.
Important! Always turn off the engine before removing the battery!
The ECU is responsible for controlling all electrical and electronic components in the car. This is the “brain” of the car. Different brands of cars may have one or more ECUs. They can be responsible for both all electrical control and individual modules and components.
It happens that the control unit burns out or stops working correctly. The car stalls and comes to a complete stop. The reason for the ECU failure may lie in an incorrect battery removal algorithm.
To remove the battery without damaging the ECU, you need to understand whether these components are connected to each other. Let's consider three categories of passenger cars in which removing the battery in one way or another affects the operation of the main control unit:
- Expensive luxury foreign cars. This includes cars such as: Infinity, Lexus, BMW and other executive or luxury cars. In these cars, removing the battery yourself can radically affect the operation of all vehicle components. Manufacturers themselves warn car owners that replacing the battery on their cars can only be done at an official service center. It is worth listening to their instructions.
- Cars with protection when removing the battery. Some cars have a special toggle switch that is responsible for safely removing the battery. Before replacing the battery, you must turn on this switch and only then proceed to remove the battery.
- The rest of the cars. Most cars are not equipped with protection when removing the battery. However, they do not have problems with the ECU when simply removing the battery. The maximum that can happen is that the clock on the dashboard is reset, and the radio station and radio equalizer settings are reset.
Important! In expensive cars, replacing the battery yourself removes the car from warranty service. This condition is prescribed by both dealers and manufacturers themselves.
Any battery must be removed from the car in stages. This will avoid breakdowns and also preserve the health of the car owner. Let's consider the algorithm of actions in more detail.