Replacing a windshield with your own hands will be within the capabilities of the average car enthusiast if all operations are carried out carefully. But many motorists believe that replacing a windshield can only be done at a specialized service station equipped with professional equipment.
There are many myths and fears regarding the windshield removal and installation procedure. Therefore, car owners rarely dare to replace or reinstall it themselves. However, if all operations are carried out consistently, it will be possible to carry out the replacement efficiently, quickly and with your own hands.
Why do you need to replace your windshield?
There are two main reasons that lead to the need to replace your windshield.
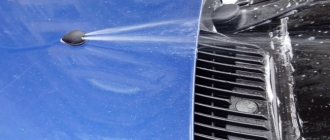
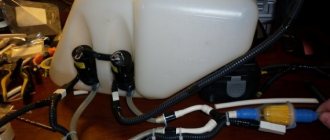
- Penetration of moisture from under the seal. Leakage between the glass and the body occurs due to the presence of an untaped area. If there is no warranty, you will have to carry out the repairs yourself. Sometimes it is possible to eliminate a leak when a hole is detected by filling the gap with sealant. If you cannot get rid of the leak, you will have to completely re-glue the glass.
- Damage to the windshield. Many motorists have encountered problems such as cracks and chips. They gradually grow, forming a whole “web” on the windshield. In this case, you will not be able to pass the state technical inspection, and the operation of the vehicle will be unsafe. If there is minor damage, chips and cracks can be repaired, otherwise the glass must be replaced.
Below we will tell you what tools and materials you will need for replacement, how to remove the old windshield and install a new one in its place. And at the end of this article, watch detailed video instructions on how to replace a windshield with your own hands according to all the rules.
Side windows of GAZelle Next
In addition to the windshield glass in the GAZelle Next car, the side windows are also subject to replacement. This is advisable if the elements have been knocked out, cracked or have lost their original properties during operation. The replacement procedure depends on what glass is being replaced:
If you take a careful approach to replacing your windshield yourself, you will definitely be pleased with the results of the work. Strictly follow the instructions and recommendations provided so that the result meets your expectations. If you are not confident in your abilities, contact a workshop.
Source
Materials and tools for windshield replacement
Before you start replacing your windshield, you need to stock up on the following materials and tools:
- metal string with 2 handles;
- awl or sharpened wire;
- suction cups for holding glass;
- screwdrivers;
- spanners;
- chisel;
- masking tape;
- glue-sealant for glass;
- gun for applying sealant;
- solvent, primer;
- tampons and gloves.
To replace glass, you will need a closed and dry room (garage or car bay). The car must spend at least one day in it.
To do the job efficiently and safely, you will need one or two assistants. Before starting work, the car should be washed (how to properly wash a car), especially in the area of the windshield.
What types of car glass are there?
To choose the best glass for a Gazelle, you need to have a general idea of what manufacturers can offer.
Manufacturers of automobile glass, trying to keep up with the times, are constantly improving both the production technology itself, paying increasing attention to the quality of the product, and the technology of additional functions, including modern capabilities that are in demand by car owners.
How to remove an old windshield
A clean car must first be placed in a garage or box on a flat surface. The procedure for removing the windshield is as follows:
- Using a flat-head screwdriver, you need to remove the rubber seal located on the outside of the car.
- Wipers, plastic protection, and moldings are dismantled.
- In the cabin, the dashboard and front seats should be covered with film to protect them from dust and dirt.
- The seal is removed from the interior side, and the front pillar cards are pryed off in the area of the latches and dismantled.
- Now you need to unscrew the screws and remove the sun visors.
- The existing sensors and wires that go to the windshield must be disconnected and removed.
- An awl or sharpened wire is used to pierce the sealed seam (old glue).
- A faceted string is inserted into the puncture, after which handles are attached to its edges. It is more convenient to start cutting the old windshield from the upper left corner.
- It is more convenient to carry out the work of cutting the adhesive-sealant together. One is conveniently located inside the cabin, and the second is on the outside of the car. The principle of operation is simple: first, one person pulls the string towards himself, and the other holds his section taut. Then the string moves in the opposite direction. In this case, the string shifts along the windshield.
- In those places of the body where the string can touch the panel or trim, a piece of metal sheet should be placed.
- When a cut has been made along the entire perimeter, the windshield is removed from the car using suction cups.
- Now you need to clean the old glue from the body and glass (if it will be installed again). This requires a chisel and solvent.
Windshield Installation
Installation of a new windshield is carried out in the following sequence:
- Before applying glue to the surface of the body and glass, it is necessary to treat the contour with primer. It will improve the adhesion of the surface to the glue.
- Before applying the glue, it is advisable to warm the tube or container with a hairdryer or warm water, then it will be more convenient to apply the sealant to the base.
- A clean rubber seal is mounted on the glass.
- The dispenser tube is trimmed at approximately a height of 20 mm (width 5 mm).
- The glue can be applied both to the contour of the windshield and to the surface of the body. Most specialists treat glass with sealant. But in the absence of suction cups, it is better to glue the perimeter of the body. It is very important that the sealant strip is continuous. The only joint is made at the bottom center.
- After applying the glue, the windshield must be carefully placed in the opening. After placing the glass in place, lightly press on it - then it will fit tightly to the body, and the sealant will fill all the voids.
- To prevent the glass from accidentally moving, it should be secured with several strips of tape.
- After replacing the windshield, you can install plastic protection, side moldings and wipers.
- Do not slam the doors, trunk or hood to avoid creating vibrations and dislodging the glass.
- In this position, the car must be left alone for a day. It should be remembered that the higher the air temperature in the garage or box, the faster the glue will polymerize. If the room temperature is below 0 degrees, the sealant will not harden.
The next day, the tape is removed and the windshield and adjacent areas of the body are washed. At this point, you can check the tightness of the resulting seam. If a leak is detected, then you should additionally glue both the inner perimeter and the outer side of the seam. When 100% tightness is achieved, the car can be completely assembled.
Video instruction: how to replace a windshield with your own hands
To glue glass, use a special set and a “gun” device for squeezing glue out of the tube.
You can do without a device by squeezing out the glue with the handle of a hammer.
We do the work together.
We remove the inner trim of the windshield pillars and the lining of the outer front panel.
Using a screwdriver, unscrew the four screws securing the outer trim of the windshield pillar
Remove the seal from the top edge of the glass.
Use an awl or thick needle to pierce the glue seam.
Pass a steel string through the puncture
We attach handles from scrap materials to its ends.
We stretch the string and, working with it like a two-handed saw, cut the adhesive seam along the entire perimeter of the glass.
We cut carefully, without damaging the paint on the body, the headliner and the instrument panel.
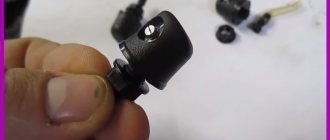
There are two rubber stops located under the lower edge of the windshield.
They provide an even gap between the glass and the body.
We save them when removing the glass.
Instead of a string, you can use wire from a semi-automatic welding machine.
Having removed the windshield, use a sharp knife to cut off the excess of the old adhesive seam, leaving a layer 1–2 mm thick.
To glue new glass, we use a special set and a “gun” device for squeezing glue out of the tube.
If there is no device, then the glue can be squeezed out, for example, with the handle of a hammer.
We cut off the tip of the tube nozzle and make an angular cut, as shown in the figure.
We put a seal on the upper edge of the glass, and two stops on the lower edge.
Degrease the edge of the glass on the side that will be adjacent to the opening, and the remaining adhesive layer on the window opening
We apply primer to the edge of the glass along its perimeter and to the body opening.
Squeeze the glue out of the tube along the edge of the glass, stepping back 6–7 mm from the edge
Apply glue along the entire perimeter with a continuous roller 10–12 mm high
We apply the glass to the window opening, ensuring that the gaps are even with the mating body panels and that the seal is properly attached to the body panels.
Having opened the doors, we wrap a cloth tape or cord several times around the cabin pillars.
We place two tire tubes under the tape on both sides of the glass.
If the tape is thin, we place wide wooden strips under it on top of the chambers.
We inflate the chambers so that the glass is pressed tightly against the opening.
Polymerization of the glue continues for several hours (see instructions included with the glue).
During this time, the car must not be moved, the door windows closed or slammed, as any increase in air pressure inside the car may cause the glass to break off.
After waiting at least 6 hours, we remove the cameras and ropes.
Installation of a new part
Installing a windshield on a GAZelle Next is quite simple, especially if you work with a partner, know the installation technology and have the right tool at hand. Installation is performed in 5 steps:
- Thoroughly clean the new element and the body for installation, cover the perimeter with a layer of soil.
- Apply primer to the edge of the glass sheet and put on the rubber seal.
- Leave a gap of 6 mm from the edge of the glass, apply glue along the perimeter of the canvas.
- Carefully place the canvas against the cabin opening, making sure that it fits evenly.
- Secure the element with strips of tape, or better yet, press down with rubber bands.
After installing the new glass sheet, wait until the glue has completely cured. The time required for polymerization is written in the instructions for it. While the glue is polymerizing, you cannot operate the GAZelle Next - start, drive, open and close the doors. Even slight vibrations and air currents can change the position of the glass.
When at least 24 hours have passed since the part was replaced, make sure that the adhesive seam is 100% sealed. To do this, thoroughly wash the windshield and the areas of the cabin in contact with it. If drops of water are found in the interior after washing, it means the seal of the seam is broken. It is not necessary to repeat the replacement of the part - just additionally glue the seam.
What is polymerization?
In the context of the topic under consideration, polymerization is the hardening of glue after contact with air. The glue gradually hardens, bonding the surfaces of the glass and the body of the GAZelle Next. The exact polymerization time depends on the composition of the adhesive. The average values are:
- hardening after 1.5 – 3 hours;
- polymerization after 24 hours;
- crystallization after 72 hours.
The time required for the sealant to harden largely depends on the temperature and humidity of the air. To ensure that the composition hardens as quickly as possible, replace the canvas in a dry and warm room. Glue hardens slowest in cold and damp environments.
You can start using your car carefully within a day after gluing the glass into the cabin. Protect the body from strong vibrations and air currents until the glue crystallization process is completed. Otherwise, you will have to reinstall the glass structure again.
Dismantling
1. Wash the windshield thoroughly.
2. Leave the car in a dry, ventilated area for at least a day.
3. It is recommended to cover the interior with rags or polyethylene to avoid contamination.
4. Take a flathead screwdriver and carefully remove the outer seal.
5. Remove the protection and wipers in the same way.
6. From the inside of the car, remove the rest of the seal.
7. Remove the A-pillar cards from the interior.
8. Next, remove the sun visors by unscrewing the screws.
9. Carefully work through the wiring: it must be disconnected and removed away from the work area.
10. Puncture the sealant with a sharp thin object (for example, an awl or wire), then insert a faceted string into the resulting hole.
11. It is recommended that two people perform the cut: one works inside the car, the other works outside the car. Move the string, starting from the top left edge, along the entire perimeter of the glass.
12. Once the sealant is cut, use suction cups to remove the damaged glass.