Stages of replacing the coolant Hyundai Accent
Since there is no drain plug on the engine, it is best to replace it with a complete flush of the cooling system. This will allow you to completely flush out the old antifreeze from the system and replace it with new one.
The best option for replacement would be to have a hole or overpass for more convenient access to the drain holes. Instructions for replacing the coolant will be useful for owners of the following Hyundai models:
- Hyundai Accent Restyling;
- Hyundai Accent Tagaz;
- Hyundai Verna;
- Hyundai Excel;
- Hyundai Pony.
Popular engines are petrol with a volume of 1.5 and 1.3 liters, as well as a diesel version with a 1.5 liter engine. There are also models with other displacements, but more often they were sold in other markets.
Coolant drain
All work should be carried out when the engine has cooled to 50°C or lower, so there is time for preparatory work. It is necessary to remove the engine protection, as well as the protective plastic, which is secured with 5 10mm head bolts, as well as 2 plastic pistons.
Next we move on to the main procedure:
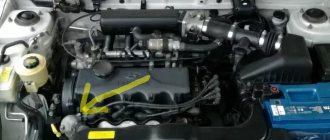
- We find a plastic drain plug at the bottom of the radiator and unscrew it, having previously placed a container under this place into which the old antifreeze will drain (Fig. 1).
Fig.1 Drain plug on the radiator - Open the radiator cap to speed up the draining process (Fig. 2).
Fig.2 Radiator cap and expansion tank - We remove the expansion tank for flushing and draining, since sediment often forms at its bottom. Which can sometimes only be removed mechanically, for example using a brush.
- Since there is no drain plug on the block head, we will drain it from the hose that goes from the thermostat to the pump. Removing the clamp with pliers is not convenient at all. Therefore, we select the correct key, unclench the clamp and tighten the pipe (Fig. 3).
Fig.3 Unclamp the clamp using a key
In this way, we managed to completely drain the antifreeze from the Hyundai Accent, so we can collect everything and put it in its place. After which you can proceed to the next stage of replacement.
Flushing the cooling system
Before flushing, we check that all the pipes are in place, and that the drain valve is closed, and proceed directly to the procedure itself:
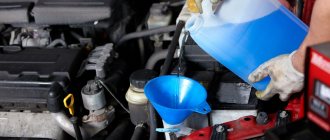
- Fill the radiator with distilled water to the top and close the lid, also fill the expansion tank halfway.
- We start the car and wait until it warms up completely, until about the second time the fan turns on. In this case, you can periodically add gas.
- We turn off the car, wait until the engine cools down, and drain the water.
- We repeat the procedure until the water after rinsing is clear.
Usually clear water comes out after 2-5 runs. Each case is individual and depends on many factors.
After a well-carried out flush, the antifreeze on our Accent will fully perform its function until the next service replacement. If this procedure is not followed, the service life may be sharply reduced, since plaque and decomposed additives of the old coolant remain in the system.
Filling without air pockets
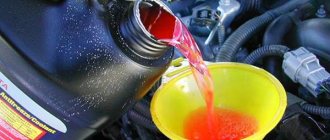
If the replacement is carried out with a complete flushing of the system, it is recommended to use a concentrate as a new fluid. Since distilled water remains in the system, in a volume of 1-1.5 liters. The concentrate must be diluted taking into account this volume.
Now we begin to pour new antifreeze into the radiator to the level of the bypass tube, as well as to the middle of the expansion tank. After this, close the covers and start the engine. We wait until it warms up completely, sometimes increasing the speed.
That's it, now we wait for the engine to cool down, check the fluid level in the radiator and tank. If necessary, make gravy. Fill the tank to the letter F.
With this approach, no air lock should form in the system. But if it does appear and the engine overheats because of this, you need to perform the following steps. We put the car on a hill so that the front is raised up.
We start the engine, warm it up with a constant increase in speed to 2.5-3 thousand. When doing this, we look at the temperature readings; we must not allow the engine to overheat. Then we turn off the engine and open the radiator cap a little so that it does not come out of gear, but the air can escape.
Usually after this you can get rid of the air lock. But sometimes this procedure must be repeated 2-3 times.
Cooling system
Coolant
The engine cooling system is filled at the factory with coolant consisting of 50% water and 50% low-temperature concentrate (low-temperature composition based on ethylene glycol with anti-corrosion additives). This mixture not only ensures the functionality of the engine cooling system down to a temperature of –36 °C, but also protects parts, especially those made of light alloys, from corrosion. In addition, it prevents the formation of scale and significantly increases the boiling point of the coolant.
Therefore, the content of low-temperature concentrate in the warm season and in countries with hot climates cannot be reduced by adding water. The share of low-temperature concentrate in the solution must be at least 40%.
In a cold climate zone, you can increase the concentrate content, but not more than 60% (the freezing temperature of the coolant in this case will be about –40 ° C), since with a higher content of low-temperature concentrate the freezing temperature will begin to increase and the heat capacity and thermal conductivity of the coolant will deteriorate .
When checking the coolant level or density, evaluate its condition. The liquid must be clean and transparent. If the coolant is brown or rust-colored, drain the coolant, flush the cooling system, and refill with fresh coolant.
It is necessary to replace the coolant after carrying out any work on the elements of the cooling system and draining the coolant. If the cylinder head, head gaskets, radiator or oil heat exchanger were replaced during the repair, fresh coolant must be added to the cooling system. This is due to the fact that the anti-corrosion additive in the coolant precipitates during engine operation and creates anti-corrosion protection. In used coolant, anti-corrosion additives are less active and do not form a protective layer on newly installed parts.
Checking the specific gravity of the coolant
1. Using a hydrometer, measure the specific gravity of the coolant.
2. Measure the coolant temperature and determine the antifreeze concentration from the relationship between specific gravity and temperature (Table 2.11).
Table 2.11
Relationship between antifreeze concentration and coolant specific gravity
| Specific density, g/cm3, at coolant temperature, oC | Temperature freezing, °C | Safe working temperature, оС | Antifreeze concentration (specific volume), % | ||||
| 10 | 20 | 30 | 40 | 50 | |||
| 1,054 | 1,050 | 1,046 | 1,042 | 1,036 | -16 | -11 | 30 |
| 1,063 | 1,058 | 1,054 | 1,049 | 1,044 | -20 | -15 | 35 |
| 1,071 | 1,067 | 1,062 | 1,057 | 1,052 | -25 | -20 | 40 |
| 1,079 | 1,074 | 1,069 | 1,064 | 1,058 | -30 | -25 | 45 |
| 1,087 | 1,082 | 1,076 | 1,070 | 1,064 | -36 | -31 | 50 |
| 1,095 | 1,090 | 1,084 | 1,077 | 1,070 | -42 | -37 | 55 |
| 1,103 | 1,098 | 1,092 | 1,084 | 1,076 | -50 | -45 | 60 |
For example, the safe operating temperature is -5 °C when the measured specific gravity is 1.058 g/cm3 at a coolant temperature of 20 °C.
| WARNINGS If the concentration of antifreeze in the coolant is less than 30%, its anti-corrosion properties will significantly deteriorate. In addition, if the concentration is more than 60%, the properties of both antifreeze and coolant will deteriorate, which negatively affects the engine. Therefore, make sure that the concentration level is within acceptable limits. Do not mix coolants of different brands. |
Checking the tightness of the cooling system
1. Wait until the radiator cools down to less than 38 °C and remove the radiator cap.
2. Make sure the coolant level reaches the filler neck.
3. Place a pressure gauge on the radiator filler neck and apply a pressure of 130.3 kPa. Maintain this pressure for 2 minutes, checking the radiator, hoses and their connections for leaks.
| WARNINGS The coolant may be very hot. In this case, do not open the radiator cap, otherwise hot coolant may splash out and cause burns. Allow the vehicle to cool before servicing the cooling system. Make sure that you have completely removed any moisture from the parts being tested. When removing the device to create and measure pressure, be careful not to spill coolant from it. Be careful when installing and removing the device and testing so as not to deform the radiator filler neck. |
4. If there is a leak, repair or replace the appropriate part.
A significant decrease in the coolant level most likely indicates a leak in the seals.
In a sealed cooling system, the coolant level can drop when the engine overheats and the coolant boils and rushes out.
If there is a large loss of coolant, topping up should only be done when the engine is cool to avoid engine damage.
Cooling system pipes and hoses
| Rice. 2.109. Location of tubes and hoses of the SOHC engine cooling system: 1 – coolant outlet; 2 – O-ring; 3 – bypass hose; 4 – bolt, 10–15 Nm; 5 – heater hose; 6 – coolant hose |
The location of pipes and hoses for SOHC and DOHC engines is shown in
.
| Rice. 2.110. Location of pipes and hoses of the DOHC engine cooling system: 1 – coolant inlet pipe; 2 – coolant inlet pipe |
Examination
1. Leaks in the cooling system are usually detected by a white or rust-colored coating in the area of the leak.
2. Carefully check the radiator and coolant hoses along their entire length. Replace hoses that are cracked, torn or showing signs of aging. Cracks are easier to detect if you squeeze the hose. Pay special attention to the clamps securing the hoses to the cooling system elements. Clamps that are too tight can cause the hose to rupture or puncture, resulting in leaks in the cooling system. Inspect all hoses and their connections. If leaks are found, replace them or the gasket.
3. Because metal parts contract when cold and rubber hoses become looser, any leaks will become more noticeable when the engine is cold.
Installation
1. Install the O-ring into the groove at the ends of the coolant inlet pipe, after wetting it with coolant.
2. Make sure there is a yellow mark on the coolant inlet hose, and while holding the mark towards the inlet pipe, connect the hose to the pipe at the end of the yellow mark.
| WARNINGS Do not apply oil to the coolant pipe O-ring. Make sure that the connections of the cooling system pipes are not exposed to sand, dust, etc. Insert the coolant pipe completely into the cylinder block. Do not reuse the O-ring, replace it with a new one. |
Water pump for SOHC engines
Removal
1. Drain the coolant and disconnect the coolant outlet hose from the water pump.
2. Remove the drive belt, unscrew the bolts and remove the water pump pulley.
3. Unscrew the bolts, remove the casings and the idler pulley of the timing belt.
4. Unscrew the water pump mounting bolts and remove the generator support.
| Rice. 2.111. Water pump for SOHC engines: 1 – water pump; 2 – water pump pulley mounting bolt, 8–10 Nm; 3 – water pump mounting bolt, 12–15 Nm; 4 – gasket |
5. Remove the water pump from the cylinder block ().
Examination
1. Check each part for cracks, damage or wear and replace the water pump if necessary.
2. Check the bearing for damage, abnormal noise and slow rotation, and replace the water pump if necessary.
3. Check for coolant leaks. If coolant leaks from the hole located at the bottom of the pump shaft hub, the gasket is damaged. In this case, replace the water pump.
Installation
1. Clean the mating surfaces of the water pump housing and cylinder block.
| Rice. 2.112. Location of the water pump mounting bolts for SOHC engines: 1 – bolt 60 mm long, 12–15 Nm; 2 – bolts 28 mm long, 12–15 Nm |
2. Install the water pump with a new gasket into the cylinder block and secure with bolts, tightening them to the required torque. Keep in mind that the water pump mounting bolts are of different lengths ().
The tightening torque of the water pump mounting bolts is 12–15 Nm.
3. Install the timing belt idler pulley and the drive belt and adjust the tension of the latter.
4. Install the timing belt covers and secure them with bolts.
5. Install the water pump pulley and its drive belt, adjust the belt tension.
6. Fill the cooling system with coolant.
7. Start the engine and check the cooling system for leaks.
Water pump for DOHC engines
Removal
1. Drain the coolant and disconnect the coolant outlet hose from the water pump.
2. Remove the drive belt, unscrew the bolts and remove the water pump pulley.
3. Unscrew the bolts, remove the casings and the idler pulley of the timing belt.
4. Unscrew the water pump mounting bolts and remove the generator support.
| Rice. 2.113. Water pump for DOHC engines: 1 – water pump pulley mounting bolt, 8–10 Nm; 2 – water pump mounting bolt, 12–15 Nm; 3 – generator support; 4 – water pump; 5 – gasket |
5. Remove the water pump from the cylinder block ().
Examination
1. Check each part for cracks, damage or wear and replace the water pump if necessary.
2. Check the bearing for damage, abnormal noise and slow rotation, replace the water pump if necessary.
3. Check for coolant leaks. If coolant leaks from the hole located at the bottom of the pump shaft hub, the gasket is damaged. In this case, replace the water pump.
Installation
1. Clean the mating surfaces of the water pump housing and cylinder block.
2. Install the water pump with a new gasket into the cylinder block and secure with bolts, tightening them to a torque of 12–15 Nm.
3. Install the timing belt idler pulley, drive belt and adjust its tension.
4. Install the timing belt covers and secure them with bolts.
5. Install the water pump pulley and drive belt, and then adjust the belt tension.
6. Fill the cooling system with clean coolant.
7. Start the engine and check the cooling system for leaks.
Radiator
Removal
1. Disconnect the connector from the radiator fan motor.
2. Set the temperature control in the car interior to the “HOT” position.
3. To drain the coolant, loosen the radiator drain plug.
| Rice. 2.114. Radiator: 1 – radiator cap; 2 – upper support; 3 – lower radiator hose; 4 – lower support; 5 – heat exchanger hose (only in cars with automatic transmission); 6 – upper radiator hose; 7 – expansion tank; 8 – bypass tube |
4. Disconnect the upper and lower radiator hoses and bypass tube ().
5. If the car is equipped with an automatic transmission, disconnect the hoses going to the heat exchanger from the gearbox.
| WARNING Plug the heat exchanger hoses and transmission pipes to prevent fluid from spilling and dirt from getting into it. |
6. Remove the radiator mounting bolts.
7. Remove the radiator with casing and fan motor.
8. Unscrew the bolts and remove the fan from the radiator.
Examination
1. Check the radiator fins for bending, damage, or blockage.
2. Check the radiator for corrosion, damage, and scale.
3. Check the radiator hoses for cracks, damage or wear.
4. Check if the expansion tank is damaged.
5. Check the radiator cap spring for damage.
6. Using a device, check the opening pressure of the radiator cap valve.
7. Check the radiator cap gasket for cracks or damage.
8. Make sure that the radiator fan motor rotates when voltage is applied to the contacts of its connector directly from the battery terminals.
9. Make sure there is no extraneous noise when the fan motor is running.
Installation
1. Install the radiator and connect the cooling system hoses to it. Fill the cooling system with fresh coolant.
2. Start the engine and let it idle until the thermostat valve opens; then stop the engine.
3. Remove the radiator cap and add coolant to the level of the radiator neck, then fill the expansion tank to the top.
4. Make sure there are no leaks from the radiator, hoses or their connections.
Thermostat for SOHC engines
The cooling system thermostat accelerates engine warm-up and maintains the required thermal conditions. When starting a cold engine, coolant circulates around the cylinder block and cylinder head. Warm coolant flows through the heater core to the water pump. The flow of coolant through the radiator is closed, which is ensured by a closed thermostat. When the coolant reaches a certain temperature, the thermostat opens and hot coolant flows through the hose to the radiator. As the coolant passes through the radiator, it is cooled by the oncoming air flow.
Removal and inspection
1. Drain the coolant to or below the thermostat level.
| Rice. 2.115. Thermostat for SOHC engines: 1 – bolt, 15–20 Nm; 2 – coolant outlet fitting; 3 – gasket; 4 – thermostat; 5 – thermostat casing |
2. Unscrew the bolts and remove the coolant outlet fitting and gasket ().
3. Remove the thermostat.
| Rice. 2.116. Using a thermometer (1) and a container (2) of water to check the opening temperature of the thermostat valve |
4. Place the thermostat and thermometer in a transparent vessel with water (). When heating water, check the opening temperature of the thermostat valve and, if necessary, replace it.
Installation
1. Make sure that the thermostat flange is correctly installed in the thermostat housing fitting. If the thermostat is not installed correctly, the bottom of the thermostat will touch the fin inside the intake manifold, causing the thermostat to malfunction.
2. Install the coolant outlet fitting with a new gasket and secure it with bolts.
3. Fill the cooling system with clean coolant.
Thermostat for DOHC engines
Removal and inspection
1. Drain the coolant to or below the thermostat level.
| Rice. 2.117. DOHC engine thermostat: 1 – coolant temperature sensor; 2 – bolt, 15–20 Nm; 3 – coolant inlet pipe; 4 – gasket; 5 – thermostat; 6 – thermostat casing; 7 – gasket |
2. Unscrew the bolts and remove the coolant outlet fitting and gasket ().
3. Remove the thermostat.
4. Place the thermostat and thermometer in a transparent vessel with water (see). When heating water, check the opening temperature of the thermostat valve and, if necessary, replace it.
The valve opening temperature is 82 °C.
The temperature at which the valve is fully opened is 95 °C.
The valve stroke when fully open is at least 8 mm.
Installation
1. Make sure that the thermostat flange is correctly installed in the thermostat housing fitting.
2. Install the coolant inlet pipe with a new gasket and secure it with bolts.
3. Fill the cooling system with clean coolant.
Radiator cap
| Rice. 2.118. Radiator cap: a – position of the radiator cap valves at a pressure of 81.4–108 kPa in the cooling system; b – position of the radiator cap valves at a pressure of 6.86 kPa in the cooling system; 1 – exhaust valve; 2 – radiator cap; 3 – spring; 4 – intake (vacuum) valve spring; 5 – inlet (vacuum) valve |
The cooling system is closed with a sealed radiator cap (). The radiator cap contains exhaust and intake valves. With a sharp increase in temperature or boiling of the coolant, the pressure and boiling point of the liquid in the cooling system increases, as a result of which the heat transfer from the radiator increases. When the pressure in the system increases, the outlet valve of the cover opens and the vapors are released into the atmosphere, as a result of which cavitation in the suction zone of the water pump is eliminated.
During cooling, the pressure in the system decreases and outside air is sucked into the cooling system through the inlet (vacuum) valve.
Checking the radiator cap pressure
1. Using an adapter, connect the radiator cap to the device to check it.
2. Increase the pressure until the meter needle stops moving.
The opening pressure of the exhaust valve is 81.4–108 kPa, the minimum permissible pressure is 65 kPa.
3. Make sure the pressure is equal to or greater than the minimum permissible value.
4. Replace the radiator cap if the pressure does not reach the minimum permissible value.
| WARNING Make sure the cap is clean before checking as rust, dirt, etc. on the cap gasket may cause incorrect readings. |
Checking the radiator cap
1. Check the radiator cap for damage, cracks and wear.
2. Attach the radiator cap tester to the radiator.
3. Use the device to increase the pressure until its needle stops.
4. If the instrument needle remains motionless for 10 s at a point exceeding the operating limit, then the radiator cap is in good condition.
Replacement frequency, what antifreeze to fill
Based on the operating instructions, as well as the manufacturer’s recommendations, replacing antifreeze on a Hyundai Accent Tagaz must be carried out once every 40,000 km.
After this period, basic functions deteriorate sharply. Protective and anti-corrosion additives stop working. Car enthusiasts use coolant standards G12 or G11 for replacement, guided by their knowledge, as well as the advice of friends. But the manufacturer recommends using original antifreeze for Hyundai Accent.
In Russia you can find Hyundai Long Life Coolant and Crown LLC A-110 for sale. They are both original antifreezes that can be used in cars of this brand. The first is produced in Korea, and the second has a country of origin of the Russian Federation.
There are also analogues, for example CoolStream A-110 from the description, which you can find out that it is poured from the factory into cars of this brand. Another analogue of RAVENOL HJC Hybrid Japanese Coolant, which also meets the tolerances.
The choice of which coolant to use remains with the car enthusiast, and there is plenty to choose from.
How much antifreeze is in the cooling system, volume table
| Model | Engine capacity | How many liters of antifreeze are in the system | Original liquid / analogues |
| Hyundai Accent | gasoline 1.6 | 6.3 | Hyundai Long Life Coolant |
| Hyundai Accent Tagaz | gasoline 1.5 | 6.3 | Crown LLC A-110 |
| gasoline 1.4 | 6.0 | CoolStream A-110 | |
| gasoline 1.3 | 6.0 | RAVENOL HJC Hybrid Japanese Coolant | |
| diesel 1.5 | 5.5 |
Cooling system Hyundai Accent
Hyundai Accent 2005, 2007 and 2008 produced by TagAZ uses cooling systems that include:
- Expansion tank. Coolant enters the system through this container.
- The lines through which the refrigerant circulates.
- A thermostat designed to turn on a large and small circle of circulation of consumables.
- Radiator cooling device for the power unit.
- A fan designed to prevent overheating of a car engine.
If one of the system components, be it a radiator or a ventilation device, fails, cooling the Hyundai Accent internal combustion engine will be impossible.
What refrigerant do I use at the factory?
According to the instruction manual, when assembling Korean cars, red coolant is poured into the cooling system. Depending on the year of manufacture and modification of the car, refrigerant manufacturers may be different. Often, Ravenol, Cool Stream Premium or Castrol liquids are poured into Accents.
Special product for flushing the cooling system
Leaks and problems
Over time, your car needs to pay close attention to the pipes and hoses. They may begin to dry out and crack. What causes a leak to form, the worst thing is when it happens on the road, where you can’t get to a service center or a spare parts store.
The radiator filler cap is considered a consumable and therefore must be changed periodically. Because due to a soured bypass valve, the pressure in the system may increase, which will lead to a leak in the cooling system at a weak point.
Rarely does anyone pay attention to these little things, but they are the ones that can lead to problems with the cooling system.