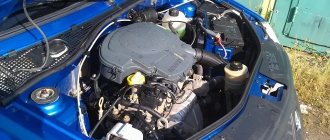
What is a coolant temperature sensor
All sensors are used to monitor the operation of certain components and parts. If the operation functions are disrupted, the sensor indicates that the operation of a particular device is unstable. A car has many sensors in its design.
Important recommendation: is it possible to mix antifreeze with antifreeze or with each other, or with water, and what will happen if you mix it? The answer can be found in the link.
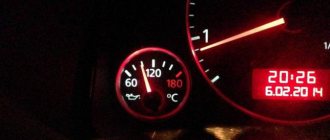
The internal combustion engine needs stable operation. So, the cooling fluid temperature sensor provides control over the stability of the internal combustion engine. The car’s engine heats up faster thanks to this sensor and is slower to reach high temperatures that lead to boiling of the coolant in the system.
DTOZH is not a sensor that shows the temperature of the fluid in the block and radiator system. Some people have the wrong idea about this.
The coolant temperature sensor transmits fluid temperature data (antifreeze, antifreeze or water) to the electronic control unit (ECU). And the temperature of the liquid that the driver sees on the dashboard is transmitted by another sensor, also a temperature one.
If the sensor that displays the temperature value for the driver breaks down, then this will not bring anything serious to the system. And, if the sensor that transmits the temperature value to the computer fails, then the control unit will incorrectly regulate the operation of the internal combustion engine.
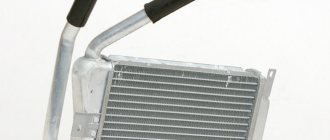
Information for novice motorists: the cooling system (radiator, engine cooling system jacket) must contain a liquid (preferably one that has a high boiling point) that removes heat from the engine.
In addition to removing heat and cooling the engine, the circulating coolant cools the engine oil, which, when boiling, loses its properties.
The coolant also cools the air that is in the turbocharging system (turbine), cools the exhaust gases and the gearbox oil. The sensor has the function of heating air in ventilation and heating systems.
The coolant temperature sensor is a small link in the aggregate design of the car system, but it is very important. The stability of the motor depends on its correct operation and serviceability in general.
Types of sensors for measuring the temperature of the cooling system fluid
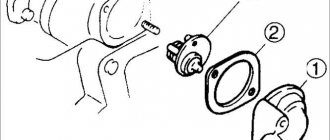
Outdoor temperature sensor
The following types of sensors are used to measure coolant temperature:
- magnetic sensor;
- bimetallic sensor;
You can independently determine the type of sensor by the reaction speed of the temperature gauge after the ignition is turned on. If a magnetic sensor is installed in the car, then the temperature gauge needle reacts instantly after turning the key in the ignition switch. In the case of a bimetallic sensor, a slow rise of the arrow is noted.
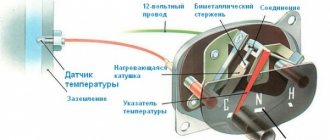
The magnetic temperature sensor consists of two coils that are located on the sides of a rotating metal armature. The said anchor holds the temperature gauge needle. The coils are powered into the vehicle's electrical circuit, one wire is grounded, and the second goes to a sensor that produces different resistance depending on the temperature of the internal combustion engine. The passage of electricity through the coils results in the formation of a magnetic field, which moves the armature with an arrow attached to it. The difference in the magnetic field that the coils create depends on the current supplied to them by the temperature sensor, and also determines the degree of displacement of the armature with the arrow.
The bimetallic sensor is based on the tendency of metal to expand when heated and contract as a result of cooling. The use of metals with different expansion coefficients in the sensor design allows the temperature to be accurately recorded.
The operating principle of a bimetallic temperature sensor can be seen in the following example. Two plates, one of which is made of steel and the other of copper, are tightly connected to each other. Next, they are heated, resulting in expansion. Copper has a greater coefficient of expansion compared to steel, which will cause the copper plate to increase in length relative to steel. Since the two plates are securely connected to each other to prevent movement, the copper plate will begin to bend around the steel plate.
As for the bimetallic temperature sensor in the engine, the design includes a special rod, which, as a result of heating, exhibits a change in its length. The result is an increase or decrease in the current that is supplied to the arrow block on the instrument panel.
The warning light on the instrument panel (if equipped) is based on the same principle. With a certain heating, the plate bends, which leads to the contacts connecting and the engine overheating lamp to light up.
Among the blocks that interact with temperature sensors, there are two types:
- semiconductor block;
- bimetallic strip block;
The semiconductor-type sensor block is most widely used today, based on a semiconductor resistor in a metal housing. A semiconductor is characterized by its ability to reduce resistance as temperature increases. As the internal combustion engine heats up, the resistance decreases and the current in the sensor increases.
The bimetallic block works on the principle of displacement of a bimetallic strip, which is located inside the heating coil. As a result, there is an increase or decrease in the current that is supplied to the instrument panel.
Design and principle of operation of DTOZH
When the sensor contacts close, the system receives information that the temperature of the liquid has risen.
Due to the similarity of functions, a temperature sensor is similar to a resistor. The sensor is designed in such a way that the resistance of the electric current changes as the temperature around it changes. Changes in resistance are transmitted to the electronic engine control unit.
Before DTOZH, so-called thermal relays were used. They were installed in injection systems. When the contacts were in the open position, the internal combustion engine heated up. If the contact closes, then the motor has reached operating temperature (usually 90 degrees).
The thermistor is the main design element of a temperature sensor. It is the thermistor that determines how the current resistance will depend on the ambient temperature.
In turn, the thermistor consists of cobalt, or rather oxides of cobalt (Co) and nickel (Ni). When heated, these substances increase in number of free electrons. Due to the increase in free electrons, the resistance decreases.
There are thermistors with negative temperature coefficient. In this case, the thermistor shows maximum values when the engine is cold. A voltage of 5 Volts (V) is supplied to the temperature sensor. Further, when the engine heats up, the sensor will reduce resistance.
The ECU looks at voltage changes and, based on this data, calculates what the fluid temperature is at the moment. When the engine is hot, the electronic control unit gives the command to supply a lean mixture of fuel and air.
If the sensor is faulty, the ECU may give a command to enrich the fuel mixture when it should have been made lean. When working with a rich mixture, the spark plugs will quickly become dirty.
The engine may not start if the engine speed at startup is not sufficient. The ECU can give a command to increase the speed. In order to maintain controllability while starting the internal combustion engine, the recirculation valve must be in the closed position until the engine reaches operating temperature.
If the speed fluctuates, then this is one of the signs that the temperature sensor is not working correctly. In this case, the engine may stall. The ignition angle depends on the correct operation of the sensor, because this parameter is also regulated through the ECU. The emission of harmful substances from spent fuel mixtures with such regulation is reduced.
As a result, it turns out that the power and operational characteristics of the car depend directly on the operation of the coolant temperature sensor.
Operating principle of the sensor
Most vehicles are equipped with a ratiometric coolant temperature gauge. The operating principle of such a device is the interaction of the field of a permanent magnet with the magnetic field of the measuring windings. As a rule, there are three such windings, and voltage passes through them. In turn, the permanent magnet is connected to an arrow, which shows the driver the temperature status.
New antifreeze temperature sensors
The coolant temperature gauge sends information to the engine control unit. This data is then used to adjust the electronic gasoline injection and regulate the ignition timing. Depending on the type of engine, the device can be used to activate the cooling fan, which is installed directly on the antifreeze (coolant) radiator. This information can also be displayed on the instrument panel if this function is present in the vehicle.
In other words, the operating principle of the antifreeze temperature sensor is to ensure prompt warming up of the engine when it starts and maintain operating temperature during operation. If the operating temperature of the engine changes, the resistance of the sensor also changes. Depending on the design of the element, a change in temperature is accompanied by a decrease or increase in resistance.
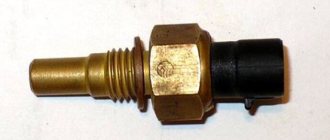
The sensor is screwed into one of the channels of the cooling system and immersed in coolant.
Many cars have more than one coolant temperature sensor. In most vehicles, the primary DTS (ECT sensor 1) is installed next to the thermostat in the cylinder head, block or on the thermostat housing. The second sensor can be installed in another part of the engine or in the radiator.
Some vehicles use a cylinder head temperature sensor or CHT sensor instead of or in addition to the DTS. The CHT sensor works the same way, but it measures the metal temperature of the cylinder head and is not immersed in coolant.
This allows the CHT sensor to correctly measure engine temperature even when coolant is lost. This may help prevent overheating.
Where is DTOZH located?
In different brands and models of cars, the temperature sensor is located in different places. But, usually it is installed in the cylinder head (cylinder head), not far from the thermostat or directly on it. It is also imperative that the sensor is located near the outlet pipe through which antifreeze or antifreeze, or water flows back into the radiator. This is the optimal location. In this case, the sensor transmits accurate information to the ECU.
Crankshaft position sensor device
A standard (inductive) device is mounted at the generator drive pulley and structurally consists of three parts:
A cylindrical body made of plastic or aluminum equipped with a tracking element. Flange mounting base. A cable connecting the sensor to the on-board circuit.
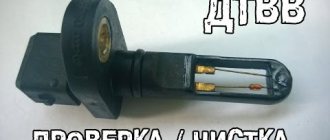
How to check the crankshaft position sensor
Typically the sensor either works or it doesn't. But there are a number of reasons that have a negative impact on the quality and life of its work:
- Overheating (regular loads at elevated temperatures).
- Frequent sudden changes in temperature.
- Increased humidity levels.
- External or internal damage.
IMPORTANT! The most common type of malfunction is wiring wear, but there are more reasons for device failure. Therefore, it is necessary to regularly inspect and diagnose DPKV.
At service stations, a special diagnostic scanner is used, which is part of the basic toolkit at any city service station. If the sensor stops working on the road between large populated areas, it will be easier to install a new one rather than looking for a service station with a diagnostic scanner.
Symptoms of a problem
In most modern cars, a breakdown of the DPKV is indicated by the “check engine” signal on the panel. In this case, you need to check the wiring and, most likely, change the device. Cars produced in the last century are often not equipped with this function, so you can focus on the following points:
- The engine stalls, there is no idle speed.
- At idle, the engine is unstable.
- The ignition does not work.
- The dynamic characteristics of the car as a whole have dropped sharply.
- The engine stalls for no reason while driving.
- The power of the power unit drops sharply for no reason.
- When the engine is under load, noticeable detonation occurs.
The appearance of these problems is a symptom that the sensor is losing its functionality. Moreover, if the owner of the car does not regularly check it for work. The most effective way is to contact a service station, check and replace the device.
If you want to save money, testing and changing the sensor yourself is quite possible. Its installation is a simple process. It is worth remembering that a faulty sensor is the main and most likely, but not the only cause of problems. It is best to diagnose all engine elements.
P0336 sensor error and other common DPKV errors
One of the most common messages that the system produces is “sync sensor error.” The signal indicates problems with the crankshaft sensor. Often this has less to do with the sensor and more to do with the wire or plug. If replacing them does not help, it is worth replacing the DPKV.
Other common errors may not be related to the sensor itself, but to the wires. For example, when the VAZ 2114 panel displays P0335 (P0336 sensor error), this most likely indicates a broken wire near the connector. If this is found during inspection, you can replace the connector rather than the sensor. P0341 error says there is a mismatch between the camshaft sensor and the crankshaft sensor (the error has nothing to do with the crankshaft sensor).
Self-replacement of DPKV
To solve the problem without extra costs, you need to carefully dismantle the sensor and conduct a detailed inspection. If the housing has cracks or is deformed, it must be replaced. If everything is normal with the housing, the winding is checked for resistance. This is done using a multimeter. The permissible resistance level is within the range of 600-900 Ohms. Deviations indicate irregularities in work.
When the engine is idling, the voltage amplitude should be less than 6 W, and when the engine is rotated by the starter, it should exceed 5 W.
An alternative method of testing with a multimeter is to wave a metal object next to the sensor, simulating the operation of the disk. If the meter detects voltage surges, the device is working correctly.
A common cause of problems is debris trapped between the sensor and the synchronization disk or other cases not related to a malfunction of the sensor itself. They can affect the operation of the engine.
IMPORTANT! You can test the power supply and spark occurrence at the injectors. But this is a risky method, suitable only for experienced car owners. To do this, the high-voltage wire is removed from the spark plug and brought to the engine, after which the starter is cranked. If there is no spark, the DPKV does not function. The danger is that the spark may cause too much discharge, damaging the ECU.
To determine the power supply to the injectors, you can do without a multimeter; a 12 W light bulb will suffice. If the sensor is working, the light will light up when the engine is rotated by the starter. If this does not happen, the device must be changed.
Replacing a sensor without a mechanic is a simple but careful process. You will need regular keys (usually 10 in Russian cars). The main thing is the gap between the sensor core and the synchronization disk. Before dismantling the device, it is advisable to make marks in relation to the mounting bolts to the body and the position of the sensor and power wire. Installation of a new one is carried out using old bolts. Each engine type has its own sensor mounting features.
Synchronization sensor error - how to check with an oscilloscope
An electronic oscilloscope allows you to monitor not only voltage indicators, but the process of pulse formation itself. This will give the most accurate data. For safety, it is better to remove the sensor, but you can check it with the engine running.
The procedure is:
- Connect the oscilloscope to the sensor terminals, the polarity can be any.
- Simulate the operation of the disk by waving a metal object in front of the sensor.
- If the sensor is functioning correctly, a waveform will be displayed.
A similar test with the engine running will give a more accurate result.
The crankshaft speed sensor is the most important element of the vehicle's electronic system. Therefore, car owners with extensive experience in solving problems carry a spare crankshaft sensor in the trunk along with a spare tire. Especially if a sign of its incorrect operation was previously noticed. The original DPKV is inexpensive, and installation is a simple procedure. At the same time, being on the road with a broken DPKV is a serious problem, and if you don’t have a spare one, you can lose a lot of time.
Types of sensors
Classification of DTOZH by change in resistance:
- Negative temperature coefficient sensor. The operating principle is that the internal resistance drops as the temperature increases.
- Sensor with positive temperature coefficient. The operating principle is the opposite of that of the first type of sensor, that is, the internal resistance increases with increasing temperature.
The most popular in the automotive industry is the first type of DTOZH. It happens that there are 2 sensors installed in the car, the main one and the additional one.
The main sensor transmits information to the electronic control unit, and the additional sensor turns on the fan.
Malfunctions and checking the motor temperature sensor
Failure or incorrect operation of the internal combustion engine temperature sensor on vehicles with an ECM can cause unstable operation of the entire power unit. The list of main signs by which you can identify problems with DTOZH includes:
- a cold engine is difficult to start, especially at low outside temperatures;
- the color of the exhaust during warming up may indicate that the mixture is over-rich;
- there is excessive fuel consumption when driving;
Before deciding that the coolant temperature sensor needs to be replaced, it is necessary to diagnose the device. The fact is that the most common cause is not the sensor itself, but a malfunction of its contacts. You should disconnect the electrical connector from the sensor, and then inspect the contacts themselves for oxidation, corrosion, etc. At the same time, it is necessary to eliminate possible defects in the electrical wiring to the device. We should not forget that a low level of coolant in the system can also lead to sensor malfunctions. For this reason, you need to check the coolant level and add antifreeze or distilled water if necessary. If there are leaks in the radiator, expansion tank or pipes, then you should first fix the problems that have arisen.
The check boils down to the fact that after starting a cold engine and with a further increase in coolant temperature, the sensor resistance should decrease. It is also possible to increase the resistance if there is a sensor based on a positive temperature coefficient. Changes in resistance should occur in accordance with indicators that are considered normal. Such indicators can be found in special technical literature or other available sources. Deviations in readings from normal during testing can be considered a sign of a malfunction of the engine temperature sensor itself. In such a situation, the device should be replaced.
Types of sensor malfunctions and how to fix them
Due to the simple design of the sensor, it is considered reliable. The simpler the design, the higher the reliability. The sensor may have a calibration problem. In this case, the resistance value will change at random and incorrect information will be transmitted to the ECU.
The main and main breakdown or malfunction of the coolant temperature sensor is that it does not turn on the fan when the switch-on temperature is reached.
The malfunction may be caused by oxidation of the wiring plug or a breakdown of the additional sensor responsible for the operation of the fan.
DTOZH malfunctions:
- engine speed drops for no reason;
- The motor takes a long time to heat up;
- the engine often overheats;
- increased fuel consumption;
- deterioration in vehicle control;
- Black smoke comes out of the muffler;
- there is no stability in the operation of the internal combustion engine.
There are also knocking sounds in the engine - detonation. On older cars a controller was installed. When the controller arrow reaches beyond the critical zone, an immediate stop of the vehicle is required. This may be due to a breakdown of the DTOZH.
And in modern cars, the on-board computer will tell you that the engine has overheated and needs to stop. By the way, if antifreeze, antifreeze or water boils, you cannot turn off the engine. You need to stop and let it idle. When the temperature drops a little, turn off the engine.
The pointer or the temperature sensor is faulty
There is one small but very insidious nuance in this matter. The fact is that both the pointer itself and the temperature sensor can fail. In the first case, the driver only receives unreliable instrument readings, which in most cases, if the car is in good condition and there are no faults in it, does not lead to serious consequences, however, it is a rather unpleasant breakdown.
However, if the DTOZ breaks, the consequences can be much more dire. And the whole point is that modern cars are “stuffed” with electronics, which are designed to protect the car from possible breakdowns. The operation of all this electronics is based on sensors, and it is the data received from them that is the basis for generating signals to control mechanisms that correct the operation of vehicle components.
If the on-board computer receives incorrect data from them, then as a result it incorrectly regulates the operation of the vehicle components, which can lead to extremely unpleasant consequences. Therefore, if you have problems with engine temperature indicators, then first of all you need to decide whether the problem is in the temperature indicator or in the sensor.
How to check if the temperature sensor is working
To dismantle, check, replace the sensor, the following tools are needed:
- 19mm wrench.
- Multimeter.
- Container for draining coolant.
- Electric kettle for heating water.
- Thermometer.
- Another container, but for hot water, small, for example, a glass.
How to check
Diagnostics are done using special equipment in car services. To check whether the sensor shows the temperature correctly, you need to lower it into hot liquid and measure the resistance with an Ohmmeter or multimeter in the resistance position. On different sensors, different brands and models, resistance values may vary. On the Internet there are special tables with resistance data for which sensors of a particular model.
If the resistance value differs from what it should be according to the table, then the temperature sensor must be replaced. The sensor cannot be repaired.
How to check the coolant temperature sensor?
- Take the sensor and lower it into warm water.
- Take a thermometer and lower it into a container of cold water. For accurate readings, it is better to use an electronic thermometer.
- We connect a multimeter to the sensor and lower the sensor into the water. Let's see what the measuring device shows.
- Cold water at this time heats up to 15, 20, 25 degrees. The results are recorded. At what temperature, how much does the resistance show. If the data does not coincide with the tabular, reference data, then the sensor must be replaced.
There is another way to check the temperature sensor without a thermometer. Water usually boils at 100 degrees. We measure the resistance when the sensor was immersed in boiling water. The resistance in this case should be approximately 176 ohms. Plus or minus the error can reach up to 190 Ohms. But without a thermometer, this is a rough check.
Now I will give a table showing at what temperature and within what limits the resistance should be.
| Temperature, C | Resistance, Ohm |
| 0 | 5 000 — 6 500 |
| 10 | 3 350 — 4 400 |
| 20 | 2 250 — 3 000 |
| 30 | 1 500 — 2 100 |
| 40 | 950 — 1400 |
| 50 | 700 — 950 |
| 60 | 540 — 675 |
| 70 | 400 — 500 |
| 80 | 275 — 375 |
| 90 | 200 — 290 |
| 100 | 150 — 225 |
How to check functionality?
To check functionality you will need the following tools:
- thermometer (necessarily with a maximum permissible temperature of over 100 degrees, it is better to use a digital one);
- multimeter (to measure the resistance of the thermistor);
- a container of water (which will need to be slowly heated to boiling point).
When the sensor has cooled to room temperature, you need to connect a multimeter to its contacts and switch it to resistance measurement mode. At a temperature of 20 - 30 degrees Celsius, the initial resistance should be about 1300 - 2200 Ohms.
Next, the sensor with connected probes is placed in a container of water and slowly begins to warm it up. As the temperature rises, the resistance should gradually drop. The optimal indicators are as follows:
- 40 degrees - about 1000 - 1200 Ohms;
- 50 degrees - 1000 Ohm;
- 60 degrees - 800 Ohm;
- 80 degrees - about 270 - 380 Ohms;
- 100 degrees - about 170 - 180 Ohms.
At a temperature of 110 degrees or higher, the thermistor switches to “protection” and the circuit breaks. In this case, the resistance becomes infinite (the ECU recognizes this signal as overheating and turns on the cooling at full power).
If the multimeter readings differ radically from the above, this will be a clear sign that the sensor has failed. It cannot be repaired, so it is simply replaced. In rare cases, thorough cleaning of contacts and threads from traces of corrosion helps, but this is only a temporary solution. If the controller “fails,” it is recommended that it be completely replaced; it will not cost much.
How to replace a temperature sensor
This can be done with your own hands; it does not require much experience. The order is:
- Drain the coolant.
- Remove the old sensor. It screws into the special. threaded hole. We unscrew it.
- Screw in the new sensor. It is recommended to lubricate the seat with sealant before screwing it in.
Conclusion
So, the coolant temperature sensor is one of the important elements in the design of the car. If it malfunctions or completely fails, the operation of the internal combustion engine is immediately felt. Deviations in work, as they say, are obvious.
The sensor is a thermistor. It transmits data on changes in temperature outside to the ECU through changes in resistance.
Video
This video explains how to properly replace the sensor.
Checking the sensor yourself at home.
The VAZ temperature sensor does not work.
0
Author of the publication
offline for 3 months
DTNV Installation Guide
How to install or replace an outdoor temperature sensor at home?
If your machine is not equipped with this regulator, the installation procedure is as follows:
- First you need to purchase an ambient temperature sensor and select a location for its installation. It must be taken into account that the controller should not be exposed to high temperatures from the power unit. The most suitable location for installation is next to the radiator unit.
- The device needs to be fixed, after which the cable with ground needs to be routed into the car interior.
- The dashboard is being dismantled. Depending on the vehicle model, you need to find a contact for connecting the regulator; at this stage you should use the service manual.
- If errors occur in the operation of the controller, you need to disconnect the battery for some time (usually 10-15 minutes is enough), then turn it on again and check the functionality of the device.
Throttle position sensor
It is installed on the throttle assembly and is rigidly fixed to the axis of rotation of the throttle valve. When you press the accelerator pedal, the sensor changes its voltage. The harder you press the pedal, the more the damper deflects and the more the sensor output voltage increases. Receiving this information, the ECU increases the amount of fuel injected by the injectors, and the engine begins to gain speed. The sensor perceives the closed damper as a zero mark. In this case, the amount of air supplied bypassing the damper depends on the position of the idle air control solenoid valve, also installed in the throttle assembly.