General information
As noted above, various sensors are installed on cars for a reason. They are necessary for the efficient operation of the system as a whole. As for the outside air temperature controller, it is mostly informational in nature and shows the temperature outside. But this does not apply to all systems. Sometimes the coolant temperature sensor is connected to the engine electronic systems. This is necessary to start the engine in the cold season and is a very convenient addition to the “autostart” function.
Unfortunately, not all cars have a temperature sensor built in at the factory. Many VAZ models do not provide this. But it doesn’t matter, let’s look at how to install it and what is remarkable about this process.
Types of sensors that monitor coolant temperature
All sensors installed on modern cars are divided into magnetic and bimetallic. You can independently determine the specific type installed on your personal car by the speed of its reaction after starting the engine. The magnetic one has an instant response, and after starting the motor it immediately shows the current temperature. The bimetallic version does not differ in such “efficiency”, showing the correct temperature after a short pause.
The operating principle of a bimetallic (tape) sensor is quite simple. The existing control unit changes the current depending on the current temperature of the circulating fluid, which leads to heating of the coil on the metal strip. It is able to change its length according to the temperature, and rotate the arrow attached to it, showing the current temperature of the liquid.
The design of the magnetic sensor is also not complicated. It consists of an armature with an arrow attached to it, on the sides of which there are two coils powered from the on-board electrical network. The resistance of the coils changes depending on the passing current, and it is determined by the current temperature of the engine. There is another type of sensor - capillary. Currently, it is practically not used due to the inconvenience of the design.
Where is the ambient temperature sensor located?
On different brands of cars, the controller has a different location. This is due in most cases to the design differences of the machines. For example, on a BMW you can install a temperature sensor directly behind the bumper, but not on a VAZ.
However, understanding where the ambient temperature sensor is located is quite simple. You need to find its number in the electrical diagram, and that's all. In most cases, it is installed near the radiator, usually in front or behind it. But it happens that it is mounted on the side. The main requirement is the absence of temperature effects from the engine. The motor gets hot and affects the controller. He, in turn, will give incorrect testimony.
"Lada Granta": sensor installation
This car is equipped with a controller only in the maximum configuration. In other cases, there is preparation, that is, there are all the necessary connectors and wires for connection. This is done so that the driver has the opportunity to carry out the installation himself.
However, before installation, it is advisable to check whether the dashboard will display controller readings. To do this, press the daily mileage button and turn on the ignition. This is how we run self-diagnosis, as a result all indicators are displayed. During diagnostics, press the daily mileage button again, which should bring up version 090 or higher on the display. This will indicate the possibility of installing a sensor
Direct installation
As noted above, the VAZ ambient temperature sensor is not difficult to install. Especially if all connectors are provided by the manufacturer. The next step is purchasing a sensor. There is nothing complicated, we go to the car store and buy the thing we need. The most optimal location for the sensor is near the radiator. The mass can be thrown over the welded pin. The wires need to be pulled into the interior. How this will be done is up to you. The most convenient and shortest way is through the clutch plug. Of course, you can’t do without disassembling the instrument panel. We dismantle it and look for the 25th contact. It is precisely intended for the ambient temperature controller. Readings on the on-board computer usually appear automatically. If this does not happen, reset the battery terminal for 10-15 minutes. After this everything should work. The VAZ ambient temperature sensor costs a penny. Its installation does not take much time.
Diagnostics and replacement
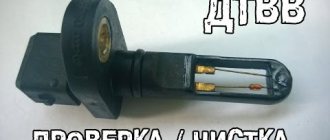
To check the functionality of the temperature sensor, you can use either simple methods available at home or resort to the help of a service station. If you decide to diagnose the device yourself, you will need to acquire at least a simple multimeter. The verification process consists of the following steps:
- Disconnect the power cord from the intake air temperature sensor contact block.
Rice. 4. Disconnect the power cord from the sensor contact block
- Using a multimeter, measure the resistance value of the sensor when it is cold.
Rice.
5. Measure the resistance of the sensor with a multimeter. If the engine has just been turned off and you do not know the temperature value, you can remove the sensor and force it to cool.
- Then, using a household hair dryer or, if the design of the sensitive element is made of metal, heat the thermistor over the gas burner.
Rice. 6. Heat the sensor with a household hair dryer
- Re-measure the resistance to electric current at the sensor terminals.
Rice. 7. Remeasure the resistance of the heated sensor
- Compare the measurement results with the table for your sensor model
For example, consider a series of temperatures for a sensor from Lada Priora, shown in the table below:
Table: dependence of sensor resistance on temperature
| Intake air temperature, °C | Resistance, kOhm |
| –40 | 39,2 |
| –30 | 23 |
| –20 | 13,9 |
| –10 | 8,6 |
| 0 | 5,5 |
| +10 | 3,6 |
| +20 | 2,4 |
| +30 | 1,7 |
| +40 | 1,2 |
| +50 | 0,84 |
| +60 | 0,6 |
| +70 | 0,45 |
| +80 | 0,34 |
| +90 | 0,26 |
| +100 | 0,2 |
| +110 | 0,16 |
| +120 | 0,13 |
As you can see, when measuring the resistance of a cold sensor whose temperature is 0 °C, the multimeter will produce 5.5 kOhm. If the sensor is heated to +70 °C, the resistance will be about 450 Ohms. Otherwise, the device is faulty and cannot display the air temperature correctly and requires replacement.
To replace a failed temperature sensor, you need to follow a few simple steps. Disconnect the power cord from the sensor and unscrew it from its seat.
Rice. 8. Unscrew the sensor using a wrench
Install the new temperature sensor into the seat and screw it tightly into the housing. Connect the connector to the contact block - the device is ready for use.
How to install an ambient temperature sensor on a Priora
The standard configuration includes this controller. But there are times when for one reason or another it is absent. For example, you bought a used car, but there is no sensor or there is one, but it doesn’t work.
However, this is not a big problem. True, for installation or replacement you will need to remove the bumper, since it is not always possible to get under it. It is located directly behind the front bumper and mounted on the front of the body. If there is an air conditioner, then there will be two such sensors. First of all, you need to check the functionality of the old one. The best option is to take a household thermometer and compare the readings. Deviations may be caused by excessive voltage on the contacts.
If the sensor is missing, then install it in the appropriate socket. There should be a wiring harness, so all that remains is to connect and enjoy the result. If the old sensor is acting up, then take it out, turn on the ignition and check the voltage on the connecting block (wire harness). It should be in the 3.5 V range. If there is no voltage, then the problem is somewhere in the circuit. We call and eliminate.
Types of sensor malfunctions and how to fix them
Due to the simple design of the sensor, it is considered reliable. The simpler the design, the higher the reliability. The sensor may have a calibration problem. In this case, the resistance value will change at random and incorrect information will be transmitted to the ECU.
The malfunction may be caused by oxidation of the wiring plug or a breakdown of the additional sensor responsible for the operation of the fan.
DTOZh breakdown rarely bothers motorists due to its simple design. But there are still enough reasons for failure. The use of low-quality antifreeze and motor oil leads to the destruction of the surface of the DTOZH. The sensing element of the sensor may become covered with sediment in the form of crystals.
https://www.youtube.com/watch?v=ytpressru
The reason may also lie in a manufacturing defect. You should not buy DTOZH at flea markets and various cheap auto parts markets. DTOZH purchased on such a market will often not meet the declared parameters and the slightest damage will lead to sensor failure. An antifreeze leak can cause the gasket to wear out. A voltage surge in the on-board power supply and corrosion of contacts can also cause sensor failure.
About installing the controller on Kalina
Let's figure out how to install an ambient temperature sensor on this car. "Kalina", unfortunately, often does not even have the necessary wires, so you will have to pull them into the cabin yourself.
To install, you need to remove the bumper and install the sensor, preferably in front of the radiator. There are only two wires - ground and signal. We hook the mass to the nearest bolt, for example from a horn. We tape the signal wire to the harness with tape, although it is more preferable to use plastic clamps. The most convenient way to bring it into the cabin is through a plug installed near the battery. We remove the tidy and connect the sensor. Usually it shows the temperature right away, you don’t even have to remove the terminals. Now you know where the ambient temperature sensor is located on VAZ cars.
Firmware for instrument cluster on Kalina2Granta
Since the USBDM programmer had already tested it at home (CAN recovery) and found out that it can also flash instrument clusters (gearboxes), I decided to flash it myself.
My gearbox costs 219240 and came with firmware 007 and did not display engine temperature readings. I decided to upgrade to version 009. But as always, the first thing is lumpy, an error popped up during the firmware and the result was a brick. Again, study the internet and figure out what’s wrong. I found my mistake, reflashed it with a new one - everything worked.
But the mileage readings became “000” and the IMMO was lost. There were no problems with retraining the keys (IMMO), the Internet is full of information, and I’ve already done it myself. But it was not easy to restore the mileage; the car is under warranty and also needs mileage. MrRararai for help
, he helped restore my mileage, for which I thank him very much.
Now I have firmware 012 on my gearbox.
Now I have also learned to change the mileage.
I surfed the Internet and this is what I found about instrument clusters:
how to view the CP firmware
- press the mileage switch button, then turn on the ignition without releasing the button (without starting the engine), the test will begin, press the button again - we see the software version (top line) and equipment (bottom line).
There are two firmware options:
1) with mileage and IMMO reset (it will be necessary to retrain the keys)
2) with preservation of mileage and IMMO.
— The gearbox seal is broken (warranty).
— When flashing the firmware, there must be a training key nearby, if something goes wrong and the IMMO is jammed, the car will not start, you need to train the keys (IMMO)
015
- on the old board, there is not a single temperature.
029 — 040
- updated board. there is no temperature.
All panels from the standard have a different display installed; to flash the firmware, you need to change it to a display from the standard. And add a bunch more elements. The old and new versions are different, each has its own improvements.
053, 060, 076, 087
- there is no temperature.
090, 091
– it is possible to connect an ambient temperature sensor (TOS), but there is no coolant temperature (TOZH)
092-095
– there is TOZ and TOS
053, 060, 076
– Old boards, to flash them you need to modify the board with a soldering iron or sew adapted 092 firmware
087-095
– New boards. Sewn without any modifications.
046
– has everything (same as 009 from Kalina)
009
– has everything (same as 046)
012
– everything is there, the latest version. It differs from 009 in the presence of a gear shift prompt.
Hardware PCs of configuration 40 (Lux) from configuration 20 (Normal) differ in the presence of an LED for indicating PPTF and the color of the glasses
— 219220(40)-007 and higher, there will be software: 009 or 012 — BC of the “Lux” configuration + engine temperature + removed the glitch with the outside air temperature + corrected the clock
On the 012 firmware of the gearbox and the firmware “i427ge05”, “i427GKA1” of the ECU, only on the luxury PC (219240), only on the manual (127 engine) - a hint about gear shifting appeared.
— 219020-060, 076 will be software: adapted 092, TOS and TOZH will be added
— 219020-087 and higher, there will be software: 092 or 046 (unlike 092, it will additionally show the engine operating time, fuel consumed and average speed. All parameters are resettable) or 009 from Kalina (in addition to 046, the squeak of the turn signals).
— 219040-032 and higher, there will be software: 046 — BC of the “Lux” configuration + engine temperature + removed the glitch with the outside air temperature + corrected the clock
Some data on firmware versions was taken from Goffka
