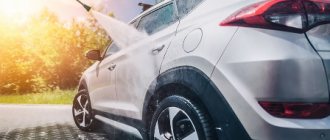
Covering a car with film is gaining popularity. Whether it is necessary to glue the film to the car is an individual decision for each owner. Everyone has their own vision on this issue and the pursuit of certain goals. If you have the desire and patience, it is possible to wrap your car yourself. To do this, you need to resort to studying some technological features.
Advantages and disadvantages
Body coating is acquiring more and more positive aspects than disadvantages.
Advantages:
- In addition to scratches and chips, dents are hidden. After pasting, the unevenness will be visible from a certain angle.
- The coating protects against weather conditions (sunlight, rain, hail), mechanical defects.
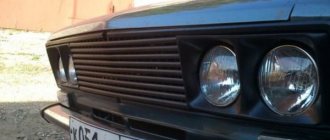
- When using transparent film, covering can be done on headlights and mirrors, which will keep them in their original condition for many years.
- If properly maintained, it can be used for up to 7 years without restoration.
- Changing the style according to the wishes and capabilities of the car owner.
- Affordability.
- Large assortment of colors and shades.
Disadvantages appear when working with cheap materials and poor quality preparation:
- Deformation of the coating.
- Burnout, possibility of peeling off when exposed to direct sunlight.
- Surface roughness.
Another point is that if the color of the material and the color of the car do not match, you will have to redo the documents for the car and introduce a new tone.
Body wrap options
Body wrapping will allow you to quickly change its appearance and create protection from aggressive external factors that shorten the life of the car.
It is not recommended to cover cars with film that require or have undergone body repairs. In the first case, vinyl will only cover up the problems, but you will still have to solve them in the near future. In the second case, subsequent removal of the film can seriously damage the paintwork. Auto repair shops cannot guarantee that during dismantling the plastic will not come off along with the paint if it is not factory.
Car enthusiasts need to know that various options for applying protection are possible.
You can separately cover the areas under the handles, the loading area, door edges, headlights, fenders, mirrors - these are the most vulnerable parts of the car. It will be much more economical. Such overlays will protect the pasted areas from scratches that inevitably appear. But partial pasting has to be changed more often.
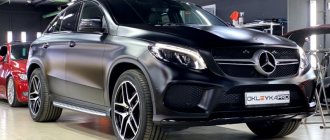
Full
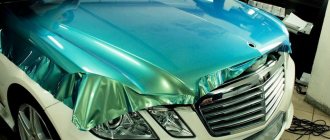
You can wrap the car completely, but this is a rather expensive operation. This type of coating allows you to completely stylize the car and give it a new look. The car is not only protected from debris, sand, pebbles, and vandals, but also becomes more interesting and original in appearance.
You can radically change the color, “paint” airbrushing, “cover” it with crocodile skin - whatever your imagination allows. Reupholstery is completed within 3-5 working days. Later everything can be returned to normal.
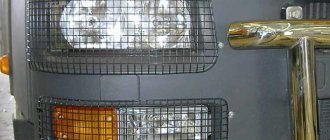
Thresholds and fenders
Experts say that car enthusiasts most often ask for comprehensive protection, covering the areas of the car that are most often damaged.
On some cars, problem areas are sills and fenders. Even anti-corrosion treatment does not always save them from destruction.
Rapids are generally considered a high-risk area and suffer the most from destruction. Motorists even listed women's stiletto heels as enemy No. 1.
Coating them with a transparent polyurethane anti-gravel coating helps solve the problem. It is not recommended to use vinyl in such cases.
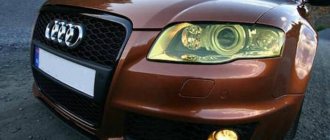
The wings are also a “sore spot” of the car. The main problem is corrosion. To prevent problems, they are simply covered with a transparent protective coating.
Bumper and fenders
Another popular “duet” is a bumper and fenders. When driving, the car bumper takes the full impact from debris, stones, sand and gravel. In 80% of accidents, it is the first impact.
After several minor damages, discounts on repainting or insurance money may be lost. That's why motorists are asking to reserve certain elements of the car that suffer the most when used on the roads.
It is best to use polyurethane. Most small scratches will heal on their own under the influence of the hot sun.
Covering a bumper with armor takes one day, and the headache disappears for several years. Finishing can be a bit challenging and requires skill.
You can also use vinyl or polyurethane coating. The first option is suitable for cautious drivers who move exclusively around the city. The second is for lovers of fast driving and extreme sports.
Hood and bumper
Everything that flies into the bumper ends up in the hood. It is also an ideal target for bird droppings and hail. If there is no shock absorption protection, then hail leaves dents, and droppings burn through the varnish.
When finishing the hood, the film consumption is greater, but it is not such a complicated procedure. It would be more reliable to make a “hood and bumper” complex.
Also, in order to save money, you can simply make a transparent anti-gravel strip on the hood. Its size is up to 40 cm, and it protects against various types of chips.
Types and features of films
There are two types: vinyl, polyurethane. The protective properties of vinyl are due to their thickness, and that of polyurethane due to their abilities.
When purchasing vinyl material, pay attention to:
- adhesive composition on the surface of the back side of the vinyl;
- thickness in microns;
- width;
- strength, elasticity;
- possible service life.
The range of vinyl by type falls into several categories:
- Matte. The advantage is the adoption of fairly complex shapes. Service life up to 7 years.
- Glossy. Mainly used for reupholstering body parts.
- Mirrored. Prevents the formation of body rust. Available in two colors - gold, silver. Service life depends on the manufacturer.
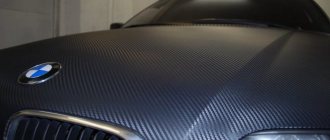
- Carbon. Availability at different prices depends on the quality. Service life from 5 years.
- Textured. Used to imitate various materials: wood, metal. The material is dense, service life exceeds 10 years.
There are several other options for vinyl film (chameleon, etc.), but they are expensive and very rarely used.
Durable polyurethane (up to 300 microns), protects the body from scratches and impacts. Capable of transmitting ultraviolet radiation, which is important when wrapping not the entire car (when the material is removed from a part of the body after a few years, the color of the entire car will be uniform). The price is more expensive than vinyl.
What will you need for pasting?
Before wrapping a car, we study what is necessary and what may be needed in the process. To apply film you will need the following materials and tools:
- The film itself. It is advisable to take it with a reserve or choose one with a larger width. The specialist will tell you the number of meters and which company to buy.
- Sharpened scissors, a sharp knife, preferably a stationery knife.
- Spray bottle with soap solution (prepared from water, liquid soap, detergent, car shampoo in a ratio of 10 to 1).
- Paper tape.
- Two types of squeegee (spatula): plastic, felt.
- To degrease the surface, alcohol or solvent is required.
- Technical (professional) hair dryer.
- Lint-free cloth or napkins.
- A special composition for enhancing the properties of the adhesive side of the material - 3M primer (A transparent liquid with a pungent odor enhances the adhesive effect of the self-adhesive material, has no analogues).
You need to prepare all this in advance so that you can quickly take it if necessary.
To cover a car, a film from 80 to 200 microns thick is used.
Methods of wrapping cars with film
There are two ways to glue vinyl film to a car: wet and dry. These methods are similar in the application process, the difference is the application technology.
Wet method
The wet method is more convenient if you are applying it for the first time or with your own hands. Either the adhesive layer or the surface itself is moistened with the solution. This will allow, if necessary, to correctly direct the material when it is displaced on the body. All soap solution and bubbles are removed using a squeegee and hair dryer.
Dry method
This application method is chosen by specialists who are confident in their work. It is much faster than the previous one. The material is glued directly to the surface of the body with great precision. With this method of gluing, the vinyl does not need to be dried, which increases the service life of the coating.
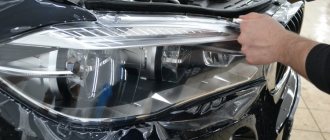
How to stick armor film yourself
Here is one way to stick armor film on a car:
Step 1: Clean the headlight glass and hands. Make sure there are no cleaning agents left on surfaces. Without removing the headlight cover from the backing, lift it up and make sure you have the correct shape (i.e. slightly oval lenses). If it is below 65 degrees, you can gently heat the lens with a hairdryer, this will help.
Step 2: Carefully remove the cover from the backing - touching the adhesive as little as possible
Take the adhesive side and carefully place it on the headlight. Move towards the center and align the edges
This is the most important step as it will have a big impact on the final alignment. Make sure that the maximum permissible edge deviation is allowed. Be careful, the glue is pressure sensitive. If necessary, lift and rinse with water until the piece of armor film is evenly leveled. Then press down on the center.
Step 3:
The remainder of the installation will require using a hair dryer on low. Apply water to the surface of the lens and move the scraper in small increments with steady pressure from the center outwards around the headlight. Hold the outer part while squeezing. Use both hands if necessary for best results. If you leave bubbles, stop, lift the material a little, rinse again and squeeze with firmer pressure.
Step 4: Once there are a few centimeters of margin left from the edge, you should press them firmly. The material at the edge will have a waviness. Everything needs to be distributed evenly.
Step 5: Go over the edges of the armor film with a hair dryer on low setting and make sure the edges are firmly set. Use a sharp razor knife to carefully trim away areas that are misaligned or overhanging.
Instructions for gluing
By following all the rules, you can quickly and efficiently cover your car with auto vinyl.
General principles and rules
If vinyl is chosen for covering, it is better to cover the body completely rather than partially. This is due to the fact that it does not allow sunlight to pass through, and the color of the car will not completely fade. This will be very noticeable after removing the film.
Before the coating itself, it is necessary to carefully prepare the surface of the car. If there is rust somewhere, this place needs to be treated and puttied to prevent the spread of metal corrosion.
Conditions for pasting
Initially, you need to choose the place where the work will take place. This could be a garage with good lighting; the room temperature should be at least 20 degrees.
Cleanliness is the key to quality coating. The smallest speck of dust or particle caught under the film coating will ruin the entire appearance. The work will have to start again. Therefore, before starting work, wet the floor surface to prevent dust from flying.
Such work cannot be carried out on the street!
Preparing a car for wrapping
Before sizing a car, it must be carefully prepared. The preparation stages include:
- If the surface contains some suspicious places (where the paintwork may come off), it is better to clean it immediately, since the film may be adjusted several times during the work.
- For convenient gluing in hard-to-reach places, it is better to disassemble the body in as much detail as possible.
- Wash and dry the surface very well.
- Treat the surface with a degreaser solution.
- When gluing, apply a primer in bend areas for better adhesion to the surface.
Pasting process
After preparing the car, you need to move on to preparing the material for wrapping. Make patterns in accordance with the places where the gluing will take place:
- apply vinyl around the perimeter to the surface;
- secure with paper tape;
- make appropriate marks, taking into account the reserve;
- cut out.
When pasting wet on a prepared surface:
- a soap solution is applied;
- the protective layer is removed from the film;
- The material is glued in the center and then slowly move to the edges, smoothing with a squeegee;
- if bubbles have formed, carefully remove them from the place of formation with a squeegee along with a soap solution and the bubbles will disappear;
- in the bend areas, heat the material with a hairdryer, and apply a primer to the edges, from the side of the adhesive base;
- if irregularities appear on the bend, heat it up a little more;
- After applying the film, the entire surface is heated for better adhesion and getting rid of some imperfections.
When pasting using the dry method, the application process is repeated, the difference is that the material is applied to a dry surface of the body. After application, the carbon coating is heated. Pass over the surface with a felt squeegee and wipe with a dry cloth or rag.
Heating should not exceed 70 degrees to avoid color loss and destruction!
When applying, carefully ensure that the material does not stretch too much and bubbles do not form. If this happens, it is recommended to press the unfinished area with a wet rag and treat it with a hot stream of air. The vinyl should shrink a little, the imperfections will be hidden.
After application, it is not recommended to wash the car or drive at high speed for 10 days. This time is necessary to dry the material.
We recommend watching this video before starting work:
How to remove
After the armor film has used up its resource, the question arises of how to remove it. It is impossible to peel off the armor like ordinary material; scraping it with a knife is not recommended.
You can quickly remove the armor using a hairdryer. If the part is glass, you can choose a higher temperature for heating the film and, after softening the material, remove the protection. If it is plastic, strong heating is not recommended: the plastic will darken.
Before heating the part, the body is degreased so that there are no solid particles left on the film, which could burn it when heated and leave a noticeable mark on the body.
Residues of glue after removing the vinyl film are removed with White Spirit. Car service technicians recommend cleaning car headlights and hoods from glue using the following means:
- Allegrini Puliscitutto;
- Koch Orange Power/ Eulex;
- 3M Orange;
- Mr. Muscle with ammonia.