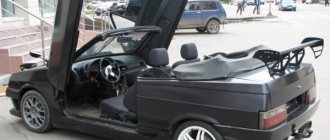
The Chevrolet Niva SUV has been very popular among domestic car enthusiasts for many years. The versatility of the vehicle and high cross-country ability are what are most valued among the owners of the “baby”. The car is suitable for daily trips, for going hunting or fishing, and can also serve as a “workhorse”. The Chevrolet Niva is a versatile, but structurally not ideal car.
What fans of the compact SUV are most unhappy with is the interior, which looks a little unfinished. It is possible to correct this drawback and make the movement of passengers more comfortable by tuning the interior of the Chevrolet Niva. Doing all the work yourself, without resorting to the help of specialists, will not be difficult. The main thing is to arm yourself with the necessary tools and show a little imagination.
Tuning options
In any car, not only the appearance of the body is important, but also the interior.
Chevrolet Niva is no exception here. For some reason, the appearance of the dashboard of this car does not please the owners for long, and some often want to change something almost immediately after purchase and add style, so to speak. The most serious change inside the cabin is the tuning of the Chevrolet Niva dashboard. Before starting work, it is important to decide what exactly you want to do and think about the consequences.
The choice of options for tuning is not particularly large:
- Install a device from another car. In this case, you will need the services of a qualified electrician, since the connectors will have to be redone. You can also install a digital version of the tidy - it will be more than original.
- As a tuning option, you can install LED bulbs instead of regular ones. Many car owners choose this option because it is less expensive and the easiest to implement.
- Another tuning method is to install original instrument scales on the speedometer, tachometer and other sensors. Moreover, you can buy such scales either ready-made or make them yourself in accordance with your preferences.
For those who want to bring something new to the interior of the cabin, there are special offers in the form of electronic panels such as Gamma GF 825, GF 826, GF 610 SL, FLASH-I, etc. They look great and are installed without problems.
If you decide to carry out such tuning of the instrument panel, the Chevrolet Niva will immediately be transformed for the better. You just have to pay from 9 to 20 thousand rubles for this. But for this money you will additionally receive:
- multifunctional trip computer;
- digital and analogue vehicle speed indicators;
- LED warning lamps with two-level alarm;
- on-board network voltage indication;
- "Autolight" system;
- integrated diagnostic tester for electronic engine management system;
- ability to select and adjust the backlight (color, brightness).
Well, if you don’t have the opportunity to spend that kind of money, you can modernize the panel using special tuning kits. They include overlays for instruments and indicators (of different colors) and lighting elements. Such sets cost 500-800 rubles.
Transmission modification
Most often, transmission tuning involves some measures to reduce vibrations that occur in the front gearbox and are transmitted to the entire car body. Attempts to install self-locking gearboxes are also no less common. But if measures to reduce vibration are clearly necessary for the car and passengers, then all kinds of differentials with a high coefficient of friction and ball “self-blocks” will significantly complicate the use of the car.
Difficulties when using this kind of units, as a rule, rest on the not very high resistance of structural materials. Barely surmountable design flaws of modern devices prevent their effective use. Many Chevrolet Niv owners note the negative results of such DIY modifications. In some cases, repairs are required altogether.
It’s not for nothing that reviews from fans of this kind of modifications recommend putting the factory rear axle gearbox in the trunk and always carrying it with you, i.e. one day it will definitely be needed. But Chevy Niva tuning is very often narrowly focused and is carried out with the goal of improving the road properties of the car. The installation of wheel gears is quite reasonable here.
It should be noted that wheel gearboxes make it possible to equip a car with special softer tires, which will make it possible to move through swampy areas or deep snow. A slightly raised body, large-diameter wheels, high cross-country ability and an aggressive appearance are the result of installing the following final drives:
Description and location of indicators and instruments on the panel
The instrument cluster includes many elements.
In accordance with the diagram above, the shield structure is as follows:
- The coolant temperature control sensor, the arrow on it rises as the engine warms up. The controller needle should not be allowed to move into the red zone, as this will indicate overheating of the power unit.
- A tachometer is a device that measures the number of revolutions of the engine crankshaft.
- The left turn signal activation symbol, made in the form of a green arrow, appears when the corresponding indicator on the steering column switch is turned on. If the light blinks faster than usual, this may indicate a burnt out bulb.
- Right turn signal.
- Speedometer, this device allows the driver to know how fast the vehicle is moving. The speedometer is connected to the transfer case via an electric drive.
- Gasoline fuel level controller; the Chevy Niva uses an electromagnetic device that functions only when the ignition is activated. When the ignition is turned off, the controller needle moves down the scale.
- The fuel reserve indicator in the gas tank appears on the dashboard when the fuel level in the system is about 4-6.5 liters.
- The side light activation lamp appears on the dashboard when the corresponding optics are turned on.
- The brake system emergency symbol appears if the brake fluid level in the expansion tank has dropped to a critical level.
- High beam indicator.
- A key that allows you to reset the daily mileage readings. You can also use this button to switch to the clock or outside temperature sensor.
- A screen that displays the total and daily mileage of the vehicle.
- The Check Engine indicator indicates the need for engine diagnostics. It should always appear when the ignition is turned on, and disappear after starting the engine. If this light remains on while driving, the engine management system needs to be checked.
- Light alarm activation lamp.
- Symbol of time and temperature; you can switch from one mode to another using button 11.
- Battery low indicator, this light should always appear when the ignition is turned on and disappear after the engine is started. If the indicator is always on, this indicates that there is no charging current in the on-board network. This may be due to a failure of the voltage regulator or generator unit, or the lamp may light up if the tension of the generator strap is insufficient or breaks.
- Handbrake activation symbol. If your Niva Chevy is on the handbrake, the indicator will light up when you turn on the ignition and start the engine.
- Indicator of emergency low pressure of engine fluid. It should always appear when the ignition is activated. If it lights up after turning on the engine, this indicates low pressure in the system or a lack of engine fluid.
- Reserve indicator (video author – Artem S).
Also interesting: Additional light for an SUV - you need to know this!
The shield of the Niva-Chevrolet has a classic arrangement. It is shifted to the left and is located on top of the steering column. This position gives the driver the opportunity to observe the sensor readings without turning his head to the side while driving.
Engine
There are plenty of options here. To add power and increase engine displacement, the cylinders should be bored and larger diameter cast or forged pistons installed. The increased cylinder volume entails optimization of the combustion chamber. For this purpose, it is necessary to bore the seats and install valves of larger diameter. The use of such valves gives a significant effect; you don’t even need to use boring. There is also a more economical option for modifying the engine. With the help of chip tuning, the program values of the machine are changed; mechanical intervention is not required.
Disassembling the dashboard
If the shield malfunctions, it will have to be disassembled in any case to determine the cause of the breakdown. How to remove the instrument panel? “Niva-Chevrolet” will not cause problems in this sense.
This is done as follows:
- Use a slotted screwdriver to pry up and remove two plugs. The first is located to the right of the hazard warning button, and the second is in the far right corner of the panel trim.
- We turn out the screws located under the plugs.
- We pull out the right side of the dashboard trim and remove the connectors from the control buttons. Remember (take a photo) which connectors go to which buttons!
- We disengage the left side of the trim, remove the block from the buttons for turning on the headlights and dimensions. We remove and remove the lining.
- Unscrew the two screws securing the dashboard. Disconnect the connectors.
- We remove the panel.
First, disconnect the battery; this must be done, since the dashboard contains a lot of wiring that can be shortened during careless removal. To de-energize, remove the terminal from the minus and this will be enough. After which you can remove the console.
External tuning – functionality and aesthetics
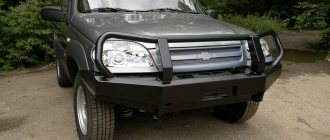
Any vehicle that is used in or near off-road conditions requires the installation of several functional elements and external accessories. Perhaps the most important thing is to install a bumper with a winch - if you get stuck, the winch will be very useful. The functionality of this element is undeniable.
Durable steel, three millimeters thick, which is integral with the engine protection, will ensure the safety of the body in extreme road conditions. Additional headlights recessed into the bumper are usually equipped with fog filters. Inside such a bumper, there will also be a perfect place for a winch and towing loops.
Design Features
What can the instrument panel tell us? The Chevrolet Niva is designed in such a way that its panel unites all the control devices of the car. It includes:
- speedometer;
- odometer (counter of kilometers traveled);
- tachometer (crankshaft revolution counter);
- coolant and ambient temperature indicators;
- fuel level indicator;
- 12 control (signal) lamps.
In order for the driver to monitor instrument readings at night, the panel is illuminated when the side lights are turned on. How bright is the instrument panel backlight? "Chevrolet Niva" has the function of adjusting the level of illumination of the dashboard. It is provided by six special light bulbs.
Important: the shield has an electronic design and cannot be repaired if it fails! Spare parts in the form of individual panel units are not available for sale. The only exceptions are signal and lighting lamps. In other words, if at least one indicator fails, you will have to buy an assembled panel.
Key points for upgrading the Chevrolet Niva interior
For the comfort of the driver and passengers, it is important to provide stylish, comfortable and functional conditions inside the car. The main directions for upgrading the Chevrolet Niva interior with your own hands:
- Installation of chrome trims on handles and gearbox.
- Reupholstery of the interior and dashboard.
- Replacement of radio and speakers.
- The use of LED strip instead of one common incandescent lamp on the ceiling and in other parts of the cabin.
- Light tuning of the dashboard.
The simplest light tuning
- After you have removed the dashboard, remove the dark-edged protective glass.
- Remove the arrows and turn the panel over, unscrew the screws that hold the entire structure using a Phillips screwdriver.
- The next step is to remove the scales, but since they are glued to the plexiglass, be careful not to break it.
- Peel off the light filter (located on the scales) and wipe off any remaining glue with nail polish remover or solvent.
- Then we put everything back in its place and check it.
Important! It is better to control the entire process through a fluorescent lamp, so all the shortcomings are visible.
The scale values on the dashboard will be highlighted much brighter than before the upgrade. This option is quite simple and quick. Moreover, there is less chance of breaking something.
We drag complex elements using glue (doors, panels, etc.)
- Initially, you need to prepare the surface; to do this, you need to rinse it well, sand it and degrease it. Sanding should be done carefully to avoid leaving scratches.
It is best to degrease with products specially designed for this purpose, such as Supercolle or at least gasoline.
- Then glue is applied to the entire surface and material, uneven areas are coated with a brush. Use a hair dryer to heat and smooth the material.
If you can’t glue the material to some areas of the surface, then they need to be filled with automotive putty and the re-upholstery must be repeated again.
Dashboard plug addresses
| White 13-pin header (X-1) | |
| 1 | "Mass" (body) |
| 2 | Tachometer (low voltage input) |
| 3 | Tachometer (high voltage input) |
| 4 | battery (via fuse F-3) |
| 5 | Coolant temperature sensor |
| 6 | Fuse F-10 |
| 7 | Empty (reserve) |
| 8, 9 | Electronic engine control unit |
| 10 | Terminal “15” of the ignition switch (via fuse F-10) |
| 11 | Handbrake switch |
| 12 | Generator output "D" |
| 13 | Oil pressure sensor |
| Red block for 13 pins (X-2) | |
| 1 | Ambient temperature sensor |
| 2 | Terminal “15” of the ignition switch (via fuse F-16) |
| 3 | "Mass" (body) |
| 4 | Panel light control |
| 5 | Turn switch (starboard repeaters) |
| 6 | Turn switch (left side repeaters) |
| 7 | Brake fluid level sensor |
| 8 | On-board computer |
| 9 | Speed sensor |
| 10 | Fuel level sensor |
| 11 | F-14 fuse |
| 12 | Emergency light switch |
| 13 | Terminal "50" of the ignition switch |
A few words about warning lamps
Why are indicator lights needed on the instrument panel? With their help, Chevrolet Niva gives the driver signals that a failure has occurred in one of the systems. It looks like this:
- a lamp in the form of an oil can indicates that there is insufficient pressure in the engine lubrication system (may be due to damage to the crankcase, a malfunction of the oil pump or the sensor itself);
- the light with the image of the battery turns on when the battery stops receiving charging from the battery (the voltage regulator may fail or there may be an open circuit in the generator circuit);
- a lamp in the form of a circle with an exclamation mark inside lights up when the level of brake fluid in the expansion tank drops below normal (it is better not to continue driving until you find out the cause of the fluid leak);
- a light bulb in the form of a schematic engine - “CHECK” may indicate the failure of any sensor, malfunctions in the operation of systems and mechanisms (accurate diagnosis is carried out after reading and decoding the error code);
- a signal indicator in the form of a thermometer located on top of the scale of the coolant temperature meter lights up if it heats up above normal (failure of the radiator fan, temperature sensor, thermostat).
According to the previous scheme, we disassemble the Niva’s dashboard and unscrew all the light bulbs, there are 18 of them in total, and they are all the same, and replace them with LEDs.
You can also replace the light bulbs in the stove, there are only 2 of them. To do this, remove all the knobs and remove the panel, change the light bulbs. Put everything back together and check for functionality. This another simple tuning will cost you about 400 rubles. and 40 minutes of work.
Also interesting: Niva Chevrolet alarm connection points
If you don’t like the way the basic instrument panel on a Chevrolet Niva looks, you can tune it by replacing the standard background. For these purposes, you will need to buy a special overlay in the store with the dial values already printed on it. They are usually presented in a wide range of car dealerships. All that remains is to choose a ready-made one to suit your taste and replace the standard one with it; this can be done while replacing the incandescent paws with LEDs.
Salon
For some reason, they often try to modify the outside of cars, leaving everything inside as it was intended by the factory. This is not entirely the right tactic, since there is a strong contrast between the bright exterior and the gray interior.
In order for the interior to have its own strong qualities, which Chevrolet did not try very hard to equip its Niva with, everything has to be taken into your own hands.
In terms of internal tuning, I offer the following options:
- Retighten the role with leather or buy a new steering wheel. Beautiful and practical, because the factory steering wheel is very boring;
- Change the instrument panel. A complete change of the dashboard, which includes the instrument panel, is not the easiest task. But the car is transformed instantly;
- Install fashionable electronics. Yes, you can take a separate navigator, audio system, install DVRs, etc. Although it’s easier to take a comprehensive multimedia system that will have everything. We will also include a high-quality audio system for fans of good music;
- Inserts for transfer cases, gearshift knobs, regulators. They can be completely replaced, decorated with stickers or tinted;
- Noise insulation. A drastic intervention that will not affect your appearance in any way. But it will noticeably affect the level of comfort;
- Replacement of seats. You can only change the trim, install covers, or completely get rid of the old interior by stuffing new front and rear seats into the Chevrolet Niva. If you have money and have big plans for a crossover, you can invest;
- LEDs, stickers, pedal covers, etc. Minor tuning that allows you to specifically change the appearance of the interior. Nowadays we sell a wide variety of tuning elements, so choosing products for your Chevrolet will not be difficult for you.
In fact, we can talk endlessly about internal improvements. Companies come up with everything they can to make car owners spend their money. Some accessories are truly useful, while others just help you stand out a little and show off your personality.
Also interesting: Fuses Niva 21214 injector
"Niva-Chevrolet": instrument panel, designations
Now let's look at the “screen” itself. What indicators does the instrument panel combine? Chevrolet Niva is not original in this regard. The largest indicators are the tachometer and speedometer. Their round scales are located in the center of the shield. The hands of these devices are driven by small, separate stepper motors.
Below the tachometer there is a liquid crystal screen, which displays information about the ambient temperature, as well as the time. At the bottom of the speedometer scale is the same display informing the driver about the total and daily mileage.
To the left of the tachometer is the coolant temperature gauge scale, to the right of the speedometer is the fuel level indicator in the tank. Both devices have a magnetic-electric design.
In the lower left corner there are warning lamps for the battery discharge indicator, parking brake engagement, emergency engine oil pressure, as well as another backup lamp. The lower right corner is occupied by indicators for turning on the headlights, high beam headlights and a low brake fluid level indicator.
At the top, between the tachometer and speedometer scales, there are arrows for activating the turn signals (right and left). At the bottom center of the dashboard there is an indicator for turning on the hazard warning lights, and below it is a “CHECK” indicator lamp.
Installation
Attach the purchased trim to the dashboard and trace all the components and symbols so that when you cut off the excess, the trim will lie flat. Then remove the old one and glue a new one in its place. This is probably the most difficult thing in the whole procedure.
Also, many people like to change the color of the instrument hands, most often to white, as it advantageously reflects the LED backlight of the dial. This is done using women's nail polish. The old paint is cleaned off with a utility knife and the hands are degreased with nail polish remover or acetone. Then they are coated with white varnish.
After the varnish has dried, they can be put in place. Glue the overlay onto the panel, place the arrows and assemble everything in reverse order. Enjoy the updated version of the instrument panel.
Possible faults
The instrument panel, like any other electronic component, is susceptible to harmful factors such as a short circuit, broken wires in the power or information circuit, or a malfunction of one of the main components of the device. If you have encountered a similar problem, first of all, determine what signs of failure the shield is showing:
- the panel does not function at all, but the engine starts and runs normally;
- The Niva-Chevrolet instrument panel does not light up, but all indicators work (no backlight);
- The speedometer and tachometer do not work;
- Temperature and fuel level sensors are not functioning.
In the first case, contact on the device connectors is most likely lost. It is enough to disconnect the pads, clean the contacts, and everything will work again. A similar malfunction can overtake you in the fall or winter, when the level of moisture in the air is high.
If on a Niva-Chevrolet car the instrument panel lamps do not light up, but all its elements are operating normally, the reason must be sought in the power wires of the lighting bulbs, or in the lamps themselves.
Failure of the tachometer or speedometer also indicates a break in the power circuit. The same can be said if there are problems with the fuel level and temperature sensors.
If you understand the symbols of the light bulbs in the Niva Chevrolet instrument panel, let's look at the next point - possible malfunctions of the device:
- The instrument cluster does not work, but the engine starts normally. Most likely, the problem is caused by either a failure of the shield itself or a lack of power.
- The lights on the instrument cluster do not light up. If all the indicators stop working at once, this may indicate a break or fraying of the wire responsible for the lighting. If only some of the lamps do not work, then most likely they are simply burnt out.
- Devices do not work - speedometer or tachometer. Most likely this is an electrical type problem; you need to disassemble the panel and look for the fault.
- Sensors do not work - fuel level, antifreeze temperature. As practice shows, this usually indicates poor contact in the electrical circuit. Usually this problem is solved by disconnecting and cleaning the plug contacts (the author of the video is the Ig K channel).
Also interesting: Replacing the heater valve (heater valve) Niva VAZ 21213, 21214, 2131 lada 4×4
Exterior finishing
A separate topic is the replacement of wheels, which can add up to eighty percent of the beauty of a car. The appearance of the car changes significantly if tuning headlights are installed on it. As a rule, optics are easy to change; all work can be done on your own.
The tuning also includes a power body kit, which involves installing a front bumper with the ability to mount a winch and a reinforced rear bumper to ensure the protection of the body when traveling through the forest.
You should also think about protecting the engine compartment to give the car greater advantages on bad roads. Sheet metal will perfectly protect the motor from water getting into it. An excellent solution is to install additional thresholds. They will make an excellent support when leaving a car stuck in the mud. An additional tuning element is cables stretching from the front bumper to the roof. This is additional protection from branches that can damage the car when driving among trees.
Torpedo tuning Chevrolet Niva
To tune the torpedo, you must first remove it. Don't forget to turn off the power beforehand. After which you can either cover the torpedo with leatherette, or paint it with a spray can or spray gun in any color you like. If you decide to cover the dashboard with fabric or leatherette, to do this you need to take measurements from the dashboard and make patterns from them so that it is convenient to cut the material and not confuse anything with the dimensions.
Then you need to sew the components together and start reupholstering. To do this, use hot glue and a regular hairdryer. The glue needs to be applied to the dashboard and, after waiting a little, apply the material, smoothing it and heating it with a hairdryer. This is done to prevent air bubbles from forming underneath.
When the work is completed, the torpedo can be installed in place, but keep in mind that some parts will become thicker and you may have to file down the plastic or trim the fabric here and there.
Of course, the easiest option for tuning a dashboard or dashboard is to buy a new one, but it is much more interesting to make the upgrade yourself and catch the admiring glances of passengers.
Upholstery reupholstery
Still, the most difficult and most responsible of the entire list is reupholstering the car interior. And it, first of all, catches your eye when opening the doors, so let’s dwell on it and consider in detail all the stages of implementation.
Choosing a color
Choosing color is one of the most important and serious stages of work. In any case, the choice remains up to the taste preferences of the car owner, but some aspects should still be taken into account:
- The color of the car and the interior should be in harmony, but it is not necessary to make them the same.
- Choose the right color combinations. You can use the diagram below.
- Typically, the design of a car interior involves two basic colors in a ratio of 55 to 45%.
- When the ceiling remains unchanged, then some parts of the interior are adjusted to match its color.
- Pay special attention to the color of the stitching, but do not overdo it with contrast. The stitching matches the color of the car and looks very good.
Important! If the interior material is black and the stitching color is light or white, please note that all defects will be immediately noticeable.
Choosing material
The range of upholstery materials is simply huge, so when choosing, try to imagine your salon with each of the options you like. The main criterion in this part of the preparatory activities is the price issue, since everyone’s capabilities are different. The materials most often chosen for reupholstery are:
- Faux suede.
- Velveteen.
- Velours.
- Leather.
- Leatherette.
Important! Do not buy material over the Internet, since it is very difficult to understand from the photo what quality a particular option has; most often the images do not correspond to reality.
Buy material in reserve. The most proven way not to miss the quantity is to measure all the components of the interior that you are going to tighten and multiply by a safety factor of 1.2. Threads should be strong and elastic; a good option would be threads for leather products or eco-leather (Gutermann, Arianna, Synton, etc.). They can also be used to work with other materials.
Glue
To tune the interior of a Chevrolet Niva, you will also need glue. For these purposes, “Moment”, “Kaiflex” and universal “88 Luxe” adhesives are suitable.
Replacing the instrument cluster on a Chevrolet Niva
What can you tell by looking at the described instrument panel? Chevrolet Niva, despite the participation of foreign designers in the development of the car, remained close to its relatives. This is a typical VAZ shield, not much different from those installed on the new Samaras. And, to be honest, reviews about it do not evoke positive emotions.
Display – TFT LCD with RGB backlight. 3.2″ (240x320) Displays up to 5 parameters simultaneously. Updated design. Reset ECU errors. Working with parking sensors. Software Update.
Display - LCD graphic 128×64 Installation - in a standard place. Black background white symbols. Autolight. Working with the partner. Reset ECU errors.
For VAZ 2110, Lada Samara, Chevy Niva. Display - graphic with RGB (128x64) Installation - in place of the standard EPC. Reset ECU errors. Autolight. Tropic.
Display – LCD graphic 128×64 Black background white characters. Autolight. Installation is a regular place. Software Update. Working with parking sensors. Reset ECU errors.
Display - LCD graphic 128×64 Installation - in a standard place. Black background white numbers. Software Update. Working with the partner. Reset ECU errors.
For Lada Samara, VAZ 2110, Chevy Niva. Display - PLED graphic (128x64). Installation - in the standard location of the EPC. Reset ECU errors.
Display: TFT with RGB backlight. Installation - in place of the standard EPC. Autolight. Tropic. Watch. Encoder. Reset ECU errors.
For Lada Samara, VAZ 2110, Chevy Niva. Display - PLED graphic (128x64). Installation - in the standard location of the EPC. Reset ECU errors. Autolight.
Display - LCD graphic 128×64 Installation - in a standard place. Black background white symbols. Working with EPG. Working with the partner. Reset ECU errors.
Display - LCD graphic 128×64 Installation - in a standard place. Black background white numbers. Working with the partner. Reset ECU errors.
If you are planning to change the instrument cluster on a Chevrolet Niva, you have a choice - whether to buy a new factory combination, produced since 2021, the old model panel until 2021. or "tuning". It hardly makes sense to install an old panel with a “ten” design on a car - it’s too outdated, and it’s not easy to find it on sale.
What is a torpedo
In any car, comfort is created not only by comfortable seats and the presence of heating devices. A very important element of comfort in cars is the dashboard – the dashboard. Its appearance affects the mood of not only the driver, but also the passengers. On a Chevrolet Niva SUV, the standard dashboard can be improved with the help of new decorative elements and components. The main detail in changing or tuning a car's dashboard is the desire of the car owner.
All cars have a dashboard (board), which is located in front of the passenger compartment. In a Niva Chevrolet car, it is a plastic covering on which almost all vehicle control elements are located. Although the panel is not a necessary part for driving a car, without it driving turns into complete dissatisfaction.
Read news about the new Niva
- Ignition relay Niva Chevrolet where is it located
- Review of the standard alarm system Niva Chevrolet
- Niva Chevrolet installation of air conditioning - Auto magazine MyDucato
- Niva Chevrolet alarm connection points
- Installation and repair of Niva Chevrolet cooling system fans
- Chevrolet Niva pinouts. Wire diagrams || Niva Chevrolet power window button diagram
- How to change the light bulbs on the instrument panel of a Niva Chevrolet: video
- Relays and fuses Lada 4×4 (VAZ 21214, 21314) » Lada.Online || Niva 21213 low beam power button
Upgrading the suspension to match the new transmission
After tuning the transmission due to inertia, it is necessary to modify the suspension. Experienced Niva owners, even without changing the basic characteristics of the car, often replace standard suspension parts with more reliable ones that are resistant to operational loads. The practice of replacing rubber bushings with polyurethane ones is quite common and should be taken into account by each Chevy Niva owner.
Polyurethane silent blocks, couplings, seals, limiters and similar suspension elements last several times longer than conventional rubber ones. They are also not sensitive to temperatures and petroleum products, and work well in rupture and compression.
Installing double shock absorbers, contrary to the assurances of skeptics, will not make the suspension inert. Double shock absorbers will increase the car’s ability to withstand dynamic vehicle loads and make it possible to drive the car off-road at high speed.
On numerous forums that are dedicated to tuning the Chevy Niva, the issue of choosing the type of shock absorbers that is optimal for installation on an SUV with a short wheelbase is very often discussed. Fans of radical changes stick to gas-filled shock absorbers.
Niva operating experience shows that shock absorbers pay off only if they participate in cross-country racing. During normal operation, high-quality oil shock absorbers or conventional gas-oil shock absorbers from reputable manufacturers have proven themselves to be the best.