How to make it yourself
To repair heating filaments, it is not at all necessary to use special substances. It is quite possible to make conductive glue yourself. There are several popular options for such funds.
Superglue with aluminum shavings
To obtain an effective conductive composition, it is worth moving the shavings and superglue. These substances are taken in equal proportions.
Nail polish with silver graphite powder
It is recommended to add 2 types of powder to the bottle with varnish. To mix the composition, you should use a toothpick.
Epoxy resin and copper shavings
To make an adhesive, it is recommended to mix epoxy resin with shavings. In this case, it is worth observing the ratio of 5:1. It is recommended to add an amine ingredient before application. It is required for the resin to harden.
Tsaponlak and graphite powder
To obtain graphite powder, it is recommended to grind the battery core. The powder can also be obtained from a graphite pencil. To prepare the adhesive composition, it is recommended to mix tsaponlak with graphite powder in a 2:1 ratio.
Video “Repair of rear window heating threads”
Detailed explanation of heating filament repair. The video was taken from the channel “Flight Magazine Renault Megan”.
On almost all cars we can see thin longitudinal lines on the rear windows. This is exactly the heater. So why is it on almost all machines? The thing is that in the area of the rear part of the car there is difficult air exchange and with high humidity, moisture condenses and visibility deteriorates
This affects driving safety, so it is extremely important that this element is in good working order. But, unfortunately, threads do not fail very often
In this situation, restoration of the rear window heating is required.
How to find the location of a broken glass heating filament
Now let's talk about how to check where the rear window heating thread has broken. To do this, you will need a voltmeter or ohmmeter of your choice. Do the following:
- Inspect the rear window - sometimes the break is visible to the naked eye: the thread is interrupted and resumes after a few millimeters.
- Turn on the heating and see where the water drops have not dried. Take a magnifying glass and look at this area more closely.
- Let the heating function remain active. One metal rod of the voltmeter needs to be connected to the positive heating terminal, and the second should be drawn along the thread from the side of the clamp with the “-” sign. Keep an eye on the indicators: the break will be where 0 volts is displayed.
- Take an ohmmeter and attach one probe to the common wire (the negative of the battery is connected to it), and carefully lean the other one against the center of each thread in turn. The break is where the resistance jumps to 4-6 ohms.
This is interesting: Features of decoding and hidden information in the marking of xenon headlights
Possible device malfunctions
If the rear window heating does not work, it means that one of the components listed above has failed or its electrical circuit has broken. You can check all the components of the heating device yourself if you have at least the slightest idea about machine repair. Below we will consider in detail the reasons for the malfunction of each node.
System fuse
Initially, if problems arise with heating, you should ensure the integrity of the safety element. Its burnout will affect the performance of the device. Each car manufacturer places this fuse in different places in its models. To quickly find its location, it is recommended to use the vehicle’s operating instructions or service book.
You need to remove the found element and check for suitability. The blown fuse should be replaced with a new one, otherwise further attempts to troubleshoot the heated glass will be pointless.
One of the reasons for the failure of the glass heating may be a malfunction of the relay; this element is located in the mounting block. The relay turns off the heating when the motor stops running. This device cannot be restored, so it is replaced with a new one.
Electrical wiring faults
If the fuse and relay are in good condition, it is necessary to diagnose the electrical wires. They probably broke, burned out or broke off at the attachment point. In this case, the heating strips will not receive voltage.
Test the condition of the power supply wires as follows:
- You need to turn on the heating button.
- Using a multimeter, check the voltage at the first and second terminals connecting the wires to the heating “buses”. They are located at the bottom or on both sides of the glass. Lack of voltage causes the heater to not work.
The first thing you need to do in this case is to clean the terminal contacts and all areas of the connection; they may oxidize and not allow current to pass through. If the tester still outputs "0", then there is a break somewhere in the wiring. A visual inspection of the entire electrical circuit path is performed. Having discovered suspicious or damaged areas, you need to connect them, since a break may have occurred in these places.
Heating strips are also susceptible to damage. Before looking for a problem area, you should become familiar with the working process in threads.
Voltage is supplied to the entire heating unit and is evenly distributed over each parallel-connected strip. As a result, these tapes act as conductors of electric current. Due to resistance, they heat up to a low temperature, which is quite enough to remove ice and snow from the surface of the glass. If the integrity of one of the threads is broken, the electric current will stop circulating through it, and heating of this area of \u200b\u200bthe glass will not occur.
Violation of thread integrity
Controls
When you press the button, the indicator should light up, notifying you that work has begun. If the switch is activated, the indicator lights up, but heating still does not occur, it means that the button contacts have become unusable. As a result, electricity is not supplied to the heater. A worn power switch cannot be repaired - a new one must be installed.
Description of the rear window defroster
First of all, you need to understand what conductive heating of a car is, how incandescent film filaments work and what malfunctions are typical for it.
Device
Heating the windshield or rear window copes well not only with thawing ice in the winter season, but also with fogging in dry weather. Thanks to the filament film filaments, the glass can be evenly cleared of ice while the car is warming up. When the air flow of the heater just begins to become warm, heating the windshield or rear window will already make it completely transparent. A heater is the only effective method to combat fogging.
Places where the thread breaks
As for the windshield, it is heated by exposure to warm air. As for the rear, in this case the heater is a certain number of filaments on a film, installed on glue, which operate from voltage. These threads, characterized by high resistance, are installed on heated glass. Filaments mounted on glue conduct energy through themselves, which allows heat to be generated. Ultimately, when the rear window heating button is pressed, the filaments begin to heat up and completely heat it up.
Working principle and functions
If your rear window or windshield heating does not work, then to correctly diagnose breakdowns you need to understand the operating principle. Below is a diagram of the operation and connection of the heater with your own hands to the vehicle’s on-board network. As you can see, power comes from the positive terminal of the battery through the ignition switch, as well as fuses, ultimately arriving at the device controller and relay contact. As for the negative terminal, it is connected to the vehicle body, and one of the heater terminals is also connected to ground.
Heater device connection diagram
When the heater is activated, current begins to flow to the relay coil. After the relay is activated, the power contacts are closed, as well as the simultaneous connection of two terminals, marked 87 and 30. The voltage is supplied to the car heater, passing through threads installed on glue, connected in parallel. After this, the voltage again passes through the vehicle's ground and returns to the battery negative.
How to find the reason
All manipulations to find the cause of the breakdown should be performed after checking the fuse. Also, often the very nature of the breakdown can suggest a path to troubleshooting.
For example, along with the heated rear window, the light in the button stopped working. It is likely that this is just a coincidence, since the light bulb could simply burn out. But the contiguity indicates the likelihood of a lack of power supplied to the button. In this case, according to the diagram above, you need to check the circuit from the ignition switch, pins 1 and 9, 2 and 4 on the mounting block, relay contacts 85 and 86, as well as the button itself.
There is no heating of the filaments, but the light in the button works after switching on. In this case, power is definitely supplied to the button, so there is a breakdown in the circuit after the switch. It is necessary to check fuse F4, the heating switch relay and the corresponding terminals in the mounting block, as well as the contacts of the heating filaments.
The glass only partially thaws, which indicates that some of the filaments have broken.
Power check
To diagnose an open circuit, you need to know how to use a multimeter. In DC current (DCV) measurement mode, you need to check sequentially whether voltage is being supplied to certain terminals.
To check the power supplied to the relay, it must be removed from the mounting block. To check, you will need a multimeter (in DC mode, up to 20 V) or a tester. Turn on the heated rear window. If there is current at the 85th and 86th relay terminals, then there is a fault in the relay itself or in subsequent elements of the circuit.
To check the functionality of the relay itself, it must also be removed from the block.
To check the coil located in the relay, connect the probes to pins 85 and 86. If the multimeter shows infinite resistance and the red indicator in the control does not light up, indicating a short circuit, then the coil has burned out or the contacts have become unsoldered. For subsequent testing, connect power from the battery to pins 85 and 86. After a click, indicating that the coil is working, contact should appear between pins 30 and 87.
If you do not want to check separately the relay and pins 85, 86 in the mounting block, check if there is voltage at pins 10 (Ш9) and 5 (Ш8). The presence of voltage will be a fact that the relays and tracks of the mounting block are fully operational.
Article on the topic: How to drive an automatic transmission correctly - tips for driving a car with automatic transmission
If, when troubleshooting, you find oxidation of the contacts, clean the surface with sandpaper or a file. The heater repair will be completed.
Finding a broken heating element
There are many ways to detect broken conductive threads. To search, you can use a multimeter in resistance measurement mode. You need to measure the resistance at the beginning and end of each thread. The value should be approximately the same. If the value 1 lights up on the screen, this will indicate a break. You can connect to the terminals of the battery threads. The multimeter must be switched to DC current measurement mode. Attach the positive probe to the positive terminal of the heating element, and apply the negative probe to the middle of each thread. The value should be equal to half the battery charge.
To localize the location, measure in the same way, starting from the edge of the thread. Place the probes at a distance of, for example, 10 cm and move towards the edge of the thread. To avoid damaging the tinting excessively, you can solder needles to the leads of the probes. This way you can pierce the film unnoticed and not harm the threads themselves.
Checking the voltage in the circuit
If all fuses are good, but the heating does not work, you need to check the entire circuit. For this, a tester (multimeter) is useful, which is connected to the contacts near the rear window. If there is no voltage, then you need to look for a break in the wiring.
You can also use a multimeter to determine why the heating is working, but very weakly. This may be a consequence of poor contact somewhere between the circuit elements. This is easy to spot. In such a situation, the device will show a large (more than 1 V) voltage drop relative to the voltage at the battery terminals.
Freezing point of concentrate
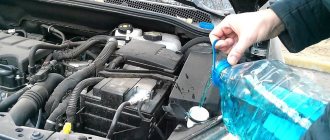
Many car enthusiasts are accustomed to buying antifreeze in 1 liter cans. And immediately after purchase, they pour the product into the cooling system of their car. But remember that this is not ready-made antifreeze, but a concentrate.
And there is no need to do this, since pure antifreeze has a freezing point of -13, no matter how trite it may sound. At the same time, on the packaging you will always see a freezing temperature of up to -70C, but it only works after mixing with distilled water, or just tap water, depending on the quality of the antifreeze.
As an example, let's take diesel antigel, which freezes in its pure form at temperatures down to -1C, and when mixed with diesel. fuel prevents it from thickening to -33C.
Classification and varieties
In trade, this product comes in two types: concentrated and ready-to-use. Concentrates are not poured in pure form, they must be diluted with water and only then used as a cooling liquid.
Many professionals recommend diluting antifreeze with distilled water to extend its service life. More often, dilution ratios are indicated on the cooling fluid packaging. It should be noted that the ratios depend on air temperature. This video will help you figure out which type is best to choose and for which car.
The process of fuel combustion inside the engine is carried out at temperatures of 2100-2300 degrees Celsius. At this temperature, without forced cooling, every part of the engine could heat up to a temperature that is significantly higher than the temperature at which the oil ignites.
In addition to oil combustion, when the engine overheats, the friction force and wear of parts increases, thermal gaps become smaller, the oil cokes and carbon deposits are deposited, the carburetor engine cylinders are filled with a poorly combustible mixture, and diesel engines are filled with air after cleaning. At the same time, strong heat removal contributes to engine overcooling, changing the properties of oil viscosity, which causes increased wear of parts, a decrease in engine power and economy.
The ideal thermal regime of the engine will be the range of 85-95 degrees Celsius, regardless of its load and the ambient temperature.
Methods for repairing heating element filaments
There are several ways to restore the functionality of a heating filament at home.
Using conductive pastes and adhesives
The easiest and most effective way is to use special repair kits, such as DONE DEAL DD6590, designed to repair rear window defroster threads and contacts by both amateurs and professionals. The good thing about this method is that it does not require tools or materials. It is enough to apply a little conductive paste from a syringe to the site of the thread break according to the attached instructions, wait until the paste hardens and the repair is completed. But this set costs more than $15.
The second method is similar to the previous one. But instead of a proprietary set, they use purchased conductive adhesives, for example, Elekont, a Moscow manufacturer. Glue is applied to the place where the thread breaks, overlapping the entire part of the thread by a centimeter on each side. To obtain a neat look, use a stencil made of electrical tape or adhesive tape. For reliability, the glue is applied twice. It is advisable to lay a piece of tinned copper wire with a diameter of 0.3-0.5 mm between the layers of conductive glue.
There is an opinion that conductive paste or glue for repairing glass heater filaments can be made independently by mixing paint or glue with brass filings in a one-to-one ratio. The resulting composition is applied in a thin layer through a stencil to the place where the thread breaks in several layers. But the reliability of this technology has not been confirmed by practice.
Electroplated copper deposition
Another method is galvanic copper deposition. The heater filament repair method seems attractive. But from personal experience I can say that the reliability of such coatings at home is low. So I was hesitant to use this technology.
Using soft soldering
A mechanical method of restoring the integrity of the rear window heater filaments, using soft soldering, has become widespread. I tested the reliability of this method when repairing rear window heating filaments in my own car. The step-by-step instructions below, written based on my experience, will allow you to easily repair the heater filament yourself in just a few minutes, with virtually no financial costs.
On the advice of theorists on the Internet, I made a big mistake and tried to clean the thread with sandpaper. As a result, instead of a break in the thread 1 mm wide, there was a break larger than 1 cm. The thread strip is very thin, only a couple of tens of microns, and can be erased instantly even with the finest-grained sandpaper. The heater threads are already not covered with anything, and it is enough to degrease the soldering area using a rag soaked in alcohol or acetone.
If the width of the thread break is less than 1 mm, then you can do without soldering an additional conductor. In my case, the width of the gap was large, and I had to first prepare a piece of copper wire for the jumper. A current of about 1 A flows through one thread of the heater. Based on this, we select a wire with a cross-section of 0.17 mm2, which corresponds to a diameter of 0.45 mm. The length of the copper jumper must be equal to the width of the thread break plus 2 cm. Before soldering, the jumper must be tinned with a thick layer of POS-61 tin-lead solder. There is no need to tin the heater thread.
In order for the solder to reliably adhere to the heater thread, before soldering the jumper, you need to lubricate the thread in the soldering zone with a thin layer using a brush.
Next, the jumper is pressed against the heating thread and heated for one second with a 12 W soldering iron. The hand is moved to the side. The jumper should be held on by a thread. Trying to tug it to check the quality of soldering is unacceptable; it will fall off and also tear off a piece of the heater thread. Unfortunately, this has been verified empirically. As a result of experiments, I eventually had to solder a jumper 5 cm long.
After soldering one end of the jumper, the second is pressed tightly to the thread and is also heated with a soldering iron. After soldering is completed, in order to remove residual acid flux, the glass is thoroughly washed with water.
To top it off for reliability, although this is not necessary, I covered the soldered jumper on top with transparent “Moment” superglue based on cyanoacrylates, the heat resistance of which is about 70°C. The heater does not heat up above this temperature.
As a result, the time to repair a broken thread with your own hands, taking into account all the preparatory work, was no more than ten minutes. The repaired threads have been in service for more than three years.
Signs of breakdown
You can understand that there are problems with heating by the following signs:
- The glass begins to sweat when the warning light does not work. The first thing you need to do is check what voltage and serviceability of the fuses
- The glass does not heat up when the control lamp is on. The reason may be due to lack of voltage
- Condensation appears in some places; this may be due to a broken thread. Can be restored through repairs, special varnishes
- Defrosting does not occur even though the system is working properly. This can happen if the glass is heavily iced and there is not enough voltage; you need to clean the ice yourself.
There can be many reasons for the breakdown, ranging from the switch to the wiring itself, which can only be repaired by disassembling the entire dashboard.
If the reason is a broken thread, you can try to restore it. There are many different ways to solve this problem, which look like this:
- To eliminate a break, up to one millimeter, you need to prepare a special adhesive composition, for example (Kontaktol, Elekont), a syringe, or a glass cleaner. Special glue is applied to the area where there is a break, and insulating tape is tightly applied on both sides.
- You can use soft soldering or resort to the option of galvanic application of the material. But this procedure is labor-intensive and difficult to carry out in garage conditions.
- If the width of the gap exceeds two millimeters, you need to use a tinned copper core with a cross-section of 0.2 millimeters. It is better to perform soldering with POS-61 solder, but do not tinning the thread.
This is interesting: Technical inspection of Renault Logan by mileage: maintenance regulations
Business and finance
BanksWealth and welfareCorruption (Crime)MarketingManagementInvestmentSecuritiesManagementOpen joint-stock companiesProjectsDocumentsSecurities - controlSecurities - valuationsBondsDebtCurrencyReal estate (Rent)ProfessionsWorkTradeServicesFinanceInsuranceBudgetFinancial servicesCreditsCompaniesState-owned enterprisesEconomyMacroeconomicsMicro EconomicsTaxesAuditMetallurgyOilAgricultureEnergyArchitectureInteriorFloors and ceilingsConstruction processBuilding materialsThermal insulationExteriorOrganization and production management
How to install a heated windshield
Installing a heated windshield is a fairly simple task. There is no need to remove the glass. The main task is to degrease the glass surface and then carefully apply adhesive tape with heating threads
It is important to ensure that the tape does not begin to peel off. You also need to take into account that if part of the filaments peels off from the glass, overheating of the filaments occurs in these places and the system partially or completely fails
Also, when performing work, do not glue threads onto wet, uncleaned or cold glass. In this case, it will not be possible to glue the tape securely; detachment will occur. If the kit for installing heated glass is minimal, then you must additionally install a fuse in a separate housing in the “positive” heating wire.
When installing the threads, it is important to glue the threads so as to heat the line of contact of the working edges of the windshield wiper blades with the glass itself. This will avoid tearing off frozen rubber and blade defects if the wipers are turned on accidentally or too early, that is, before the ice has melted.
The rain sensor may also be triggered, while the wipers have not yet warmed up.
Also, when installing the tapes, it is important to mark where the power wires will be connected to the threads. This greatly simplifies installation
The wiring itself for heating the windshield can be hidden under the pads of the front pillars (if they do not have an Airbag and/or they can be removed without difficulty).
Let us also add that when choosing a fuse for heating the glass, you can install a 10 A fuse. If the heating is powerful, then you can replace such a fuse with an analogue 15 A.
The power connection circuit must be thought out so that it is powered from standard wiring
Please note that you should not take power from the cigarette lighter, since heating can work even if the ignition is turned off. It is optimal to make the heating work only when the ignition is on
You also need to install a switch (button) for heating the windshield. It is advisable to select such a switch with a wear-resistant key and contacts for powerful energy consumers, as well as with a reliable housing that will not melt. For such tasks, it is better to choose a suitable car switch.
In parallel, you can use the connection of the heated windshield to the heated rear window, but this is not recommended due to heavy loads. It's better to create a completely separate circuit.
It is better to connect the heated windshield in the area of the engine compartment, leading the wires there. In this case, the “+” wire also needs to be brought into the cabin to connect the windshield heating button. This approach will allow you to turn on the heated glass only from a button from the passenger compartment and only when the ignition is on.
Restoring heating filaments
If the rear window heating system as a whole works, but individual elements do not heat, they can be repaired. It will not take much time, and the operation does not require large expenses or special skills.
Many car dealerships sell kits for restoring the heating of rear window heating filaments. When choosing them, you should pay attention to the color, as the dye can be red, brown, or orange.
The area where the track is damaged is degreased with alcohol, and after it dries, the adhesive tape supplied with the kit is used. It is glued so as to leave thin strips equal in width to the factory heating filaments.
If you follow the manufacturer's recommendations regarding the number of layers, drying time, temperature conditions, then the consequences of the repair will be practically invisible.
As you can see, if you put in a little effort, solving the problem is not so problematic. Continuing the topic of 7 car breakdowns that every driver should be able to fix “hands-on”.
Did you like the article? Then support us, click
:
Troubleshooting and repair
It is believed that it is quite simple to determine damage to the heating system, and every driver can cope with the given task. Before starting work, it is recommended to count the threads applied to the glass, so that later it will be easier to remember which one is damaged. There are times when the gap cannot be seen: it is so small that one of the devices should be used. This could be a voltmeter or multimeter. In any case, in order to repair the rear window heating threads, you need to carefully examine the surface and identify damage.
There are several effective troubleshooting methods:
- Visual diagnostic method - in damaged areas, when the heating is on, the glass does not warm up and remains fogged up.
- Using a voltmeter - with the heater on, one probe should be placed on the “ground” of the machine, and the second, wrapped in foil, should be placed in the center of the thread. It is necessary to monitor the voltage; its value should not exceed 5 V. If the device shows 0 or 12 V, then there is a gap in this place.
- Using an ohmmeter, the device is turned on in “kilo-ohm” mode and connected to the opposite terminals of the heater. You should moisten the cotton wool and run it along the thread. In the place where the arrow will twitch, there is a gap.
Determining whether the rear window heating is faulty
You can repair the system using a repair kit, conductive paste and traditional methods. The main difference between all options is the materials that are used during work.
Repair materials
By purchasing a repair kit, the driver has the opportunity to repair a heating filament up to 10 cm. Materials used in such kits:
- template with threads;
- thermally active polymer resin in a cylinder.
Materials for repairing heated rear window
Work is carried out strictly with the heating system turned off. Having determined the location of the damage, it is necessary to remove the protective film from the template and attach it to the location found. The polymer material is applied using a brush and, after drying, repeated several times. After completing the work, the stencil is removed and it is advisable not to turn on the heater for 24 hours.
The materials that are used in “folk” methods of repairing a heater are paint (glue) and shavings, metal for soldering the damaged area. As a rule, the paint is selected in accordance with the color of the threads and combined with shavings, maintaining a 1:1 ratio. To work, you will need a stencil on which to apply the mixture (with the device turned on). The advantage of this repair method is that there is no need to wait 24 hours for drying. The driver can immediately drive after completing the work. Zinc chloride is suitable for soldering.
How to restore heat with glue
Quite often, drivers use conductive glue to repair the heated rear window. The material is mixed with shavings, which are extracted with a file or a copper-brass bar. The proportion is 1:1. The result is a soft dough consistency. A stencil is made using electrical tape or adhesive tape, and the prepared mixture is applied to the damaged area. After the procedure, there is no need to wait for the materials to dry and you can immediately hit the road.
Adhesive for repairing heated rear window
What to do with contacts, and other methods
If the contacts in the heating system of this element of the car are damaged, then it is best to use the soldering method. This method is the most reliable and will help you forget about this problem for a long time. Zinc chloride is perfect for the job. It is recommended to use solder with a minimum tin content. After finishing work, the glass should be rinsed well with water to remove any remaining chemicals.
Why do the heating, heater and wipers fail at the same time?
Separately, situations stand out when the stove, wipers, and heated rear window do not work. Sometimes, along with these systems, the washer also stops working.
A one-time failure of these devices causes a lot of problems; problems can occur periodically, but they affect the safety of the car. The peculiarity of this breakdown is that the operation of all components is tied to one fuse.
Ways to eliminate the defect:
- To quickly solve the problem, just replace the fuse;
- When examining a faulty unit, it is easy to notice burnt tracks, which can also be soldered.
Depending on the car model, the problem may lie in the ignition relay, which is typical for domestic cars. Sometimes the contacts come loose, but more often the relay needs to be replaced to restore functionality.
What to do if the threads break, how to determine the defect
If the rear window heating stops working, you need to inspect the device to understand the cause of the problem. Most often, the main problem is a violation of the integrity of the threads - the contact necessary for the passage of current and heating disappears.
Determining the location of the damage:
- When the glass fogs up, you need to turn on the heating, which will make it easy to identify non-working elements. It is noteworthy that the performance of the remaining components is not affected, since a parallel design is used.
- Having cleaned the surface, we proceed to inspection. If there is a significant gap, the defect is easy to detect.
- In case of invisible damage, use a magnifying glass or multimeter.
Diagnostics using a multimeter begins by connecting the clamp to the housing. Then, using the second tip, you can begin the process of searching for the damaged area.
When the heater is functioning, there should be a voltage of 12 V on the side bus. Otherwise, the relay is faulty or the contact is bad.
To find a break, you need to determine the resistance by checking the threads in the central part. There should be indicators of no more than 2–3 ohms. If a resistance of 6 ohms is detected, then there is a defect. Having identified the thread, you need to carefully check it, measuring every 1-2 cm.
When identifying the location of the break, the results before and after it will be very different.
Subtleties of heating system repair
Broken threads are the most common problem. Car owners often wonder why the rear window heating stopped working. The problem lies in the threads - they are quite fragile and easily damaged during active friction. To remove dirt, it is better to use a soft cloth and special products. If you have to work with a scraper, you need to do it carefully.
How to troubleshoot:
- Using a complex that includes a syringe and conductive paste, it is easy to restore the integrity of the area. It is enough to apply a thin line of the composition to the damaged area. Drying occurs within a few minutes, sometimes you need to wait a day - it all depends on the product. You need to turn on and check the functionality of the system after complete drying.
- Choosing a conductive adhesive is a more affordable solution. The glue must be applied in two layers. And between them it is advisable to lay copper wire with a diameter of 0.3 mm.
- Applying a mass of paint and non-ferrous metal shavings. The procedure is performed with the heating on. While covering the damaged area, a hissing may occur, which soon goes away. Drying time – 30 minutes. It is advisable to begin operation within an hour.
Attention:
In each case, you need to make a stencil, since the laid line must completely correspond to the width of the thread. Before applying the compounds, the surface must be degreased.
Another restoration method is soldering. This is the most reliable method, and if the damage is small, soldering is carried out quickly, without wire.
Carrying out work for more serious defects:
- wire with a cross section of 0.17 mm 2 is used;
- its length should be slightly larger than the damaged area;
- the edges need to be tinned;
- degrease the working surface;
- coat the thread with zinc chloride flux;
- Having completed the preparation, we begin to work, pressing and soldering the wire into the edges of the threads;
- 12 W power is used;
- When finished, you need to check the soldering area and clean the surface from flux residues;
- the treated area is covered with a heat-resistant adhesive composition.
It takes several hours to complete such work, after which the vehicle can be used safely.
Can the air conditioning system work for heating?
A properly functioning air conditioning system keeps your car comfortable during hot weather. However, even in winter the air conditioning must be turned on. During operation of the device, the moving elements are lubricated. By running the air conditioner during the cold season, you can quickly defog the windows.
Useful tips
Car tuning is a constant process.
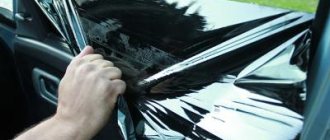
When a driver decides to replace or simply completely remove car window tinting, the following practical recommendations will help him:
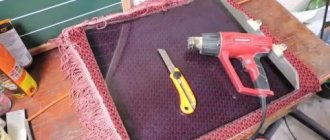
remove the tint film only in a calm environment without haste; do not use abrasive methods; use knives and blades with caution; allow the glue to soften and only then begin to separate the film; do not heat the hairdryer to high temperatures to avoid melting the film and cracking the glass; first use soap solutions and only as a last resort chemical solvents; Be careful when removing the film on the rear window or entrust it to professionals.
If you follow these simple recommendations, you can protect your car from unpleasant damage. Removing the tint film without the participation of specialists is quite possible.
To do this, you need to set aside a few hours of free time, be patient and have some available materials. After the procedure, the car windows will be in their original condition.
Finding the break point
Part of the car glass stops heating due to a broken thread, which you, for example, can touch with an abrasive while removing the adhesive from the tint film. Since the heating elements are thin and in certain lighting conditions are practically invisible. There are several ways to detect a break:
- On the glass that has already fogged up, turn on the heating (in some car models it is enough to start the engine). Make sure that the area of the break remains fogged, while the rest of the window becomes foggy.
Types of heating systems
Electric heating can be implemented in several ways. Most often heated in cars:
- the entire area;
- purifier rest zone;
- washer nozzles;
- wipers.
You can install heating yourself only in the wiper blades and washer nozzles.
Integrated
Heating the front window over the entire area is an expensive technology that is not applicable to all brands of cars. The windshield consists of several layers that are glued to a strong film in the middle. This ensures safety in the event of an accident: the impact does not cause fragments to fly apart and remain on the film.
The heating threads cover the entire area of the windshield and ensure the rapid melting of snow, ice and the disappearance of perspiration. To increase productivity, engineers integrate the system between the street layer of glass and the protective film. Thus, it is impossible to reach the threads without breaking the glass.
An important factor is the presence of a depolarizing coating. Otherwise, thin threads will distract the driver when driving in the light and at night. You can get disorientated or partially blinded even during the day from the low-beam headlights of an oncoming car.
The system includes:
- glass with built-in system;
- control unit with temperature control and automatic shutdown;
- heating switch in the car interior.
Warming up the purifier area
The option is optimal for most drivers. The cost of the system is not much higher than the price for a regular visor, and the threads do not interfere with assessing the situation on the road.
The technology involves installing thick heating elements in the lower part of the glass. The connection is made using a button in the interior and a relay with a shutdown timer. The system usually runs for 10-15 minutes and turns off automatically.
Thick threads ensure smooth heating of the glass in the wiper area. This softens the rubber and significantly increases the contact area with the glass. Heating also removes ice from the working elements of the brushes and prevents them from freezing.
Device options:
- thick threads;
- activation key in the cabin;
- relay with timer.
Heating of injectors
Heated windshield washer nozzles help quickly remove ice from the hood and clear ice from the fluid passages.
The option is often combined with heating of the entire line and the anti-freeze tank. The warm solution softens the rubber bands of the windshield wiper blades and helps remove stuck snow and ice faster.
Device:
- nozzles with built-in heating element;
- power supply button;
- temporary relay for 10-20 minutes.
The system does not provide for the use of ordinary water at cold temperatures, since it will take a lot of time to completely remove ice and be able to create pressure in the channels. When water freezes, it expands and can damage the reservoir, channels and nozzles.
Heated wipers
Heated windshield wipers prevent icing of the moving elements in the cold season. The system is the cheapest to produce. Heating is provided by an element built into the brush body.
Power is supplied via a cable that is laid inside the bezel or along the back. The option softens the rubber and transfers heat to the area adjacent to the glass. The ice at the bottom of the shield thaws and does not interfere with the operation of the wipers.
It requires a powerful flow of heat to warm the entire brush, so it is not recommended to use the system on days with particularly low temperatures. This often leads to cracking of the windshield in the area where it contacts the brush.
Repairing the heating mechanism yourself
Restoration work most often involves returning the heater filaments to working condition. Repairs can be carried out in several ways.
Troubleshooting a heater using a copper solution
Tools:
- sulfuric acid;
- copper sulfate;
- a copper rod with a diameter of 6–10 mm;
- woven strip (length - 50 cm; width - 30 mm);
- scissors;
- adhesive tape (scotch tape);
- glass cleaner.
After the preparatory stage, you can begin the actual repair.
First of all, the motorist must examine the threads of the heating system and find where the breaks appear. They are often visible to the naked eye. Next, you should turn on the heating. Let the system run for a while. After this, examine the window with your palm - all places where there are breaks will be cooler. You can also use a voltmeter to determine damaged areas. Using the positive output, faulty areas are identified. Breaks are accompanied by a drop in the voltmeter readings to zero. The negative terminal of the device must be connected to ground.
The video shows the process of repairing the rear window heating terminal:
Wrap one end of the rod with a piece of pre-prepared fabric. You can secure the improvised tassel using thick threads. Now you can start preparing the solution. Pour half a glass of clean water into a container and add copper sulfate (two teaspoons) to it. Stir until completely dissolved. After this, add a small amount of strong concentration sulfuric acid (0.2–0.3%) to the liquid. It can be replaced with battery electrolyte (0.5–1%).
The terminals from the heating system are connected to ground. A wire coming from the positive battery terminal is connected to a brush made of a metal rod. With the resulting electrode, soaked in the solution, the driver must diligently rub the sectors in which the appearance of breaks in the conductive element is noted. Areas with minor damage to the threads are completely covered with copper after this procedure. The ends of large breaks will have to be pre-treated with a soldering iron. With its help, an additional jumper made of a very thin wire is attached.
It is recommended that the motorist carry out restoration work in a work suit, otherwise the clothes may be damaged by the working solution.
Rear window defogger conductor rupture
Troubleshooting a Heater with Conductive Adhesive
Progress:
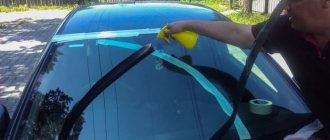
- Preliminary cleaning of damaged areas. You can use regular detergent for this. Finally, wipe the damaged areas dry and degrease them with alcohol.
- Use duct tape to seal off the area where the conductive adhesive is applied.
- Conductive glue, consisting of two components, is mixed in a separate container, strictly following the instructions indicated on the package.
- The layer of adhesive liquid should not exceed 2 mm. The hardening time of the conductive layer is 30 minutes.
- Perform the work with a cotton swab or brush.
- Removing the tape upon completion of the work done.
To facilitate repair work, you can purchase special repair kits from auto shops, which include a stencil and conductive glue. Their price ranges around 300 rubles. You can also use DD6590 glue instead. It looks like a syringe with an activator, a wooden applicator and a cloth soaked in alcohol.
Knowing how to repair the rear window heating system and what tools to use, a motorist will never drive with icy windows, and therefore will be able to avoid an accident on the road.
Phased renovation
The first thing you need to do is diagnose it and purchase a repair kit. There may be several options for a repair kit, and the repair technology in each case is discussed below.
Finding a Cliff
In addition to visual diagnostics of the condition of the threads, there are several more methods that are more reliable and effective:
- Visual diagnostics require activating the heater when the rear window is foggy. Where the threads are broken, the surface will warm up almost instantly, while in other areas visibility will be problematic.
- Using a voltmeter requires activating the ignition and then turning on the heating system. One probe should lie on the vehicle ground, and the second near the center of the heating tape. First wrap the second probe with foil. The break will be localized in the area where the voltage rises to 12 V or drops to zero. Ideally, this parameter should not exceed 5 V.
- The second method of using a voltmeter involves fixing one probe to the positive terminal of the heater, and the second one must be moved along the negative terminal strip. The problem area will be where the voltage is zero.
- Using the ohmmeter requires activation of the kilo mode. The device must be analog, with an arrow. The probes should be located near the system terminals, which are located in opposite directions from each other. Use distilled water to wet the cotton wool, which must be smoothly passed over the tape. As soon as the needle of the device moves, you will be able to detect the cliff area.
Repair with conductive glue
Repair of the rear window heating threads can be carried out using conductive adhesive. It is designed for temperatures from -60 to +100 degrees. You should not choose kits with glue, which cost 150-200 rubles. Often they do not last long or may not be effective at all. A cost of 300-400 rubles would be optimal for such a set.
Work order:
- Please read the instructions included with the kit. You should have a clear understanding of the options for applying the composition and the speed of its complete drying.
- Prepare the problem surface. Soak a rag in the alcohol solution and wipe the area.
- Lightly sand the edges in the break area with grade-grade sandpaper. It is enough to simply remove plaque and carbon deposits in two movements.
- Use tape to cover the strips along the thickness of the sides. It should not overlap the thread, but also avoid going too far away from the tape. Focus specifically on the width of the thread.
- Proceed to apply conductive glue to the prepared area using a brush or syringe. The instructions will tell you how many layers to apply. The overlap on the working areas of the tape should be 1 cm to the left and right.
- Remove the tape and wait until the composition dries completely. This will not happen before 24 hours.
- Check the functionality of the system after drying.
In winter, on cars in which the air conditioning does not work well, the rear window defroster is a real salvation. Driving a car without being able to assess the situation behind you is extremely irresponsible, and it is not recommended to go to parking areas with ice on the rear window. Some drivers use a scraper to remove ice, but most car models have a rear window defogger that can eliminate the ice problem.
The rear window defroster is a very simple device that consists of a series of horizontal lines of electrically conductive material applied directly to the glass. Near the side edges of the glass, vertical conductor lines approach the threads, through which the current flows to the electrically conductive material. The simple design of the rear window heater suggests that there are not many reasons that can lead to its failure. Below we present the main reasons why the device may not work, as well as methods for repairing the rear window defroster.
Design of the rear window heating system
The system that helps clear the rear window of ice, snow or fog is not very complicated in design. The electrical circuit in general terms can be depicted as follows:
- C - generator.
- E230 - OZS system switch.
- J519 - on-board electrical network control unit.
- Z1 - heating element of the OZS system.
Although there may be some differences in different car models, nevertheless, if we consider it in detail, then in principle it includes the following main elements.
- Mounting block.
- Ignition switch.
- Heating switch ZS.
- Indicator lamp signaling the activation of the OZS.
- Heating element of the OZS system.
K6 - additional relay. K7 - OZS switching relay. A - connection to power systems.
In addition, the system has fuses, terminals and wires that connect all elements into a single whole.
When the ignition key is turned, the OZS is turned on by pressing a button, to which power is supplied through an additional relay K6. At the same time, the rear window heating relay K7 is activated, the heating element is connected and at the same time the control light comes on.
The design of the heating element on the rear window may also vary. In the standard version, it is a mesh of thin metal nickel threads, which are connected by two conductive busbars located on opposite sides. On one side, a 12V current is supplied to the bus, and on the other, the bus is shorted to ground. Such devices are attached to the glass using special glue.
On some car models, the heating element is applied to the glass using spraying, for example, aluminum. A thin film with good light transmission is attached on top of this coating using glue that conducts current.
Oxidation of contacts on heater connectors
The rear window defroster may stop working properly due to oxidation of the contact directly bonded to the glass. To detect this malfunction, you need to measure the voltage of the supply wire and make sure that it exceeds 11 Volts.
Repair. If the measurement results in a value less than 11 Volts, it is necessary to clean the contact from any oxidation that has formed. To clean the contact, you can use fine-grain sandpaper or a special rust remover.
How to fix a heated rear window with your own hands
Now let’s figure out how to repair the heated rear window of a car with your own hands. There are several ways:
- Using paste (glue). Apply the paste to the break site, extending two centimeters beyond the intact thread. Dry with a special hairdryer (not for hair, but for various materials) or let it dry naturally for a day.
- Using a repair kit. If the break in the rear window heating threads is several centimeters, then this is the best method. Unpack the stencil and stick it on the desired area. Carefully place the new thread into the empty space. Apply a layer of the resin included in the kit on top. Once it dries, apply another coat. There should be 4-5 of them in total.
- Using paint and copper-brass powder. This can already be called restoration using improvised means. Take a copper-brass alloy ingot and file it. Mix the resulting fine powder with paint in a 1:1 ratio until it becomes pasty. Glue the electrical tape as a stencil and apply the resulting composition to the tear site.
- Using a soldering iron. Apply zinc chloride to the desired area, apply solder to the soldering area and touch the wire with a soldering iron. This way you can also repair a large tear.
There are other tips on how to restore heating, but to use them in practice you need unsafe reagents: sulfuric acid, copper sulfate, etc. It is best, especially for motorists without experience in self-repair, to use a paste or a special repair kit.
Sources of the problem
Since many drivers prefer to restore the heated rear window with their own hands, you need to know about repair options taking into account the source of the problem. There will be no obstacles to independently checking the functional components of the car if you have minimal skills in repairing automotive equipment.
System fuse
The safety element is the first thing that should attract your attention when a breakdown is detected, since the system will not work if it is burned out. The location of this element varies depending on the car model, so at this stage you will have to turn to the vehicle service book for help. Next, remove the fuse and make sure it is working. Repair of the rear window heating will be limited to replacing the burnt out element.