An oil leak that occurs for one reason or another is always a rather serious and unpleasant occurrence in a car. Some motorists occasionally experience leaks, but for others it is a regular problem.
Basically, oil leaks occur due to damage, wear and loss of elasticity of various gaskets and seals. If the required level of tightness is not present, the lubricating fluid, often under pressure, will leak through weak areas and leak out.
Most often, such phenomena occur near the oil filter, in the camshaft and crankshaft seals, as well as in the spark plug wells. It is leaks in wells that you should pay attention to, understand the causes, potential threats of such a malfunction and methods for eliminating it.
Causes of grease accumulation in spark plug wells
The problem of lubricant accumulation in spark plug wells is especially common in engines with a volume of 1.6 liters. In older versions, rubber gaskets were located under the valve cover. New versions use only sealant to ensure good contact between the parts.
In a modern Priora car, oil appears in the spark plug wells due to the sealant drying out after using the car for a long time or when using a low-quality compound. So simply removing the grease and used sealant will not fix the problem.
This is exactly the case when the manufacturer decided to simplify the design in order to reduce costs. But this resulted in new problems for car owners.
In Priora, oil can collect in wells even in a completely new car. So, immediately after purchasing a new car, it would be a good idea to check it at a service station or at least yourself. Otherwise, your new car may cause you troubles, the cause of which will be hidden in the used sealant.
There is a big risk that due to the long period of idle time of the car in the cabin, the low-quality composition will simply dry out. So, after the first trips, oil will begin to accumulate in the wells, which may subsequently lead to the need for expensive repairs.
Due to the prolonged presence of oil in the spark plug well, the spark plug insulator will begin to soften. This can result in a huge problem - puncture of spark plugs, poor supply of lubricant to the engine.
As a result of this phenomenon, the power unit will begin to operate unstably, in addition, the spark plugs will have to be replaced much more often. Therefore, the presence of lubricant in the Priora spark plug wells is a very acute problem that requires an immediate solution.
How to unscrew the spark plug well?
The principle of unscrewing the spark plug tunnels is identical for all cars with this type of design. As an example, consider a Toyota engine with the 3S-FE index.
- Take the 2 nuts that secure the valve cover to the body of the spark plug wells.
- Screw both nuts onto the spark plug well (the first nut is screwed with the skirt towards the top).
- Lock the nuts by pulling them together with two wrenches.
- By turning the lower nut counterclockwise, unscrew the spark plug well from the cylinder head.
We do not recommend unscrewing the inserts with a gas wrench, since compression runs the risk of disrupting the geometry of the tunnel. This will subsequently cause the spark plugs to become oily.
Before applying sealant to the bottom of the well, be sure to degrease the surface. The threads in the cylinder head must be cleaned of oil.
Reason for oil getting into spark plug wells
The roots of the problem lie in a malfunction on the valve gasket side. There may also be a problem with the spark plug well seals. In short, any source of oil ingress implies problems with the rubber gasket or sealing agent.
Often the rubber gasket may not even be used by the manufacturer. This is done in order to simplify production, as well as minimize the cost of parts. Of course, the absence of a gasket (using only sealant) negatively affects the reliability of the connections.
It should be noted that high mileage of a car does not always act as a catalyst for wear or incorrect functioning of gaskets. The problem with filling spark plug wells is quite common on cars with no mileage or with a minimum number of kilometers traveled.
Causes of failure and solutions to the problem
This kind of trouble happens quite often. Let's figure out why. Oil in spark plug wells appears due to wear of the gaskets. In general, this problem is not so dangerous, at least not as dangerous as, for example, the same lubricant getting on the cylinder head. Perhaps the most serious consequence of such a problem is the softening of the rubber insulator of high-voltage wires, which, in turn, will cause a breakdown. But this does not mean at all that you can let things take their course. Have you noticed that oil is getting into the spark plug well? Change the well gaskets immediately - and the problem will be solved. Otherwise, you will have to change the spark plugs very often (usually their service life is reduced several times).
Why does oil accumulate in spark plug wells?
Often this problem is typical for cars of this brand with an engine capacity of 1.6 liters. In older models of cars, rubber gaskets were located under the valve cover, while new ones now use only sealant, which ensures good contact between the parts. In modern Priora models, oil can accumulate in the spark plug wells due to the drying of the sealant. This usually happens after using the car for a long time or if the driver used a low-quality compound. This problem will definitely not be solved by simply removing grease and used sealant. Moreover, oil can accumulate even in a completely new car. Therefore, it would be appropriate after the purchase to immediately go to the service station and check your car so that it does not bring a surprise at the most inopportune moment.
What to do if grease appears in the Priora wells?
For beginners, it’s better to go to a service station and order repairs. If the car owner has sufficient experience and does not want to spend his own money, then he can carry out the repairs himself.
Repair instructions
- First you need to remove the motor cover and receiver. All holes in the intake manifold must be covered. This is required to prevent foreign components from entering the part.
- After this, you can begin dismantling the ignition module and the crankcase ventilation hose from the cylinder block cover pipe.
- Then, using a 10mm wrench, you will need to unscrew the bolt of the injector wiring harness connector bracket.
- Using a size 8 wrench you will need to unscrew the 15 screws on the cylinder block cover. After this, you can remove the block cover itself.
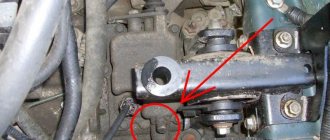
Checking the hydraulic pusher
After the work described above has been carried out, you will need to check the hydraulic pusher. This is easy to do using a metal drift or an ordinary screwdriver. You just need to press the hydraulic pusher and check its condition. It must be pressed with great effort.
If you hardly had to apply any force, then this device requires replacement. Make sure that when checking the hydraulic tappet, the camshaft cam is turned to the back of the device.
Replacing the hydraulic pusher
- First you will need to remove the wire from the oil pressure lamp sensor and the timing pulleys. After this, you will need to unscrew 20 bolts of the bearing housing using a 8-mm spanner.
- You will also need to remove the bolt that connects the rod to the rear engine mount bracket. At the same place you will need to remove three nuts with a 15 wrench. After this, you can easily remove the bracket and camshaft bearing housing. Then remove the spark plug guide tubes. After this, you can remove the oil seals and camshafts.
- In the future, it will be necessary to dismantle the two cylinder block plugs located at the rear, along with the camshaft bearing housing. It is not difficult to remove the hydraulic pusher; to do this, you just need to bring a magnet to it.
- Before assembling the cylinder head, it is necessary to clean it from dirt, and the camshaft bearing housing from used sealants and lubricants. After this, it will be possible to lubricate the bearing journals and shaft cams with new grease.
- You will need to apply sealant to the bearing housing connected to the cylinder head with a flagellum. After this, the housing can be mounted in its original place.
- Then you will need to lubricate the seal rings and install the guide pipes into the bearing housing and cylinder head, and then press in new oil seals. On the other side of the block you will need to install plugs.
- Before installing the cylinder head cover, sealant must be applied to it.
We recommend: How much oil to fill in a VAZ 2110 engine - the answer is here
What to do if the spark plugs are filled with antifreeze
The main reasons for this malfunction are burnout of the cylinder head gasket and violation of the head geometry
. As a rule, this occurs after repeated overheating of the engine. If the geometry is violated, the head must be ground; this is a complex and expensive service.
The most difficult situation is a violation of the geometry of the cylinder head. Not every service station will be able to fix the problem, and if they do, they won’t give you a 100% guarantee. If you have an old engine, it is more profitable to replace it with a contract one.
An alternative solution to the problem
Repairs can be carried out without removing the valve covers and receiver. But for this you will need a special tool, which is not so often found in stores. Therefore, motorists have to make it themselves.
We are talking about a puller. To create this tool, you need a metal pin with a length of 15 cm, a hose with a diameter of 20-25 mm, nuts, washers and a bushing. You will need to put a washer on the stud, and then an elastic band and a sleeve with nuts. That's it, the tool is ready. Its cost will be 100 rubles. And it will only take a few minutes to create it.
The puller will need to be inserted into the spark plug well. After this, you will need to tighten the bottom nut so that we can easily remove the well. When performing work, make sure that the rubber part of the puller is not higher than the well. As in the first case, you will need to install new oil seals, lubricate them with grease and put them back together.
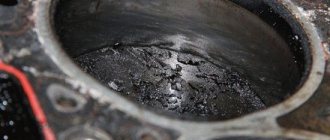
Experts advise using high-quality lubricant and heat-resistant sealant. Along with the old sealant, it is also recommended to remove carbon deposits; they are also harmful to candles. In order for the car to function normally, it is necessary to maintain all its components in good condition.
The second option requires much less time for repairs than the first. It is also simpler to implement and does not require financial costs.
How to fix the problem yourself?
To eliminate the malfunction that led to a leak of lubricant, you can contact specialists or do the repair yourself. However, if you do not have the skills to work with car parts, it is recommended to entrust the work to auto mechanics.
To remove oil from spark plug wells yourself, you can use syringes or absorbent sponges. Also do the following:
- Remove the intake manifold. Its location and dismantling rules can be found in the vehicle operating instructions, which are included in the package.
- Remove the timing belt cover.
- Remove the timing belt and valve cover.
- Remove the camshaft.
At this stage of repair work, the car owner gains access to places where fluid can be poured. The old layer of sealant, worn gaskets and seals should be removed. The seats need to be cleaned. It is recommended to additionally treat the surfaces with a solvent.
You should check for any remains of old sealant. Problems may arise when it interacts with new material. To remove product residues, it is not recommended to use aggressive means, such as sandpaper. Otherwise, scratches will appear on the surface.
But if you remove oil from the spark plug wells, this will not solve the problem. The cause needs to be eliminated. So, if there are signs of wear on the spark plugs, it is recommended to replace them.
The appropriate elements are installed in the cleaned wells. Then you need to apply new sealant. The layer should not be too thick or thin. This may negatively affect its functionality. For candles, a special automotive composition is used, marked in red.
After troubleshooting, all parts are returned to their places. If no new oil leaks are found during periodic inspection, you can conclude that the job was done correctly.
How to fix the problem?
To ensure normal operation of the motor, there are several options to avoid the problem. Let's look at each of them.
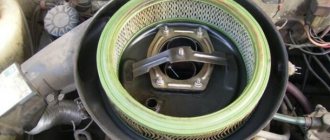
Cleaning the crankcase ventilation system
The procedure is demonstrated using the example of a Lada Granta car:
- It is necessary to loosen the clamp and disconnect the crankcase ventilation system pipe from the air supply line. Disconnect the second end of the pipe from the fitting located on the cylinder head cover; the hose can then be removed. Carry out the dismantling of the small branch pipe in the same way; to do this, you need to disconnect it from the cylinder head and the fitting of the injection module. At this stage, you need to disconnect the supply pipe of the ventilation system, disconnecting it from the BC and cylinder head fittings.
- All pipes must be washed with kerosene or fuel, then blown with air and dried. It would be a good idea to clean the fitting holes.
- Remove the cylinder head cover.
- Unscrew the screws securing the oil separator device on the inside of the cylinder head cover and remove the washers. The oil separator housing must be removed.
- Then all the screens are removed from the cylinder head and must be washed with kerosene along with the cylinder head cover and the oil separating element.
- All system components are assembled in reverse order.
Engine decarbonization
For candles that are filled with oil, there are not many options for solving the problem. You can try to decarbonize the power unit, which is done as follows:
- High-voltage cables are dismantled and all protective equipment is removed. At this stage, it is advisable to remember their location. After this, unscrew the high-voltage cables from the reels.
- The consumables are drained from the motor and the drain plug is put in place. A special decarbonizing agent must be poured into the engine. The best option would be to decarbonize all cylinders of the internal combustion engine.
- After this, the SZ must be slightly tightened, this will prevent the evaporation of the product. So the car should be left for 6-12 hours, depending on what is written in the instructions for use of the cleaner. After waiting the appropriate time, unscrew the lock, but do it carefully, otherwise the cleaner, along with carbon residues, may splash throughout the engine compartment.
- Afterwards, the drain plug is unscrewed and all consumables are drained along with the remaining carbon deposits. You can pour oil into the engine and spin it on the starter for 10 seconds; this must be done without installed SZ and a connected coil. Such actions will prevent water hammer when starting the internal combustion engine. When you are sure that there is no more carbon deposits in the cylinders, the SZ must be screwed into place.
Repairing leaks
There is no need to simply try to remove the accumulated oil in the wells. Here you need to deal with the very source of the problem. And for this it is necessary to perform a number of procedures.
This is not to say that dealing with oil leaks in spark plug wells is incredibly difficult. For many motorists, this is a fairly simple task. But here you should have at least minimal experience in working with cars. If you don’t really know what to do when oil has accumulated in the spark plug wells, and you have never partially disassembled a car before, it is better to seek help from a trusted car service center.
For those who decide to remove oil from car spark plug wells on their own, there are quite detailed instructions on how to do this and avoid mistakes.
The work includes the mandatory completion of the following steps:
- The first step is to dismantle the intake manifold. You can learn about its location and dismantling rules from the repair and operation manual for your car, which is supplied with the car by the manufacturer;
- Next, the necessary procedures are performed for the subsequent removal of the timing belt. Pay special attention to the issue of removing the casing;
- Then the timing belt itself and the valve cover are removed. It would be a good idea to check its current condition. If the machine is used long enough, the belt may have worn out. This is a great reason to replace it;
- All this makes it possible to remove such an element as the camshaft, that is, the camshaft.
Now you are as close as possible to how to independently eliminate accumulated oil in spark plug wells and get rid of the reasons that provoked such a malfunction.
The work done opens up access to places where you need to change gaskets and update the sealing layer. Before this, all old sealants, seals and gaskets are removed, and the seats are cleaned. It would not be superfluous to additionally treat problem areas with a solvent. Here the classic and well-known White Spirit performed well. It perfectly dissolves and cleans surfaces.
Here we should give a few additional recommendations that will allow you to achieve a good result with your own hands, without involving car service employees in the work.
- Be careful when removing old sealant. You should not allow any traces of the old product to remain, since problems may arise when interacting with the new composition. Sometimes motorists had to disassemble and clean everything again because they did not clean the surfaces properly.
- To remove old sealant, it is better to use fairly neutral and gentle materials. The use of abrasives such as files and sandpaper is not recommended here. These materials leave behind chips and scratches. Because of them, a new depressurization may occur in the near future, which cannot be eliminated by simply replacing gaskets or sealant.
- To get rid of old sealing materials, it is better to use solvents or regular gasoline. You just need to moisten a rag in this substance, and then carefully, but without applying much effort, treat all surfaces.
- Don't forget to remove the lubricant from the wells themselves. This is quite easy to do. Some use syringes, while others simply soak the oil with a sponge or absorbent rag. It makes no sense to buy and use special materials or tools for such tasks.
- If you managed to clear the wells of lubricating oil residues, the elements can be installed in their rightful places. At the same time, it would be a good idea to check the condition of the spark plugs themselves. A large amount of carbon deposits and signs of wear are a strong argument in favor of replacing spark plugs.
- When applying the sealing compound, be extremely careful. You don’t need to add too much sealant, but you shouldn’t skimp on it too much, otherwise the composition won’t be able to fully perform its functions.
- For spark plug wells, a special sealant is used. It is distinguished by its red color. Similar compositions are sold in almost all car dealerships and markets.
- Replace all existing gaskets and seals only with similar ones that are suitable specifically for your car and these areas. In the manufacture of oil seals and gaskets, various materials are used, not all of which are intended for use in engine construction.
- As you carry out dismantling and repair and restoration work, do not forget to simultaneously check the condition of other components to which you have access. This will allow you to simultaneously carry out a number of useful measures, detect wear of certain elements in time, replace them and solve several problems at once in one go, or prevent their occurrence at the very initial stage.
We recommend: When to change tires to winter tires: a simple complex decision
Now all that remains is to reassemble all the dismantled elements. Don't forget to check the quality of the work done and make sure the spark plugs are in good condition.
Periodically check the cavities of the spark plugs to see if new oil appears there. If the leaks do not recur, you did everything right, and you managed to find the source of the trouble and also eliminate it efficiently.
The job of preventing oil leaks in spark plug wells is not the easiest for those new to car maintenance. But experienced motorists cope with this task quite quickly and easily.
If you are not confident in your own strengths or capabilities, or simply cannot take the time to repair your car yourself, contact a good and trusted car service center that is ready to provide guarantees and solve your problem efficiently.
For what reasons does soot appear on candles?
Now it is possible to use many methods when diagnosing a car and its engine. The most common are:
- Computer diagnostics;
- Measurement of compression indicators;
- Use of external inspection of damaged parts.
However, one of the ways that can accurately indicate the occurrence of malfunctions in the engine is the appearance of carbon deposits on the spark plugs, the cause of which lies in the engine.
What does the appearance of carbon deposits on candles indicate?
By examining the appearance of the removed spark plugs, a specialist can easily determine the current condition of the main power units, as well as malfunctions in the operation of the vehicle’s auxiliary components and systems.
Depending on the color and degree of carbon deposits observed on the spark plug, auto mechanics accurately determine the diagnosis of the engine. At the same time, an understanding is formed - the engine operates primarily on a rich or lean fuel mixture. Also, a different color shade of soot on a set of spark plugs indicates specific reasons for poor engine performance.
The main malfunctions include:
- Change for the worse in the quality of the air-fuel mixture that forms carbon deposits.
- The quality of the system that is installed by the injector program.
- Problems appearing in the carburetor settings. The result is an overflow of fuel when the pump is running and the formation of black carbon marks on the spark plugs.
- Sudden wear of spare parts of the ignition system.
- Problems with ignition control. Changing the advance angle, which, in turn, affects the timely appearance of the spark and the possibility of engine detonation.
- Acceleration of wear in valve system seals. Characterized by the appearance of a black coating on the skirt.
- Wear before the expiration date of cylinder-piston groups, which, in turn, increases deposits in the form of carbon deposits.
- Significant wear of the ellipse in the block, the set of piston rings and the piston design itself.
Advice: in order to see the reason for poor engine performance, you don’t always need to go to a car service center. First, remove the set of spark plugs from the cylinder block and look at the color of the carbon deposits that appear. The indicator symbols on the instrument panel will also indicate problems with the engine.
What does the color of soot deposits indicate?
Using a color shade, you can quickly understand what problem areas are in the engine of your car. However, simply replacing samples will not solve the cause of soot - new spark plugs will very quickly become unusable. Currently, there are 3 main colors of deposits in the ignition system.
Each of the colors presented indicates the occurrence of a specific malfunction or group of problems in the car’s engine.
This is interesting: Replacing brake fluid: how much to pour, how often to change
The appearance of black soot
This plaque can be either dry or oily. The appearance of a black coating in dry form indicates that an enriched mixture is being supplied to the engine. Candles become covered with such soot as a result of:
- Incorrect operation of carburetor systems;
- Clogged air filters;
- High pressure at the stage of fuel supply to the fuel rail;
- Little spark energy;
- Weak compression.
If black oily deposits appear, it is necessary to check the possibility of oil getting into the combustible fuel mixture itself. As a rule, oil leaks as a result of wear of the oil scraper type piston ring set. In addition, the cause of oil deposits can be damage to the valve system caps.
Advice: if you have recently repaired a VAZ-2114 generator, be sure to check the spark plugs. Perhaps some of the problems with the car lie there.
The appearance of white soot
White deposits in the ignition system can have several color shades:
- Slightly ashy colored deposits. Appear as a result of engine operation on low-quality gasoline samples. To solve the problem, you just need to remove and wipe the spark plug rings, after which they will become suitable for use again.
- Shiny white soot. Indicates the appearance of erosion on the body of the contact electrodes. It occurs as a result of overheating of the ignition system, and the cause may also lie in an insufficiently enriched fuel mixture. In addition, problems with early ignition and breakdowns in the cooling system can give such a tint. If the deposits are shiny white, it is best to replace the entire set.
Tip: if the spark appears weakly, a situation may occur when the car jerks when you press the gas pedal. This is also a common cause of a faulty spark plug set.
What to do if oil has accumulated in the spark plug wells of the Priora?
Novice motorists are advised to contact a specialized service station for proper repairs.
If the owner wants to save on repairs and carry out them himself, then he will need to study the instructions in detail and follow them exactly. Since oil in spark plug wells is not only an unpleasant problem for Priora, but also a rather serious problem, it is necessary to begin solving it as early as possible.
Complete repairs are carried out according to the following scheme:
1. The intake manifold is removed.
2. The timing belt cover and the belt itself are removed.
3. The valve cover is removed.
4. The camshaft is removed and the old sealant is removed from all surfaces. Let us dwell on this point in more detail. The phrase “the old sealant is removed” does not mean that you can pick it off with a screwdriver or knife! Under no circumstances should you do this! There will be scratches and scratches on the metal, and you will never be able to achieve sealing of the parts.
They will snot oil and suck in air. The sealant can be removed with gasoline, acetone, and white spirit. Just wet the cloth and rub the surface until the part is clean.
5. The surface of the cover is coated with anaerobic sealant, and assembly is carried out in the reverse order.
Such a system is quite simple, but it also requires careful sealing of the joints between the well connections. Don’t forget about the wells themselves, because the elements quite often contain old composition on the walls. They are usually covered quite thoroughly with sealant and this should also be wiped off the surfaces.
All this will allow you to remove oil and sealant from the spark plug wells on the Priora and achieve optimal system condition and normal engine operation.
Old sealant must be washed off. If residues remain, they may interfere with the correct and high-quality sealing of the parts. As a result, the above operation will need to be repeated.
The cost of the work is minimal, since only one tube is enough to cover all surfaces. It is also important to consider that Priora oil accumulates in the well if it is not sealed correctly again, and as a result, you will need to lose personal time for another repair.
To process the connection of the wells, you need to use a special red sealant, which can be purchased at any automobile store or workshop. But when carrying out work, it is important to remember about the correct installation of the camshafts and all other parts.
Correct operation of the system will only be guaranteed if all removed elements are carefully assembled. If the work was carried out incorrectly, and more serious problems followed: breakdown, deterioration of the power unit, then it is recommended to contact a professional workshop to perform high-quality repairs.
For owners of models with a 1.5 liter engine, such a replacement is not suitable. Because you will need to purchase new gaskets and install them between the connecting parts. In particular, the cost of such repairs will be very insignificant. But it is worth remembering that the spark plug is pierced, and that the coil may simply fail later.
When making repairs, experts recommend using a heat-resistant sealant, as well as high-quality oil, which, in case of leakage, will corrode the insulation more slowly. It is also worth removing not only the old sealant, but also the deposits that have formed, because it also negatively affects the operation of the candles. The normal functioning of the car will be ensured only if its normal condition is maintained.
Consequences of the problem
Many drivers do not consider the oil leak problem to be dangerous, but this is a misconception. This malfunction can have the following consequences:
- Softening of rubber elements. As a result, sparks may break through and difficulties in engine operation may appear, especially in winter.
- Failure of spark plugs.
- Loss of motor power.
If repairs are not started in time, the malfunction will lead to complex breakdowns. This is fraught with large financial losses. There will be a need to conduct a complete diagnosis, identify and eliminate problems.
Symptoms of a problem
If the spark plugs fail, there will be no spark. Consequently, the fuel mixture will not be able to ignite, the engine will freeze and show no signs of life.
There are several telltale signs that may indicate poor spark plug performance.
- The engine starting procedure gets worse. The starter turns, but the motor itself does not respond;
- Fuel consumption increases;
- CO emissions increase;
- At idle and while driving, the engine begins to jerk the car;
- The dynamic performance of the car drops, it is not possible to raise the speed to the required maximum, the engine power noticeably decreases, etc.
Article on the topic: Replacing the timing belt on a VAZ 2109 (carburetor)
But all these are indirect reasons, since they do not directly indicate the failure of the spark plugs. You can verify their malfunction only by checking.
What are the dangers of oil in spark plug wells?
You need to fix the problem as soon as you discover it. This issue cannot be delayed. Driving a vehicle with such a malfunction entails the appearance of many more serious problems. Some of them:
- weakening of insulators (in high-voltage wires, spark plugs);
- failure of spark plugs and coil;
- loss of engine power;
- periodic spark breakdowns.
We recommend: Car maintenance: types, frequency, regulations TO-1, TO-2
In addition, minor troubles are possible: the engine may start noticeably worse. This is especially noticeable in winter.
As a result of the occurrence of the above-mentioned malfunctions, the “Check engine” indicator lights up. The car owner is forced to spend time and money diagnosing the engine, as well as resetting errors. The consequence of “flooding” the spark plug wells is accelerated wear of the high-voltage wires and the spark plugs themselves.
Is it possible to drive
If the car stalls all the time, then it is better to refuse further use of the car until repair work is carried out . An engine that runs on three cylinders runs out of wear and tear , and if solving the oil problem is a cheap thing, then a major overhaul of the engine will cost the owner a tidy sum. In addition, if the second cylinder fails, and this can happen very quickly, if oil floods the contact of the spark plug, the car will simply stall and will not start.
But if the car is not moving, but you just noticed oil in the well, then you can drive a little , just paying attention to your problem and not abusing the reliability of the car. It’s better to go straight to a car service center , or do the repairs yourself. Otherwise, the car will inevitably begin to fail, since sooner or later, due to oil, the spark plug will break , and then the coil or armored wire. Moreover, the more neglected the situation, the more expensive the repair will cost .
As a rule, all repairs come down to replacing the valve cover and gaskets between the well rings; even spark plugs do not always need to be changed. But this is only if you take action right away and don’t delay repairs.
How to remove oil from spark plug wells?
So, you have decided to overcome the problem in order to get rid of the oil leak. First of all, it is worth saying that this procedure is quite simple, however, without any experience in repairing and interacting with the “insides” of the car, it is still better not to undertake it (contact your nearest car service center).
If you still have experience (or have a great desire to do everything yourself), we suggest following the following algorithm:
- remove the intake manifold;
- prepare everything for removing the timing belt (remove the casing);
- remove the timing belt itself (by the way, it is recommended to check the belt for wear at the same time) and the valve cover;
- remove the camshaft.
Then you will be free to get to all the places where the sealant needs to be replaced. First, of course, it is necessary to remove the old layer of sealing substance, and then thoroughly clean the surface. If necessary, you can also treat all problem areas with a solvent (white spirit, for example, will do an excellent job with this task).
It is necessary to approach the removal of old sealant from parts as responsibly as possible, since any (even the smallest) remnants of the old substance can cause sealing problems with the new composition. In this case, you will be forced to redo all the disassembly, cleaning and repair work. In addition, a fraction of the material will be wasted.
To remove the old layer of sealing agent, it is recommended to use gentle materials. Do not use abrasives (such as hard sandpaper) or files. Such tools can leave scratches and chips, which often cause depressurization of connections in the future. As a result, a new oil leak appears, air is drawn in and all repair measures are repeated.
You can wipe off the old sealing agent with a simple solvent or gasoline. It is enough to moisten a cloth in the liquid and then treat the surface without any extra effort.
In addition to all measures to seal the connections, of course, it is necessary to remove the oil from the spark plug well. There are no difficulties in this process. It is enough to simply blot the spark plug well with rags or sponges. You can get by with scrap materials without the need to use any special tools.
Having completely cleared the spark plug well of oil, you can install the spark plugs back. Before installation, make sure that the spark plugs from the wells where the oil leak was observed do not have carbon deposits and are in good condition. Otherwise, the spark plugs must be replaced immediately (you should not try to continue using them).
When applying a new layer of sealant, be careful, because it must be even. Significant deviations from the optimal amount of sealant in any direction can cause further problems. Spark plug wells are usually treated with a special red sealant (it can be easily found in car dealerships or at the car market in your city).
If the material was interesting or useful for you, publish it on your social network page:
Useful tips
As you can see, replacing the sealant under the valve cover is not a complicated procedure. The main requirements include thorough cleaning of the old layer and proper application of fresh sealant to the surface.
The applied layer must be even and no interruption is allowed. It should also be noted that the sealing compound must also be used to treat the joints between the connections of the spark plug wells, having previously removed the old sealant from there.
Let us add that these areas, as a rule, are generously covered with a sealing compound, which will require some effort to fully clean such surfaces. To process the connections of the spark plug wells, a special red sealant is used, which can be purchased at car dealerships.
If only one engine needs to be repaired, then it will be enough to purchase a small tube of heat-resistant sealant. You can also read about selecting the best sealant for the engine in our separate article.
It should be noted that the use of sealant if the valve cover on a particular internal combustion engine is installed through a rubber gasket is undesirable. In this case, it is necessary to purchase a new high-quality gasket, after which the mating surfaces are checked. Next, the new valve cover gasket is installed in place, after which the valve cover is tightened, taking into account the order and torque of the fasteners.
What's the result?
- As a rule, it is possible to solve the problem of oil in spark plug wells with minimal financial costs. Even if you purchase an expensive professional sealant, the price of a small tube remains quite affordable.
After removing the oil from the wells, replacing the spark plugs and high-voltage wires may also be necessary to restore normal engine operation. The reason may be that the oil in the wells quickly softens and damages the rubber insulation.
- We would like to add that in some cases it is not necessary to change the spark plugs at the initial stage, but it may be necessary to clean the spark plugs separately. Only after removing dirt and carbon deposits will the power unit operate stably and smoothly.
- If mistakes were made during the application of the sealant, then the oil leak may continue in the future. For example, anaerobic sealants only cure when there is no contact with air. It turns out that if it is not possible to achieve a tight fit of the surfaces, then the composition will remain liquid and the seam will not be sealed.
Sources
- https://AvtoTehnar.ru/chto-delat-esli-na-priore-poyavilos-maslo-v-kolodcax-svechej/
- https://rulikoleso.ru/interesnoe-na-jrepair-ru/agregats/chto-delat-esli-popadaet-maslo-v-svechnye-kolodtsy
- https://automend.ru/articles/problemy-na-priore-skoplenie-masla-na-svechnyh-kolodcah-i-chto-s-ehtim-delat/
- https://ford-master.ru/maslo-v-svechnyih-kolodtsah-prichinyi-posledstviya-sposobyi-resheniya-problemyi/
- https://autochainik.ru/maslo-v-svechnyh-kolodcah.html
- https://DriverTip.ru/repair/chto-delat-popadaet-maslo-v-svechnye-kolodtsy.html
- https://priorapro.ru/dvigatel/poyavlenie-masla-v-svechnyx-kolodcax-priory-prichiny-i-metody-resheniya.html
- https://KrutiMotor.ru/techet-maslo-v-svechnye-kolodtsy/