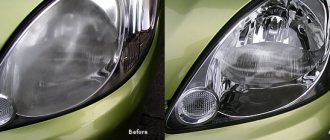
Welcome to the kuzov.info blog!
Today we will look at the features of using anti-gravel composition.
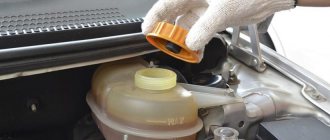
Anti-gravel coating is very effective when used inside wheel arches and on body sills. Sometimes it is applied to other parts of the body, for example, the lower parts of the doors. This is a coating that remains plastic after drying.
It consists of synthetic polymer and rubber, as well as anti-corrosion additives.
The anti-gravel coating is applied using a special gun connected to a source of compressed air, or with a spray can. The coating is obtained with coarse shagreen.
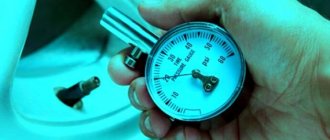
The spray pressure should be 4–7 bar. Do not exceed the permissible pressure, otherwise the cylinder may “explode”. This is not dangerous to health, but it can cover everything around with anti-gravel composition.
The shelf life of the anti-gravel composition in cylinders is not long, no more than a year. In fact, it is better for anti-gravel to be stored for no more than 6 months. It is better to check the manufacturing date of this product when purchasing as it is quite important.
If the shelf life is greatly exceeded, the composition inside the cylinder turns into a difficult-to-spray mass. Heavier particles settle to the bottom and are practically impossible to mix.
Application of anti-gravel on the sills and rear panel
Greetings, car enthusiast on the RtiIvaz.ru blog!
Today we’ll look at Vlad ShchCh’s video where he shows the step-by-step process of preparing and applying anti-gravel to the sills and rear panel of the car. The body repair master laid out the process of preparing the sills and rear panel of the car for applying an anti-gravel coating for protection during operation.
Our example considers painting with anti-gravel. A layer of soil has been applied to the thresholds, which has already dried and you can move on, that is, prepare the thresholds for applying “anti-gravel”. Anti-gravel coating is a fairly simple operation, but it requires certain knowledge when performing the work. So, before applying the coating, it is necessary to “knock off” the gloss from the ground for better adhesion to the anti-gravel coating.
In addition to the fact that it is necessary to remove the gloss from the ground, you also need to cover the problem areas with sealant, but in our case there are no such places on the thresholds, and therefore we skip this operation. The sealant will need to be applied to several points on the back panel, since welding work was carried out there, which are problem areas.
Tools and materials required for work:
- Scotch-brite – for removing gloss from the ground;
- Anti-silicone and paper napkin - for degreasing the surface before applying anti-gravel;
- Painting tape - for covering car parts that are not intended for painting with anti-gravel;
- Polyurethane joint sealant (in cans or tubes) – for sealing seams and other problem areas;
- Short bristled brush for applying sealant;
- Anti-gravel (gravitex);
- Anti-gravel gun;
- Solvent “647” for cleaning tools after work, this is washing the paint gun, brush and other things.
If there are no marks on the prepared surface, then the material that will be applied will simply peel off from the painted surface during subsequent high-pressure washing or when exposed to compressed air. Without the risk, there is no proper adhesion of the paint.
When the car is already prepared for painting, that is, it is covered with film up to the thresholds, then you need to rub the surface carefully so as not to damage the film itself.
Instead of Scotch Brite, you can use sandpaper No. 220-320 and a block to level the surface from previously applied primer. In our case, nothing needs to be leveled on the thresholds, and we use Scotch-Brite. In addition, if there are any small defects on the thresholds, the anti-gravel will simply hide them when applied.
Let's move on to the back panel. Here we also carefully rub the gloss, trying not to leave untreated areas. Scotch Brite is very convenient for getting into hard-to-reach places, which cannot be done with a power tool or sandpaper. Video: In the video, Vlad showed that the surface after treatment became matte, that is, the gloss was knocked off and a small mark was applied. On gloss without treatment, as mentioned above in the article, the coating will not stick and will quickly “slip”.
How to prepare a surface for applying an anti-gravel compound?
Before applying the anti-gravel coating, you need to coat the joints and welds with seam sealant.
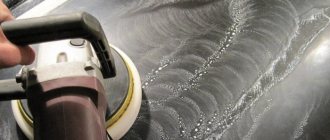
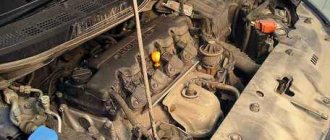
It is important to properly prepare the surface before applying the anti-gravel coating. There should be no rust left. Sandblasting is perhaps the best way to prevent corrosion, but you can also use wire attachments on a drill and grinding wheels on an angle grinder. For more details, you can read the article “removing rust from a car body.” The surface must be washed, dried thoroughly and degreased.
Before spraying anti-gravel, you need to coat the welds and joints with a brush with a special joint sealant, and you can also apply primer with zinc.
It is necessary to cover adjacent surfaces using covering material and masking tape.
In case of application on a paint coating or acrylic primer, matting under anti-gravel can be done with sanding paper from p240 to p600.
Surfaces that are not subject to anti-gravel application must be covered with masking tape and covering materials.
In general, you need to prepare the surface as for painting.
Applying joint sealant to seams
Before applying the sealant, use compressed air to blow dust off the treated surface. This must be done after working with Scotch Brite, especially paying attention to seams and holes.
Then take anti-silicone, apply it to a paper napkin and wipe the entire surface that has been prepared for applying anti-gravel.
It is clearly visible on the napkin that even after blowing with air, dust still remains on the surface. The napkin removes dust well and also degreases the surface.
Next, you can apply the sealant. Using a brush, pick up the sealant and carefully coat all problem areas. So, if there are pores left somewhere in the seams after welding, the sealant will fill them, and you can also use it to level out minor unevenness.
The places where the sealant was applied will be leveled when applying anti-gravel and you don’t have to worry about these fragments being noticeable.
In our case, it is clear that the sealant is very thick, since it is already leftover in the jar and it has dried out a little. In the new jar it has a thinner consistency and is easier to work with when applied.
After applying the sealant, it needs to be allowed to dry, this will take 20 to 30 minutes.
Pasting thresholds for applying anti-gravel
To protect parts, bodies not intended for anti-gravel coating are covered with film and taped along the edge of the threshold with masking tape. Next, using masking tape again, we glue it along the edge of the edging so that the anti-gravel layer lies evenly and beautifully.
Actually, here everyone can decide for themselves which part of the threshold to cover in height. Some do this up to half the threshold, others right at the door, in short, the choice is yours.
In order to end up with an even line of tape, you need to stick it with one continuous tape, stretching it along the entire contour, and not use pieces. In places where the pieces are glued, the edges may peel off and the anti-gravel will lie in an uneven line.
At the same time, it is desirable that the gun has in its design the adjustment necessary to change the supply of compressed air during operation. The adjustment allows you to change the shagreen from applying anti-gravel, for example, larger or smaller.
If the gun does not have adjustment, you can use a separate regulator; it is clearly visible in the video. It is a gearbox with a pressure gauge and an air pressure regulator knob, as well as connectors for the air supply hose and the gun.
There is a separate video on the Vlad ShchCh channel on how to make this regulator, where everything is explained in detail.
After you have connected the gun to the anti-gravel can and connected it to the air, you need to configure the gun. It is advisable to make a moderate air supply, as in the video.
Next, you can begin applying the coating. Don't forget to wear a personal protective mask so as not to breathe in the vapors of the sprayed toxic coating. We begin to apply anti-gravel from the upper parts, “going” a little onto the film coating.
It is necessary to apply several layers, with layer-by-layer drying for about 20 minutes. In hard-to-reach places, the cylinder can be turned over to get to them.
The distance from the gun to the surface to be painted is about 5-10 cm; if you take the gun further, there will be a lot of splashing and you will get a big shagreen.
Anti-gravel can be diluted, this is done using an acrylic solvent to the required consistency. To obtain the softest shagreen, the coating material is prepared more liquid.
Application of anti-gravel on thresholds
The principle of coating is identical. One has only to note that the thresholds do not have a completely smooth surface. The transition at the bottom, where it is not very convenient to pick up with a pistol, you have to adapt, reclining, propping up something for ease of work.
However, for ease of work, the car can be raised and placed on jackstands, then it will be convenient to paint the entire surface of the sills.
Several layers are also applied to the thresholds (2-3 layers) with intermediate drying. If you often travel outdoors, where the bottom of the car often comes into contact with road obstacles, then you can apply 3-4 layers. For normal urban use, applying two layers of protective coating is sufficient.
Why do you need anticorrosive on thresholds?
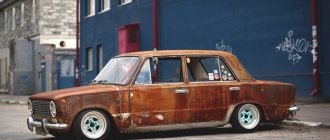
If you are going to drive your car for more than 2-3 years, then anti-corrosion protection is a must, because no metal can resist rust. New imported cars have anti-corrosion coating applied at the factory, but it is very thin and can be scratched or peeled off due to stones, branches, sand and other mechanical or chemical influences.
The car will not rot in a couple of years, but then this process will develop very quickly. Even some Japanese brands have thresholds that rot completely to the point of large holes within 4-5 years. Anti-icing chemicals are usually blamed for this. It will not be possible to sell such a car at a normal price. If the car was involved in an accident and body work was carried out, then anti-corrosion treatment must be done immediately after it.
Why the first treatment should be entrusted to experienced craftsmen
At the technical station, the craftsmen know how to properly protect car sills from corrosion and will do it quickly and efficiently, because:
- They have all the necessary equipment and tools for this, as well as technologies that have been proven over the years.
- Drying of the compositions is carried out using special equipment; it will take less time and therefore the anticorrosive material will lie more evenly.
- The coating in a car repair shop is done in several layers only with a proven composition.
- The service station immediately installs mudguards and fender liners. Thanks to this, the protection will be well preserved.
- At the technical station, they will select the appropriate color of car enamel, which will be used to cover the thresholds after processing.
If you don’t need serious body repairs, then you can do the anti-corrosion sills again in 2-3 years with your own hands.
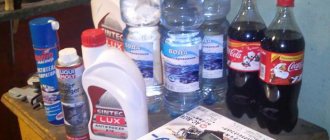
What you will need for self-processing
Before starting work, you need to prepare all the necessary tools and materials in advance. To do anti-corrosion treatment of car thresholds with your own hands, you will need:
- rust converter;
- abrasive sandpapers, a metal brush or a drill with special discs for cleaning the surface;
- means for protecting thresholds from rust;
- clean and dry rags;
- primer;
- white spirit or other degreaser;
- newspapers, tape or special film;
- protective clothing and glasses, gloves, respirator.
When purchasing materials for processing, carefully read the manufacturer's recommendations and instructions for their use.
Preparing a car for treating thresholds with anticorrosive agent yourself
First, you need to thoroughly wash the car (and especially carefully the thresholds) with detergent or special chemicals. Then dry well and remove the protection. For ease of handling, drive the car onto an overpass or lift it with a lift. Using the tool you have prepared, thoroughly treat all affected areas, and then apply a rust converter to the surface. It is left for the time specified in the instructions, most often for one hour. Then use a clean rag to remove any dust and foam that has formed from the rust.
How to apply anti-gravel
Anti-gravel protection is present on all cars leaving car factories: the bottoms, sills and lower parts of the wings, and sometimes the lower parts of the doors, are treated with anti-gravel. Officially, antigravel is credited with noise absorption and anti-corrosion qualities, but at home it is applied not so much as anicor, but as a means of extending the life of already rotten parts. That is, for example, a rusty door is cleaned of corrosion, treated and anti-gravel is applied to make the part “look like” a little more. Anti-gravel coating thickness after application is greater than that of paint or varnish; it better protects body iron from flying stones; Moreover, if the anti-gravel is applied correctly, it does not “crack”. And when the rust begins to swell again, it will not be visible from under the corrugated surface; defects in the paintwork are not so noticeable on the “pimply” anti-gravel.
To properly apply anti-gravel to a car, you need to know: the surface for application must be prepared as when painting a car. If there were rusty places, then they need to be cleaned, treated with a rust converter, if necessary, putty and primed (bare metal needs to be primed; putty and old paintwork do not need to be primed for applying anti-gravel, but only sanded). The photo below shows putty on the doors and thresholds after treating the rusty areas.
Anti-gravel, like other paintwork, cannot be applied to a glossy surface, so we matt the varnish with sandpaper. By the way, this can be done after gluing the tape along the application border - this way you will see where to sand and where not. First, having opened the doors, we cover the inside of the thresholds with wide tape - this is necessary so that the anti-gravel does not get through the gaps where it is not needed. By the way, also cover the lower part of the rear wing.
We close the doors and tape them. First we glue the “beacons”. At the required distance from the bottom of the door (this will be the width of the anti-gravel strip), we glue a “beacon” from below the future border; in the photo we chose the width of the anti-gravel strip to be 10.5 cm. We glue such “beacons” on all doors - about 2-3 pieces each on the door.
We glue the border over the “beacons” with tape and newspapers. We also glue the wings, continuing the tape line of the door border. We remove the "beacons".
Matte the surface. Choose coarser sandpaper, the marks from the sandpaper are not visible under the anti-gravel - the size of the “sandpaper” is from 500 and even up to 120 (I would recommend 320). In the photo below we are preparing the lower parts of the doors and wings and the sills - sanding everything.
The plastic protection can be unscrewed, or it can be pasted over (photo below).
We degrease everything with a degreaser. And we apply anti-gravel.
Anti-gravel in the store comes in: 1. in spray cans (in aerosol packaging - for use independently at home) 2. a “gun” cylinder (for professional use, it requires a special spray gun for anti-corrosion protection of the body) 3. in banks (rarely used in car service stations)
If you are reading this article, then most likely you do not have a special pistol, so let’s consider option 1. Read the instructions on the can. Most likely it will say that the container needs to be shaken for 3-5 minutes. Then apply anti-gravel from a distance of about 25 cm. Then let the applied layer dry for about 5 minutes until it dries slightly. Then reapply anti-gravel and dry for at least several hours.
Anti-gravel under the “gun” (number 2 on our list) is more difficult to apply, although the instructions would seem to be the same. Shake the balloon. Wrap it on the “gun”. Spray. Such anti-gravel either does not want to be sprayed (too thick) or flows (too liquid). You need to get used to each gun, thick anti-gravel needs to be diluted a little with a solvent (and mixed well), and the compressor pressure needs to be adjusted. Be sure to practice on a flat surface the first time! It is better to apply in 2 layers. If there are drips, try moving the gun quickly along the surface and do not linger in one place. Spraying occurs as during painting: the spray gun goes to the right to the end, then to the left to the end. Please note that the tape should also be slightly colored; a common mistake for beginners is to stop the hand even before the border.
Next question. Will we paint the anti-gravel in the body color? Let's consider the options.
No, we will not paint anti-gravel. Then we dry it (it’s better to let it sit for half a day), peel off the tape and that’s it.
Yes, we will paint it. Then, when buying anti-gravel, pay attention to whether you can apply paint to it, this is important. Most anti-gravels can be coated with paints and varnishes, although some cannot. We'll check in the store.
If we only paint the anti-gravel (we don’t paint the doors), then we paint it in the body color and dry the paint. We peel off the tape the next day.
If we paint the body (doors, fenders) together with anti-gravel, then after applying it (after 10 minutes), we tear off the tape and paint the entire parts together with anti-gravel. This option is used when we paint the entire doors, and apply anti-gravel immediately before painting (photo below - we applied anti-gravel, removed the tape, now we will paint the entire doors and the thresholds too).
Regarding the last option: the anti-gravel application itself is like a small stage in the process of painting a car. Please note that before applying anti-gravel, all work on the elements (in our case, car doors) must be completed - puttying, priming, and the soil must be sanded.
Anti-gravel after painting - in the photo below.
In general, in terms of surface structure, the “gun” (professional) option is preferable to the aerosol one. And it would be nice to paint it on top as well.
Anti-gravel painting
The packaging or documentation for any anti-gravel product always contains instructions that clearly state the algorithm for its application, as well as precautions. Most of them are similar
In addition, there are a number of standard requirements and mistakes that, unfortunately, are made by some car enthusiasts. This section contains recommendations for applying anti-gravel to car body elements.
What surfaces can anti-gravel be applied to?
Depending on the specific brand and type of anti-gravel agent, it can be applied to the following types of surfaces and the materials from which they are made:
- plastic;
- matte paintwork;
- primary acid soil;
- putty;
- aluminum;
- steel - ordinary, stainless, galvanized.
Surface preparation
Surface preparation of body parts is carried out if anti-gravel is planned to be applied before painting. It is also necessary to remember that there are two types of anti-gravel agents - coarse-grained and fine-grained. Only pre-varnished surfaces are treated with coarse grain. And fine-grained ones can be applied directly to clean, processed, stripped and degreased metal. You need to read more about this in the instructions for the specific anti-gravel. In other words, if anti-gravel has good adhesion to metal, then it can be applied to “bare” metal. But it is still recommended to treat the metal surface with acid primer, and then with filling primer, and only then with anti-gravel. This information is always in the instructions.
As for surface pre-treatment, it is standard and consists of cleaning the surface from debris, rust (carefully, if necessary using rust solvents) and degreasing using additional degreasers. For cleaning, you can use a grinder with a grinding wheel, cleaning brushes, sandblasting, or wire wheels on a drill. Weld seams need to be treated with sealant, only so that by the time of application it is already dry and sanded.
If anti-gravel coating is planned to be carried out over a paint coating or acrylic primer, then it is necessary to treat the surface with sanding paper in order to ensure better adhesion. Those areas of the surface where anti-gravel is not planned to be applied must be protected with masking tape, which peels off easily and does not leave behind adhesive traces.
Do-it-yourself anti-corrosion treatment of car thresholds
Car thresholds need protection, since they are located in the lower part of the car and are subject to the negative effects of external factors (temperature changes, salt reagents, negative temperatures, high humidity).
Often small stones, sand, crushed stone and gravel can leave minor damage on the outside of the threshold. They often become hotbeds of future corrosion processes.
The choice of anti-corrosion treatment for car thresholds is wide and varied. You can find cheap or expensive products. All of them received the general name “anti-gravel for thresholds”. Can be sold in cans or metal cans.
If it is not possible to use a lift to process the thresholds, then it is better to postpone the work to the summer. During the summer months, you can drive onto the overpass and work outdoors. It is impossible to carry out work on threshold treatment in winter or autumn.
The process of treating car thresholds can be divided into several stages:
1. Preparation of materials and workwear.
- work clothes that cover all areas of the skin;
- latex gloves;
- protective glasses;
- respirator;
- metal brush;
- sandpaper;
- pure water;
- means for anti-corrosion treatment of thresholds;
- White Spirit for degreasing
- rust converter;
- rags;
- construction hairdryer
2.Preparing the car.
- dismantle the protection;
- thorough car washing with emphasis on sills;
- drying the car;
- access to a lift or overpass;
- removing all rust spots on the thresholds using sandpaper or a special disc;
- treatment of thresholds with a rust converter;
- degreasing thresholds;
- drying thresholds;
- using masking tape to protect areas adjacent to thresholds;
3.Applying anti-gravel to the thresholds.
- the can of anti-gravel should be shaken vigorously for at least 2-3 seconds before use;
- you need to keep the can at a distance of 15-20 centimeters from the surface of the threshold;
- ensure uniform application of the protective agent;
- between layers it is necessary to maintain a time of about 5-7 minutes;
- the optimal number of anti-gravel layers is at least 3;
- to speed up the drying of the anti-corrosion agent, you can use a hair dryer;
- removing masking tape;
- installation in place of protection;
- use the car no earlier than 2 hours after treatment.
There is nothing complicated about treating rust thresholds. You need to prepare and follow the sequence of actions. There is no need to rush, as the quality of the work will suffer.
Durability and disadvantages of anti-gravel
Anti-gravel coating has a large number of advantages and is distinguished by durable results. However, this processing has several disadvantages.
The process of applying anti-gravel in a can
For example, a high price that is not suitable for every car owner. It also contains synthetic compounds that can harm the driver’s body when applied.
Thus, anti-gravel paint for cars is high-quality protection of the car from minor damage and the development of metal corrosion. It is important to approach the choice carefully and responsibly, since at a high cost you need to purchase a quality product the first time.
Anti-corrosion treatment of car thresholds using mastic
This method of treating car thresholds with your own hands is less popular. This is explained by the complexity of the process and the large amount of time spent.
To protect thresholds, you can purchase “Anticor bitumen”. It is a cold applied mastic. Produced by mixing rubber and resins. It is affordable and can be easily found on sale.
The preparatory stage of the car is the same as in the case of using anti-gravel. The bottom of the car must be thoroughly washed, dried and free of rust. After this, you can begin applying anti-corrosion mastic.
Before using “Anticor bitumen” it is better to warm it up a little. This will increase its fluidity and adhesion level. The mastic is applied with an ordinary paint brush. No need to skimp on mastic. The thickness of the layer directly affects the effectiveness and durability of threshold protection against corrosion.
After applying the mastic, you need to wait for the anti-corrosion material to dry naturally. Using a hair dryer to dry your hair will have the opposite effect. On average, 2 hours is enough. After this time, you can put the protection in place and use the car.
Can anti-gravel coating be painted?
If applied incorrectly, anti-gravel coating often turns out uneven and may have pores. Also, if the storage period and conditions are violated, it will be impossible to mix the composition well and it will not be sprayed correctly, leaving pores. To ensure that the surface is protected from moisture penetration, it is better to paint the applied anti-gravel coating with paint or varnish.
Painting will extend the service life of the anti-gravel coating and add decorative properties.
There are paintable and non-paintable anti-gravel compounds.
Modern anti-gravel compounds contain synthetic polymers and do not contain bitumen, which makes it possible to paint them after drying.
To ensure that the paint coating will adhere to the anti-gravel coating, the anti-gravel container must bear the inscription Overpaintable, indicating that paint can be applied over the coating.
You can paint after 2 hours; in the case of water-soluble paints, you need to wait 24 hours.
After painting anti-gravel, the surface is better washed during use and does not change color.
One of the reasons for painting is the need to match the color with the body.
Types of anti-gravel for car thresholds
The number of anti-corrosion treatment agents for car sills is large. By and large, they are not much different from each other.
Means for protecting car thresholds from rust can be divided into several groups:
1. Period of use.
- permanent protection;
- temporary protection;
- aerosol can ready for use;
- aerosol can for a special gun;
- metal cans;
- plastic containers.
- transparent;
- white;
- black;
- gray;
- color.
4.Additional effects.
- containing a rust converter;
- anti-corrosion substances;
- increased adhesion;
- enhanced strength.
Types, composition and features of paint
There are several types of anti-gravel paint that can be used to protect the coating of your car. Each of them has its own characteristics, composition and features.
Based on their composition, there are three types of substances.
- The basis is various types of resins and rubber.
This composition is used for processing the body, but is not suitable for the bottom.
Black anti-gravel
It has high anti-corrosion characteristics, protects the vehicle from water, absorbs unnecessary sounds, and is mechanically stable.
- The base is a mixture of resins and wax.
Prevents rust and metal corrosion. With the help of the composition you can treat even invisible areas. It does not lose its effect due to sudden temperature changes, but does not have high mechanical protection.
They are based on various resins, rubber, wax, bitumen. They prevent the development of corrosion, absorb unnecessary sounds well, and do not lose efficiency when the temperature changes.
Can be used to process car thresholds.
It is also worth noting that the paints are presented in several containers:
- anti-gravel for cars in a can;
- a jar of liquid composition for application with a brush or remote control.
Choosing a product for treating car thresholds with your own hands
Despite the abundance of various means of protecting thresholds from corrosion, many car enthusiasts are wondering: how to treat thresholds? We will give a complete and comprehensive answer to this question. It will help the car enthusiast make the right choice.
1. Anti-corrosion spray BODY-950, capacity 400 ml
Anti-gravel, created on the basis of special resins. Has high adhesion and is resistant to damage. Application requires the use of a special gun. Dries quickly. Cost 4-6$.
Anti-gravel aerosol ELTRANS, capacity from 400 to 1000 ml.
Inexpensive but effective remedy. Does not require the use of a special gun. Consumption of one layer is 400 grams per 1 m². It is recommended to apply in 2-3 layers. Cost for 400 ml. 2-3$.
Anti-gravel KERRY, capacity 650ml.
High-quality anti-gravel that provides effective protection of thresholds. Has a high degree of adhesion. Does not require special skills to use. Cost 3-4$.
What does anti-gravel coating provide?
You need to understand that different manufacturers make anti-gravel compounds of different quality and composition. High-quality modern compounds do not contain bitumen and have the following properties:
- good corrosion protection
- resistance to non-aggressive acids and salts
- high resistance to impacts from small stones
- reduces noise
- reduces vibrations
- provides protection against engine oil, water and fuel
How to cover thresholds with anti-gravel with your own hands
The material base consists of a small amount of improvised means.
We need to “arm ourselves”:
- Brush for an angle grinder. This is the main tool for removing paint layers.
- Sandpaper. Its number is not particularly important, so the range is large from 80 to 240.
- Solvent. Typically, the dissolving liquid MOZHKHIM number 646 is used.
- Silicone remover - cleaning and degreasing special solvent.
- With a spray gun.
- Painting tape and covering film. It is acceptable to use old newspapers.
- Ground.
- Anti-gravel - a polymer-based protective coating, usually available in cans.
Anti-gravel coating is applied according to the following procedure:
- Tape sticker. This will help clearly mark the work area.
- The machine is sealed with a film so that during the work no soil or anti-gravel gets into other areas.
- Using an angle grinder equipped with a special brush, rust is removed from the thresholds.
- Opened holes (if they are found) are welded and ground. Sometimes they are simply coated with epoxy. In the “pre-sale” case, ordinary putty is used.
- Paint that cannot be removed with sandpaper is matted with sandpaper.
- Application of primer. You should wait for it to dry.
- Primed areas are matted with sandpaper. Its number ranges from 180 to 240.
- Then the thresholds are degreased.
- Application of anti-gravel. Its drying time is within 60 minutes. However, experts recommend doing two layers. The first is followed by a seven-minute drying period, then the second is performed. In this case, drying lasts up to ten hours.
After wrapping up your car, you can enjoy the fruits of your labor.
About the optimal conditions for applying anti-gravel:
- For work you will need a warm, ventilated room.
- The technician is recommended to use gloves and a respirator.
- The can of anti-gravel is shaken for up to 7 minutes. The temperature of the packaging itself is also important - more than 25 ºС.
- The distance to the surface to be treated when spraying is at least 200-250 mm.
The video will tell you how to quickly apply anti-gravel from a can onto the thresholds of a car.
What not to do when it comes to high-quality anti-gravel painting:
- Cover rusty areas with anti-gravel. The new coating will quickly fall off, and the rotting process will only accelerate.
- Anti-gravel is also not recommended for bare metal. The protective coating has porosity, that is, the ability to breathe. This means that corrosion processes will not “sleep” - rust will appear in the near future.
- Application without matting. The adhesive properties of anti-gravel in general are beyond doubt. The material fits well on a primed surface and adheres well to paint. However, the absence of matting threatens to cause large pieces to fall off if the car is washed with Karcher or similar equipment.
How to remove anti-gravel from the body
If you have already treated the thresholds and other areas of the car body, then you may be interested in the question of how to remove or how to wash anti-gravel from the car body. After all, over time you have to remove the old coating.
The first option is solvent 646. It is advisable to use cotton wool and a brush with it. There is no need to get too carried away during the work, since there is always a risk of damaging the paintwork with such an aggressive agent. First, use a soft brush to spread the solvent over the surface to be cleaned. Usually, if there are no caked pieces, this is enough and under the influence of a brush, the anti-gravel perfectly lags behind the paintwork. If not, you can use cotton wool or a soft cloth. The main thing is not to rush and do everything carefully!
If the varnish nevertheless darkens after such a procedure or loses its shine, it can always be treated with ZM No. 74 paste. If necessary, you will need to remove stains from the case in the future.
The second option is white spirit or pure acetone. The cleaning procedure is similar. However, before removing anti-gravel, it is better to try to do this somewhere in a remote place in order to make sure that these products will not damage the paint or varnish on the car body
Please note that the paint is not varnished everywhere (for example, on the thresholds it may not be varnished on some cars), so you need to work carefully so as not to damage the paintwork
The third option is products for removing bitumen stains from the car body. They can be used to scrub not only the resin itself, but also the anti-gravel coating. This is true only if the anti-gravel was bitumen-based.
Welcome to the kuzov.info blog!
p, blockquote 1,0,0,0,0 —>
Today we will look at the features of using anti-gravel composition.
p, blockquote 2,0,0,0,0 —>
Anti-gravel coating is very effective when used inside wheel arches and on body sills. Sometimes it is applied to other parts of the body, for example, the lower parts of the doors. This is a coating that remains plastic after drying.
p, blockquote 3,0,0,0,0 —>
It consists of synthetic polymer and rubber, as well as anti-corrosion additives.
p, blockquote 4,0,0,0,0 —>
The anti-gravel coating is applied using a special gun connected to a source of compressed air, or with a spray can. The coating is obtained with coarse shagreen.
p, blockquote 5,0,0,0,0 —>
The spray pressure should be 4–7 bar. Do not exceed the permissible pressure, otherwise the cylinder may “explode”. This is not dangerous to health, but it can cover everything around with anti-gravel composition.
p, blockquote 6,0,0,0,0 —>
The shelf life of the anti-gravel composition in cylinders is not long, no more than a year. In fact, it is better for anti-gravel to be stored for no more than 6 months. It is better to check the manufacturing date of this product when purchasing as it is quite important.
p, blockquote 7,0,0,0,0 —>
If the shelf life is greatly exceeded, the composition inside the cylinder turns into a difficult-to-spray mass. Heavier particles settle to the bottom and are practically impossible to mix.
p, blockquote 8,0,0,0,0 —>
Where is it better to treat the thresholds - at a service station or in your garage
Most car owners know that basic anti-corrosion treatment of the car body is carried out at the manufacturer. Despite this, corrosion protection does not last forever, so it is advisable to update it every 2-3 years. Otherwise, the metal from which the body is made will begin to rust or even collapse much earlier than it should.
Timely repetition of treatment of the bottom, sills, arches and other body areas with anti-corrosion and anti-gravel significantly increases the service life of any vehicle.
Based on the above, we can conclude that anti-corrosion treatment of the body is necessary for every car owner. But where is it better to hold this event: at a service station or in your garage? Undoubtedly, specialists will do a better job than even the most “handy” master of the people. This is due to the fact that during treatment with anti-corrosion and anti-gravel at service stations they use special equipment that an ordinary car enthusiast simply cannot have. In addition, specialists are able to provide deeper and more enhanced body protection, thanks to their secret technologies and accumulated experience.
To summarize, it is important to state: the first anti-corrosion protection of the body or individual thresholds is best done at a service station. After carrying out such a procedure, you can simply update the protective layer, but on your own.
Treatment of thresholds - visit a service station or do it yourself?
In the current state of the automotive industry, anti-corrosion protection for the body is done at the manufacturing plant, but in order to prevent the car from breaking down earlier than the warranty service suggests, it should be repeated every two years. Thanks to this, you will be able to maintain the integrity of the factory coating for as long as possible. Thus, you will protect the most vulnerable places of your car, and these are welds, hidden cavities, wheel arches, sills, underbody and bending joints.
The main difference between the anti-corrosion treatment that you do at home and the treatment at a specialized station is, of course, the availability of professional equipment for the latter. Thanks to this, it is much easier to thoroughly wash the underbody of the car and then force dry it. In addition, complex processing with several coatings is carried out at the stations; naturally, you can try to do all this yourself, but then such an experiment will cost you a pretty penny, and the lack of experience will take its toll, so the savings will be questionable.
Also, specialists will definitely install mudguards and fender liners, thus protecting the outside of the car from water, sand and gravel will be more reliable.
Preparing for the event
Anti-gravel treatment of car thresholds is a simple procedure, but it requires some preparation. Before you begin to locally improve the protection of the body of your car, you need to select a special solution called anti-gravel or anti-corrosive for thresholds. The choice of such products in car dealerships is quite wide, so choosing one is not difficult. It is worth noting that the choice must be based on the prestige of the manufacturer, reviews of car owners about the solution, advice from the seller and your own experience (if any).
When purchasing anti-gravel for thresholds, it is important to properly prepare the car for the event and some tools. Regarding the latter, the list is as follows:
- anti-gravel itself;
- metal brushes of different hardness;
- sandpaper;
- rags, newspapers and tape;
- personal protection: respirator and gloves.
Preparing the car consists only of bringing its thresholds to a clean state and waiting for them to dry completely, as well as, if necessary, providing full access to them.
The procedure for preparing a car for painting sills
- car washing;
- thorough inspection of the vehicle;
- cleaning the surface of the thresholds;
- putty of damaged areas;
- primer.
Preparing to paint a car and painting the sills with your own hands is a very real procedure. The removable part can be easily dismantled by yourself. To remove the threshold, it is necessary and sufficient to unscrew the self-tapping screws that secure it to the side member. Afterwards, straighten the metal using straightening tools. Next, paint the inner surface of the threshold with an anti-corrosion compound.
Before painting the thresholds, it is necessary to sand, putty, and prime them.
According to the technology, after straightening and welding work, cleaning begins. For what?
- smooth the welds;
- polish cracks and chips;
- remove old paint.
Treatment of thresholds with a protective solution
Having prepared the tool and the car in accordance with the recommendations presented above, you can begin applying protection to the car body. Treatment of thresholds with anti-gravel consists of the following measures:
- First of all, use sandpaper and metal brushes to clean the surface of the thresholds from rust and peeling paint.
- Then, using rags, newspapers and tape, bury all areas adjacent to the thresholds. This is done so as not to stain unnecessary components of the car with anti-gravel.
- Next, apply anti-gravel to the prepared thresholds in full accordance with the instructions.
- Wait until the anti-gravel layer dries (as a rule, how long to wait is indicated on the packaging).
- After it has dried, repeat applying the protection 1-2 times in the same way.
- The last step is to wait for the anti-gravel applied to the thresholds to dry completely. In most cases, 2-4 hours of leaving the car either on the street or in the garage is enough.
This is what an event for applying anti-gravel protection to car sills with your own hands looks like. Using the information presented above, you can keep your body in good condition without any problems. However, it is worth understanding that it is advisable to do the first treatment by specialists.
How to cover thresholds with anti-gravel - video:
Step-by-step application instructions
Before purchasing anti-gravel treatment, you need to decide on the color.
The product is available in basic colors:
- gray;
- black;
- white;
- There are also transparent formulations.
There are also multi-colored products, but they are difficult to find in regular stores.
Example of a scratch on a surface coated with anti-gravel
After choosing anti-gravel, you also need to purchase some other materials. After completing these steps, you can proceed to applying the composition to the car coating:
- Prepare your car by washing it to remove dirt and dust. Be sure to wait until the surface dries.
- Clean the areas to be treated using brushes and sandpaper and remove any existing rust.
- Lay out clean rags to prevent the composition from getting on other parts of the vehicle, or use a protective film.
- Apply anti-gravel substance to the cleaned car.
- Wait for the parts to dry completely.
- Reapply the composition. There may be 2-3 layers in total.
- Allow 3-4 hours to dry completely.
Mazda Protege (2L freedom) › Logbook › Features of applying anti-gravel
Anti-gravel coating is very effective when used inside wheel arches and on body sills. Sometimes it is applied to other parts of the body, for example, the lower parts of the doors. This is a coating that remains plastic after drying. It consists of synthetic polymer and rubber, as well as anti-corrosion additives. The anti-gravel coating is applied using a special gun connected to a source of compressed air, or with a spray can. The coating is obtained with coarse shagreen. The spray pressure should be 4–7 bar. Do not exceed the permissible pressure, otherwise the cylinder may “explode”. This is not dangerous to health, but it can cover everything around with anti-gravel composition. The shelf life of the anti-gravel composition in cylinders is not long, no more than a year. In fact, it is better for anti-gravel to be stored for no more than 6 months. It is better to check the manufacturing date of this product when purchasing as it is quite important. If the shelf life is greatly exceeded, the composition inside the cylinder turns into a difficult-to-spray mass. Heavier particles settle to the bottom and are almost impossible to mix.
Why exactly thresholds?
Coating exterior body elements with anti-gravel and other agents with an anti-corrosion effect has long proven to be highly effective. But before you do the processing yourself, you need to clarify some points.
Thresholds are an important part of the body. They require increased protection because they are located in the lower part of the car body. Because of this, they are actively affected by various factors in the form of temperature changes, reagents on winter roads, low temperatures, intense heat, high humidity, etc. Small stones, sand, pieces of crushed stone and gravel fly from the road. They cause microdamage, destroy the paint layer, and minimize the work of factory anti-corrosion treatment.
All this leads to the fact that it is on the thresholds that the first pockets of corrosion most often appear, gradually turning into large red rust spots.
I think it’s not worth reminding once again why rust is dangerous and what consequences it can lead to.
It is important to understand that you need to fight corrosion not after it actually appears. Timely prevention and high-quality metal preservation will protect against rust and prevent it from appearing on the body of your car.
There is a huge list of products intended for anti-corrosion treatment. The choice is huge, so everyone will find an option according to their wallet and needs. Some products are priced very high, others belong to the budget category. But they are all called anti-gravel for thresholds. Most often they are produced in special cans and metal containers. Moreover, preference should be given to spray cans. Mastics require a more complex and lengthy application procedure.
But regardless of the release form of the chosen product, anti-gravel must be applied correctly, following a certain sequence. You will decide for yourself what to blow out, cover or fill with on the thresholds in your car.
Making and applying anticorrosive coating to a car using a gun
Anti-corrosion treatment of a car is an expensive service in a car service center. Therefore, many people spend it at home. To do this, you need to know several features of the process being carried out.
Treatment of internal and hidden cavities (spars, pillars, thresholds)
Do-it-yourself treatment of hidden car body cavities is carried out using liquid materials with a low degree of viscosity containing corrosion inhibitors. To apply them, use a special air spray (can or aerosol).
These devices help treat the car's thresholds from the inside. It is recommended to proceed to protecting the remaining parts after these elements have dried.
Anticorrosive on the bottom and arches of the car
Protecting the underbody of the car from corrosion is one of the most important stages. It must be carried out on a lift, which allows full access to the bottom of the machine. At home, the lift can be replaced with an inspection hole (in extreme cases, the car is turned on its side). Anticorrosive agent is evenly applied to the bottom and arches.
Do-it-yourself anti-corrosion treatment of the underbody of a car is carried out using a roller, brush or brush. The process is carried out manually. It is necessary to treat the underbody of the car against corrosion at least 3-4 times. In this case, after applying each layer, you should wait some time until the coating dries.
Full anti-corrosive treatment of the car interior
Inside the cabin, only the floor needs to be treated, since it is most vulnerable to corrosion. To do this, remove all seats and rugs, and then begin the process. The mixture is applied with a brush or roller. If it's cold outside, you should warm up the car interior. The air temperature must be at least 15 degrees Celsius. The substance should be applied evenly, in several layers.
How to use anti-gravel correctly
Before you start working with the substance, you must carefully prepare the surface of the car. To do this, do the following:
- Clean areas covered with rust;
- Thoroughly wash the surface and completely degrease it;
- Remove varnish and putty;
- The exception is the aerosol type substance, since it cannot be applied to a smooth surface.
Anti-gravel is applied (in a can) as follows:
- After reading the instructions, the motorist gets to work;
- The surface intended to be coated with the substance must be primed;
- Neighboring areas are covered with tape;
- The can must be shaken to distribute the liquid evenly;
- The contents are sprayed from a distance of 25 centimeters from the working surface and the mixture should cover the tape so that the border between the areas is completely covered;
- If necessary, the product is applied in several layers to create a film of the required thickness;
- The product is allowed to dry, after which, if possible, the surface is coated with paint.
It should be noted that anti-gravel perfectly protects the surface from mechanical damage and corrosion and at the same time creates a beautiful, aesthetic appearance of the car even without painting. On the other hand, the fact that the product is applied to the surface very easily and simply completely smoothes out all sorts of imperfections of the top layer of coating, which may have a grainy surface when drying.
It is very important to pay attention to the shelf life of the mixture, since the quality of its protection after application depends on this indicator
Preparing a car for anticorrosion
Protecting a car from rust involves several stages. First of all, the car must be prepared for the process. To do this, you need to clean it from existing rust. Most often it accumulates in the bottom area, so special attention is paid to cleaning it. To do this, you should:
After this, you can treat the underbody of the car with an anti-corrosion compound.
It is usually applied in a thick layer, which takes several days to dry. It is prohibited to operate the machine during this period.
How to apply anti-gravel correctly?
Anti-gravel -
a two-component composition based on rubber and synthetic resin that protects the vehicle body. The ingredients form a seal with sound-reflecting properties, which provides less wear on the body and protection against vibration, rust, and mechanical damage.
Primary anti-gravel treatment is carried out at the factory. Thresholds, bottom, boxes and other body elements are covered with a dense layer. It forms a film that prevents premature wear of parts. Be sure to treat sills, arches, and the bottom of vehicles.
If your car doesn't already have anti-gravel protection, you should fix it immediately! To do this, you do not need to contact a car service, since you can apply the coating yourself using anti-gravel in cans, which is easy to apply and provides reliable protection of the body from rust and other damage.
What is it used for?
The purpose of the anti-gravel coating is to protect vehicle elements from the aggressive effects of external factors. Anti-gravel in the form of an aerosol is sprayed onto all body parts and, when the film dries, it performs the following functions:
Painting with anti-gravel does not require the use of professional tools, but before performing work, auto experts recommend that you read the video instructions. You should also follow simple requirements, which will be discussed below.
Types of anti-gravel
When the question arises of protecting a car from the destructive effects of external factors, you must first decide which anti-gravel product to choose? Currently, there are numerous types of protective membranes on the market, which have different bases: rubber or acrylic, as well as different compositions of additional substances. Anti-gravel for car painting differs according to the following criteria:
As for the release form, anti-gravel for a car can be:
When asked which anti-gravel agent is best, experienced car service technicians answer almost unanimously – aerosol. To apply it you do not need to have professional skills, but simply follow simple instructions.
What surfaces are anti-gravel applied to?
Anti-gravel protection is applied to various body parts. Anti-gravel on the thresholds and bottom usually has a bitumen base, so it is not recommended to paint it subsequently.
Many people are also interested in whether it is possible to apply anti-gravel coating to a putty surface. Automotive service technicians answer this question positively, and also note that the product works well on the following types of surfaces:
Many car owners note that anti-gravel coating not only has a protective effect, but also significantly facilitates car body care during operation. Dust, dirt, water stains and other contaminants are easily removed from the membrane.
Preparing the surface for coating with an anti-gravel membrane
If you decide to use anti-gravel yourself, you must first understand how to properly prepare the surface, since the adhesion and strength of the membrane will depend on this. There should be no rust on the treated surface. For cleaning, car experts recommend using the sandblasting method.
If you do not have the opportunity to use it, then wire attachments for a drill or diamond discs for an angle grinder are also suitable.
After removing the rust, thoroughly rinse the surface and dry it. Be sure to treat the welds with sealant, or use a special mixture of primer and zinc.
If anti-gravel is applied to a paint coating or acrylic primer, it is necessary to treat the surface with sanding paper for higher adhesion.
Surfaces that will not be treated must be protected using special masking tape or covering material.
How to properly apply a protective coating?
As already mentioned, car service technicians recommend using aerosols to apply the protective membrane yourself.
The LAVR company offers to order inexpensive anti-gravel aerosol in cylinders, which are characterized by excellent performance properties and an affordable cost. They are easy to use and do not require special professional skills.
Before applying anti-gravel to the sills and the bottom, it is recommended to thoroughly shake the can for 3-5 minutes. When spraying, you must adhere to the following rules:
Note:
Under no circumstances should anti-gravel coating be applied to elements of the power unit and exhaust system. Drying time is about 2 hours: after 60 minutes a dense film is formed without a sticky layer, after another equal period of time the body can be coated with paint.
Source
Processing stages
It is important to understand that this problem can affect everyone. Yes, on expensive cars, the factory anti-corrosion treatment is of better quality and therefore lasts longer.
But when the car is in difficult conditions, constantly in contact with strong reagents, abrasives in the form of sand or gravel, even the most reliable anti-corrosive agent will not withstand it for long. Especially on the rapids. Among the most vulnerable cars are the following:
I think there is no point in listing further. It is much more important to understand the correct sequence of activities.
In total, 3 stages can be distinguished. Namely:
Actually, it is in this sequence that we will analyze the question.
Tools and materials
Please note that any anti-gravel is a very harmful composition for human health. Therefore, you should not allow it to come into contact with the skin, mucous membranes, and especially the nasal and oral cavities. You should arm yourself not only with tools and materials, but also with protective equipment.
As a result, your set should consist of:
Although you can make anticorrosive yourself, I advise you to use high-quality and proven products.
Preparing the machine
The next step is to prepare the car. You can watch the video and at the same time plan your further actions, visually learning the subtleties and nuances.
Having treated the thresholds first, I recommend that you subsequently think about protecting the body from chips and scratches in order to maximize the service life of the anti-corrosion agent.
Preparing a car involves performing the following tasks:
Preparation is of great importance for the final result of the anti-corrosion treatment. It is especially important to get rid of any existing rust and any drops of water. A hair dryer or some kind of heater, for example, will help here.
Anti-gravel treatment
And now the final stage. No less responsible and important. The complexity of application largely depends on the form of release you buy. Spray cans are more expensive, but much more convenient and effective at an excellent level.
The essence of the procedure is as follows:
In the case of mastic, you will have to spend more effort and time. This is a much dirtier method of anti-corrosion treatment, since the substance is applied with a brush. In principle, the procedure will be similar.
The thicker the layer of mastic, the more effectively the anticorrosive agent will work. Therefore, there is no need to particularly regret the remedy. After applying the first layer, be sure to wait for it to dry completely. Moreover, a hair dryer is unlikely to help in this case. Heating has the opposite effect, that is, the mastic again takes on a liquid flowing form. You can dry it simply by blowing air at room temperature.
Usually one layer of mastic dries in 2-3 hours. To apply at least 2-3 layers, you will have to spend quite a lot of time. But mastics in cans are much cheaper than cans of anti-gravel. It's up to you to choose.