Surely, every driver has encountered a situation where the appearance of a car has lost its luster and chic; over the years of faithful service, it has turned into a banal workhorse, but it was once an excellent model worthy of attention and respect. Just a decade ago, one could only dream of high-quality polishing with one’s own hands without special equipment. Today, a great variety of polishing products have appeared that allow you to do this yourself without spending a lot of time and saving the family budget on buying a machine. How to polish a car with your own hands, what is car polishing without a machine, what nuances and features does this work include?
Advantages and disadvantages of acrylic
Acrylic paint enjoys well-deserved popularity due to the many advantages it has. This is a material that contains polyacrylates, which give the surface a wonderful shine, similar to varnish. The film created by acrylic paint on the surface is very hard and wear-resistant, making it less likely to be renewed and polished.
In addition to the advantages, the painting material also has disadvantages. These include labor-intensive application technology, as a result of which a lot of time is spent on painting a car.
Polishing steps
Being technologically consistent, the polishing process can be divided into several types, depending on its depth and stages (cycles). Polishing can be:
- Protective, aimed at extending the life of the paintwork in its original form, easily renewing its shine, and reducing the negative impact of external influences on it;
- restorative, used to restore the natural beauty of tarnished paint, remove minor scratches, cloudiness from any aggressive liquids, unevenness after local repairs, etc.;
- comprehensive, carried out to achieve all the above goals.
Without the preparatory procedures that need to be carried out to polish your car (achieving its maximum cleanliness, creating the necessary external conditions, etc.), polishing the body itself can be divided into the following stages.
- Partial removal of the top layer of paint using sandpaper and fine abrasive. It is used only if there is severe surface damage. If the damage is minor, this action is not performed.
- using abrasive pastes.
- Treatment with non-abrasive polishing agents to add shine to the body and protect its painted surfaces.
To complete most of the above preparatory steps, as well as achieve the final goals at each of the listed stages, you need to have the appropriate car polishing equipment and consumables.
Polishing Features
The final step in painting a car is polishing it. This process can be divided into the following parts:
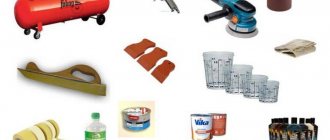
Before starting work, it is necessary to prepare the room and provide free access to the tools and materials needed in the process. The master will need: polishing pastes with different grains, degreaser, napkins or rags, a polishing machine and discs for work, clean water. Let's focus on the features of independent work with the acrylic surface of a car.
Where to start?
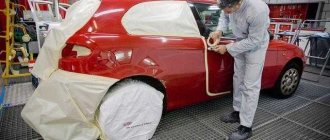
Determine the timing of the work, since the car can only be polished 3-4 weeks after painting. During these days the paintwork will dry completely. The work room should have good ventilation, well lit, but without direct sunlight. Before starting work, thoroughly clean the surface of the car from dust and dirt.
Plastic and rubber parts of the car must be sealed, and the working surface must be thoroughly degreased. To polish the body after painting until it shines with your own hands, prepare the following tools:
- sandpaper;
- polish with different abrasiveness;
- spray;
- lint-free wipes;
- polishing wheels (felt and soft foam);
- a grinder or drill with a special attachment.
Preliminary work with coarse abrasive
The body is treated with a degreaser using a napkin, all flaws and shortcomings made during painting are revealed. They begin to rub the surface with sandpaper of P 2000 abrasiveness moistened in water to get rid of defects. The most common of them is shagreen or the orange peel effect, most often obtained by using thickly diluted paint.
The work can be done using a power tool or manually, and the surface and sandpaper must be constantly moistened with water. In any case, movements should be circular and neat.
Do not allow dust to get on the work surface, as it will scratch the coating.
Visually and by touch, you can determine the end of this stage, when the car body appears matte and smooth to the touch before the master.
Sanding with an eccentric sander
- An eccentric sander can be used in the initial stages, when there is a large amount of work to be done and hard, difficult-to-sand putty is used. Leveling must be completed by hand sanding using a block. At the final stage, when the surface is leveled, a sander with P220-P320 abrasive can also be used to remove scratches left by coarser abrasives.
- When using a sander, sand at slow or medium speed. A slowly rotating grinding wheel is able to cut material better and faster and the process is easier to control than with a fast rotation, when the abrasive does not have time to grind and slides along the surface.
- In addition, at high speeds, heating occurs, and the grinding wheels clog faster.
- There should not be strong pressure. Orbital sanders lose their effectiveness if you apply too much pressure to them. The sole, in this case, stops rotating.
- A soft backing for the sole of the sanding machine allows you to reduce pressure on the surface and prevent the abrasive from cutting deeply. Processing is carried out at low or medium speeds. Such grinding does not change the shape of the surface, but removes traces of the previous abrasive and helps make the marks more uniform. A soft sanding pad should be used when sanding raised areas of panels and during final sanding. It helps soften the action of the sanding wheel so that it conforms to the shape of the panel and removes only scratches rather than changing the shape, even when the machine's sole is at an angle.
- There is a difference between the scratches left when sanding by hand and when sanding with a sander. When processing manually, the risks remain greater. So, for example, when sanding by hand with P400 abrasive, the risks will remain approximately the same as when processing with a grinder with P320 abrasive. Sanding by machine with a P180 abrasive will be approximately equal to sanding by hand with a P220 abrasive.
- When working with an eccentric machine, it must be constantly moved, otherwise it will cut a lot of material from one place and create a depression. You need to move slowly, evenly, at the same speed, without strong pressure. The next passage should overlap the previous one by half.
- When sanding the surface with a sander with a coarse abrasive, do not use the edges for this, sand the entire surface of the sole. When preparing a damaged area for repair and puttying, sand at a minimum angle.
Treatment with polishes
When starting to polish an acrylic paint coating, follow the technology to avoid a decrease in gloss and the appearance of new defects on the surface.
Abrasive polish No. 1
Having cleared the body of dust generated during the first stage of work, they begin to treat the surface with abrasive polish No. 1. To successfully polish, you need to take a specialized polishing disc, the hardest one (it is distinguished by its special density and light color). The paste is applied to the moistened circle and polishing begins without much pressure. The movements must be consistent, gradually covering the entire surface of the body. You need to be careful at the edges, especially sharp ones, so as not to completely remove the paint layer. At the end of this stage, remove the remaining polish with a rag.
If you plan to polish using a tool, do not forget that it is advisable to use the machine at low speeds.
Extreme caution should be exercised when working with sharp corners and in close proximity to rubber and plastic parts.
Abrasive polish No. 2
At the stage of working with paste No. 2, you must adhere to the above recommendations, with the only difference being that you use a polishing wheel with a finer grain. This disc is softer and darker than the previous one. With its help, you can level out previously made mistakes. At this stage, shine should already appear on the acrylic surface of the car.
Polish No. 3
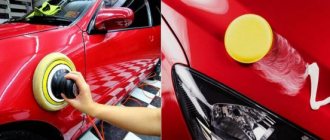
The composition used at this stage is not abrasive. The polish can be used manually or applied by machine, for which the softest of the polishing wheels is selected. The surface of the car body must first be moistened and while the paint is being polished, do this several more times.
The paste is applied to the disc and polishing begins. At this stage there is also no need to make excessive efforts. Periodically, you can stop work and evaluate the preliminary result. By treating acrylic paint with polishing compounds, the result is a deep shine.
What is polishing and why is it needed?
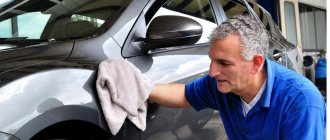
One of the main auto tuning procedures – polishing – can restore your car to its former shine, refresh the paint and, at the same time, create powerful protection against the effects of an aggressive external environment. Today, car mechanics practice two types of car polishing: without a machine, by hand, and with its use, each method is interesting and significant in its own way.
A permissive attitude towards external damage will not only have a negative impact on your aesthetic feelings, but will also serve as a fertile environment for the occurrence of corrosion of the car body.
Moreover, work done by hand is considered to be of even higher quality and more precious, because in this case a smaller layer is removed and the damage to the body surface is not as significant as when working with a polishing device.
The basic rules for do-it-yourself polishing are as follows:
- Choose your polishing products wisely. Today the market is replete with a range of materials, but not all are equally effective. Not only are they divided into categories, but each brand also offers the buyer a product of one quality or another, as well as additional features that should be taken into account when purchasing.
- Polishing work must be carried out in a warm, well-ventilated and lighted area. In heat, so that the materials do not lose their consistency, in light, so as not to miss a tiny area of the car body coating, and thus not to negate all the work. Well, we all need fresh air when working with toxic materials.
- It is imperative that before you start polishing the car, you must thoroughly wash the body so that the smallest particles of dirt and dust do not deform the paint surface during the procedure.
- Never carry out polishing and other work (for example, priming, puttying) at the same time in the same garage, as the smallest particles of other materials can settle on the polishing and lead to big troubles.
Final polishing
When finishing polishing the dark surface of a car body, you often get clearly visible circular marks. Special washes are suitable to neutralize them. With the help of tools you can eliminate the resulting errors. This composition is additionally applied to the surface of the car and rubbed in with a dry cloth or rag.
Note to the master! When polishing a car roof or hood, you often have to hold the tool with both hands. At this stage, you can easily scratch the paint, since the master often forgets about the power cord, which runs behind the machine. In this case, it is better to secure the wire in advance, ask someone to hold it or throw it over your shoulder. This way you can avoid scratches on the acrylic paint surface.
Having completed the work according to the recommendations, the car owner receives a shiny surface of the car body without defects, and the car’s exterior takes on a finished look.
Source
Types of polishes
You need to choose a product for your car that will not only give you a special shine, but also hide minor defects. You need to study the characteristics well and choose the appropriate type.
Polish is an emulsion or paste that has a long shelf life. Its composition, depending on its purpose, includes synthetic and natural ingredients.
- For mechanical processing, abrasive and restorative compounds and a polishing machine are usually used. This method helps to quickly remove a thin layer of varnish and remove small scratches. In addition, you can return the original color that the car had.
- Protective silicone and polymer polishes do not contain abrasive particles, since they can be used to mask abrasions and create an additional layer that will protect the car from ultraviolet radiation, aggressive acids and climatic influences. They can be applied by hand.
Synthetic and Teflon protective types can withstand up to 10 washes, while those created on a wax basis are washed off much faster.
The color of the car determines the choice of the desired polish, which has the appropriate shade. The kit often includes a soft sponge, but you'll need other tools to polish your car.
Causes of defects after painting
There are several main reasons why certain defects appear after painting a car.
Dusty room
Among all paintwork defects, debris adhesion during operation occurs in 70% of cases. The reason for this: dust in the garage, a poorly washed car, insufficient ventilation of the room. Painting defects are eliminated by “wet” or “dry” sanding. Sandpaper with an abrasiveness of at least 2000 grit is used if sanding is done by hand. You can use a grinder. Polishing of the ground surface is required.
Shagreen
The reason for the appearance of “orange skin” on the body, instead of a beautiful shiny surface, is simple:
The defect can be eliminated if the body is properly sanded and polished after the paintwork has completely cured.
Matte
The defect of a matte surface instead of gloss will be noticeable only on the fifth day after painting. If you wet the body with water, it will sparkle in the sun, showing the color that the driver would always like to see on his car. A defect appears if:
Main stages
Today, this operation can be divided into two types, since different types of polishes are used.
- Restorative or needed to remove abrasions, scratches and microcracks that have appeared. There are special tools and sandpaper for this. At the very beginning, you need to properly remove a thin layer of varnish, and then begin to smooth out the defects. It is better to use abrasive paste no more than ten times, otherwise all the varnish will be erased.
- Protective polishing can be used more frequently and can be done two to five to six times a year. The polish must be applied to the restored coating immediately, without waiting for small particles to get in. This will fill all the pores and microcracks, giving a richer shade of color and shine.
If you don’t have a special tool, you can use a regular drill or grinder, as well as a polishing block, which is an attachment. During friction, the pad will quickly warm up the paintwork, and the polish particles will fill all defects.
The process itself usually does not cause any particular difficulties, and the video will allow you to learn how to do it correctly.
To restore, you need to choose a polish of at least several types.
- Coarse or fine abrasive is applied, starting from the front bumper or hood of the car, to small square areas measuring forty or fifty centimeters in size. The amount should not exceed 10-20 grams so that drying occurs faster.
- After a minute, use a soft cloth to rub the paste. Soon you can see the appearance of a shiny film on the car body.
- A polishing machine with a round attachment or a drill is also used. You should work at low speed, trying not to press too hard so as not to damage the varnish layer. Movements can be circular or left to right, up and down. It is necessary to distribute everything evenly and remove the remaining paste. Then proceed to processing the next area.
- After completing the first stage, it’s time for soft polishing. The paste is evenly distributed in a circular motion over the area, and after it dries a little, when it starts to turn white, a machine operating at medium speed will help polish everything.
- The finishing touch will be made after applying the protective composition. You will have to repeat the already familiar procedure.
The sponge and polishing wheel should be rinsed well and dried after processing three or four areas.
If at the very beginning a low rotation speed is used, then it gradually increases to medium speed. The main task is to avoid the appearance of clots or lumps, since they are immediately removed, so you need to correctly calculate the pressure force.
Preparatory stage
Sanding and polishing is carried out no earlier than on the 20th day after painting. This is the optimal period when even a thick layer of paintwork dries out. In addition, in the third week all possible surface defects become noticeable.
The preparatory stage before polishing after painting takes a short time. You need to wash your car using car shampoo. The surface of the body is treated with a degreaser, all rubber bushings and car parts are sealed with masking tape.
Features of puttying
Since preparation for applying putty is carried out by grinding, and its correct application also affects further processing with abrasives, we will consider some important points in preparing and applying putty.
- To prepare for puttying, you need to remove the paintwork to bare metal with a P80-P120 abrasive, a little beyond the damage. At the edges there should be a smooth step from the old coating to the “bare” metal measuring 2-3 cm. When working with an eccentric machine, grind with the plane of the sole, at a minimum angle. The grinding wheel may not be able to reach the shallow grooves of the repair area. To do this, use a special wire nozzle. Next, you need to process the edges with a grinder with P180-P220 abrasive a little further, about 5 cm. Scratches from such abrasive will be well covered with primer. After smoothing the edges of the repair area, all layers of paint, primer and materials that have ever been applied to the panel will be visible. Smoothing the edges will prevent a border from forming between the repair area and the rest of the panel.
- The putty should be applied beyond the damaged area. The first layer of putty is applied with pressure on the surface. This way adhesion will be better and air will be squeezed out if there is any in the putty. Before re-puttying, it is better to blow the repair area with compressed air and then degrease it. Blowing will clean out pores and scratches, and the next layer of putty will adhere well. The next coat should be applied after curing and sanding. It is always better to fill a cavity with several thin layers of putty rather than one thick one. A thick layer may develop subtle cracks during the curing process, which will become noticeable after painting.
- To smooth and remove excess putty after application, you can use a wide spatula or a steel ruler (it is more elastic). It needs to be pulled along the putty, resting on the plane of the panel on both sides of the repair area. Some of the putty will be removed with a ruler, and the required amount will remain on the surface. This technique significantly reduces the need for rough grinding to achieve the original shape. This works well on small repair areas, about 20 cm. On larger areas, the ruler will bend and extend above the surface level.
- If the putty is not sanded down to the level of the overall surface, and metal is exposed in some places, then these are most likely small hills that were not leveled before puttying. They need to be gently tapped with the sharp part of the hammer head, holding the support on the reverse side.
- We must not forget that water under the putty layer can come from the back side of the panel if there are cracks or holes under the putty. So, some craftsmen putty the repair area with fiberglass putty, thinking that it will still close any gaps and not crack. Therefore, it is important, before puttying, to check the panel for leaks. This can be done by illuminating it from the reverse side with some light source. This way the smallest hole will be visible. Any leaks must be welded or tinned, and the reverse side treated to prevent rust.
- Putties of different hardness are sanded differently. One will cut faster and the other slower. The same applies to paint and primer. Taking this into account, you need to roughly level the repair area so that there are no visible holes left, and then apply a thin layer to the entire sanded surface, which you then work with as a whole. So, you will be processing material that is sanded equally over the entire area.
How to polish a car after painting
Work to eliminate painting defects is carried out in several stages: grinding, polishing, applying a protective coating. Depending on the type of defect (if it is dull, for example), initial grinding is not used. The process begins with deep polishing. In other cases, the order of work does not change.
Grinding
Sanding is done using sandpaper. The wet method involves pre-soaking the skin with 2000 grit abrasiveness for 10 minutes. Then the surface of the body is polished in a circular motion, while the paper is constantly wetted.
Dry sanding can be done using a machine. Use sandpaper to remove possible sagging, making cross-shaped movements with the tool. Use sandpaper with an abrasiveness of 3000-4000 grit.
Abrasive polishing
The second stage will be polishing the car after painting, using an abrasive paste. Can be polished by hand or using a polishing machine.
The paste is evenly applied to the surface, choosing a working area of no more than 40 square meters. cm. Polish in a circular motion, gradually changing the composition of the paste, reaching a polishing composition without abrasive. After each paste change, the working surface of the body must be washed.
If the car is painted with matte paint, then in 80% of cases gloss will appear after polishing. The composition of the matte varnish should use special clay, which retains its matte finish even after polishing, but in order to preserve the selected color of the car, polishing the matte surface is allowed with pastes without abrasives. After the procedure, protective polishing is mandatory.
If the car is painted in a metallic shade, then special abrasive pastes marked “metallic” from the manufacturer are used for polishing. Abrasive compounds and polishes are not used
Protective polishing
Protective polishing of machines is used as a final step. The polish contains Teflon and wax. Protective coatings are applied either manually or by machine with a felt or leather attachment.
Before finishing polishing, choose a clean, windless place, protected from direct sunlight.
Polishing a car after painting takes relatively little time if you choose the optimal tool and the necessary polishes. This procedure can be done independently, which will allow you to save money and gain experience, since protective polishing should be carried out every 3-5 months.
Source
Hand polishing technology
Polishing a car with your own hands is carried out in several stages:
- thorough washing of the car body;
- degreasing (only after this simple procedure will it be possible to polish, otherwise all efforts will be in vain);
- applying polishing agent;
- drying.
The first and second stages, we think, are not worth dwelling on; you can do this yourself. Let's tell you in more detail about how to apply the product by hand correctly. Shake the bottle with the product first and apply in small portions so that you have time to grind the emulsion before it dries. After applying the product, rub it with a cloth (preferably a napkin).
Polishing a car by hand always requires physical effort: the more energy you put into your work, the better the end result will be. You need to polish your car until it shines like a mirror.
Remember: car polish dries within five minutes after application. So, you need to meet the allotted deadline, otherwise you will have to repeat the work again, but in a day.
Doing this with your own hands is not so easy, but if you master some simple technology, then it is quite possible to do it correctly, saving a lot on car service costs.
Technique for painting a car with a spray can
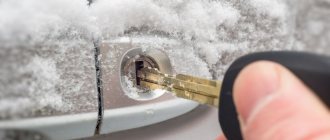
Sometimes minor damage appears on a car's paintwork (scuffs, shallow scratches, chips). The reasons for their occurrence can be very diverse, from minor accidents and the actions of hooligans to hail or small stones from under the wheels.
It is sometimes unprofitable to contact a car service center with such minor defects. A much simpler and cheaper option is to paint the car yourself with a spray can.
The benefits of spray painting
This method of restoring a damaged area of paintwork is very popular. It has the following advantages:
Sequencing
The process of paint restoration depends on the degree of its damage. Therefore, at the first stage you need to inspect the body very carefully. If the integrity of the layers of primer and putty is not compromised, work to eliminate defects may be limited to simple polishing. True, this is only possible if the paintwork around the problem area remains strong enough and has not begun to peel off.
If the damage has reached the primer or even the metal, it can only be eliminated by touching up the paint. The cheapest and easiest to use material for this is spray paint.
The shade is indicated by a number on the packaging, which greatly simplifies the selection procedure. Depending on the type of original paintwork of the car, glossy or matte paint in cans is purchased.
We must not forget that it is necessary to begin eliminating defects as quickly as possible, because if the damage reaches the metal, the oxidation process will certainly begin, which will lead to corrosion. When repairing damage of this kind, a preliminary primer with an anti-corrosion material followed by putty is required, otherwise the body will rust under the paint.
List of materials
Before you spray paint your car, you need to purchase the following:
Before painting begins, preparations are made. First, wash the car thoroughly with warm water and detergents, then let it dry.
The area of the car body to be spray painted must be degreased. This is done using two napkins. One of them is impregnated with a solvent and the damaged area is wiped with it, the other is used for subsequent wiping of the surface.
If the defect has reached the metal, then, having cleared this area of the old paintwork, a layer of primer should be applied to it. When the soil dries, degreasing is done again. Then acrylic putty is applied.
To protect surrounding surfaces, protective film or paper stencils are used, which are glued with masking tape or soft plasticine. Sometimes a special composition is applied to areas that are not to be painted, which is washed off upon completion of work.
It takes about half an hour for the putty and primer to dry at room temperature. Sanding the hardened putty layer is carried out with sandpaper with a gradual increase in abrasiveness (up to 320-400 units for sanding the damaged area and up to 500 units for its edges). Processing continues until the original geometric shape of the part is restored.
To improve adhesion, before you start spray painting the car, the surface is matted. This is done using Scotch Brite and a special paste or high-grain sandpaper with an abrasiveness of up to 1200 units. Then degreasing is carried out again in the manner described above.
Nuances in the preparation process
Painting the surface with a spray can should only be done on the area that has been pre-treated, without going beyond its boundaries. The varnish should completely cover the area where the enamel is sprayed.
It is also necessary that the surface treatment area be slightly larger than the damage itself. Only in this case can high-quality polishing of the transition lines be ensured.
Shake the can vigorously for about 3 minutes before use. After this, it is recommended to test it on some unnecessary old body element (if it is missing, any other metal surface will do). This test painting is carried out in compliance with all the requirements contained in the instructions.
Close attention should be paid to the preparation of the room: temperature, humidity and other factors. It is desirable that there is no dust or flying insects in it: both of these can negatively affect the result of the entire work.
In a warm room, paint takes much less time to dry. However, it is necessary to strictly adhere to the drying times, because even if the top layer looks dry, this does not mean that the composition inside has also had time to dry. The process can be accelerated by using a hair dryer (especially when partially painting the body).
How to prepare the car
Preparing the car body is one of the final stages. It is carried out in the same way, regardless of whether you plan to polish the car yourself with a machine or without a power tool.
Requirements for the car body:
- The car is thoroughly washed to remove dirt.
- Drying is a mandatory stage; during service, the car is driven into the box.
- Degreasing is an important point that determines the effect of applying products. Special substances or diluted white spirit are used.
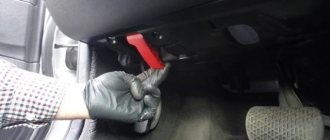
- Decorative elements made of plastic and rubber, cracks, holes, and glass edges are sealed with masking tape. They require protection, since removing the polishing substance from their surface is difficult. After drying, white spots and a matte coating may appear that are difficult to remove.
To ensure that polishing a car by hand is successful and there are no missed spots, good lighting of the work area is required. The body itself is visually divided into several parts - roof, doors, trunk, fenders, hood. These elements are divided into several sections for ease of application and polishing.
How to polish by hand
It is worth understanding that polishing a car manually without a machine requires considerable effort. The more energy you put into your work, the better the final result will be.
Main stages:
- The bottle must be shaken thoroughly if a liquid composition is used.
- The substance is applied to a sponge, a clean cloth or the surface of the part itself. Take small portions as the paste dries quickly.
- Rub the polish with light movements along the selected plane.
- You need to work with one area until the composition becomes almost invisible, and the sponge or napkin glides with ease.
- Taking a dry mitten, you can easily remove the remnants of the applied product and get a perfect, mirror-like surface.
- If as a result of processing there are traces left, roughness, polishing continues.
What to pay attention to:
- do not delay processing, as the compositions dry out within 5 minutes;
- with active exposure, it is easy to overheat the working plane, which will not have the best effect on the condition of the protective layer;
- corners and edges require special attention; it is easy to wipe the coating here;
- also, the treatment zones should not overlap one another.
Experts advise starting with the use of low-abrasive pastes that eliminate minor coating defects. The second time, protective compounds without abrasives are chosen - finishing ones. They eliminate the smallest imperfections and add depth and shine to the shade.
When should you polish your car?
The polishing process is an aggressive mechanical effect on the paintwork. Therefore, the question may arise - why is car polishing necessary? The procedure involves removing a small amount of varnish, which over time can cause rusting. Therefore, the craftsmen remind that after 20 polishings it is worth renewing the varnish coating.
And yet polishing solves many problems:
- Scratches on the paint layer are removed.
- Cobwebs and shagreens that arise as a result of long-term use and washing are eliminated.
- The body color is updated, becomes brighter, more saturated.
- Drips and signs of poor-quality pigment application are removed.
- The protective functions increase - the coating becomes resistant to moisture, mechanical stress, and ultraviolet radiation. The ingress of chemicals and reagents does not cause harm.
To get the best effect, it is important to choose the right paste.
Subtleties of choosing pasta
To understand which polish to choose for manually polishing a car, it is worth studying the features and advantages of the materials.
Types of polishes:
- Wax - the most popular, affordable, easy to apply. Ideal for hand work, non-toxic, no tools required. Made from natural or artificial base. The compositions are not durable, but they allow you to obtain the best shades for bodies in white, black, red, green. There are hot, cold, and hard polishes, but the best and most expensive ones are those made on an artificial basis.
- Synthetic - made using polymer components. Highly strong, durable, but toxic, often requiring the use of special tools. There are polymer, silicone, and wash-off cleaners.
Abrasive polishes should be considered separately. It is better not to use them for manual processing, as they can easily cause damage to the body. In addition, you can’t do without a grinder here. The pastes themselves are expensive and are not suitable for cars with old coatings.
All rules for polishing the body after painting a car
Polishing a car after painting is a mandatory procedure if the car owner wants to maintain a uniform color and iridescent gloss on the body of his car for a long time (at least 3 years). This is a necessary job regardless of whether the car was painted completely or locally.
Defects after painting
Polishing a car body after painting eliminates the following defects:
Causes of defects after painting
There are several main reasons why certain defects appear after painting a car.
Dusty room
Among all paintwork defects, debris adhesion during operation occurs in 70% of cases. The reason for this: dust in the garage, a poorly washed car, insufficient ventilation of the room. Painting defects are eliminated by “wet” or “dry” sanding. Sandpaper with an abrasiveness of at least 2000 grit is used if sanding is done by hand. You can use a grinder. Polishing of the ground surface is required.
Shagreen
The reason for the appearance of “orange skin” on the body, instead of a beautiful shiny surface, is simple:
The defect can be eliminated if the body is properly sanded and polished after the paintwork has completely cured.
Matte
The defect of a matte surface instead of gloss will be noticeable only on the fifth day after painting. If you wet the body with water, it will sparkle in the sun, showing the color that the driver would always like to see on his car. A defect appears if:
The defect is eliminated by deep polishing of the body.
Air droplet breakthrough
The defect appears a few days after painting. Causes:
The defect is completely eliminated after grinding and deep polishing.
Preparatory stage
Sanding and polishing is carried out no earlier than on the 20th day after painting. This is the optimal period when even a thick layer of paintwork dries out. In addition, in the third week all possible surface defects become noticeable.
The preparatory stage before polishing after painting takes a short time. You need to wash your car using car shampoo. The surface of the body is treated with a degreaser, all rubber bushings and car parts are sealed with masking tape.
Required tools and materials
To sand the body yourself you will need:
To polish a car after painting, use:
How to polish a car after painting
Work to eliminate painting defects is carried out in several stages: grinding, polishing, applying a protective coating. Depending on the type of defect (if it is dull, for example), initial grinding is not used. The process begins with deep polishing. In other cases, the order of work does not change.
Grinding
Sanding is done using sandpaper. The wet method involves pre-soaking the skin with 2000 grit abrasiveness for 10 minutes. Then the surface of the body is polished in a circular motion, while the paper is constantly wetted.
Dry sanding can be done using a machine. Use sandpaper to remove possible sagging, making cross-shaped movements with the tool. Use sandpaper with an abrasiveness of 3000-4000 grit.
Abrasive polishing
The second stage will be polishing the car after painting, using an abrasive paste. Can be polished by hand or using a polishing machine.
The paste is evenly applied to the surface, choosing a working area of no more than 40 square meters. cm. Polish in a circular motion, gradually changing the composition of the paste, reaching a polishing composition without abrasive. After each paste change, the working surface of the body must be washed.
If the car is painted with matte paint, then in 80% of cases gloss will appear after polishing. The composition of the matte varnish should use special clay, which retains its matte finish even after polishing, but in order to preserve the selected color of the car, polishing the matte surface is allowed with pastes without abrasives. After the procedure, protective polishing is mandatory.
If the car is painted in a metallic shade, then special abrasive pastes marked “metallic” from the manufacturer are used for polishing. Abrasive compounds and polishes are not used
Protective polishing
Protective polishing of machines is used as a final step. The polish contains Teflon and wax. Protective coatings are applied either manually or by machine with a felt or leather attachment.
Before finishing polishing, choose a clean, windless place, protected from direct sunlight.
Polishing a car after painting takes relatively little time if you choose the optimal tool and the necessary polishes. This procedure can be done independently, which will allow you to save money and gain experience, since protective polishing should be carried out every 3-5 months.
Polishing
This is the most critical stage in the entire process. The point is that everything needs to be done at a certain pace, but with high quality.
Many people know that the polish dries within 3-5 minutes after application, so the entire treatment must be done before it dries, otherwise you will have to redo everything again, but only the next day, because you can seriously damage the car’s paintwork.
As is already clear, polishing is a multi-stage process, so several main stages should be highlighted.
- At the first stage, you need to prepare all the necessary tools and supplies before starting the operation. This is considered the first stage because all this needs to be selected and purchased at the store.
- The second stage is a complete washing and drying of the car.
- The third stage is applying polishes to the car with your own hands.
- And the last stage is to dry the car body.
Particular attention must be paid to the application of polish. In fact, there is nothing difficult here, the main thing is to follow certain rules.
- First of all, you should not add too much product at once. The fact is that it dries very quickly (3-5 minutes), if you do not have time to grind it during this time, it will dry out and you will have to redo everything.
- After completely rubbing the emulsion, you need to wipe the body with a damp cloth.
What polish to use to polish a car after painting, types of polish
The answer to the question of which polish to polish a car with should begin with a list of types of paintwork treatment.
Types of polishing
Polishing can be of only several types:
Today we will take a closer look at polishing after painting. For other types of treatments, see the "Painting" section.
Paintwork condition
It is the amount of damage and its degree that determines which type of polishing is best to apply. Particular attention should be paid to the depth of the scratches, since the degree of abrasiveness of the polishing compounds used depends on this.
Scratches can be:
For each type there are separate methods for removing scratches.
Run your fingernail perpendicular to the direction of the scratch. This way you can determine the depth. If the damage is not felt, you will be able to remove it even manually. Anything deeper will “go away” only after polishing with a special machine. Of course, it will not be possible to completely remove damage that is too deep.
Polishing compounds
The composition of body polish depends on its purpose. The following types are distinguished:
The best manufacturers whose range includes car body polish:
It is difficult to say unequivocally which polish is better. Each of these manufacturers has a following among experienced auto body repair specialists. They all have recommendations for using their products. Perhaps the difference in technology will help you make your choice.
How to choose
Each manufacturer uses a unique system of gradations of abrasiveness of car polishes. Before polishing a car or buying a compound, be sure to refer to the technical documentation, which will indicate the name of each type, the degree of abrasiveness and the best way to polish the car. For example, 3M divides its compounds by assigning them a special number:
For greater convenience, the grain ratio is visually represented on the label. Also, each container has an individual cap color. Many manufacturers produce their own polishing wheels and abrasives, which help not only to update the car by polishing, but also to remove paint defects.
You can polish a freshly painted car only after the varnish has completely dried. Drying time depends on the characteristics of the environment (temperature, humidity), the drying method (normal use of the car after the initial setting of the varnish, thermal in a special warm chamber, infrared) and the type of varnish. Consider these points if you are going to paint your car yourself.
If you start polishing, for example, “raw” acrylic, you may observe the paint rolling into small lumps; also in such conditions it is very easy to wipe the paint layer.
Removing painting errors
No matter what experience you have, no one is immune from mistakes in the painting business. Let's look at the most common mistakes that can be removed by polishing. These include:
We will polish a car that has paint defects using 3M technology.
How to remove dust and stains
Let's look at how to polish a surface that has received specks during the painting process:
In a similar way, you can polish a car if, for example, you are not satisfied with shagreen. If you need to remove a smudge, be sure to use a hard block. In terms of abrasives, you can start with P1000. To control it, you can put a little putty around the smudge. This will reduce the chances of rubbing down to the base coat of paint. To remove dullness, start with a medium-abrasive polish. After painting, it is advisable to apply a protective compound.
Source
Summary
Many drivers think that polishing a car without a special machine will be problematic, so they try to avoid this procedure. But you absolutely cannot ignore it, because this may cause the car body to begin to rust. In fact, the process of polishing a car without using a polishing machine is not very difficult and has a number of advantages, because everything will be done with your own hands, and you will gain some experience in working with a car yourself.
Secrets of properly polishing a car using a machine
When working, keep the following points in mind:
- The cleanliness of the water container is of paramount importance. The fact is that just a few grains of sand accidentally falling on a circle or surface can irreversibly ruin the result of the work by scratching the paintwork;
- Wetting the part with water - this is necessary in cases where the paste dries out too quickly;
- Cleaning the polishing wheel - this should be done periodically, as lumps of paste stick to it;
- Applying the paste - it is not recommended to spread it directly on the circle; it is better to apply the paste to the surface of the part;
- Overheating is possible when the same place is polished for too long. This approach leads to excessive heating of the varnish (the circle seems to begin to get stuck in it) and even to its “tearing off”;
- Smears - they happen if the worker holds the polishing machine at an angle and the circle does not touch the surface with its entire area;
- Rhythm – it is not recommended to immediately turn on the machine at maximum speed. The paste applied to the part must first be evenly rubbed over the surface at low speeds, and only then gradually increased;
- Different pastes - if you need to switch from a paste with a large grain to a paste with a finer one, you need to carefully clean the surface of the parts. It is better to change the circle, but if this is not possible, then you can leave the old one, but provided that it is washed in clean water;
- The intensity of the machine's operation - it is not recommended to set its speed to more than 2500 rpm - this can lead to overheating of the coating on the part. It is most convenient to regulate the frequency on machines with disk regulators;
- The choice of wheels - they can be hard (used to erase shagreen and remove scratches from sandpaper), as well as medium-density and soft (give the coating more shine). There are also relief products on sale, which are also aimed at adding shine;
- Finishing paste - after polishing, it is necessary to apply either a special protective paste to the surface or treat the paintwork with liquid wax.
Polishing agents
The polishing kit required by the performer must include polishing agents, which differ in their characteristics depending on each stage. Additionally, when restorative polishing you need to have a special sandpaper.
Polish is a complex composite mixture consisting of silicone resins, various waxes, abrasive particles, resistant to separation and in a paste or emulsion form. The composition may also include chemical compounds, pigmenting and insoluble dyes, which enhance the color of the body paint and fill in scuffs and scratches.
When applied to a car, the product actually acts as the outer layer of paintwork, reducing the impact of ultraviolet rays, as well as salts and acids, which are abundant in urban and natural environments. Being offered for sale in a wide range, polishing agents can be differentiated into several types based on consistency.
| Types of polishing paste | Features of the material |
| Pasty | Thick in consistency, which makes it possible to use them on vertically and horizontally oriented surfaces. They are usually more expensive than other types, but have a greater effect, returning the paint to its previous color depth. |
| Liquid | They are safer for paintwork. Even with their repeated use, unlike the previous type of products, critical thinning and wear of the coating does not occur. |
| Aerosol | They are most suitable for use by non-professionals, but due to the presence of gas and solvent in the cans, the volume of the polish itself is very small, which leads to an increase in the cost of such a product. |
According to their types and composition, polishes differ as abrasive, cleaner-regenerating, synthetic, silicone and polymer. All of them have their own specific application and application to the car, validity period, as well as a different price range, depending on the composition and type.
Choosing products for polishing a car in each specific case, regardless of whether polishing is done in a car service center or independently, is the prerogative of the car owner himself, who finds it quite difficult to understand their palette. In this regard, it is better to consult with a specialist who has completed the necessary training.
How to polish a car?
Polishing a car in workshops costs a lot of money, because there it is done by professionals, but it is quite possible to polish a car correctly at home. This is done both manually and using a polishing machine. Polishing after painting is especially important, because in fact it is the final stage of work on the appearance of the car.