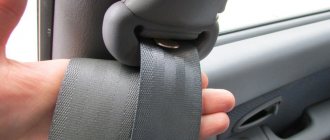
Seat belt buckle
(aka
seat belt latch
) is a latch located on the side of the seat into which the seat belt itself is inserted. It is extremely rare for a seat belt buckle to fail. But apparently I was lucky and encountered this problem.
At first I didn’t want to describe this problem at all. However, after studying search engine queries, I found out that several hundred people a month are interested in this topic. And this is not so little. Therefore, the security lock may break not only for me))).
So, what exactly is the problem? I came to the car service center and solved it. But! Firstly, if you have been to our car services, then you know that it is better not to go there again. Secondly, the malfunction is really rare. It’s not a fact that everything will be fixed for you on the same day (there may simply not be a spare seat belt buckle in the warehouse). And if you have an expensive foreign car, then even such a trivial repair will cost significant money.
There is a second way - go to the store and buy a new seat belt buckle. I did so. However, this trifling thing turned out to be in short supply. I had to visit several stores before I found it, and even then the seat belt latch turned out to be not original, but only similar, and cost me 350 rubles. I had to slightly bend the bracket that is attached to the seat, but in the end I put it in place.
However, there was a simple and cheap alternative - to fix the faulty latch. Yes, you have to spend a little time, but I spent the same time on shopping trips. Again, 350 rubles is not a lot of money, but it’s still money. It is better to pour a little gasoline into the tank for them. In short, I suggest that we repair the seat belt latch together with you. More precisely, I will repair, and you will read a text report about the work performed))). We will talk about the lock for the Lada Priora, however, the seat belt buckle device may be similar for other VAZ models, and maybe for some foreign cars.
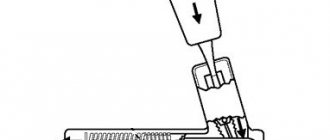
So, first we need to disassemble the case. The case is actually not collapsible. So you will have to divide it into two halves along the seam with a screwdriver or knife. Having disassembled the case, we will see something like the following (Fig. 2).
Seat belt buckle mechanism
Here the numbers indicate:
- Seat belt retainer.
- Security lock lever.
- Roller.
- Spring.
When we insert the belt into the lock, it presses on lever 2. This lever moves back and allows latch 1 to latch the belt. Spring 4 acts on roller 3, and roller 3 presses on the latch, which snaps the belt into the lock. In my case, one end of spring 4 broke off (Fig. 3), its force became insufficient to influence the latch, so the seat belt buckle stopped working.
Broken spring
You are unlikely to be able to buy such a spring. You can try to get it from another castle, but this is also not an easy way. I chose a different method - I made the spring myself. In order to make a spring, we need a springy wire with a diameter of approximately 0.5 mm. Such wire can be “obtained” from an ordinary spring by straightening it. From this wire we bend a spring similar to the original one. See the result in Fig. 4.
Converting a regular spring to the format we need
Of course, my spring is not as beautiful as the factory one, and its dimensions and shape are slightly different. But in our case this is not important, since it will perform its duties in this form! All that remains is to put the spring in place (Fig. 5) .
The renovation is complete
OK it's all over Now. We install the case in place and check the operation of the lock. If everything is fine, then glue the body together and off we go! Good luck on the roads, I hope that you will never have to try a seat belt in action (although this does not mean that our repair was done poorly))).
Over time, the seat belt in the VAZ 2110 begins to jam
, that is, it prevents the belt from being pulled out of the reel, even when you pull it very slowly. Or in winter, the belt is difficult to pull out of the reel and you have to put in a lot of effort to fasten it.
Many owners of tens face two unpleasant moments when using seat belts
:
- The seat belts jam even when you pull them out very slowly.
- Seat belts are too tight in the cold
According to UNECE Regulation No. 14-05; 16-04, GOST R 41.14; 41.16
. Belt malfunctions (does not hold the lock, the reel lazily retracts the strap or does not fix it, etc.) cannot be eliminated yourself! Any tampering with the design or installation method of the seat belt relieves the manufacturer of the seat belt from liability for proper operation of the seat belt and any injuries sustained in an accident. Some locks, retractors, etc. They are specially made so that after disassembly they can no longer be reassembled. But blowing with compressed air is acceptable;
Therefore, you do all actions with seat belts at your own peril and risk. The author is not responsible for any damage or injury associated with tampering with the seat belts.
How seat belts work
: The coil lock is made on the basis of a ratcheting mechanism, locked by a sensitive element - a pendulum with a hemispherical support or a metal ball located in a sphere of larger diameter. The ball or pendulum, moving, fixes the ratchet gear of the reel to the body through a system of levers. A flywheel disk is installed on its axis on screw splines with a small angle. When the strap is pulled out slowly, the disk only rotates with the shaft due to friction, without locking the reel. When the belt is jerked, the disk, by inertia, presses harder on the screw surface, overcomes the friction force and, moving along the screw splines, blocks the ratchet
Repair of seat belts VAZ 2110
To repair a seat belt reel with your own hands
Needed:
Remove the seat belt reel
.
It is not necessary to remove the seats for this; just move them forward and tilt the backrests forward. We determine the side where the blocking device is located
(as a rule, this is the thicker half). You can determine this by shaking the belt near your ear, where the ball will be strumming, there is a blocker there. Or you can completely unwind the belt, the blocker is on the side where there is a plastic square on the sidewall.
Inertial coil: a - body; b - coil; c — retracting spiral spring; g - inertial mechanism; d - ball; e - control ratchet; g - blocking ratchet.
We recommend: Inflating tires with nitrogen - real benefits or a marketing ploy?
If you mistakenly disassemble the reel from the other side where the winding spring is located, then keep in mind that the spring can cut your hands and face. Therefore, it is better not to make mistakes when choosing a side :)
Remove the cover
(you need to pull out 4 pistons). Be careful not to let the insides fall apart! The cover must be removed in a horizontal position.
Disassembling the seat belt reel
(without effort) and get to the locking ratchet. Nearby, in a rectangular body with a foot, is a ball that blocks the belt when the reel body is tilted.
Having reached the rubbing parts, remove the thickened lubricant
, which looks like a dry substance and only interferes with the smooth operation of the locking mechanism.
Lubricate the seat belt reel mechanism.
And you need to lubricate with a lubricant that does not thicken in the cold (litol, CV joint, fiol, engine or transmission oil are not suitable). You need frost-resistant lubricant Tsiatim201 (or its equivalent), or a good silicone lubricant.
In addition, for clearer operation of the seat belt mechanism
you can bend the bracket, or rather,
bend the copper tab
on which the ball acts. The fact is that due to the weight of the ball, it bends slightly and the belt works worse and worse. That is, you need to reduce the bending angle of the copper tab so that when the coil is in a vertical position, the latch does not engage with the teeth of the coil. We check that when the coil is tilted, the lock is activated.
There are opinions that you can simply throw out this block with a ball and the seat belts will work without problems, however, this latch is activated not only when the car turns over, but is also an inertial mechanism and will block the belt even during sudden braking or strong shaking of the body. Therefore, there is no need to throw anything out of the seat belt reel.
.
We assemble everything in reverse order. Now the seat belt works perfectly in any frost
.
I read a lot of forums on the topic that belts jam when pulled out and fastening becomes a test of nerves. Even if you pull slowly, they jam. All the solutions that were proposed were either replacing the belts with new ones, or removing part of the mechanism with the ball. I didn’t want to remove the ball that blocks the belt when the car turns over. Still, it performs a useful function and there are no trifles in ensuring safety. Yesterday I took it apart and realized that there is nothing tricky and I consider it my duty to share. I didn’t take my camera with me, but when I realized that my experience could be useful, I started taking photos with my phone. In the twilight of the garage, the photos didn’t turn out well, but you can get the gist. Let's begin. Remove the belt reel. Nothing tricky, and there are a lot of photo manuals on the Internet that show the process with the seats removed. It is not necessary to remove them, just move them forward and tilt the backrests forward:
You can only remove the coil, but due to the darkness in the garage, I removed the belt completely. If you hang it from something, it’s very convenient:
The reel is closed on both sides with covers. On the one hand, we don’t need a spring (moreover, knowledgeable people warn that opening the lid with a spring is dangerous for the eyes and is fraught with cuts to the hands, and putting it back together is borderline impossible), but we need an inertial mechanism. It is located under a thicker cover:
Push out the four pins and remove the cover. Be careful - the insides may fall apart! Remove the cover in a horizontal position and do not shake the reel. Under the cover you will find something like this:
Underneath the plastic blue gear is an inertia mechanism that is activated when the belt is quickly unwound. Nearby, in a rectangular body with a foot, is a ball that blocks the belt when the reel body is tilted. He is the cause of our troubles. It’s easy to verify this - if you assemble the mechanism without a module with a ball and pull the belt, the inertial mechanism will still work, but when pulled out calmly it will not block. It can be easily disassembled with a screwdriver
In the foreground you can see a copper bracket that will need to be bent. you can wipe the parts with a cloth, remove dust and dirt and reassemble
Next is the crux of the matter. We need to slightly bend the copper tab on which the ball is acting. I wasn’t able to take a good picture of this small detail with my phone, but I think you’ll figure it out on the spot. It’s just that under the influence of time and the weight of the ball it bends slightly and the belt works worse and worse. It is necessary to reduce the bending angle of this copper tab and ensure that when the coil is in a vertical position, the latch does not engage with the teeth of the coil:
We make sure that when the coil is tilted, the lock is activated
and, satisfied with ourselves, we collect everything in reverse order. Don’t forget to wipe the dirt off the belts after assembly.
In my opinion, it is impossible to completely throw away this block with a ball. This lock is activated not only when the car turns over - it is also an inertial mechanism and will block the belt even during sudden braking or strong body shaking. BEFORE the fastened body begins to pull the belt
Owners of VAZ cars eventually encounter a problem - seat belts begin to jam
, they are difficult to pull out of the spool even if you pull them slowly. The most common problems with seat belts are that they get stuck or are difficult to remove. According to the rules, it is impossible to independently eliminate such a problem, since the manufacturer will not be responsible for the performance of seat belts or for injuries received in an accident.
Some retractors and locks are designed such that once disassembled they cannot be reassembled. To restore their functionality, you can blow them with compressed air. We must not forget that when modifying seat belts, you act at your own peril and risk.
What does a jammed belt mean?
If the seat belt does not pull out of the installation socket, it is most likely jammed. To understand what this means, you first need to understand how it works. When the belt does not extend, this indicates a failure of the locking mechanism or that the belts were jammed as a result of an accident. But first, let's look at the principle of operation.
Vehicle seat belt
Inside the blocking device there is a sensitive element responsible directly for blocking, which is made in the form of a ball. This ball, moving through a system of levers, clings to the body of the coil gear. If the belt is retracted too quickly, the spool disc puts more force on the screw surface, thus blocking the ball.
If the lock is jammed and cannot be turned off, this means that over time the security mechanism has begun to function incorrectly.
In such cases, the strap does not retract and cannot be turned off in any way. In such cases, even an attempt to slowly latch the element may not help - it simply jams and no longer retracts, does not work.
We recommend: Car service in Lyubertsy
How do they work
Before starting repairs, it is important to understand exactly how seat belts work, what are their features, and what devices generally take part in protecting the driver and passengers.
- The coil lock is made on the basis of a ratchet mechanism, which is locked by a sensitive element. Its role is played by a pendulum with a semi-spherical support. In some cases, this is a ball of metal placed in a sphere with a large diameter.
- The pendulum or ball moves, while the ratcheting gear of the reel is fixed to the body through a system of levers.
- A flywheel disc is located on the gear axis on screw splines.
- When the straps are slowly tightened, the disc rotates with the shaft due to friction, but does not lock the reel.
- If you make a jerk, the disk will put more pressure on the screw surface, acting by inertia, overcome the friction force and block the ratchet, moving along the screw splines.
Checking status
When driving, the driver and his passengers must wear seat belts.
This node will only provide security if it is used. The problem for many of our citizens is that they wear seat belts not for the sake of safety, but to avoid fines for violating traffic rules. That’s why many people simply throw on the tape without putting it into the lock, creating an imitation of a fastened belt for the traffic police.
You should always be sure that your seat belts are functioning properly. Therefore, it is recommended to check them periodically.
There are several useful recommendations for this:
- Check whether the belts are twisted due to improper use.
- If the tapes are twisted, they may jam and retract incorrectly.
- Pull the belt out to its full length, straighten it and return it to its original position.
- Remove the tape completely and let it come together on its own.
- If the device jams when pulling in and out, check the condition of the tape, dirt, grease and other defects.
- Washing can only be done with a mild soap solution. If it is impossible to rinse with a weak solution, the belt must be replaced.
- Make sure the belt attachment points are secure and in good condition. All bolts must be tightened tightly.
- Check the condition of the device's fastenings to the body. Sometimes on a VAZ 2110, traces of corrosion appear in that area. All corroded elements must be replaced.
When replacement is required
There are several situations in which it may be necessary to replace just the tape or the entire device assembly.
We invite you to familiarize yourself with these situations in a special table.
| What to change | Reasons for replacement |
| Belt replacement |
|
| Replacing the complete device |
|
The condition of the device should be checked periodically. Only there can you be sure that your safety is under reliable protection.
Repair
We remind you that only you are responsible for the consequences of self-repair.
The sequence of work is as follows:
- Remove the safety coil. This does not require removing the seats. Simply slide them all the way forward and lower the backrest forward.
- Find the side where the blocker is located. Typically this is the thicker side. You can shake the belt near your ear. If you hear the sound of a metal ball, the desired blocker is located there.
- Another option is to unwind the tape completely. Your blocker will be located where the plastic square is on the side.
- If you disassemble the lubrication spring side, be very careful with it. She often cut her hands and face.
Dismantling process:
- Remove the cover by first removing the four pistons. Do everything carefully, otherwise the insides may fall apart.
- The cover can only be removed horizontally.
- Without applying much force, disassemble the coil. This will take you to the ratchet.
- Next to it is a rectangular body with a foot. This ball is responsible for blocking the belt when the reel body is tilted.
- Now get to the rubbing parts. Most likely, a lubricant clot has formed on them, which must be removed, since these contaminants interfere with the operation of the device.
- Lubricate the mechanisms with fresh compounds. Be sure to choose those compounds that will not freeze at subzero air temperatures.
- To increase the reliability and efficiency of the belts, you can use the method of bending a copper tab, which is affected by a metal ball.
- The weight of the ball over time straightens the tab, causing the belt to not work as efficiently.
- Make sure that after this manipulation the coil works when tilted.
- Do not remove anything from the device structure under any circumstances. There are many smart people who think that a block with a ball is completely unnecessary. In practice, the belts will work, but this complex also plays a more significant role for your safety.
- If the parts are heavily worn, the tape itself has traces of defects, it is advisable to replace the entire assembly. Moreover, it is better to do this at specialized service stations.
Perhaps, repairing seat belts is one of those few cases when it is better to entrust your VAZ 2114 to professionals, rather than trying to save money by doing it yourself.
Didn't find the information you are looking for? on our forum.
The main causes of failure of inertial belts
Among the common breakdowns that occur during the operation of seat belts and the mechanisms that control their operation are the following:
- jamming of the belt when trying to fasten, even if pulled out smoothly;
- belts do not stretch due to frost or wear of the roller mechanism;
- the straps do not retract when unfastened;
- The spool lock is broken or the main mechanism is damaged.
Of course, there are other problems, but they are less common, which means that the risk of encountering such a breakdown in your car is minimal. Many people believe that in case of some breakdowns it is possible to drive with faulty seat belts, but, according to traffic rules, if a vehicle is operated with a faulty seat belt mechanism, an administrative fine may be imposed on the driver.
Faulty seat belt mechanism
In addition, the car manufacturer is not responsible for a traffic accident, even if the car is under warranty if the owner does not contact specialists to replace the seat belts. Therefore, before you repair belts with your own hands, you need to understand that all changes are made, as they say, at your own peril and risk.
Most often, owners decide to do their own repairs due to the very expensive maintenance. For example, replacing a belt mechanism or completely replacing belts on a standard middle-class passenger car will cost the owner at least 15 thousand rubles. Not everyone is ready to pay that kind of money, especially if it is a simple breakdown, for example, the need to lubricate or replace the gear of the main mechanism.
Repair or replacement
A logical question: should the belt be completely replaced or repaired? Depends on the specific variant of the faults listed above. For example, if the belt does not retract or does not extend (jammed), a repair is sufficient: remove and clean the recess where the ball is located - after all, the point is that this ball moves forward during sharp braking and jams the belt. Most likely the ball itself is jammed. To do this, it will be enough to remove the socket, twist the coil, remove the housing cover, and then put it back together. Ten minutes of work.
If the belt is worn out, it is worth replacing.
Repair options
Troubleshooting measures directly depend on the cause of the breakdown:
- If you have successfully pulled out the belt, buckled it, but when you need to unfasten the belt does not return to its original position, the problem may lie in the spring. It often comes off due to prolonged use or under stress. It is necessary to disassemble the lining and reach the drum to install the spring in the correct position. If it is still there, you will have to change the drum.
- Dirt on the belt and in its fixation areas can also cause the belt to not return to its original position. This problem is most common with older cars. Just rinse the entire device and dry it thoroughly.
- If the device is jammed and the seat belt does not extend at all, the cause may also be the accumulation of dirt, but not on the belt, but directly in the mechanism. To fix the problem, use a special composition, which can be purchased at any auto supply store. Spray it as close to the mechanism as possible and try moving the tape a couple of times to develop the device. You can also disassemble the device yourself and clean it, but first pull out the tape to the end and secure it with improvised devices, which can be a clothespin or a paper clip.
What will be required for repairs?
For the reasons mentioned above, sometimes the seat belt does not extend. What to do ? Advice from experienced auto mechanics will help. First of all, you will have to disassemble the casing and remove the coil. In some models, you will have to dismantle the seats in the place where the breakdown occurred.
To do this, you need to prepare screwdrivers (flat and Phillips), as well as spanners. Their diameter should be different. You should also purchase a multi-purpose lubricant. The seats must be protected from accidental contact with oil. You will also need napkins and wire.
Repairs can be simple or more complex. In some cases, you have to completely change the coil. For some machine models, you will need to prepare special tools. But repairing a seat belt yourself will help save quite a lot of money in the family budget.
Troubleshooting seat belt problems
At the very beginning, it is worth making a reservation that driving with a malfunctioning safety device is not only costly (after all, valiant traffic inspectors are not asleep and will happily issue you a fine for such an offense), but most importantly, it is life-threatening.
Of course, if the seat belt breaks, you can contact a specialized service station, where specialists will quickly and efficiently carry out repair work. However, you can do this yourself, and with the help of our tips it will be completely easy and simple.
There are a large number of belt malfunctions; we will focus on the most common problems and try to eliminate them.
It often happens that the belt does not want to screw back on. Sound familiar? They got into the car, buckled up, drove to their destination, unfastened the belt, and it remained unassembled. The situation, admittedly, is unpleasant, but, fortunately, not hopeless. Usually the cause of such a breakdown is a failed drum; to replace it, you need to remove the casing. However, often to restore the drum's functionality it is enough to replace the spring, which often simply flies out due to strong tension. Agree, everything is much simpler than one might expect. Just don’t relax too much and take precautions while working, otherwise you risk injuring your hands, in which case the seat belt, no matter how paradoxical it may sound, becomes dangerous.
It happens that the belt begins to jam. To do this, it is also necessary to remove the trim and check the serviceability of the mechanism that drives the belt. Usually it is enough just to clean it of dirt, after which it returns to its former performance. However, simply pulling out and cleaning the mechanism, as is done in most cases, is too labor-intensive and quite time-consuming, so it is better to take a can of special dye, inject it several times into the mechanism and pull the belt back and forth a couple of times, in this simple way the heads of the mechanism will be cleaned and the belt will stop jamming.
All about seat belts on VAZ 2109, 2110, 2114
Every car, regardless of manufacturer and configuration, must be equipped with seat belts. This is an international requirement, the violation of which entails very serious consequences. Moreover, both for the manufacturer and for the owners of such cars.
As you understand, the VAZ 2110 is no exception, and therefore the design of its interior includes seat belts.
The video shows how to solve the problem with jamming seat belts
Repair process
Now that we have dealt with the signals and reasons for blocking a fastened and unfastened seat belt, let’s move on to the repair process. Cleaning seat belts is one of the main tasks in this process, so we will consider this procedure separately. So, what should you do if you receive a signal that the lock is jammed? How can I clean it or turn it off? You will learn more about this below.
Tools
To disable the lock if a corresponding signal appears, the entire mechanism will need to be cleaned. To do this, you need to thoroughly prepare in advance and collect all the necessary tools. so what to prepare:
- a Phillips screwdriver, preferably a short one;
- flat head screwdriver;
- a wrench set to “17”, it will be more convenient to use a socket wrench;
- stationery pin;
- syringe with tube;
- some gasoline (lighter fuel is ideal).
Phillips head screwdriver.
Slotted screwdriver
Wrench 17
Stationery clothespin for fixing
Syringe with tube
Gasoline for lighters
Step by step instructions
When the entire list of tools is ready, you can begin repairing and cleaning.
- Using a Phillips screwdriver, unscrew the screws that secure the strap protection.
- If the lock is not working, pull the strap out to its full length and secure it with a clothespin.
- Take a wrench and remove the screw that secures the element coil. The screw must be removed from its installation location. To prevent the element from starting to unwind, you can attach it directly to the same spool using the same clothespin. In any case, in order to disable and clean the lock, it must be locked to make further actions easier.
- Put the reel aside and sit in the next seat. To disable and clean the lock, you will need to find the lid behind which the inertial device is hidden. As a rule, it is slightly thicker in design. Shake the coil - under which cover you hear the noise - under that one it is located.
- Now to dismantle the protective cover you will need to remove four plastic pistons. This can be done using a slotted screwdriver or a thin knitting needle. The pistons should be supported by hand so that they do not fly out and you do not have to look for them and collect them throughout the cabin. Then pry up the cover with a screwdriver and remove it. Set the lid aside.
- Your view will now be presented with the first mechanism of the component. It is a kind of box with a cylinder and thus a locking ball and a so-called rocker inside, which jams the lock. This mechanism can be dismantled freely from the installation site.
- Check the functionality of this rocker - ideally it should move freely along the axis of rotation. This device should be positioned vertically with the top angled toward the locking ball. One way or another, the rocker arm must be positioned vertically so that it does not jam. If you feel that the so-called rocker arm does not move freely, then you need to clean its rotation axis. Pour some gasoline and rinse the device until it rotates freely on the axis, without the slightest jamming.
- Now let's move on to the second, inertial device. It is located under the gear, which is made of plastic and in most cases is made of steel. The gear comes off freely, so remove it.
- Note the center of the serrated hole. It contains an eccentric with teeth. It is these teeth that jam the strap when it is suddenly pulled out. The space under this very eccentric needs to be cleaned. Pour a little prepared gasoline around the entire perimeter of the hole, add a little fuel to the center. At the same time, hold the strap, preventing it from winding up, for which you can temporarily remove the clothespin. Make sure that the liquid gets into all parts of the element, otherwise cleaning it will be useless.
- Take the dismantled spool with one hand so that the plastic guide along with the spring can be supported with one finger. Using your other hand, pull and wrap the safety element several times. Also pull it a few times until the device itself engages. Next, hook it on the reel one more time. These steps should be repeated several times.
1. First, unscrew the screws that secure the rack trim
2. After this, secure the belt with a clothespin
3. Pry off the inertia mechanism cover with a screwdriver
4. In front of you is a box with a cylinder and a so-called rocker arm
5. This is what the inertial mechanism looks like, which should be filled with gasoline
We recommend: How to properly check oil scraper rings and what is needed for this?
At this point, the cleaning process of the mechanism can be considered complete. You should carry out all further assembly in reverse order. Do everything correctly, because an incorrectly assembled mechanism will cause breakdowns in the near future with regular use of the straps.
Also check in advance whether all elements of this node work correctly and move freely. If this is not the case, then the cleaning should be repeated, because what is the point if everything is not cleaned. Only with the right approach to such repair work will you be able to avoid major mistakes and carry out all actions correctly.
If you are not sure that you can do all the steps described in this article correctly, then we recommend that you contact a service station with this question. After all, if the seat belts are locked, you need to do everything correctly, and incorrect actions will only cause further breakdowns, which you are unlikely to want to encounter. In any case, washing the components is not the most radical measure, because you will always have time to change the mechanism.
How to remove a seat belt: rear, front - step-by-step instructions with photos and videos
Keeping seat belts clean affects more than just the appearance of the interior. Over time, the internal mechanism becomes clogged and begins to jam, causing problems with fastening. Car enthusiasts are often interested in how to remove seat belts in order to completely remove dust and dirt. It is better to learn in advance about the removal methods, because if you make a mistake, you can damage the winding reel and other parts of the mechanism.
Design and types of seat belts
These devices differ in the number of attachment points. There are modifications from two-point to six-point. Two-point ones are found in older cars; they are attached to the waist on both sides of the seat. Modern cars use three-point belts that evenly distribute the energy of a moving body. Other types are installed on sports cars. Five-point ones are also attached to child car seats.
The design of a modern three-point belt consists of the following elements:
- The strap is made of durable material - it is attached not to the seat, as in sports cars, but to the body. A metal tip is attached to the end; the person locks it before the trip. It has three attachment points - on the threshold, rack and rod. Most models provide the ability to adjust the belt depending on the height of the passenger.
- Retractor reel - allows you to unwind the belt. It is designed in such a way that it is blocked during a sharp jerk. Therefore, in the event of an accident, the belt does not unwind.
- Lock - necessary to secure the belt. It usually sends a signal to the dashboard to remind the driver to buckle up.
- Tensioner is a device that includes shock sensors. When there is a strong impact, they send a signal to the control unit, which activates the tensioners. To ensure that when the freedom of fit decreases, the belt does not exert excessive pressure on the person, a limiter is installed.
Safety belt
If one of the mechanism components malfunctions, it is necessary to repair the breakdown as soon as possible. But repairs can only be made after removing the seat belt. Motorists often have to disassemble this element. This is due to the fact that, like other parts of the interior, it becomes dirty over time. To wash a belt, you must first remove it, and do it correctly.
What tools will you need?
To remove the seat belt, you need the following set of tools:
- A screwdriver or screwdriver with a flat-head and Phillips-head bit.
- A solid screwdriver without a bit or other tool that can be used as a stop.
- Socket head with a diameter of 17 mm.
- Ratchet handle.
- Head extension.
How to remove rear seat belts
The instructions below show removal on a domestic car. First you need to use a screwdriver to pry off the plug on the bottom bolt that holds the belt in place. This bolt is located near the door, next to the threshold.
The coil is mounted at the rear, on the trunk side. The other two points are attached to the interior. First, unscrew the coil.
Remove the plug from above the chair and unscrew the bolt. This is the top attachment point.
Unscrew the bottom bolt located near the door. After this, you can remove the element that will be cleaned.
How to remove front seat belts
First, unscrew the two bolts located at the bottom of the plastic box.
Then use a flat screwdriver to pry up and remove the plug. Underneath there is a bolt that needs to be unscrewed.
There is one more bolt left on top of the plastic box, which also needs to be unscrewed. Next, unscrew the top fastening.
Now you need to open the plastic window on the box and pull out the textile element along with the coil.
To remove belts on a foreign car, for example a BMW, you first need to remove the plastic covers. They are attached using four clips, two of which are attached at the bottom. The other two are fixed on top.
The fastening elements are unscrewed using a TORX key.
Then you need to unscrew the bolts of the fixing metal part. In this case, only one bolt can be unscrewed.
The plastic cover is removed using a special tool. You can also pry out the plastic with a regular screwdriver. There will be quite a lot of dust inside.
Now all that remains is to unscrew the bottom bolt.
After unscrewing the bolt, the belt should come out easily.
To wash the belt, the removed mechanism must be disassembled. Next, installation is performed in reverse order.
Useful videos on the topic:
How to remove the front seat belts on a Volkswagen Polo
How to remove the front seat belts on a Toyota Camry
How to remove the seat belt on a VAZ 2110, 2111, 2112
We will tell you step by step how to remove the belt on VAZ models.
First you need to use a screwdriver to pry and remove the decorative trims of the lower and upper seat belt fastenings.
There will be bolts under the covers that need to be unscrewed with a 17mm wrench.
Next, remove the upper belt fastening bracket.
Next, you will need to remove the plastic cover to free the coil. To do this, you need to unscrew several screws on it:
- two on the lower pillar, near the sills;
- one - in the central part of the pillar, near the seat belt guide;
- and another one at the top of the counter.
The cover is removed.
Next, you need to remove the coil - it is located at the bottom of the rack. To do this, use a 17mm wrench to unscrew the bolt holding it in place. Afterwards the coil is simply removed.
All is ready!
How to pull a seat belt out of a reel
When all the bolts are unscrewed, you need to correctly pull the belt. To do this, you need to pull it while holding the coil with your finger. To pull out the end with the stopper, you need to pull harder.
Now you need to carefully pull the strap out of the reel, holding it.
Pulling the seat belt from the reel
In this case, you need to make sure that the spring does not unwind. To do this, place a screwdriver inside the mechanism instead of a stopper. This is very important, since an unwound spring is difficult to put back into place manually.
Reel stopper
How to remove a jammed belt
If during disassembly you cannot pull out the strap, then the reason is that the mechanism is jammed. In this case, it is impossible to pull it out; the belt gets stuck and does not move. To solve the problem, it is enough to use the tools that most car enthusiasts have in their garage.
First, you will need to unscrew the screws on the lower trim of the middle door pillar (if there are no screws on the trim, it may simply be held on by brackets/clips). After this you need to remove the cover. To do this, just lift it and pull it towards you. Next, you need to pull out the belt and lock the mechanism.
Removing the center pillar trim
The next step is to unscrew the bolt that holds the coil in place. Once unscrewed, it can be easily removed.
To prevent accidental winding, the strap is secured with a paper clip. The coil needs to be shaken, the mechanism should shake. It is important to remember where it is. Using a thin wire, it is important to squeeze out the plastic caps. When removing, the pistons must be held, as they may fall and get lost.
Now you can use a slotted screwdriver to pry and remove the cover located on the mechanism side. Under the lid there should be a plastic box with a cylinder, in the middle of which there is a metal ball. The rocker arm of the locking mechanism will also be attached here. The box needs to be hooked with wire and pulled out.
Disassembled seat belt reel
Next comes the check. It is important to check the rocker arm, which should rotate freely on the axle. If this unit jams, then the axle needs to be washed and the clogged dust removed.
After checking the primary mechanism, you need to inspect the main one. It is also under the cover. This unit, made of metal, is located under the plastic gear. You can remove the gear from its recess without using tools. There should be a toothed eccentric in the middle of the connector.
Then remove the paper clip from the belt, while holding it to prevent it from unwinding. The connector of the main mechanism must be cleaned of contaminants, which often cause jamming. To do this, first carefully pour gasoline over it. You need to take the reel while holding the guide. At this time, wind the belt with your right hand, while trying to tighten it.
It is necessary to make several sharp jerks for the mechanism to lock. After the manipulations have been completed, the belt is again installed on the reel. And again you need to wind it several times, while simultaneously tightening it. The performed operations should solve the jamming problem.
Do-it-yourself seat belt reel repair
Regardless of the car model, in order to get to the mechanisms that are responsible for the proper operation of the seat belts, it is necessary to remove the plastic lining of the side panel. On almost all models it is held either with clips at the top and bottom or with bolts of various diameters. To access the trim, you need to move the seat as far forward as possible, or remove it according to the instructions (unscrew several front and rear fastening bolts and remove the seat from the slide).
To comply with safety precautions, especially for cars with side airbags, before starting work with the belt reel, it is necessary to remove the negative terminal from the battery and, if possible, the contacts on the airbags (can be seen by the color of the wires in the car’s electrical circuit). This must be done to prevent the squib from firing, which could lead to injury. The reel, as a rule, is closed with a plastic case with the inscription “Do not open”, but in order to eliminate the cause of the breakdown, it still needs to be opened. This plastic casing is attached to the rack with several bolts.
Removing the negative terminal from the battery
If the seat belt does not retract well, then the return mechanism spring may simply have fallen off or been damaged. If the problem is the spring, it can be replaced. At the replacement stage, you should be careful, since removing the spring mechanism is easy, but installing it back on the reel is quite problematic. There is no specific installation scheme; it all depends on the model and complexity of the mechanism.
Another common reason why the belt does not retract back is wear of the metal tensioner tape or a break in the steel angle that threads the tape into the hole on the shaft. Because of this break, the shaft spins idle, that is, it does not wind the tape around itself. If the corner is not severely torn, you can bend the tape with pliers and correct its position by bending the tip a little closer than intended.
As you can see, repairing a belt is not difficult, but the process can be lengthy. Buying a new seat belt will save you a lot of time if you're running short. Before purchasing, make sure that the selected seat belts match the make of your car.
Operating rules
The procedure for proper operation of the protective accessory in question is regulated by the following rules:
- The shoulder part of the tape must go over the chest and shoulder; it is forbidden to thread it through other parts of the body, even if it causes inconvenience.
- When the seat back is positioned vertically, maximum protection is achieved when using a seat belt. Leaning the seat back increases the risk of a person slipping under the belt. Under these circumstances, a head-on collision will result in the passenger striking the instrument panel.
- One seat belt is designed for one passenger; two people are not allowed to wear it together.
- It is forbidden to drive with a child in your arms with a seat belt fastened. In this case, the accessory not only does not protect the adult passenger, but can also cause injury to the child in the event of an accident. The child must have a separate seat belt or child seat.
- It is prohibited to add or change the design of the device in question in order to weaken the tension or block the tightening of the belt.
- Make sure that the tape fits against your body and does not twist.
- If the child's height allows him to be fastened correctly, the use of a belt is mandatory. If the child is too small, a child car seat should be used.
- The waist part of the tape should be adjacent to the area above the hips.
- Adjust the mechanism to ensure a snug fit of the tape to your body.
