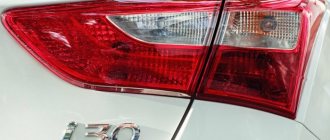
Design and typical malfunctions of rear lights
Structurally, the rear light of the VAZ-2107 car consists of:
- left and right diffusers;
- left and right conductors;
- two 4 W lamps and two sockets for them;
- six lamps with a power of 21 W and six sockets for them;
- four M5 nuts.
The rear light of the VAZ-2107 consists of diffusers, conductors, lamps and sockets
The brake light and side lights on the rear light should be red, the turn signal should be orange, and the reverse light should be white . The most typical malfunctions of the rear lights of the VAZ-2107:
- lack of mass on the lantern;
- lamp burnout;
- oxidation of contacts;
- broken or frayed wiring;
- failure of connector contacts, etc.
No mass
One of the reasons that the tail light does not work may be the lack of weight on it. You can check the integrity of the ground wire visually or by ringing it with a tester. The ground wire in the standard configuration of the VAZ-2107 is usually black, and it occupies the extreme position on the connector block. It is followed by wires:
- brake light (red);
- side lights (brown);
- fog lamps (orange-black);
- reverse lamps (green);
- direction indicator (black and blue).
The wires on the connector go in a certain sequence and have their own colors
Typical headlight malfunctions and methods for eliminating them
Replacing lamps and tuning rear lights of a VAZ 2114
During operation, a car's headlight is one way or another subject to mechanical damage and exposure to atmospheric factors, so after a certain period of operation it may require repair or restoration.
Glass replacement
To dismantle the VAZ-2107 headlight, you will need an 8-size open-end wrench and a Phillips screwdriver. The sequence of actions when removing the headlight is as follows:
- Under the hood, you should find the power plugs for the lamps and hydraulic corrector and disconnect them.
- On the front side of the headlight, you need to unscrew three bolts with a Phillips screwdriver.
- When unscrewing one of the bolts from the reverse side, you will need to secure the counter nut with a size 8 wrench.
- Remove the headlight from the niche.
The glass is attached to the headlight housing using sealant. If it is necessary to replace the glass, the joint should be cleaned of old sealant, degreased and a new sealing layer applied. Then attach the glass and secure it with masking tape. After 24 hours, the headlight can be replaced.
Video: replacing headlight glass on a VAZ-2107
Replacing lamps
To replace a burnt-out high-low beam lamp in a VAZ-2107 headlight, you must:
- Disconnect the negative battery terminal.
- Remove the headlight unit cover by turning it counterclockwise.
- Disconnect the power supply from the lamp.
- Remove the spring clip from the chuck grooves.
- Remove the lamp from the headlight unit.
- Install the new lamp in reverse order.
When carrying out work to replace lamps, you should remember that when we touch the lamp bulb with our hands, we oil it, and this can lead to premature failure of the lamp.
Replacing side light bulbs and direction indicators, as a rule, does not cause any difficulties: to do this, you need to remove the corresponding socket from the reflector and remove the lamp by rotating it counterclockwise.
Video: replacing the main and side lamps on a VAZ-2107
Glass cleaning
If the headlight glasses have lost their transparency, you can try to restore their appearance and light transmittance by contacting a service station specialist or performing the restoration of the optics yourself. To do this, the car owner will need:
- sandpaper of different grain sizes;
- abrasive and non-abrasive paste;
- masking tape;
- rags;
- grinding machine or grinder with a grinding wheel.
Glass restoration work is carried out in the following sequence:
- The headlight is covered around the perimeter with masking tape or film so that during work the paintwork of the body is not damaged.
- The surface of the glass is treated with sandpaper, starting with coarse sandpaper and ending with fine-grained sandpaper. If grinding is performed mechanically, the surface should be periodically moistened with water.
- The treated surface is thoroughly washed with water.
- The glass is polished with polish and washed again with water.
- The surface is alternately treated with abrasive and non-abrasive paste using a grinding machine with a foam wheel.
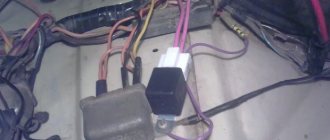
Causes of reverse lights not working
If you find that the light on the seven does not light up when reversing, then you need to immediately identify the problem and fix it. Most likely the reason will be:
- Fuse blown. If any electrical appliance or circuit malfunctions, the first step is to check the serviceability of the fuses. From the name you can guess that the essence of a fuse is to protect an electrical circuit from high current and short circuit. If the fuse is blown, it needs to be replaced and the lights will work properly.
- Bulbs burn out. One of the reasons is the burnout of the lamps, but this factor is easy to exclude, since if the lamps burn out, not both of them burn out at once.
- The integrity of the wiring is compromised - mechanical stress often contributes to damage to the wires. Rarely is the cause of their damage due to a short circuit. To determine if the wiring is working properly, you will need to use a multimeter by ringing each wire or measuring the voltage on the lights.
- Sensor malfunction - it is also called the reverse switch, since it is responsible for turning on and off the light alarm. Moreover, it may either break, in which case it will need to be replaced, or the terminals may oxidize, compromising the quality of the contact connection.
This is what the sensor on the gearbox looks like:
The sensors on 4- and 5-speed gearboxes of 7s are different. You need to pay attention when purchasing.
Malfunction of the reverse sensor is quite common, so you first need to check the integrity of the fuse, then make sure there is voltage on the lights, and only then proceed to replace the switch in question. Moreover, its malfunction can be manifested not only by the lack of lighting of the lights, but also by constant burning. If the 3X lights are constantly on, then it is necessary to replace the sensor.
How to find the reverse sensor VAZ 2107
The element in question, which is responsible for turning the rear lights on and off on the VAZ 2107, is located in the main mechanism - this is the gearbox. To find the location of the switch, you need to crawl under the car and look at the box. The element is attached to the bottom of the gearbox on the right side.
It is impossible to confuse it with another sensor if you know where the box is and what it looks like. There is only one sensor installed on the box, not only on carburetor, but also on injection modifications.
This small part cannot be repaired, so if it is found to be faulty, it will need to be replaced. To make sure that the cause is in the device in question, you should remove the lead wires from the sensor terminal, and then move the gear shift lever to the reverse position. Set the multimeter regulator to the continuity position and touch the two contacts with the probes. If the device emits a sound signal when the reverse gear is engaged and, on the contrary, is silent when the lever is moved to the neutral position, it means that the element is working and you need to look for the cause in other components. Knowing where the frog is located on the VAZ 2107, it will not be difficult to check it further.
Location under the bottom of the car
How does headlight range control work?
The cylinder system is manufactured hermetically, with:
- The highest (basic) fluid pressure corresponds to switch position I;
- when switching sequentially to positions II, III and IV, a vacuum is created in the system;
- pistons are retracted in the actuating cylinders and the optics are turned down;
- when returning to position I, the pressure in the system increases to the base one, the pistons protrude and turn the optics upward.
Since the system is under pressure almost all the time, except when the trunk is heavily loaded, seals often leak. The reason may be the fragility of domestic rubber on the VAZ 2107 during winter temperature changes. Due to a leak of working fluid, the piston in the working cylinder becomes stuck in one position.
A working hydraulic corrector must ensure free play of the piston and must be at least 7 mm.
Due to the manufacturing features (tightness), the hydraulic headlight angle correction on the “classic” in general, and on the VAZ 2107 in particular, is non-removable and cannot be repaired. Its cost is low, so it is advisable to replace the entire set if it fails.
Let us remind you that before removing the old cylinders from the headlight housings, the main thing is not to forget to tighten the clamps on the working cylinders and turn them counterclockwise
In conclusion, let us remind you that there are no trifles on the road, and the topic of the corrector is a vivid example of this
Drivers who do not monitor the condition of this small but important device sometimes argue that they do not drive with a full trunk, especially at night. But according to traffic rules, outside populated areas you need to drive with low beams on even during daylight hours
And then an incorrectly adjusted corrector can blind road users even during the day and cause an accident.
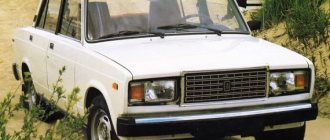
The VAZ 2107, unlike its predecessors, has advanced front optics that provide better visibility on unlit roads. Headlights on the VAZ 2107 are one of the main areas of tuning. In addition, the functionality of the headlights ensures the safety of night driving. Therefore, knowledge of the structure and methods of repairing and replacing headlights will not be superfluous.
How to change the reverse sensor on a VAZ 2107
Before replacing the sensor, it is advisable to clean the gearbox of dirt. If this is not done, it may get into the oil, which is located in the crankcase. Replacement of the VAZ 2107 reverse sensor is carried out in the following sequence:
- disconnect the wire tips from the sensor contacts;
- Using a 22mm wrench, unscrew the old sensor from the gearbox, removing it along with the metal washer;
Note: if the sensor is “stuck” and cannot be unscrewed with a wrench, you can try to unscrew it using a chisel and hammer. However, this must be done extremely carefully so as not to damage the gearbox housing, which is made of a fragile aluminum alloy.
- clean the sensor seat;
- put a new washer on the new sensor and screw it into the gearbox using a 22mm wrench;
- Place the wire ends on the sensor contacts.
Now you know how to change the reverse sensor on a VAZ 2107. After installing the new sensor, pay attention to how tightly the wire tips fit on the sensor contacts. They should not dangle or fall off. If necessary, tighten the tips using pliers. It is a good idea to clean the tips before placing them on the sensor contacts. This way you can be sure of reliable contact on this connection.
Replacing the headlight
Let's first consider the situation when the old headlamp has outlived its usefulness and needs to be replaced. Such cases occur when water gets inside and causes corrosion processes on the reflector or its darkening, as well as when the headlight is completely damaged. Replacement requires the presence of a basic tool and disconnecting the car from the battery. After this, we proceed to removing the unusable headlight:
- All power wires are disconnected by removing the plugs;
- Removing the hydraulic corrector. To do this, press the plastic lock, turn it clockwise 90 degrees and pull it towards you.
- From the outside, the headlight unit is attached to the body of the VAZ-2107 car using three bolts. One is located on top and in the middle, and the other two are located below - on the sides. There may be a problem with unscrewing the bottom bolt closest to the grille. On the other side of this mount there is a fixing nut, which must be held with a key “8”.
- The headlight can now be removed to the outside of the vehicle.
- The seat for installing a new headlight is cleaned, all fastening bolts are lubricated and installed in the reverse order of removal.
There is no difficulty at all, and the procedure for replacing one side will take no more than 15 minutes. The cost of a regular block headlight on a VAZ-2107 ranges from 1,500 to 2,500 rubles.
Glass replacement
It is known that the headlights have a glass coating, and it is a rather fragile element. And the front part of the car is the most susceptible to physical destructive actions. Such actions occur primarily due to a pebble jumping out from under the wheels of an oncoming car, as well as during collisions with foreign objects. Replacing the headlight glass on a VAZ-2107 is a pressing question that owners of “Sevens” ask themselves. After all, there is no need to replace a complete set of headlights when replacing glass will cost 150-300 rubles. To replace glass you will need the following tool:
- screwdriver;
- pliers;
- sealant;
- degreaser or acetone.
Sequence of glass removal and installation:
- There is no way to remove the glass without removing the headlight, so you need to follow the sequence of actions described in the previous section.
- When the headlight is removed, its surface must be cleaned and try to remove the glass yourself, always wearing gloves. Glass can be easily removed when it shows significant damage.
- If the glass is not damaged, then you can go in two ways: a) break it if it is no longer needed; b) warm it up with a hairdryer and carefully remove it, but this will take much longer. You can watch a video about this method on the Internet if anyone is interested in this type of withdrawal.
- Having decided that glass removal will be carried out according to method a), we proceed to its implementation. We break the glass with a hammer and all the fragments are removed.
- The glass seat is cleaned of old sealant and degreased.
- Once everything is ready to install the new glass, you need to apply sealant around the perimeter of the headlight. It is better to use a special transparent sealant so that its release is not visible.
- We apply the glass to an even layer of sealant and press it using tape or rope. Leave it to dry in this form for about a day. After drying, you can install it, which will take no more than 5 minutes.
Important! Before breaking the glass, you must remove all the light bulbs to avoid damaging them.
Replacing the hydraulic corrector
The purpose of the hydraulic corrector is known, but to replace it you need to understand its design. It consists of a main cylinder, which is a switch, and actuator cylinders. The mechanisms are connected using special tubes with liquid. Any breakdown of one of the elements of the hydraulic corrector entails its complete replacement, since its design is non-separable.
The hydraulic corrector is replaced in the following order:
- The hydraulic corrector mounts are removed from the headlight unit and on the switch handle. To remove the handle, you just need to pull it towards you.
- Use a wrench to unscrew the nut of the main cylinder and remove it to the inside of the panel.
- Afterwards, the entire assembly assembly is removed and a new one is installed in the reverse order of removal.
Knowing the sequence of removing and replacing the headlight on a VAZ-2107 car, you can save not only money, but also the time that a trip to the service station will take. Replacing a headlight is as easy as changing a tire, so happy repair work!
The main causes of brake light failure
Unlike dimensions and hazard lights, your car must have working brake lights. They signal to cars behind that the driver is slowing down. Notifying drivers behind when braking helps prevent collisions and accidents. It is quite difficult to detect a stop fault on a VAZ 2107 yourself, since these signals are located at the rear. In order to see the operation of the brake lights, you will need two people, one of whom must press the brake pedal, and the second must control the effect.
When you press the brake pedal, the following effects may occur:
- If they don’t light up, you need to look for the problem. Moreover, the signal that both lamps on the car are not lit indicates the need for a global check, since paired light elements burn out in rare cases.
- They are half lit - if only one brake light is on, then you need to disassemble the second headlight and check the serviceability of the lamp. It is more likely that the lighting element (light bulb) has failed, and less often the cause may be a broken contact.
The reasons for the stop malfunction on the VAZ 2107 are:
Flashlight weight
- Fuse F11(10A) has failed. A fuse consists of a fuse-link that burns out when a large current passes through the circuit. The fuse is designed for the appropriate current value, so its blowout may be due to a short circuit or the installation of high-power lamps.
- Wiring is shorted or damaged. This type of malfunction often occurs after work has been carried out in the interior or luggage compartment.
- Oxidation of contacts. Oxidation may form over time at the junction of the lamps with the socket, or at the junction of the wires to the headlights, which is caused by poor contact and moisture getting inside the taillight headlight unit.
- Burnout of incandescent lamps - lamps have their own resource, so often the inoperability of the brake light is associated with their burnout.
- The malfunction of the toad or frog is a sensor that is located in the brake pedal structure. The sensor closes the contact when the brake pedal is pressed, causing the brake light to come on.
These are all types of malfunctions that are associated with the inoperability of the stop on the VAZ 2107 and other cars. You can identify the breakdown and fix it yourself, without contacting an electrician. To identify a breakdown, you will need a tester or multimeter. Let's take a closer look at how to find and fix brake faults on a VAZ 2107.
Checking the light bulbs
The most common scenario is trivial: a light bulb or even two has burned out (this also happens, for example, when a car gets caught in a heavy downpour). Well, or in case of abnormal contact closure. So, we disassemble the sidelights from the inside and take out the brake light bulbs. If they turn black/cloudy/stained, we change them immediately without further discussion. If the defect is not visually detected, then the best option would be to take a good-quality spare light bulb and replace it with the problematic one. In this case, the brake pedal should be in the pressed position (by the way, if you are checking alone, you can put something heavy on it, for example, a brick). If a new lamp lights up, then this is exactly the problem. No - let's move on. Checking contacts:
It is possible that the contacts in the socket have oxidized and do not give a good light bulb a chance to light up. This reason can be detected visually by removing the lamp and inspecting the socket. To clean the oxides, we rotate the lamp in the socket or, to be sure, we treat the socket from the inside with a small piece of sandpaper. You should also check the contacts leading to the cartridge; damage may occur or the cartridge needs to be replaced. If this is okay, we continue checking the contacts in the wire block for oxidation. Manual stripping may be required. Or try putting on and taking off the spare part several times in a row (this will remove the oxide layer if it is not too large).
DSS:
For VAZ owners, the brake light sensor is one of the most vulnerable points in the system. This may be why the lights don't light up. You can check for a malfunction using a fairly simple method: remove 2 wires from the frog and connect them directly with a piece of wire. If at the same time the brake lights come on, then the DSS needs to be changed - it is not working. By the way, many experienced VAZ owners begin a general check to identify such faults with this sensor, since it fails quite often.
Contacts have oxidized
It is not difficult to identify such a malfunction; to do this, you should unscrew the lamp from the socket and inspect the inside. Oxides and rust can be identified visually, and to eliminate the malfunction, you will need to clean the contacts with sandpaper. After this, before installing the light-emitting element, you should treat the socket area with silicone grease.
This is interesting! The contacts may oxidize, become corroded, or become loose, resulting in the brake lights not functioning properly. The contacts should also be checked on a frog or DSS.
After you have assembled the circuit, connect it to the power supply of the headlight or flashlight.
What advantages will headlights and flashlights with LED lamps have? First of all, the load on the network of the entire vehicle is reduced. This is achieved at the expense of reduced power. Secondly, as a result of such tuning of VAZ 2107 headlights, you will receive an even and diffused light, thereby increasing the efficiency of the headlights. At the same time, while driving, you will not blind drivers of vehicles on the road.
If the option with LEDs does not suit you, you can install xenon headlights. What benefits will you get in this case? Firstly, more powerful light (unlike LEDs and halogen lamps). Xenon was widely used in headlights a few years ago. But its downside was that it created certain problems for drivers coming towards you. With the advent of LED technology, xenon began to be abandoned.
In addition to tuning the exterior, using LEDs you can also change the lighting and backlighting of devices in the cabin. All this can be done with your own hands without any difficulty. But if you are not ready to pick up a wrench and a screwdriver, you can contact specialized workshops. Specialists will develop for you an individual project for tuning VAZ 2107 headlights.
VAZ-2107 diagram
The VAZ-2107 car was produced from 1982 to 2014. Here are colored wiring diagrams (for the injector and carburetor) with a description of all the elements for various modifications. The information is intended for self-repair of cars. Electrical circuits are divided into several blocks for ease of viewing via a computer or phone; there are also circuits in the form of a single picture with a description of each element - for printing on a printer.
The “sevens”, like most modern cars, use a single-wire circuit for supplying electricity to electrical equipment. The other terminal of the consumer is always connected to the ground of the machine to which the negative terminal of the battery is connected. This solution allows not only to simplify the design of the on-board network, but also to slow down corrosion.
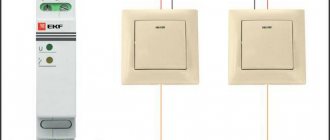
Do-it-yourself installation of LEDs in VAZ 2107 headlights
Tuning the dashboard of the VAZ 2107
Modern technologies offer many new, more serious opportunities in the automotive industry. Experts say that using LED lamps instead of halogen lamps provides higher quality light and is more economical.
You can install LEDs with your own hands in both the front and rear lights of your car. To complete the work you will need the following materials:
- LEDs;
- resistors;
- mounting space for LEDs in the front and rear lights;
- electric drill and drill with a diameter the size of the LEDs;
- wires;
- sealant.
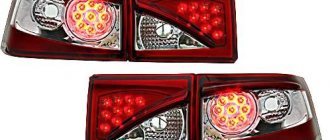
LED headlights at the rear
Once you have stocked up on everything you need, you can get to work:
- We adjust the dimensions of the seats to the front and rear lights where we are going to install the LEDs;
- We drill holes in a circle at the same distance in the seat and install the LEDs there. We select the quantity experimentally;
- We connect the contacts: positive and negative - separately;
- We put a resistor on each four diodes: we select its characteristics depending on which LEDs we chose;
- We place the seats with the entire “kitchen” in the front and rear lights, and connect them to the power supplies.
By installing LEDs on the front and rear lighting sources on your car, you will be able to appreciate the following advantages:
- the efficiency of LEDs will make it possible to significantly relieve the on-board network of your car;
- this type of lamp provides an even and diffused light - it will not dazzle drivers of oncoming cars and at the same time provide a good view of the road;
- long service life;
- reliability;
- high external aesthetics.
Tuning headlights with film
Some car enthusiasts install xenon headlights in place of halogen headlights: they shine brighter than LEDs. However, xenon strongly dazzles oncoming drivers. This is one of its significant disadvantages.
VAZ-2107 diagram: first option
Full size wiring diagram:
Electrical diagram VAZ-2107 carburetor
Electrical diagram of VAZ 2107, 21074 produced in 1988-2001 with generator 37.3701
- block headlights
- side direction indicators
- accumulator battery
- starter relay
- carburetor electro-pneumatic valve
- carburetor microswitch
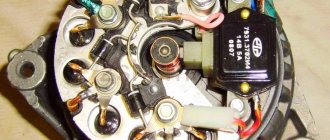
- generator 37.3701
- gearmotors for headlight cleaners *
- Fan motor switch sensor
- engine cooling fan motor
- sound signals
- distributor
- spark plug
- starter
- coolant temperature gauge sensor
- engine compartment lamp
- low oil pressure warning sensor
- low brake fluid level indicator sensor
- windshield wiper motor
- carburetor electro-pneumatic valve control unit
- ignition coil
- headlight washer pump motor *
- windshield washer pump motor
- mounting block
- windshield wiper relay
- hazard warning and direction indicator relay
- brake light switch
- reverse light switch
- ignition relay
- ignition switch
- three lever switch
- hazard switch
- socket for portable lamp**
- heater fan switch
- additional resistor for the electric motor of the heater (stove)
- rear window heating indicator lamp
- low brake fluid level warning lamp
- signaling unit
- heater fan electric motor
- glove compartment lamp
- light switches on the front door pillars
- switches for warning lights of open front doors ***
- front door open warning lights ***
- connection block
- cigarette lighter
- watch
- instrument light switch
- diode for checking the serviceability of the low brake fluid level indicator lamp
- fuel level indicator
- fuel reserve indicator lamp
- speedometer
- turn signal indicator lamp
- carburetor choke indicator lamp
- battery charge indicator lamp
- carburetor choke warning switch
- instrument cluster
- econometrician
- light switches on the rear door pillars
- coolant temperature gauge
- tachometer
- parking brake indicator lamp ("handbrake")
- low oil pressure warning lamp
- high beam indicator lamp
- indicator lamp for turning on external lighting
- voltmeter
- parking brake indicator switch ("handbrake")
- outdoor light switch
- rear window heating switch with backlight
- rear fog light switch with on/off indicator *
- fog light circuit fuse
- lampshade ****
- tail lights
- level indicator and fuel reserve sensor
- connectors for connecting to the rear window heating element *
- license plate lights 2107
Wiring diagram VAZ-2107 carburetor - full view:
Fog lights
Fog lights are a lifesaver when visibility is poor. However, over the years they begin to fade, which creates unsafe driving conditions. The easiest option is to install xenon in the fog lights or mount 2 more fog lights side by side. But such methods are not legal, so it’s not worth the risk.
The VAZ 2107 is standardly equipped with rectangular fog lights located on the bumper
The most common option for tuning fog lights is to replace them with higher-quality lighting devices, most often round in shape or from foreign cars. To work you will need:
- frame with mechanism from standard VAZ 2107 fog lights;
- new fog lights;
- aluminum frame fasteners;
- bolts;
- silicone glue;
- primer and paint.
Round fog lights look great on the VAZ 2107 radiator grille
Mounting block connection diagram
P1 — relay for turning on the heated rear window; P2 - relay for turning on the headlight cleaners and washer; P3 - relay for turning on sound signals; P4 - relay for switching on the electric motor of the engine cooling system fan; P5 - headlight high beam relay; P6 - low beam headlight relay; A - the order of conditional numbering of plugs in the mounting block blocks. The outer number with the letter “Ш” in the plug designation is the block number, and the inner number is the conventional number of the plug.
Schemes of individual blocks of the seven
Power supply system
Power plant starting system
1 - starter; 2 - relay; 3 — ignition switch; 4 - battery
Ignition system
1 - generator; 2 — ignition switch; 3 - distributor; 4 - breaker; 5 — candles; 6 - coil; 7 - battery
Contactless ignition system
External and internal lighting
Windshield wipers and washers
1 — electric motors of the windshield wiper; 2 — washer motor; 3 — mounting block; 4 — ignition switch; 5 - washer switch
Cooling Fan
1 — fan electric motor; 2 - sensor; 3 — mounting block; 4 - ignition relay; 5 - ignition switch.
Wires for connecting electrical appliances
| Connection type | Section, mm 2 | Insulation color |
| Negative terminal of the battery - vehicle ground (body, engine) | 16 | Black |
| Starter positive terminal - battery | 16 | Red |
| Positive contact of the generator - plus battery | 6 | Black |
| Generator - black connector | 6 | Black |
| Terminal on the generator “30” – white MB block | 4 | Pink |
| Starter connector “50” – starter relay | 4 | Red |
| Starter Start Relay - Black Connector | 4 | Brown |
| Ignition switch relay - black connector | 4 | Blue |
| Ignition switch output “50” – blue connector | 4 | Red |
| Ignition switch connector “30” – green connector | 4 | Pink |
| Right headlight plug - ground | 2,5 | Black |
| Left headlight plug - blue connector | 2,5 | Green, gray |
| Generator output “15” – yellow connector | 2,5 | Orange |
| Right headlight connector - ground | 2,5 | Black |
| Left headlight connector - white connector | 2,5 | Green |
| Radiator fan - ground | 2,5 | Black |
| Radiator Fan - Red Connector | 2,5 | Blue |
| Ignition switch output “30/1” – ignition switch relay | 2,5 | Brown |
| Ignition switch contact “15” – single-pin connector | 2,5 | Blue |
| Right headlight - black connector | 2,5 | Grey |
| Ignition switch connector “INT” – black connector | 2,5 | Black |
| Six-pin block of the steering column switch - “ground” | 2,5 | Black |
| Two-pin block of the steering column switch - glove box illumination lamp | 1,5 | Black |
| Glove compartment light - cigarette lighter | 1,5 | Black |
| Cigarette lighter - blue block connector | 1,5 | Blue, red |
| Rear window defroster - white connector | 1,5 | Grey |
Car wiring diagram
1 – radiator fan drive motor; 2 – relay and fuse block (mounting block); idle speed sensor; 4 – engine control unit; 5 – potentiometer; 6 – set of spark plugs; 7 – ignition control unit; 8 – electronic crankshaft sensor; 9 – electric fuel pump; 10 – tachometer 2107; 11 – lamp for monitoring the health of electronic systems; 12 – ignition system control relay; 13 – speed sensor; 14 – diagnostic connector; 15 – set of injectors; 16 – adsorber solenoid valve; 17, 18, 19 – fuse block protecting the injection system circuits; 21 – electronic fuel pump control relay; 22 – electronic relay for controlling the intake pipe heating system; 23 – intake pipe heating system; 24 – fuse protecting the heater circuit; 25 – electronic oxygen level sensor; 26 – cooling system temperature control sensor; 27 – electronic air damper sensor; 28 – air temperature sensor; 29 – pressure control sensor.
Fuse and relay diagram 2107
On newer “sevens” a block with 17 fuses and 6 relays is installed. VAZ 2107 fuses on the “new” unit protect the following electrical circuits and devices:
- Reversing lamps, heater fan, rear window defroster warning lamp and relay, rear wiper motor and rear washer pump.
- Electric motor for front wipers.
- Reserve socket.
- Reserve socket.
- Power supply for heated rear window.
- Clock, cigarette lighter, power socket “carrying”.
- Signal and radiator fan.
- Turn signal lamps in emergency mode.
- “Fog lights” and a relay that regulates the voltage of the on-board network.
- Instrument panel lamps.
- Brake light bulbs.
- Right high beam headlight.
- Left high beam headlight, high beam warning lamp.
- Side lights (rear right, front left), license plate and engine compartment lighting.
- Side lights (rear left, front right), glove compartment and cigarette lighter lamps.
- Low beam (right lamp).
- Low beam (left lamp).
The block relays perform the following functions:
- Heated rear window relay.
- Headlight cleaner and washer relay.
- Signal relay.
- Cooling system electric fan relay.
- High beam relay.
- Low beam relay.
The fuse block of the VAZ 2107 (injector) is no different from the block on the carburetor “seven”. Injection models are simply equipped with an additional relay and fuse box installed in the cabin under the glove compartment. The block includes three relays - the “main” relay, the fuel pump relay and the fan relay.
Fog lights
Driving a car in rain or snow can create a lot of trouble for the driver who is forced to drive the car in poor visibility conditions. In this situation, fog lights (FTL) come to the rescue, the design of which provides for the formation of a light beam that “spreads” over the surface of the roadway. Fog lamps are usually yellow, since this color tends to dissipate less in fog.
Fog lights are usually installed under the bumper, at a height of at least 250 mm from the road surface. The installation kit for connecting PTF includes:
- set of wires;
- relay;
- button.
In addition, a 15 A fuse will be required, which will be installed between the relay and the battery. The connection should be made in accordance with the diagram supplied with the installation kit.
The fog lights must be connected in accordance with the diagram supplied with the installation kit.