Types of lighting devices
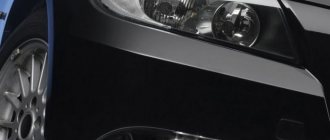
Depending on the year of manufacture, the VAZ 2110 can be equipped with either Kirzhach or Bosch headlights. Both of them are a block that includes high and low beam headlights, side lights, and direction indicators.
No matter how much difference there is, there are some nuances:
- In Kirzhach, the glass is sealed, so both removing it and replacing it with a new one is more difficult. In addition, the low beam glass has a lens that makes the light output more focused, although limited;
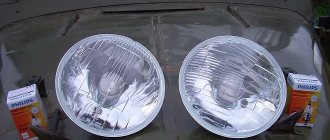
Left headlight block Kirzhach
Right headlight block Bosch
It’s difficult to say unequivocally which headlight unit is better. But disassembling Boshevskys is definitely easier. In any case, it doesn't hurt to know how to do it in both cases.
What to choose?
Lada 2112 hatchback (VAZ 2112 hatchback)
It would seem that we are talking about German quality products, which by definition should be better than their domestic counterpart. But in reality things are somewhat different.
Let's look at the key features of Kirzhach and Bosch headlights to determine which ones you should choose for your VAZ 2110 model.
The purpose of any low beam is to provide good visibility of the roadway at night, while at the same time avoiding dazzling oncoming traffic. Headlights from German and domestic manufacturers cope equally well with these functions. The headlights from Kirzhach have a low beam lens, and a reflector is provided for the high beam. German products have two reflectors - for low beam and high beam. The lighting is ultimately the same, but Bosch has better brightness. Lenses are actually better than reflectors. They create a clearer line of light and allow the installation of xenon optics. As a study of reviews of VAZ 2110 owners using German devices shows, they are characterized by worse illumination in low beam mode. Bosch headlights have a very important plus for many - when driving a car in cloudy and rainy weather, they provide a better quality glow compared to Kirzhach devices
It's all about the larger surface of the low beam reflector. This Bosch plus also comes with a minus - you are deprived of the opportunity to install xenon optics. Note that, regardless of the manufacturer, these headlights contain H1 format lamps. If we take into account all other characteristics, then the undisputed leader here will be the products of the domestic manufacturer.
Based on all that has been said, it becomes clear why headlights from Bosch are cheaper than Kirzhach, and also why experts recommend installing a headlight unit from a domestic company on a domestic car.
It is noteworthy that this is one of the few exceptions when domestic products turned out to be better than foreign ones. Sad but true.
Dismantling
To remove the headlight unit, you need to open the hood:
- De-energize the VAZ 2110 (this must always be done during repairs, especially anything related to electricity) by disconnecting the negative terminal from the battery;
- Remove the lining from the radiator;
- Disconnect the block with wires from the headlight;
- Press the latch of the hydraulic corrector cylinder and, turning it 90° to the right, remove it from the socket. There is no need to disconnect the hoses;
- Unscrew the three bolts securing the headlight unit, then move it back;
- After which, move the device to the side, towards the center of the car, until it disengages with the wing hook;
- Loosen the upper bumper bolts;
- Press the pad from below until its flange disengages from the buffer, then remove the pad;
- Unscrew the nut securing the headlight from below;
- By pulling the headlight unit towards you and disconnecting the block from the turn signal, you can remove it.
Typical faults
A burnt-out light bulb, of course, is not the only malfunction of the rear light device. He can refuse for many reasons, the main ones of which we will consider:
- Fuse blown;
- Oxidation of connecting blocks;
- Failure of the lighting device itself;
- Failure of the breaker relay (only for direction indicators and hazard lights);
- Failure of limit switches (brake light, reverse signal);
- The power wire is broken or shorted to the body.
Circuit breakers
The issue with fuses is easily resolved. We open the mounting block, which is located to the left of the steering column and is fixed with a mechanical button.
The VAZ 2112 mounting block is fixed in the panel with a button
We press the button, tilt the block and check the serviceability of the following fuses:
- F1 – side light (left side);
- F11 – side light (right side);
- F16 – power supply of the breaker relay (turns, alarm);
- F17 – brake light;
- F19 – direction and reverse indicators;
- F20 – rear fog light.
Finding the necessary inserts is not difficult - they are all numbered directly on the panel of the mounting block:
Location and designation of relays and fuses of the VAZ 2112 mounting block
Pads and connectors
The next problem is the connecting blocks. Moisture could get into them, they could oxidize or burn. Focusing on the wiring diagrams (section “Connection diagram”), we disconnect all the connectors, not forgetting about those that connect the mounting block. We check the condition of the contacts: they should be clean and shiny, no debris, signs of oxidation or burning. If necessary, clean or replace.
The mounting block pads are located on its rear side. Unscrew the fixing screw, remove and turn over the mounting block.
In order to remove the mounting block on the VAZ 2112, it is enough to unscrew one screw
When dismantling the mounting block, we try not to lose the fixing bracket, which is secured with the same screw.
Flashlight
Failure of the light fixture itself is also a fairly common malfunction. To solve this problem, it is not necessary to remove the flashlight. It is enough to remove the back panel with the lamps (see the section “How to change light bulbs”) and disconnect the power supply from it. Both the tail and corner lights use a flexible circuit board.
Removed panel of the corner lamp of VAZ 2112
We carefully inspect the traces of the printed circuit board for fracture, burning or oxidation. If necessary, we clean (oxidation), “treat” with a soldering iron and scraps of thin mounting wire. If “treatment” is impossible, we simply buy a board and install it to replace the failed one.
You can simply buy the boards for the rear and corner (left) lamps of the VAZ 2112
We inspect the contacts of the socket and lamp, and clean if necessary. If it cannot be repaired, we replace it.
Lamp sockets (left) P21W and P21W+T4W
Relay-breaker for direction indicators and hazard warning lights
The relay is located in the mounting block under number K3 (see photo from the “Fuses” subsection). We pull the relay out of the block, turn on the ignition, the turn switch and with a piece of wire we alternately close contacts 49a-49 and 49a-31 of the block. If the turn lamps come to life, change the relay.
Limit switches
The switch responsible for the reverse lamp is located on the gearbox and closes automatically when reverse gear is engaged. Turn on the ignition, pull off the block from the limit switch and use a piece of wire to close its contact to the body (engine or gearbox). If the signal lights up, change the limit switch.
Checking the reverse limit switch of VAZ 2112
The brake light switch also operates automatically, but when you press the brake pedal, it also lights up the brake light lamps. It is located in the cabin above the brake pedal lever and is equipped with two single-contact blocks.
The brake light limit switch has two blocks
We remove the pads, turn on the ignition and use a piece of wire to connect the contacts of the pads to each other. If the “stops” light up, change the limit switch.
Wiring
When the supply wires are shorted to the body, the corresponding fuse immediately burns out. A new one burns out either immediately after installation (a “reliable” circuit) or regularly while driving (a circuit occurs during vibration and shaking). In any case, the reason is frayed insulation. The most likely places for a malfunction are: the harness passes through body ribs, moving parts, and when passing through holes in the body.
A break occurs much less frequently, because before it completely rubs out, it will begin to short-circuit to the body, giving time to find the problem. The locations of this malfunction are the same as during a short circuit.
We carefully inspect the corresponding power harnesses, find them, and remove them using electrical tape and, if necessary, a soldering iron (not twisting!).
Connection diagram
But before you start troubleshooting the rear light of the VAZ 2112, it would be useful to get acquainted with its connection diagram. The connection diagram for turn signals on a VAZ 2112 is as follows:
Installation diagram of turn signals VAZ 2112
The rear light bulbs are marked here with the number 6, and they are activated when the ignition switch 3 is turned on by switch 7. Relay-breaker K3, located in mounting block 2, is responsible for the “blinking”.
The connection diagram for brake lights, reverse gear and dimensions of the VAZ 2112 looks like this:
Installation diagram of external lighting devices VAZ 2112
Here the number 6 indicates the side lights, 7 the brake light, and 13 the reverse indicators. The dimensions are activated using switch 3, and the ignition does not need to be turned on. The stop light lamp is turned on by limit switch 11, the reverse light by limit switch 10. These signals will light only when the ignition switch 4 is turned on.
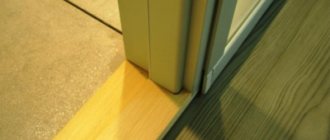
How to remove glass?
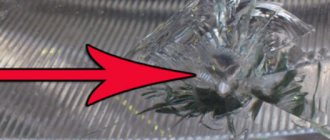
Removal will be necessary if, for example, it is necessary to replace broken glass on a VAZ 2110 or it has become cloudy, covered with microcracks, etc.
If you are dealing with Bosch, then you need to release the latches, then easily remove the glass. When installing a new one, it’s worth inspecting the rubber; replacing it won’t hurt either. Some also use sealant, although there is no particular need for this, unless, of course, you are dealing with genuine products and not Chinese fakes.
You'll have to tinker with Kirzhach a little longer. Here, in order to remove the glass, you must first carefully insert a flat-head screwdriver into the corner of the glass, forming a gap. Then connect a thin stationery knife to the process.
So, with the help of a knife and a screwdriver, you may be able to detach the glass. If the sealant “sticks”, you need to warm it up with a hairdryer and immediately continue removing the sealant while it is warm.
What is better to use: halogen, LED or xenon?
As already mentioned, headlights for the VAZ 2110 are designed for halogen lamps. This means that, by law, LED lamps or xenon lamps cannot be installed in them. According to part 3 of Art. 12.5 of the Code of Administrative Offenses of the Russian Federation, you may be deprived of your rights for up to a year.
There is an opinion that xenon can be legally installed in Kirzhach due to a different design and the presence of a lens unit. Actually this is not true. To legally install xenon on a car, you must comply with the following requirements of the Government of the Russian Federation of September 10, 2009 N 720 (as amended on July 15, 2013, as amended on April 8, 2014) “On approval of technical regulations on the safety of wheeled vehicles”:
That is, you need an auto-corrector for the angle of inclination and a washer, as well as transparent glass in front of the lens. But that is not all. You need to submit an application to the traffic police to make changes to the design, on the basis of which, if your modification is approved, you will be given a conclusion. The conclusion itself can be obtained by contacting NAMI-PTIA-FOND, and the re-equipment itself must be carried out in a certified service. In simple terms, it is legally possible to install xenon, but it is quite difficult.
With LED headlights, the situation is twofold: on the one hand, the headlights are designed for halogen lamps, and on the other hand, LED lamps are also marked - H1, which indirectly indicates compliance with halogen.
How to remove a headlight on a VAZ 2110, 2111, 2112; dismantling and installing a headlight unit
If there is a need to remove the headlight . for example to replace headlight glass. then this article is for you.
The main difficulty here is to remove the decorative trim - the “eyelash” - in order to get to the lower nut of the headlight assembly. On VAZ models of the tenth family, the front headlight unit can be simply removed by slightly loosening the bumper fastening. This process is not as complicated as it seems at first glance. It is worth remembering that plastic is very fragile in the cold, so this procedure must be carried out in a warm room.
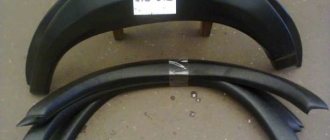
Tuning VAZ 2112
Cars of the Russian brand VAZ 2112 belong to the hatchback series; unlike its predecessors, it has a streamlined shape and a spacious interior.
However, there is still potential for making changes, both in the technical characteristics, appearance, and interior of the vehicle.
The range of tuning products is very diverse. To understand where to start, you can go to the Internet and get acquainted with what manufacturers offer.
Many interesting ideas can be offered on forums, social media. networks and using photos of headlight tuning on a VAZ, you can match it to your car.
Conventionally, tuning the VAZ 2112 model can be divided into several categories:
- appearance - rear, headlights, spoilers, hubcaps, wheels, aerodynamic bumper, sills, mirrors, airbrushing;
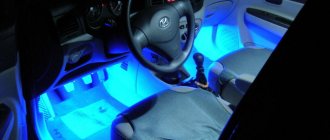
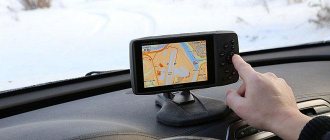
- mechanical part - chip tuning or engine reflashing, shock absorbers, alarm system, installation of a recorder, navigator;
- interior - covers, mats, audio system.
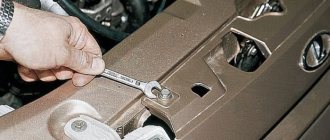
Work order
Disconnect the negative cable from the battery.
Disconnect the two electrical connectors of the headlight unit.
If there is a fender liner, unscrew it on the side of the bumper, usually 2-3 outer screws.
Using a 10mm wrench, unscrew the two bolts of the upper headlight mounting.
Unscrew the 2 bolts securing the decorative radiator grille.
Lifting it and sticking your fingers into the gap between the grille and the bumper, release 2 latches on each side
We unscrew the bolt of the lower fastening of the headlight unit.
Unscrew or loosen the 2 bolts of the upper bumper mounting and slightly pull the bumper towards you.
Using your fingers or a screwdriver, carefully pull the edge of the decorative trim — the “eyelash” — away from the headlight unit. In the resulting gap we see a plastic tab-latch, with the help of which the edge of the eyelash is attached to the edge of the wing.
CAREFULLY remove the tongue from engagement with the wing, without applying extra effort, it’s easy to do with your fingers!
We move the trim to the center of the car and remove it.
I HIGHLY recommend that before removing the eyelash, lubricate it along the entire arc of attachment to the bumper with silicone grease.
Using a “10” socket, unscrew the nut securing the headlight to the bracket.
Use a screwdriver to pry up the hydraulic corrector cylinder retainer, turn it and remove it from the headlight housing.
We carry out the assembly in the reverse order without using brute physical force. When installing the eyelash in place, we push its lower edge with a screwdriver.
If you work very leisurely, the entire procedure for dismantling and installing the VAZ 2110 front headlight will take 20 minutes.
Did you like the article? Share the link with your friends and press + 1!
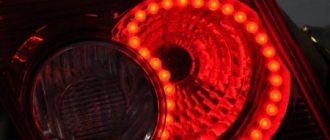
Tuning taillights - main options
Tuning tail lights on a VAZ is most often:
- painting rear lights;
- use of tint film;
- installation of LEDs.
The surface is covered with glossy or matte vinyl film. It can be applied completely, partially in a certain place on the glass and removed at any time. Tinting material is produced in different colors and shades. The film has a protective function and can be used to protect the element from mechanical impacts of small stones.
The film is applied to the outer surface of the headlight in stages:
- Wash and dry the headlight unit.
- Wet the surface with soapy water.
- Cut the film to the required size.
- Remove the backing and apply it to the surface of the lampshade.
- Carefully smooth out from the center to the edges.
- Dry with a hairdryer.
- Remove excess film.
Varnish or paint is an economical option, but not always effective if you apply it yourself. To use, you need to wash and dry the lanterns well, then degrease and varnish.
Tinting should not reduce the brightness of lights by more than 15%. Although the traffic rules do not contain clear instructions on tuning rear optics, questions from the inspector may arise.
Tuning LED headlights have increased brightness and clearly define the dimensions of the car. More often, diode strips are used, which are installed around the perimeter of the rear stop.
Using LEDs
To tune the rear lights of the VAZ 2110, installing LEDs and painting the lampshade are most often used. LEDs are mounted in plastic reflectors after dismantling the headlight unit. For the VAZ 2110 it is recommended to choose two colors: red and yellow. The tapes are soldered and placed on the base inside the headlight unit.
To make the light as bright as possible, the base of the headlight is painted black. Tuning procedure step by step.
- Dismantle the headlight, remove the glass, remove the lamps.
- Fill the inside of the block with a thin layer of polyurethane foam.
- Give the foam the desired shape by determining the areas for installing the LED strip.
- Glue the LEDs onto the base inside the headlight.
- Install glass, connect wiring.
When installing LEDs at 6 Volt dimensions, stops and turns at 12 Volt, capacitors are installed, this prevents overheating of the optics.
LED characteristics
Modern single LEDs, matrix blocks, diode strips produced by well-known companies are distinguished by their high service life and reliability. Technical characteristics of LED blocks:
- service life more than 4000 hours;
- operate at minimum on-board voltage;
- good light data;
- no overheating occurs;
- are not subject to vibration and mechanical effects;
- variety of colors.
The luminous flux of such lamps does not dazzle the eyes and is visible from a great distance. Availability allows for inexpensive and high-quality repairs.
DIY LED tuning of rear lights
To perform LED tuning of rear lights you will need a minimum set of tools and an LED strip of the required length.
Do-it-yourself tuning of rear lights on a VAZ 2110 step by step:
- Disassemble the headlight.
- Pull out the diffuser.
- Paint the reflectors black.
- Prepare the site and glue the LEDs.
- Solder stabilizers and wires from old lamps to the tape.
- Place the reflector on top of the diodes.
- Assemble the tuned spotlights and install in the reverse order.
LED pinout
Before connecting the wires, you need to pinout the LEDs. To make them glow, you need to pass an electric current through them in the direction from the anode to the cathode. To do this, a positive charge must be applied to the anode, and a minus charge must be directed to the cathode.
It is recommended to check the LED strip before installing it on the car.
How to properly remove a headlight from a VAZ-2110 car
If the car owner needs to replace a burnt-out light bulb in the headlights of the car, there is no need to disassemble the unit itself. But if you need to upgrade the lighting fixtures yourself or remove the rear windows, then you cannot do without disassembling the headlights. In addition, the dismantling procedure is sometimes required if it is necessary to replace the hydraulic corrector - a convenient device that allows you to use a lever to adjust the level of light flux directly from the inside of your own car.
Knowing the simple rules that will tell you how to remove the headlight on a VAZ-2110 step by step, you will not have to go to a service station. You can handle the work yourself.
Tuning with a plastic tube
To complete the work, you need a set of tools, as well as materials for manufacturing: a jar suitable for the diameter of the headlight, LED strips, resistors, transparent plexiglass sticks.
Having prepared everything for work, we step by step:
- Heat the tube with a hairdryer, bend it around the can using pliers, this is the diameter of the headlight.
- Let cool and saw off excess.
- Assemble LEDs and resistors.
- Sand the edges of the tube and drill holes at the ends.
- Use a hacksaw to make notches on the inside of the tube.
- Fix the LEDs in the holes and remove the contacts.
- Apply sealant to the structure and secure it around the headlight lens.
What lighting devices can be installed on the VAZ-2110
Lighting devices installed on VAZ cars can be in two versions, depending on the year of manufacture of the car:
The light block kit - from both the first and second manufacturers - includes:
- Headlights for high and low beams.
- Parking lights.
- Turning light indicators.
The differences between these blocks are as follows:
- for Kirzhach products, the glass is secured with a sealant, and in the Bosch version, special latches are used for fastening;
- the Kirzhach block is equipped with a lens, which is provided in the low beam glass, but the Bosch blocks do not have lenses;
- the first manufacturer, thanks to the presence of lenses, has a bright and clearly defined luminous flux, while the headlights from the second provide rather blurry illumination.
Design of headlight hydraulic correctors
As a rule, the following components are included in the design of a hydraulic corrector:
- master cylinder mounted on the dashboard;
- actuator cylinders mounted on the headlights;
- connecting pipelines that are fixed with clamps;
- working fluid with increased frost resistance.
The manufacturer provides a maximum operating pressure in the normal state of the corrector. To direct the luminous flux of the headlight downwards, the pressure in the system is reduced, as a result of which the actuator cylinder rod is retracted and the optics are rotated downwards. Thus, most of the time the device is under increased pressure.
Quite often, when temperature changes occur, especially in winter, the structure of the seals is damaged due to the poor quality of the rubber, which leads to leakage of the working fluid. In turn, this leads to jamming of the cylinder pistons in one of the positions.
Structurally, all hydraulic correctors that are installed on VAZ vehicles are made according to a similar design, with the exception of some differences in size, layout of cylinder fastenings and pipelines. Today the following modifications of hydraulic correctors are supplied to the market:
- “2105-3718010” - for VAZ 2105-2107;
- “2108-3718010” - for VAZ 2108-21099;
- “2110-3718010” and “2110-3718010-10” - for VAZ 2110-2112;
- “2114-3718010” - for VAZ 2113-2115;
- “21213-3718010” - for 21213 “Niva”.
Step-by-step removal of headlights
Whatever manufacturer makes the light unit, every car owner should know exactly how to remove the headlight on a VAZ-2110 before starting work. It is carried out in stages:
- Having opened the hood, you need to disconnect the “–” terminal from the battery in order to completely cut off the power to the car;
- it is necessary to remove the protective lining from the radiator very carefully and slowly;
- lighting devices are disconnected from the block and wires;
- The fixing element of the hydraulic corrector must be pressed tightly and turned to the right at a right angle. Next, the hydraulic corrector is simply removed from the socket, and there is no need to unscrew the connecting hoses;
- using a wrench of the appropriate size, unscrew the bolts securing the headlight in order to be able to move the block to the side;
- the fixation of the upper connecting bolts that hold the car bumper is weakened;
- by pressing on the lining, you need to ensure that the flange is disconnected from the buffer so that the lining can be freely removed;
- the lower headlight clamp is unscrewed;
- The reflector must be disconnected from the block and the block can be quietly pulled out by pulling it towards you.
If the removal of headlights is carried out step by step and according to the rules, then you will not break parts, but installing new parts or repairing old ones, and maybe even making original tuning, is within the power of anyone. You can learn more about the algorithm of actions in the video, which was made by professional machine masters.
The headlight unit can be dismantled for repair, replacement with a new one, or for tuning or modification. In this article we will talk about the removal and disassembly of a VAZ headlight of the tenth family, depending on its manufacturer (Bosch or Kirzhach).
Tinting and replacing factory lamps
You can replace the factory headlights on a VAZ 2110 in the garage; the operation takes 20 minutes and does not require any special tools. Replacing standard lamps is carried out in the following steps:
- Remove the negative terminal from the battery.
- Remove the plug located near the wing.
- Unfasten the spring clip that holds the lamp.
- Disconnect the fastener and remove the lamp.
- Install the new light element in reverse order.
On a VAZ 2110, tuning often involves tinting the headlight housing. Film, painting, and tinting varnishes are used. Tinting of lighting equipment is carried out by tuning studios; the question of whether the procedure is legal or illegal remains open.
According to the rules for operating lighting devices on cars in the Russian Federation, shading of individual parts of the lens can only be carried out by the manufacturer. Set luminous flux color:
- for low and high beams – white, selective yellow;
- all turn lamps are orange;
- rear lights – red.
When tinting the headlight unit, it is not allowed to radically change the color of the lampshade. There is no separate regulatory act that regulates the degree of tinting. There is an official document GOST R 51709–2001 - “Safety requirements for technical. condition of the vehicle and methods of verification.” In 2009, the document removed the ban on installing any type of tinting, film, or additional optical elements on the lens, but did not provide additional clarification as to what type of tuning is allowed to be used for commercial optics. Motorists modernize headlights, adhering to general recommendations - do not change the main lighting parameters of headlights and additional lights.
Installing bi-xenon lenses
Installing bi-xenon headlights is one way to improve road lighting. With their help, visibility in low and high beams in the dark is improved, without blinding oncoming drivers. The difficulty of reinstalling the headlight unit from standard halogen to bi-xenon lies in the different operating principle of xenon lamps.
It is necessary to install ignition units, adapters, and change the headlight design. DIY algorithm for replacing bi-xenon lenses in VAZ 2110 headlights:
- Disconnect the wires from the battery.
- Disassemble the headlight.
- Remove the reflector and old lens.
- Make an adapter from a rigid metal plate, which will be adjusted to the place where the bolts are attached to the module.
- Screw the lamp into the module, connect it to the ignition blocks and screw the block to the frame.
- To connect the ignition unit, follow the instructions that come with the lamp.
- Reassemble and replace the unit in reverse order.
- Reconnect the battery terminals.
- Check functionality and make adjustments.
Installing xenon is not difficult, the main thing is to do it correctly. Installation of bi-xenon on any generation of VAZ is technically possible, but requires permission and legalization from the traffic police with a mark in the technical passport.
Replacing a VAZ 2110 headlight
Disconnect the connectors with wires from the headlights and remove the upper radiator grille by unscrewing a couple of “10” bolts.
Then disconnect the blocks with wires from the direction indicators and remove the hydraulic corrector by pressing the latch and turning it 90 degrees clockwise.
Unscrew the three bolts securing the headlight with a 10mm wrench and move it back. Move the eyelash of the headlight to the center by 4 cm, disengaging its edge from engagement with the wing.
Loosen the two bolts of the upper buffer mounting. Remove the eyelash by pressing on the bottom of the pad until its flange disengages from the front buffer.
Unscrew the last fastening nut using a “10 wrench” and remove the headlight:
Choosing the best lamp
Choosing good low beam bulbs is not easy, because they either don’t shine or burn out quickly. We have made a small rating of the best offers on the market in ascending price, based on demand and reviews (prices for a set of 2 lamps as of March 2019):
- Beacon H1 12V 55W Super Light +50% “ULTRA” series – $3 or 240 rubles. Folk lamps of increased brightness from a domestic manufacturer.
- OSRAM ULTRA LIFE 12V 55W H1 - cost about $7 or 500 rubles. These are inexpensive but good lamps. The manufacturer promises that they will last 4 times longer than standard ones; reviews from car enthusiasts confirm this information.
- Philips Vision plus +60% 12V 55W – $10 or 680 rubles. German lamps with 60% increased brightness.
- Philips X-treme Vision +130% H1 12V 55W – about $13 or 800 rubles. A special feature is the brightness increased by 130% compared to standard ones. Many people will like the so-called xenon effect in X-Treme vision.
- OSRAM Nightbreaker UNLIMITED + 110% 12V 55W – $15 or 1000 rubles. As the name suggests, the manufacturer claims that they are 110% brighter than standard ones.
Lamp replacement process
And finally, let's talk about replacing the lamp in the headlight of a VAZ 2110. For this we will need good low beam bulbs and clean gloves or cotton fabric. In fact, you don’t need to go to a service center to get a replacement. This is done in 5 minutes. Open the hood and look at the inside of the headlight. On its back side there are two hatches covered with a rubber boot or a plastic cap.
The one that is closer to the fender and the turn signal (no matter which side) is the low beam, and the one that is closer to the radiator is the high beam
The lamp hatch cover may differ depending on the headlight model and year of manufacture of your VAZ 2110, but the principle of replacing lamps is similar. In the example shown in the photos, there are latches at the bottom that need to be pressed. In the case of rubber boots, they are simply removed; there are also caps that need to be unscrewed counterclockwise.
Lifting the cover, you will see the terminal block; you just need to remove it from the base. But don’t pull the wires, grab the plastic part firmly. By the way, the low beam hatch also contains a side light lamp (see photo below). To remove the light bulb, you need to move the spring holder (bracket). The shape and fastening of this bracket may also differ in different models and years of manufacture, but not too much, so act according to the circumstances.
Please note that the lamp will not be inserted correctly due to the shape of the skirt around the base. You can see the reinstallation process below
To replace the high beam, the steps are similar.
As it turned out, replacing the low and high beam lamps in the headlights of a VAZ 2110 is not at all difficult; you don’t even need keys or other tools for this. The main thing is that we can do it for free with our own hands.
Thank you for your attention
Previous Replacing car lampsReplacing a low beam lamp on a Chevrolet Lacetti Next Replacing car lampsHow to change a low and high beam lamp on a Lada Priora
How to disassemble a VAZ 2110 headlight
The design of dozens of headlights can vary greatly depending on the manufacturer (see types of headlights). Disassembly of the headlight will be shown on the two most popular models: Kirzhach (Avtosvet Plant) and Bosch.
Headlights VAZ 2110 Kirzhach
To remove the headlight glass, carefully insert a flat screwdriver into the corner of the glass, and then insert a utility knife into the resulting gap and cut off the sealant step by step, helping with the screwdriver.
If the sealant does not yield, then it needs to be heated using a hairdryer; this is described in more detail in the video:
After the headlight glass is removed, remove the headlight reflector by unscrewing three bolts:
To remove the board with the reflector and module from the headlight, remove the pressure spring through the hole in the hydraulic corrector. Then we tighten the adjustment as much as possible and slip in the screwdriver handle, after which we begin to unscrew first one adjustment screw, then the other. We remove the board from the headlight.
Adjusting the headlight range control rod
Sometimes a malfunction of the headlight adjustment system can be caused by a misalignment of the adjustment lever with the lampshade rod. Therefore, if, for example, the hydrocorrector of the VAZ-2112 headlights does not work, do not rush to repair it by replacing it. First, make sure that the connection between the lever and the rod matches the operating position.
The rod of the corrector actuator cylinder rests on the lever, which, in turn, acts on a similar rod rigidly fixed to the headlight dome. The lever passes through the adjusting bolt, which is its fulcrum. The adjustment mechanism works on the principle of a swing. The corrector swings the lampshade, and the adjusting bolt allows you to raise or lower the support point of this swing. If the bolt is turned to the maximum position, the reverse end of the lever in the form of a ball may slip out of engagement with the lampshade rod.
In order for the VAZ-2115 headlight hydraulic corrector to work again, the device must be repaired by returning the lever to a special recess on the rod. To do this, first tighten the adjusting bolt until it stops, then press the lampshade down and insert the lever ball into the desired position.
Replacing the headlight glass
If you see that the headlight itself is working, and its cloudiness is due to glass defects, you need to know how to remove the glass from a VAZ 2114 headlight and then replace it. The algorithm for performing the procedure is as follows:
- We dismantle the headlight using one of the methods described above.
- Take a thin flat screwdriver (spatula, knife) and pry up the corner of the glass.
- Insert the tip of a utility knife into the resulting gap and cut through the old sealant (if there is a lot of sealant left, take a hairdryer and heat the edges of the glass).
The glass is now removed, but remember that reassembly will involve applying sealant (can be replaced with a rubber seal), so be sure to get some in advance. Also, some manufacturers' headlights have headlights with clips, so don't use brute force, just look where they are and tighten them.
Types of lighting equipment
Lighting devices installed on a VAZ 2110 car can be from two different manufacturers - domestic Kirzhach and foreign, or rather German, Bosch. Moreover, the type of headlights used directly depends on the year of manufacture of the car.
Bosch optics
Both devices have a block in their design that includes low and high beams, dimensions and direction indicators. That is, there are no fundamental differences between them, but it will be useful for you to know certain nuances.
- Equipment from the domestic manufacturer Kirzhach is characterized by glass sealing, which causes certain difficulties during replacement. Also, the low beam area is equipped with a lens. This makes the flow limited but more targeted compared to its German counterpart.
- In the case of Bosch, the glass is fixed with special latches, and sealing is done using rubber gaskets. They are easier to remove. But there are no lenses for low beam. There is a reflector here, due to which the boundaries of the glow are more blurred.
Many believe that Kirzhach is superior to Bosch optics in many respects. But this opinion can be called controversial.
But when it comes to dismantling and replacement, here German devices are the clear favorite, since they are much easier to disassemble.
Changing the type of optics (tuning)
Car enthusiasts often tune their car headlights to improve their appearance. High-quality tuning gives the car a fashionable look and beauty. If you choose the right accessory, the appearance of dozens will change completely . The most popular among car enthusiasts is tuning headlights in the form of tinting. It is carried out in a variety of ways that have virtually no effect on the brightness and quality of road lighting. Types of headlight tinting:
- Painting of the headlight mask;
- Glass painting;
- Glass tinting film.
The process of such tinting is best shown in a video. For those who don't want to paint or tint their headlights themselves, there are ProSport headlights. They are already sold in black or chrome. You just need to install them instead of the standard headlights. Only they cannot boast of high quality or bright light.
Eliminating headlight shake
Many owners of the VAZ 2110 find that the light flickers when the car is moving. Such a breakdown most often occurs in Kirzhach headlights, but in Bosch parts such a breakdown rarely occurs. There is only one reason: reflector rattling. To eliminate light flicker, check:
- Is the reflector in place in the latch;
- The presence of an adjusting bolt rod;
- The emphasis is on the seating recess of the hydraulic corrector rod;
- We check the sagging of the thread (swap the high beam and low beam bulbs);
- Integrity of the tube in the hydraulic corrector (it may fray).
The most successful ways to eliminate jitter:
- We replace the hydraulic corrector with an electric corrector;
- We increase the length of the hydraulic corrector rod to tighten the spring.
This method allows you to get rid of light flicker by placing a cap on the hydraulic corrector rod .
Instead of a cap, use:
- Plastic dowel, eight millimeters long;
- The cap removed from the brake fitting;
- Different plastic cap.
- We remove the hydrocorrector itself from the illuminator;
- Place the cap tightly on the corrector rod. The main thing is that the cap does not jump inward;
- Install the corrector into the mounting socket
Lada 2112 2006, 81 l. With. - spare parts
Cars for sale
Lada 2112, 2007
Lada 2112, 2006
Lada 2112, 2007
Lada 2112, 2007
Comments 140
In general, it’s almost a year since the ala Bosch headlights were installed; they can’t be compared with the Kirzhachs, at all. It's chic in winter, even in a snowstorm)
The Prior has different headlights. Although the Kirzhach is cloudy, it shines noticeably brighter than the Bosch. But the Bosch has a slightly wider grip. But I think this grip is just adjusting the headlights to the right one. And in terms of light brightness, the Kirzhach is clearly a little better.
According to the video, Bosch is 2 times brighter
It turns out that with a lens it’s only Kirzhach, but without it it’s only Bosch?
By the way, I installed xenon on Kirzhach - ecstasy did not happen.
I had a ten 2006 with Bosch headlights, the light was a bomb, I sold it. I bought a Sang Yong Aktion Sport, a light bomb. I got a cheap ten 2007 with 27 thousand mileage but it was worn out, the headlights were Kirzhach but they were broken, I bought new Kirzhach, and that’s when I found out how it is, the light is shit, now I’m selling Kirzhach and buying a Bosch .And everything else, THANK GOD, is good
Guys, if you don’t do anything with the Kirzhach, then God is certainly better, but I installed bi-xenon lenses and xenon in the Kirzhach. I haven’t seen better light, I had both a Bosch and a Kirzhach. I advise everyone to do the same.
and become a pedestrian for six months...
After reading the comments, I understand that the original Bosch is the best option?)
Here is a good material about these 2 types of headlights www.luxvaz.ru/vaz-2110/112-fary.html
I actually had a Bosch, a regular headlight with reflectors. But I would like Kirzhach because You can install xenon there, and I would only go with it. Without xenon, Kirzhach is a dull city.
did you watch this nonsense? compare 2 headlights with different bulbs. Of course, if you insert normal lamps into one, and some kind of crap into the other...
Yes, this is just an advertisement for Kirzhach))))
Good evening! Can I have a photo of how the headlights are?
That week I also had to face this problem “Bosch” or “Kirzhach.” After reading on the Internet and comparing the facts (a friend’s Bosch costs 10k) I brought the guys to the conclusion of buying a Bosch and not bothering with lenses and other nonsense. And I’ll say You DID NOT MISS in combination with PTF finally GOOD! Kirzhach not converted and without xenon (in stock) is an ASS.
People, please advise what can be done with the low beam on 2110? Don't offer xenon. I have headlights without lenses, Philips H1 lamps. are set correctly, but the light doesn’t matter. I put xen in the PTF and lowered them all into the ground for me, but the oncoming traffic sometimes complains. to come up with, at low cost, it would be desirable for the light to be good without PTF? Can you recommend any lamps or something else?