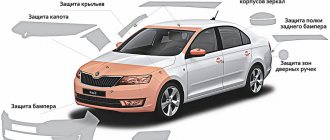
Design features of fastenings
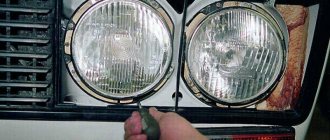
The clamps that hold the headlights are made in the form of small brackets made of durable material. There are 3-4 such brackets on one headlight. The parts are fixed to the body elements either with bolts or special screws.
In some car models, it is possible to mount the optics on special latches located near the hole for the light bulbs. In this case, the installation of the h7 lamp in the headlights can be carried out without necessarily removing the optics. Additionally, the housing is secured with two self-tapping screws on top.
These fasteners can be called one of the most vulnerable and weak points of a vehicle. The brackets are an integral part of the cast headlight housing and are constantly subject to vibration.
Optics repair kit
When buying a headlight restoration kit, you should trust trusted companies, such as 3M. The company specializes in the production of glass adhesives, polishing pastes and polishing kits.
Repairing xenon headlights is no different from restoring classic headlights. Transparent glass and a clean reflector increase the brightness of the light beam and increase visibility on the road at night. Timely care and repair of optics will preserve the presentable appearance of the car and save money.
Manufacturing materials
The most common material from which headlight mounts are made is plastic. If it is of high quality, then such products can last for decades. However, practice shows that 70% of headlight mounts can break.
The plastic alloy itself is brittle to withstand constant stress. The durability of the structure is compromised even at the manufacturing stage, because manufacturers make the fasteners too thin.
On older modifications of cars, the headlights are fixed with iron brackets. With such details there are much fewer problems. In case of damage as a result of serious impacts, you can perform independent repairs by bending the elements to their original position or fastening individual parts using a welding machine.
Stages of work
To seal the glass you will need:
- prepare the glue itself. To do this, dilute it and, if necessary, heat it to the melting temperature indicated on the package;
- clean, dry and degrease the surface;
- To seal a crack, heat its edges, where the mixture will be applied next. This is done due to the fact that many types of glue can only be glued to hot (warm) surfaces;
- lubricate the surface and glue it without any effort;
- fix the crack on the tail light. For this purpose, fiberglass and wire are suitable, which must be secured with a frame on the damaged surface to prevent the development of cracks;
- allow the composition to dry (drying time is indicated on the packaging), then remove excess material.
Sealing glass on a car headlight
Alternative ways to glue a car headlight are as follows:
- If you want to glue imperfections on car glass the old fashioned way, you don’t have to buy glue, but get by using a soldering iron. It is suitable if your headlight is made of plastic, as it can melt its edges and glue them back together without the use of foreign substances.
- You can also glue a damaged tail light using plastic tablets. You just need to heat one tablet and then spread it on the damaged glass. After hardening, the surface is treated with a fine-grained abrasive (sandpaper, abrasive clay) to eliminate excess material.
- Sealant can seal cracks of different sizes well. The algorithm of actions here is similar to working with glue. You can choose a “native” sealant (the one used by the manufacturer of your car model) or buy a high-quality analogue. The main rule is to strictly follow the instructions, especially in terms of diluting and heating the composition.
- You can glue the cracks with a special cloth. It is laid at the crack site and filled with acetone. Acetone begins to dissolve the components of the fabric, transforming them into an adhesive composition. Car enthusiasts note the fast drying time of this mixture - approximately 1-1.5 hours.
Causes of fastening failures
Insufficient plastic thickness is the most common cause of fastener failures. To reduce the cost of the production process, low-quality materials are used. As a result, the reliability of the structures suffers.
Fasteners often fail due to the low level of rigidity of the plastic.
Cases in which breakdowns occur:
- Impact aimed at the front of the car. Often occurs during minor accidents and can lead to through-and-through damage.
- A strong vertical impact when hitting deep holes, rails, or artificial bumps at speed.
- Prolonged exposure to vibration when driving over rough terrain.
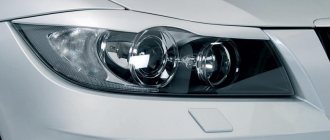
Types of automotive optics
Headlight glasses are an important element of the lighting system; auto prism can be made from:
Glass
Among the advantages: beautiful appearance, ideal light transmittance, long service life.
Glass has a number of disadvantages: with the slightest impact it can easily crack, and it is also easy to scratch.
For protection, a special film is glued to the surface of the headlights.
Polycarbonate
This optics is resistant to various types of mechanical damage, it is 200 times stronger than glass , and can withstand temperature changes well.
However, polycarbonate becomes cloudy during use, and it can also lose its quality characteristics under the influence of acid-containing products.
Plexiglas
Optics made of acrylic (plexiglass) are more practical. Acrylic and polycarbonate are similar materials, but compared to polycarbonate, plexiglass is more transparent, but with temperature changes, cracks and chips may appear on it.
Types of fastenings
The head optics predominantly use a cast type of mount. A hard plastic eyelet extends from the headlight housing, which is screwed to the body with a screw. The retainer can also be metal.
PTF has a completely different installation principle. The method of mounting fog lights involves the use of special brackets. They can be either solid or consist of two parts. The peculiarity is that such parts can be adjusted in height. A more reliable option is considered to be solid brackets that are bolted to the bumper and other parts of the front part of the body.
Fewer problems arise with mounts that are built into the bumper. To replace a plastic headlight, you only need to buy or restore the old retainer.
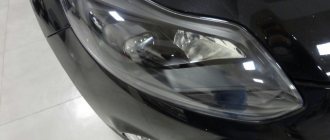
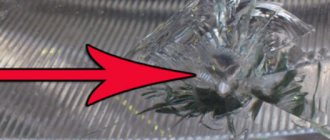
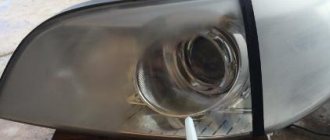
Glass replacement
Deep scratches cannot be removed by polishing, and large cracks spoil the appearance and compromise the integrity of the structure. You can repair broken optics by replacing the glass.
To do this, you will need to remove the headlight or fog lamp and disassemble it as follows:
- Place the part in a cardboard box with a pre-cut hole of small diameter.
- Use an industrial hair dryer to warm up the headlight housing.
- After 10-15 minutes of heating, remove the part and carefully pry off the glass with a screwdriver or sharp knife.
- Cut off the old sealant and thoroughly clean the internal parts from dust.
When removing glass, you should use gloves to avoid burning your hands or cutting yourself on the broken glass.
Replacement masks are sold in auto parts stores or on Internet pages with built-in catalogs.
When reassembling, car owners often wonder how to glue the glass to the body. For such tasks, black sealant is produced, and transparent options are also available. DoneDeal offers various compounds that are suitable for glass and plastic headlights.
Fastening
You can restore the fastening using a metal mesh, glue and a soldering iron. The mesh will add strength to the plastic and prevent a fracture from occurring in the same place. You can purchase the tool at a car enamel store. Before starting work, you need to remove the headlight from the car and fix the fasteners in place with second glue.
How to solder the mount:
- Cut the reinforcing mesh.
- Place the part on the fastener and heat the plastic with a soldering iron.
- Sink the reinforcement into the melted plastic.
- Carefully shape using a soldering iron.
You can refine the soldering area with sandpaper or a file with small marks.
Corrector restoration
The corrector raises and lowers the light beam using a motor, which exerts pressure with a rod on the moving elements in the headlight. During operation, the ball may fall out of the groove and damage the seat. In this case, the reflector will need to be repaired or replaced.
If the motor rod is not broken and the groove has not burst, then restoring the optics will take no more than 20 minutes.
To repair, you need to remove the rear boot from the body, unscrew the corrector and carefully insert it into place, directing the rod. The ball will click into place with a characteristic sound, this indicates that the corrector has been installed correctly.
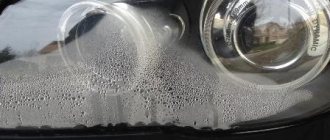
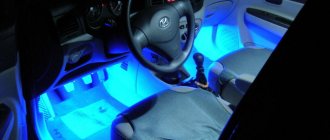
Cleaning
You can clean the inside of the headlights without disassembling their housing using a soap solution. To do this you need:
- dismantle the optics;
- remove all lamps;
- pour the solution and carefully rinse the insides in a circular motion;
- After removing dust, the headlight is cleaned with distilled water, which does not leave streaks.
Clean optics are dried with a hair dryer and then installed in place.
When cleaning, avoid chemicals containing alcohol. Such a solution will easily wash off the coating from the reflector and ruin the optics.
How to repair a plastic mount yourself
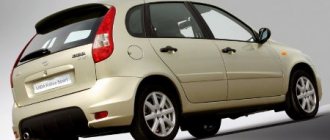
The best way to solve the problem is to buy a new product. The cost of optics directly depends on the year of manufacture of the car. For example, headlights for a Volkswagen Polo sedan can cost about 2,300 – 3,700 rubles.
However, the majority of vehicle owners prefer to solve the problem themselves. To do this, remove the headlight unit and inspect the location of the breakdown. Afterwards, you need to attach the fastener to create the correct shape of the new fastener. Experts often recommend restoring a product without changing its shape.
Features of repair of metal products
Repairing the headlight mount with your own hands in a plastic structure is quite simple. It is a little more difficult to cope with the repair of a metal . If we are talking about an all-metal fog lamp bracket, then there are two methods:
- Welding parts.
- Drilling holes in both elements and further connecting them with wire.
Before using inverter welding, you should restore the shape of the iron fastener using pliers and a hammer.
If the plastic headlight mount is broken, this part can be replaced with a metal part. You will first need to cut an exact copy of the broken part out of iron. Then holes are drilled in a metal blank of the desired shape and fixed in the lantern body. The places where the screws are screwed in are treated with a special sealant. This method is effective for through-and-through damage.
You can repair the brackets quickly and reliably if you have a soldering iron, glue, and metal on hand. Even someone who has never had to perform such work can carry out repairs. It is enough to follow the sequence of actions and the basic principles of repair.
Did you manage to solve your problem using the recommendations from the article?
Yes!
46.06%
No. More answers required. I'll ask in the comments now.
37.9%
Partially. There are still questions. I'll write in the comments now.
16.03%
Voted: 343