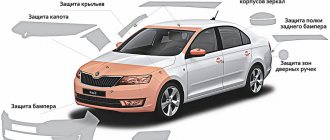
Name of works
Cost, rub.)
APPROXIMATE COST OF REPAIRING HEADLIGHTS (including the cost of materials)repair of fastenings restoration of “ear” fastenings from 1000-4500 repair of headlight housing (cracks, through breaks) from 600 per 1 cm restoration of missing fragments from 1500-5500 installation of a repair kit for one bracket from 500 pcs. from 500 glass replacement from 2000-3500 painting of headlight masksfrom 1000OUR CONTACTS:
Moscow, VDNH metro station, Mira Avenue, building 186-a building 1 Tel.fax (495) 741-58-79, (495) 683-56-19, 8-963-711-19-42 8- 926-610-73-55 E-mail ICQ: 261 965 040
Touch-up paint for filling chips on any car from RUR 350 Paint for self-repairing chips and removing scratches, making paint according to the paint code
Local painting in 3 hours removing scratches, dents, chips and abrasions
What varnish should I use for headlights?
When carrying out the headlight grinding procedure, the question arises of what varnish to coat the headlights with in order to achieve the best effect. The choice should be based on the good reputation of the manufacturer, reviews of a specific product and the type of glazing material. A good headlight varnish should provide protection, eliminate scratches of varying depths, and restore a clear, original appearance.
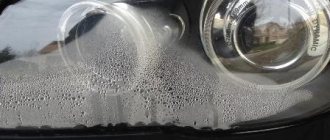
Why does moisture appear inside the car optics?
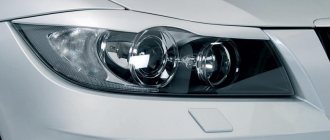
First, let's look at the design of modern head lighting. The headlights of the car are a single body with polycarbonate glass glued in with sealant. Inside there are reflectors, diffusers, and an adjustment mechanism.
Moisture affects all components of the optics
There are options with built-in lenses, including for gas-discharge lamps. In the case of standard xenon, there may be electronics inside the housing: control units and high-voltage lamp ignition units.
Contrary to the statements of some “experts,” the headlight housing is not sealed. The holes for installing lamps and bushings for electrical wiring are sealed with silicone or rubber gaskets. But when the lamp heats up, the air inside the housing expands and requires a hole to escape. For this purpose, any modern headlight is equipped with ventilation valves-breathers. They are located in strictly designated places, provide normal ventilation and are protected from accidental ingress of moisture.
It is better to disassemble lensed headlights according to the manual
- Ventilation holes clogged with dirt or blocked by the owner. Due to the temperature difference, condensation forms inside the case, and there is no ventilation.
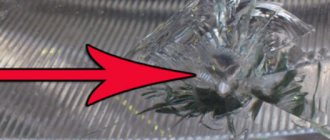
- Cracks in glass or case. Unusual openings lead to direct water ingress and disrupt natural air circulation.
- Poor quality glass sealing after disassembling/assembling the headlight. For example, after unprofessional tuning.
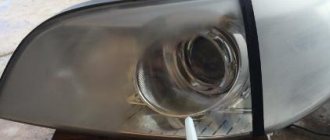
- Fogging of headlights usually occurs during rain, car washing or at low air temperatures. In the first two cases, water enters directly through the damage; in the latter, condensation forms.
Condensation can accumulate both outside and inside
Types of varnish for headlights
All headlight varnishes are applied after polishing, but they differ in the strength of the beam refraction and, accordingly, in the different penetration of light.
Varnish for plastic headlights
Varnishes are divided into groups according to a number of criteria:
- by type of material. There is a varnish for plastic headlights (polycarbonates) and for glass processing;
- as intended. There are mainly 2 main groups: protective and toning. In the protective category, there is additionally a two-component headlight varnish and an aerosol;
- by composition. The composition of the substance is of greatest importance; professionals divide it into 3 types: two-component – varnish, which is sold complete with a solvent;
- urethane. It is completely transparent, comes in aerosol cans and can only be applied to a sanded headlight. It has high protective qualities and increases light transmission. The advantage is the ability to apply to installed headlights without dismantling them;
- acrylic. It has no color, but adds shine and hardens quickly. The disadvantage is the low ability to fill cracks and chips. Can be used for glass headlights, but is useless for plastic.
- H.S. The composition contains a lot of dry residue and a minimum of solvent. Gives a rich shine, acquires better characteristics when applied in 1.5 layers;
Aerosol varnish for car optics
Let's start painting
- If you are planning to paint the surface not entirely, but partially, then you should take care of protection for the unpainted areas. All of them need to be sealed with special (painting) tape;
- Carefully apply the first (base) layer. We leave the elements alone (they need to dry). How long you have to wait will be indicated on the can of coloring composition. Then, apply another (main) layer to all surfaces. Let all the elements dry again. Usually, everything takes an hour (at a temperature of 20°C);
- At the final stage, all this splendor can be coated with varnish (choose heat-resistant);
- Since paints for optics are always translucent, even two-layer painting will not affect the luminous capabilities of the headlights.
If you covered something with tape, do not forget to remove it before assembly (it will not add beauty to your headlights).
Assembly
. The final step is to reassemble the headlight (or several). All parts are carefully installed in their rightful places. Using sealant, we put the glass in place. The headlights, again, need to be left alone until the sealant has completely dried (if you don’t want them to fall apart on the road). Even the longest-drying sealant dries completely within a day.
In conclusion, you have to reinstall everything that you previously removed from the car (headlight units, bumpers, radiator grille).
Materials and tools
Polishing varnished headlights can be done using 2 main methods: with dismantling the optics and in the installed state directly on the car. The first option will require more time due to removal and installation work, but will allow you to restore the optics even with significant damage. There is no need to remove the headlight if the damage is subtle.
Regardless of the chosen direction, coating headlights with varnish after polishing will require the following materials and tools from the performer:
- napkins and rags;
- detergent;
- masking tape;
- solvent for degreasing the surface;
- grinding machine, it is better to equip it with a soft nozzle, this will speed up the process;
- abrasive paper marked 320, 600, 1000, 1200, 2000 and 2500;
- varnish If it is 2-component, you need to prepare a container in which the working solution will be prepared;
- A hairdryer will speed up the drying time.
Dismantling
If you still firmly decide that you need it (and most importantly, that you can), then be prepared to arm yourself with a screwdriver and tape. So where to start:
- Be sure to remove the negative terminal from the battery;
- Carefully remove the bumper from the side on which we will paint;
- Loosen the lock. After that, carefully disconnect the harnesses (with wires) from the headlight;
Polishing and protective varnish to improve light
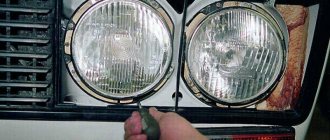
Polishing headlights and varnishing significantly improves the penetration of light from the bulb and increases the efficiency of the optics. The technique has a requirement - the presence of smooth glass headlights. If an older type of glazing is installed, where the entire surface is covered with ribs, polishing will become impossible. It is recommended to simply replace the headlight, preferably with a smooth glass.
During the recovery procedures, the following should be performed:
- If you choose a permanent glass polishing method, you will have to cover the adjacent elements of the case with masking tape. It is necessary to provide high-quality protection so as not to disturb the paintwork of the car body.
- Use special pastes with abrasive additives; Delta Kits are a good option, but there is no fundamental difference. The abrasive is useful as a sandpaper to remove the top layer of damage.
- Wash the surface and wipe with a soft, dry, lint-free cloth. After drying, you need to coat the headlight with a degreaser, preferably using an inactive solvent. Before subsequent work, it is important to ensure protection against dust accumulation.
- You can proceed before applying polish. It is important to ensure the protection of the headlight, otherwise the coating will soon become damaged again.
- Varnishing is carried out in 2 or 3 layers, depending on how many times the manufacturer recommends coating the headlight.
Polishing and protective varnish for car optics
You can speed up polishing using various tools, but they are not mandatory. It is recommended to use higher quality materials during the procedure, which include two-component varnish. The process of preparing the working solution is described directly on the bottle or packaging. One of the best varieties are polyurethane-based varnishes; they provide increased hardness and reliability of glazing.
Financial side
This process is not too complicated, it is easy to do it yourself. During a crisis, you have a lot of free time, and saving becomes the best investment. An additional bonus is new knowledge and skills! The cost of this work depends on the prestige of the car brand, the profitability of the service station, and the level of the technician. The price of work at home consists only of materials, consumables and electricity. But the downside is that you will be left with excess material, which may simply deteriorate over time (if you rarely do repairs and other similar things). The average price for one lighting device in a car service is $7. The cost of painting is always lower than the cost of a new reflector.
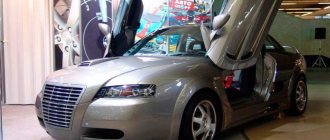
Tinting the glass of your optics is a beautiful tuning effect
There is a way to improve the appearance of the headlights even more, they will not only have a shine, but also a special color. Tinting is used to enhance visual qualities. The headlights get a dramatic look and add tint to the headlights. The only drawback is the complexity of the procedure. To create a tint, you will need high-quality polishing and subsequent frosting of the glass. Only after preparation is the material applied.
The method of applying all types of tint is described in the instructions for the product or on the official resource. To determine the best tinting varnish with the optimal combination of price and quality, you can use customer reviews, but it is not recommended to buy cheap options. Regardless of your choice, you must adhere to the following application principle.
Car optics tinting
How to check where the depressurization is
To determine where the design allows excess to pass through, you need to remove the part from the transport, fill a bath and place the optics there. Then we observe the object. If the air goes up in the form of bubbles, then determine the source where it comes from, mark it in a convenient way, and then seal the place with sealant. After the substance has dried, apply a second coat to ensure reliability and improve the quality of the work done.
Depressurization of the structure will lead to the fact that after washing the car, water will seep into the optics, during operation the device will heat up and fog will form inside.
Instructions for applying a tint coating to optics
If you compare the work of masters and amateurs, you will notice a significant difference in the quality of the final result. The reason is incorrect application or an error in following the rules. Carrying out the procedure yourself leads to risks of destructive effects of moisture or damage to integrity after abrasive stripping. You will have to repeat the polishing process again, only this time with dismantling the entire headlight.
Tinting can be carried out for front and rear optics. To obtain the best result, the most important principles should be used:
- high quality headlight painting becomes possible only after proper surface preparation;
- with careful and proper matting, as well as compliance with polishing rules, the destructive effect on the lens is reduced;
- matting is carried out using sandpaper with minimal grit, otherwise there is a risk of damage to the glass;
- the headlight should be allowed to dry on its own or wiped with a dry, lint-free cloth;
- The surface must be degreased before applying varnish;
- the coating is carried out in several layers, after each you need to wait for drying;
- the varnish is dried again, then the headlight is carefully examined for damage. If everything is in order, you can install the unit back.
other methods
An interesting method is spraying reflectors. To do this you will need to buy a can of white chrome. First, the reflector is washed and degreased. The paint is applied in a thin layer. After a few hours, the paint will dry and the headlight can be assembled. You can try the method of gluing the surface with metallized tape. The reflector is washed and degreased. Then they cover the surface with it. The final job is to coat the outside of the corrugated part with chrome. Using a similar method, you can glue the reflector with foil or mirror film.
Recommendations from experts
If the buyer wants to make the most of his money and get the best result, he should:
- ensure maximum cleanliness of the room and good exhaust;
- carry out work only with personal protective equipment - gloves and a respirator;
- Before varnishing, glass should be especially carefully examined for the presence of sealant particles; bitumen is especially harmful. It is recommended to dry the glass surface in a thermostat set at 110 °C for 3 hours. When working with a construction hair dryer, this will prevent the appearance of cracks and boiling;
- It is better to avoid polishing pastes before varnishing plastic headlights. The plastic base reacts poorly to pastes and impairs adhesion to the varnish;
- To prevent the appearance of abrasions and stripes, you need to perform the procedure in several stages, gradually changing the direction. Each subsequent abrasive material is used for perpendicular grinding. With a sharp transition to a larger grain size of paper, clouding or a holographic effect appears;
- if the optics cannot be removed, for ease of operation it is better to raise the hood;
- two-component varnish should be diluted in small portions so that each part can be used for 5–10 minutes;
- To speed up the hardening of the varnish, you can warm up the headlight with a hairdryer for 10 minutes, only at a low temperature. The procedure is carried out only immediately after gluing;
- Do not wash or treat headlights for 1 day after application;
- To enhance the protection of the varnish, it is necessary to apply an anti-gravel film on top.
Causes of reflector wear
The headlight reflector is constantly exposed to stress that affects its appearance and leads to cracks, cloudy spots and burnouts.
Reflector repair will be required due to the following factors:
- temperature changes;
- penetration of dirt into the headlight;
- use of amplified lamps.
During the cold season, when using a car, the optics are subject to frequent heating and cooling. With temperature changes, the reflector becomes covered with cracks over time, and the mirror layer becomes cloudy and loses its ability to form a beam and reflect it onto the road surface. Such wear cannot be avoided; a car headlight lasts no more than 8-15 years, depending on the lamps used and the material of the reflector.
When a crack occurs in the optics housing or protective glass, particles of dust, water, and dirt enter the internal cavity. Over time, the dirt heats up from the lamp and burns through the mirror surface. The problem can be prevented by periodically inspecting the optics and immediately removing cracks.
Drivers often install bulbs with increased wattage and get a bright beam of light. The downside of the modification is the release of high temperature, which melts the reflector, base and optics body. To avoid such damage, use only parts with recommended power ratings. For halogen it is 55 W, for xenon – 35 W. Markings with instructions are located on the flashlight body or on the glass.
Let's sum it up
When comparing good liquids for abrasive stripping and paint processing, it is recommended to use products from the manufacturer 3M. For polishing, the company's assortment includes effective solutions that meet the standard quality-to-price ratio and also provide consistently good results. The paste allows you to restore headlights even with severe scratches and chips.
Polishing mixtures are sold in containers of various capacities, each accompanied by the manufacturer's instructions. It is best to select a varnish based on individual tasks and the assortment in stores nearby.
Danger of fogging
If the headlights sweat from the inside, the danger for the driver and pedestrians is obvious: the illumination of the road is distorted. In addition to safety issues, the defect will not allow the driver to pass inspection. According to traffic regulations, any malfunctions in the lighting system are excluded. In addition, a sweating part will lead to the following problems:
- Corrosion of the internal parts of the block.
- A halogen lamp may burst if a drop of moisture falls on its heated surface.
- The electrical wiring contacts will short out if a large amount of condensate systematically accumulates in the part.
- The appearance of the car suffers: foggy optics are simply ugly.
Today there are enough ways to dry a headlight in the garage without removing it or with dismantling and complete self-diagnosis of the glass and housing. In 70 cases out of 100, simply re-gluing the structure is enough to restore the insulation. If the unit is damaged after a strong impact, it is better to replace the optics with a new one.
Painting materials
First, we will need a hair dryer, with which we will separate the glass from the headlight.
Secondly, you can’t do without alkyd or acrylic paint and varnish intended for painting the reflector.
Thirdly, for headlights you definitely need a plastic primer.
Fourthly, we will need sandpaper with different abrasive coatings to prepare the surface.
Fifthly, you need a degreaser, masking tape, a screwdriver and a sharp utility knife.
Sixth, at the end of painting we will need a sealant onto which we will have to “mount” the already painted headlight.
Let's talk separately about paint that may be suitable for painting headlight reflectors. You need to choose heat-resistant paint that can withstand temperatures up to 120 degrees Celsius. There is chrome-plated heat-resistant paint on sale that can withstand high temperatures (up to 300 degrees Celsius and above). Acrylic or alkyd paints with increased levels of heat resistance may be options.
You can also find special paint for painting headlight reflectors at the car market. It may be an order of magnitude more expensive, but you will thereby save yourself the headache of whether such paint is suitable for your purpose or not.
Painting reflective elements using different types of paint
Reflectors often darken, become coated and cease to perform their tasks. If you install sufficiently efficient lamps, you can paint them and give them interesting visual features. Painting of headlight masks and any other plastic parts is done only with heat-resistant paint. This could be Motip or any other specialized option. It is also worth considering some coloring features:
- the headlight unit must be disassembled before performing work, the element to be painted is removed;
- You should use fine sandpaper and clean the surface so that it is not glossy;
- The plastic is also degreased so that the coating lasts long enough and with high quality;
- the next step is to apply the selected paint in two layers - more layers are not needed in this case;
- assembly can be carried out no earlier than an hour later, but the headlight can be used only after a day.
The question of how to paint such elements on a Priora is quite complex. Disassembling the headlight must be done carefully and efficiently. Otherwise, it will take quite a long time to put it back together. Painting the headlights should not affect any other element, so not a single part can be painted without removing it. However, painting reflectors is not always effective. This may become a certain problem for the further operation of these products.
How to clean plastic?
4 best ways to restore and repair a headlight reflector with your own hands
Methods for cleaning white plastic and restoring its original color should take into account the specifics of the product, the ability to wet it and other features. A large selection of cleaning methods allows you to choose the best option that suits your specific circumstances.
Laundry soap
This method can be used to bleach plastic that can be wetted and is not in a state of disrepair.
How to use:
- grate 100 grams of laundry soap;
- pour the shavings into the container;
- add 1 glass of warm water;
- stir;
- apply with a brush or cloth to yellowed areas;
- wait 30 minutes;
- rub well and rinse.
This method is suitable for preventive care of plastic.
Washing powder with soda
In advanced cases, you can use baking soda and washing powder for cleaning. This method, like the previous one, is suitable for plastic parts that can be wet.
Progress of work:
- Pour 50 grams of washing powder and soda into a container.
- Pour in 1 glass of water.
- Stir.
- Using a sponge, wipe the yellowed parts with the resulting mixture.
- Leave the plastic with the applied composition for several hours.
- Rinse with water.
Using powders on glossy surfaces requires care to avoid scratches when cleaning.
Vinegar essence
In advanced cases, when the plastic item has become very yellowed, vinegar essence can be used.
The product is applied using a napkin to areas of the product that have lost their original appearance. After processing is completed, the plastic is washed and dried.
Dentifrice
You can try to deal with fresh yellowing of white plastic using tooth powder or chalk. For these purposes, the powder is diluted with water to a paste and rubbed onto problem areas. In this form, the mixture is left until completely dry and cleaned off.
Alcohol
To clean plastic, a high concentration alcohol-containing preparation without dye can be used. The best option is technical or medical alcohol.
Soak a sponge or cloth in the cleaning solution and gently rub the yellowed areas. Completes the treatment by wiping with a damp cloth.
How to clean white with peroxide?
One of the properties of pharmaceutical hydrogen peroxide is to brighten materials and remove contaminants.
The drug is used in its pure form, without dilution. The product is applied directly from the bottle onto a sponge or napkin, and the yellowed parts are wiped with it.
For advanced cases, treatment of the same area will have to be repeated several times.
Only low percentage medical peroxide can be used for processing plastic. Technical equipment should not be used at home.
Dimexide
Dimexide is an inexpensive pharmaceutical product. It is often used not only for its intended purpose, but as a preparation to eliminate yellowing from plastic surfaces.
If the areas that have lost their whiteness are small in size, you can use a sponge to apply:
- Apply a small amount of pharmaceutical product to a cotton pad.
- Wipe problem areas.
Dish detergent
Dish gel is a mild cleaner that can be used to care for plastic in the kitchen and other areas.
This method gives a good result both for the prevention of yellowing and as a means of eliminating yellowness in untreated cases.
How to use:
- moisten a sponge or napkin with water;
- give away excess moisture;
- apply a small amount of gel to a sponge (napkin);
- wipe the plastic;
- rinse with water;
- wipe dry.
White
Chlorine-containing products help brighten surfaces. Whiteness can eliminate even old yellow spots that are many years old.
Due to the peculiarities of the composition, such a product can only be used as a last resort, after first checking the reaction of the material to whiteness in an inconspicuous area.
In its pure form, the drug can be used for spot treatment, in diluted form - if the entire item needs cleaning.
The solution for soaking plastic is prepared concentrated, in a 1:1 ratio with water. To achieve the desired effect, the item is soaked for several hours.
White requires use in a well-ventilated area due to the caustic fumes.
What will help in correcting the situation
Fogging seems like a simple phenomenon that you can deal with on your own. But first you need to thoroughly dry and clean the headlight from dirt. Now we carry out the same step with the drainage and ventilation system, if there is one. After these stages, fogging should stop; if this does not happen, you will have to remove the optics from the vehicle and understand the problem in more detail.
Due to the fact that the headlights sweat from the inside, you need to remove them from the vehicle to diagnose the problem. To carry out this procedure safely, you must first disconnect the battery so as not to receive an electric shock, and only then proceed to dismantling the flashlight. After cleaning the internal space of the optics, the tightness of the structure is checked. To detect the smallest cracks, you can resort to colored gas.
Fogging due to depressurization can be eliminated using improvised methods. For example, use a soldering iron or a hair dryer without removing the optics. Do not try to fix the problem with glue or electrical tape; this will not help at all, because the headlights are made of a special plastic that cannot be held together using standard, household methods. It is not uncommon for materials used in vehicle lighting to include silicone sealant to help keep dirt and dust out, but over time the layer breaks down and liquid gets into the gaps, creating a foggy area. To solve, renew the sealant. If the reason lies in the ventilation valve, then clean it of dirt; they cannot be purchased separately, so you will have to thoroughly clean it yourself.
Timely replacement of filters will help avoid fogging of headlights!
Silica gel
In the CIS regions the question is “how to remove moisture?” solve in an original way using silica gel bags. They can be found in new shoe boxes or at the market. The chemical absorbs liquid well and will effectively attach the bag to the back of the optics. This will cause small fog particles from the headlight to begin to attach to the silica gel, without accumulating on the glass and important technical parts. The downside is that this does not guarantee a complete solution, but only speeds up the drying process and the silica gel blocks will need to be changed regularly.
Silica gel is a good absorbent, which not only saves shoes from moisture, but also, if placed correctly, will relieve the headlight from fog. The main thing is to change the chemical on time!
Brake fluid
Another way to dry a foggy headlight is to pour a little brake fluid into it. But this can cause the glass to become cloudy over time.
Vented plugs
If, when examining the car’s lights, no defects or damage were revealed, but the headlights still fogged up, then the service center technicians recommend using the following method. You need to remove the plugs from the headlights and make 4 holes in them with a 5mm drill. We insert polyester material through these holes so that they act as ventilation pipes. Lubricate the edges of the polyester with strong glue or sealant.
Xenon optics and worn sealant
Why does a xenon headlight sweat? The reason is due to the use of low-quality silicone in the factory assembly. How are they made? At the moment of connecting the headlight unit, a large amount of silicone is poured. The oil takes on a solid form and at the same time releases oil and harmful fumes that settle inside the glass. When light is used, the deposited material heats up and evaporates, then the particles accumulate in the cool part of the internal structure of the optics. If the ambient temperature is low or there is active precipitation, then the degrees in the optics drop faster and the vapor settles more actively. The difference between water vapor and silicone vapor is that the first accumulates into droplets, and the second condenses in the form of a thin film on the inner surface of the glass. At above-zero temperatures, the opposite effect begins - silicone particles wander and gravitate towards cold coatings. This wandering is one of the options why the headlight sweats.
Lada 2114 › Logbook › Painted the rear lights with red varnish.
Today I painted the rear lights with red varnish, but have not installed them yet, they are drying.
We remove the lights from the car and bring them home, washing them with dishwashing liquid.
We also wipe the circuit of the lights themselves.
We wipe it dry with a clean rag; you don’t have to wipe the inside too much until the varnish dries; everything inside will also dry. We washed the lanterns and dried the surface.
We use masking tape to cover the surface on which the varnish will not be applied, i.e. this is a rubber pad.
We begin to degrease with vodka, it is better to degrease immediately at the place where you will paint the lanterns.
We begin to apply the varnish, apply it in several layers, holding the container 25-30 cm from the lamps. Let it dry for about 10 minutes and repeat the procedure, repeat until the color saturation satisfies you.
So in the end I left them to dry under the radiator.
That's it, let's let the lanterns dry, I'll leave them to dry overnight and install them in the morning.
By the way, I don’t recommend varnishing the lanterns at home.