In recent years, tuning of passenger cars has become very popular. In the process of its implementation, the body structures are primarily subject to modification, which immediately catch the eye and clearly emphasize the individuality of the car owner.
No less effect can be achieved through internal tuning, one of the varieties of which is the use of lighting for the dashboard, upper part of the cabin and in the footwell area.
Quite often, car interior lighting, including its implementation as atmospheric interior lighting, is often done with your own hands. It is used as a means of increasing the efficiency of using products of the domestic automobile industry, such as, for example, the popular VAZ-2110.
A combination of aesthetics and functionality
The interior lighting of a VAZ as its tuning, done by hand, is usually designed by the developer to solve several problems at the same time.
The first of these tasks in relation to the VAZ-2110 is the creation of an appropriate image, which is achieved by using additional sources of varying brightness and color.
As for the functional role played by car interior lighting, its practical achievement is much more difficult. For the VAZ-2110, the presence of additional light sources means that in the dark, very comfortable conditions are provided not only for the driver, but also for passengers. Let's name just a few of them:
- tuning in the form of lighting helps to quickly find various objects, including small ones, both in the handbag and glove box, and on the seats;
- the so-called polite interior lighting makes getting into the VAZ-2110 much more comfortable, by delaying the turning off of the light after closing the door, and gradually reducing the brightness of the standard light bulb;
- illumination of the lower part of the VAZ-2110 interior allows you to quickly detect objects that have fallen to the floor near the feet;
- Illuminated door handles make it easier for passengers to get in and out.
The list of advantages can be continued if desired.
Connection
When using LEDs in interior lighting, do not forget to use resistors when connecting.
Method No. 1: to illuminate the power windows
.
- driver's door: to the power window unit (Blue with a black stripe - +12V backlight, black - ground)
- in other doors: red (No. 5) - +12V backlight, blue (No. 6) - ground.
- +12V backlight - white (No. 4).
- "Mass" - black (No. 5).
Method number 2: universal
.
Radio ISO connector contacts:
- A6 - +12V when the dimensions are turned on.
- A8 - “mass”.
Cigarette lighter connector pinout (Lada Vesta):
- black - mass.
- blue - +12V after turning on the dimensions.
We run the wires from the interior to the doors through standard rubber corrugations. If necessary, drill holes in the connector.
Are you considering such tuning of your car's interior?
See other ways to install additional interior lighting:
Found an error? Select it and press Ctrl+Enter..
LED lighting elements
Illumination, including in the leg area, can be created by various sources. Without big problems, you can implement all the varieties of known interior lighting options with your own hands.
Article on the topic: Volkswagen Tiguan 1.4, 2.0 fuel consumption per 100 km
The accumulated experience clearly demonstrates that such tuning provides the best results when using single and strip semiconductor light sources to illuminate the area around the legs and other places. This is determined by the fact that:
- they do not require high voltage for their operation and are powered from the vehicle’s on-board network;
- due to the low voltage, semiconductor sources are safe to use, even in the area of the feet;
- sources of this type are economical and do not create a serious load on the on-board network of the VAZ-2110;
- LED strips are very flexible and allow you to go around any contour;
- LED strips are available today in a variety of colors.
It is of no small importance that you can make such lighting yourself and connect it to the car network without deep knowledge in the field of electrical engineering.
Some design features
When implementing LED interior lighting with your own hands, you must first decide what and how to illuminate.
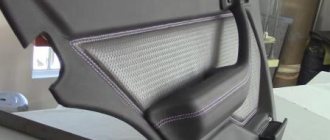
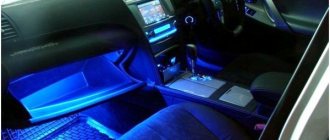
Regarding the placement of the tape in the interior of the VAZ-2110, lighting can be done everywhere, but it will bring the greatest benefit in the glove box and in the footwell area, and its benefit for the rear seat is much greater. This also includes the illumination of door handles.
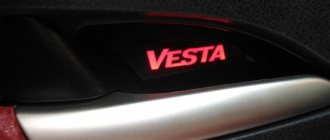
As a decorative element, such tuning is best done on air duct grilles; it looks good as illumination of doors with a logo, as well as illumination of car doors along their perimeter.
The type of inclusion of individual lighting elements, including those in the foot area, is set. The simplest option is to permanently connect it to the on-board electrical network. However, the most functional will be a separate, easily accessible switch, which will turn on the decorative lighting of the door illumination with a logo, or the illumination of the foot area, exclusively at night.
It is impossible to give general recommendations for choosing the color of the glow, except for the obvious provision that it should be in harmony with the color scheme of the illuminated components of the VAZ-2110 interior.
Article on the topic: What cars can you drive if you have category C
Technology and features of installing lighting in a vehicle interior with your own hands
Interior lighting is not only a practical solution for illuminating a car at night, but also a modern type of tuning and decoration of a vehicle. Initially, you need to set the right tasks for yourself so that the result meets your expectations. The set of tools and the specifics of the work depend on exactly which areas of the interior you want to tune - these could be the car's sills, handles, dashboard, driver's foot lighting, and how the lighting should work - when you open the door, when you turn on the ignition, or on a special button. .
And also decide which lighting devices you want to use to illuminate the car interior. Most often, LEDs or neon glow elements are used for these purposes.
Car door illumination using LEDs
You can decorate the interior of a vehicle using LED strip. The tape is easier to install with your own hands, as it has a special self-adhesive coating and therefore does not require additional fasteners. It is also shock-resistant and can withstand different weather conditions well.
Popular articles Smesharik
Purchasing special LED strips for car lighting can greatly facilitate the work of installing them, but their price category is much higher than LEDs per meter. It is necessary to improve and adapt the meter tape to the vehicle using a soldering iron.
To work, you will need to purchase heat-shrinkable pipe, LED strip and electrical wires. First, we try on the LED strip to the threshold of the car and cut off the required piece, it is better to take it with a small gap. To one end of the LED strip you need to solder two wires, minus and plus. For convenience, you can install female terminals on their ends. Separately, it is necessary to prepare four electrical wires with male terminals.
We insulate the soldering areas using heat-shrinkable tubing. The modules are ready to use. Next, you need to remove the trim from the doors and sills of the vehicle and install the developed blanks.
Two wires with male terminals on each door must be routed through the hinge, so they will stick out from it. We tighten the negative wires to the ends of the right and left doors, respectively. This will ensure that the threshold is illuminated exactly from the side where the car opens.
We connect the negative electrical wires to the diode modules, and connect the positive wires to any permanent positive in the vehicle. This could be a car's standard light source, a cigarette lighter, or a battery plus
It is important here not to confuse the polarity of the electrical wires. Checking the operation of the installed LEDs
If everything is done correctly, they will light up every time the car is opened. We put the casing in place and enjoy the result.
Similarly, you can illuminate the dashboard of a vehicle, the driver’s feet or door handles. And also the negative ends of the wires can be brought out to a separate button. In this case, the backlight will only work when you turn it on yourself.
Installing neon lighting in the car interior
Neon lighting fixtures have a diffused glow, which greatly attracts the attention of car enthusiasts. Although, on the other hand, if we compare LED and neon devices in terms of service life, the former are distinguished by a long period of operation
If you want neon lighting for the car interior, then the easiest way to work is with a neon cord. It is sold similarly to LED strips by the meter and is installed according to the same principle. For installation, it is necessary to remove the threshold covers and lay out neon cords of the required length along the outer edge. Ideally, when installing the casing in its place, it should be flush with the neon cable. Similarly to the previous method, we bring out the electrical wires to the ends of the doors and to the power supply.
Neon lamps are a more difficult lighting material to install, as they are prone to mechanical damage and are demanding in terms of operating conditions. To install neon lamps, you will need clamps, screws and aluminum corners. The aluminum corner is cut to the size of the neon light sources and attached in places above the dashboard using self-tapping screws. The same is done in the rear passenger seats. Neon light sources are attached to the installed corners with clamps. Wires are supplied to the door opening sensor and power supply to ensure that the lighting devices are turned on when the door is opened.
Tools and materials used
When implementing any type of interior lighting with your own hands, simple tools and consumables are used.
- The installation tools you will need are pliers, a sharp knife, scissors, and a soldering iron.
- Consumables are considered to be tin and rosin for soldering, one or more terminal blocks, screw-on lugs, as well as a toggle switch or a locking button.
The LED strip is sold by length, so the necessary measurements should be made in advance.
During installation, the individual lighting components are connected to each other by a flexible (multi-wire) cable, the core area of which should be 1 square millimeter. Soldering and contact connection points are covered with electrical tape. A conventional multimeter is used as a means of monitoring correct installation.
Neon lights
With neon lighting, things are a little more complicated. Here is a short list of characteristics of neon lamps:
- Brightness and saturation of lighting.
- Complexity of installation, which makes it difficult to install it yourself.
- Flashlights are quite demanding in terms of operating conditions.
- Poor response to rhythmic on-off cycle.
- Lack of resistance to mechanical damage.
Let's look at how you can install neon lights at the bottom of the car interior with your own hands, and lay an LED strip along the ceiling so that the backlight with the car brand logo in the door is triggered when the car doors are opened.
Popular articles Macrame bracelet weaving patterns
Neon illumination of the front car door
Features of LED strip installation
Installation of the LED strip in the leg area and in other places is carried out using glue. When forming the required length of the tape, it is cut with scissors; the cut must be made strictly along the round or oval marks.
Wires are soldered to the pieces of tape, and terminals are installed at the ends. All exposed wiring areas must be wrapped with electrical tape. The installation site of the tape is wiped with any degreasing liquid to ensure fastening strength.
It is necessary to connect the tape to the vehicle's electrical network in compliance with polarity.