Xenon lamps have taken automotive lighting to a completely different level. Every car enthusiast who has tried innovations can easily note the positive aspects of their use. Unfortunately, breakdowns occur with various parts of new lighting systems. It is worth considering each of them carefully, because standard solution methods may not give the desired result.
Let's consider one of the complex breakdowns that may require significant material costs. Its name is the failure of the xenon lamp ignition unit.
What can you do yourself?
If the xenon lamp stops working, you can try swapping the headlights.
When an initially serviceable light bulb does not light up, the problem can occur in three variations. For example, the ignition unit is likely to break down, as well as problems with the power supply and contact between the unit and the lamp. If one lights up, then we can say with confidence that the problem is in the other bulb. Another method is to install an efficient unit. If there is no ignition, then you should next check the high-voltage connectors, that is, their functioning. If the xenon starts working, it can be assumed that the unit is malfunctioning - this element cannot be repaired; replacement is required.
The second method of checking the unit does not require the use of a lamp. You just need to bring the connectors closer to each other and apply power. The serviceability of the unit is signaled by a crackling sound - this is how the discharge appears, with the help of which the lamp starts.
In order for xenon lamps to work smoothly and efficiently, it is better to install them in trusted centers - if you use the services of professionals, they will subsequently help solve any problems associated with the lamps.
How to check a xenon lamp yourself? Let's look at it in detail"
How to test the generator for performance in various ways.
How to test a xenon lamp on your own? Let's look at it in detail
This is both pleasant and necessary for safety purposes when driving, as well as the ability to quickly carry out maneuvers to avoid accidents
. Thereby saving the lives of yourself and other road users. But it also happens that while driving on highways you notice how some drivers literally begin to become blind in the literal sense of the word.
In such cases, you will be forced to pull over to the side of the road and wait until your unfortunate colleague passes, thereby saving the life of yourself and the car.
This begs the question:
Are there standards for car optics, and what cars are prohibited from installing high-brightness lighting? Today we will try to understand these issues and more in detail.
How to check a xenon lamp? Before doing this, you should make sure that you have it installed. So, xenon lamps today are very actively used in many areas of the national economy, including mechanical engineering. “Xenon”, as it will be more familiar, is distinguished by the following characteristics from its analogues:
- Economical energy consumption;
Possibility of use as a point or scattered optics.
Correction for reverse polarity
Reverse polarity of the base connection is implemented in many cars. The word “reverse” means that “plus” is applied to the common contact of the lamp (see figure).
The "reverse polarity" option is shown on the right
If the car uses reverse polarity, buy a universal bi-xenon kit:
Kit with two connection options
As you can see, the kit is equipped with an inverting jumper, as well as a control diode. When carrying out installation, follow the recommendations:
- If switching between modes does not work, change the polarity of the diode;
- If the switching does not work correctly, install a jumper.
No further explanation is required here. Happy installation!
Video: Checking the ignition unit for xenon lamps
How to check the abs sensor for functionality?
Why use a xenon light system?
Despite the fact that xenon is much more expensive than conventional halogen lighting, and is also multi-component, it still has a number of advantages. Xenon will give you greater safety on the road, and will also ensure the efficiency and brightness of the emitted beam. Such lamps are much more economical, consume a small amount of vehicle energy and last a long period of time. We emphasize that the quality of the glow of xenon lamps is also affected by the ignition unit. That is, by purchasing a high-quality, powerful and reliable unit, you get the fastest possible ignition of the lamp and its uninterrupted operation. You can find out even more information about the light output of xenon, as well as the positive and negative sides of xenon lamps in this article.
0 Comment on “Checking ignition units”
What it is
How to check your car battery for performance
A xenon lamp is considered a gas-discharge lamp and is a flask filled with various inert gases, one of which is called xenon. Hence the name of the lamp.
Such a light bulb does not have an incandescent filament; it is replaced by two electrodes, which, when electricity is supplied, create an electric arc. This arc creates the light produced by the light bulb.
The xenon lamp itself has the shape of an ellipse. In addition to inert gases, metal salts are present in the flask.
The main advantages of a gas-discharge light bulb are as follows:
- its power compared to other lighting elements. For example, the power of a xenon lamp is three times higher than that of a halogen lamp. In this regard, xenon lighting allows the driver to identify an existing obstacle quite early and promptly prevent a possible traffic accident;
- The color of xenon is as close as possible to daylight, so visual fatigue is eliminated even when driving in the dark for several hours;
- economical energy consumption. Compared to halogen, xenon consumes half as much energy. This produces fairly minimal heating of the optics, which extends its service life.
In addition to its advantages, like any lighting, xenon has its disadvantages: The most important disadvantage is considered to be an increased risk of blinding drivers of oncoming cars.
This can be accompanied by illegal and incorrect installation of xenon and lack of adjustment.
For example, we can take the driver of a loaded vehicle who is moving along an uneven section of the road.
When hitting another bump, the light flow is directed upward, which does not result in illumination of the road, but in blinding oncoming drivers.
A light ray corrector will help here, without which the use of xenon is prohibited.
Which lamps are better to choose when purchasing?
When choosing xenon lamps, the following parameters should be taken into account:
- Lamp base. For each make and model of car, it is necessary to select the correct lamp base, without having to resort to altering the standard system. As a rule, the size of the plinth is indicated in the description of the vehicle. If there is no such information, then you can use the table located on the website of the VipFara auto store at the link - https://www.vipfara ru/page/podbor-tsokolya-lamp;
- The optimal color of the lamp is selected, which depends on the temperature measured in Kelvin (indicated on the packaging or the lamp itself):
3000K - the resulting light is yellow It is recommended to install such lamps in fog lamps 4300K – milky white This light is as close as possible to daylight and has the highest brightness levels. Lamps with this parameter are most often installed by the manufacturer in standard xenon 5000K – white lamps with this parameter are also installed for low and high beam 6000K and above as a rule, they are not used in vehicle lighting equipment, since there is a high probability of creating an emergency situation due to blinding of the driver of an oncoming car - The company is a lamp manufacturer. This parameter is also of significant importance, since the duration of use of the lamp and its compliance with the declared parameters depend on the manufacturer. It is recommended to purchase lamps from the following companies (according to popular ratings):
Philips (Germany) the cost of lamps from 2,000 rubles is fully justified by the quality of the product and the length of use. The lamp warranty is up to 24 months depending on the model Sho-me (Korea) You can purchase lamps for a price of 400 rubles. According to users, the lamps are reliable, but unlike the previous brand they work for a shorter time (about 2,000 hours) MTF Light (Russia) the cost of a lamp starts from 950 rubles and above. The warranty period is 1 year. Russian xenon lamps occupy third place in the popular rating, as they are characterized by low cost and proper quality Optima (China) You can buy lamps for as little as 350 rubles. Product quality is guaranteed by the manufacturer. Manufacturer's warranty is 12 months from the date of purchase MaxLight (Korea) the low cost of lamps (from 350 rubles) and the ability to operate for more than 2,000 hours have led to the popularity of this brand among consumers
When installing xenon on a car, if the headlights are not provided by the manufacturer, it is necessary to undergo a legalization procedure, that is, re-equipment of the vehicle.
We recommend: Air conditioning not working? Causes
For using “collective farm” (not legalized) xenon, the owner of a vehicle may be subject to administrative punishment in the form of deprivation of rights for a period of 6 to 12 months.
How to check a radio tube?
- Share Share this post via
- Digg
- Del.icio.us
- Technorati
- Post on VKontakte
- Post on Facebook
- Post to MySpace
- Post on Twitter
- Post to LiveJournal
- Post to Google
- Post to Yahoo
- Post to Yandex.Bookmarks
- Post to Links@Mail.Ru
- Reddit!
This is not enough for professionals. Professionals use the LAMP TESTER. In this device, for almost all lamps, it is possible to apply the correct voltage to all electrodes of the lamp, from the filament to the anode. It contains a sea of lamp panels and a switching field. The device comes with punched cards for each lamp. Put it on the switching field and mindlessly stick the pins into the holes. If you run out of holes, you move on to measurements. A little brain is not a hindrance, as, indeed, in any other matter. Some lamps cannot be checked with this device. For example, some thread of 20 kilowatts, which I use more and more often at amateur stations of categories 3 and 4. I'm no help to you here. I don’t know how they are tested. Judging by the signals from certain stations, no way
- Share Share this post via
- Digg
- Del.icio.us
- Technorati
- Post on VKontakte
- Post on Facebook
- Post to MySpace
- Post on Twitter
- Post to LiveJournal
- Post to Google
- Post to Yahoo
- Post to Yandex.Bookmarks
- Post to Links@Mail.Ru
- Reddit!
Read further:
How to check a halogen lamp with a tester?
How to check a fluorescent lamp with a tester?
How to check a DRL lamp?
How to check a tablet on a generator with a tester
How to check the generator winding with a tester
Reasons for failure of the ignition unit
Practice shows that the key causes of failure are:
- Moisture gets into the middle of the block.
- Wiring faults causing a short circuit.
- Lack of contact in the connection.
Reason #1: water
Any fogging of the headlight is an alarming signal for the car owner. Depressurization allows water to fill the headlight niche itself, which leads to moisture entering the block. The connection itself suffers. Up to a certain point, the circuits hold the load, but over time, high voltage and contact with water lead to breakdown.
Advice!
With such a breakdown, only replacing the unit will not help. It is best to dry the headlight and seal it. Specialists can carry out this process. If the headlight has significant damage to its integrity, it will have to be completely replaced.
It is possible that the unit has only partially failed due to oxidation of the contacts. After drying the block and blowing out the inside, you can check it and install it again.
Reason #2: wiring faults
Wiring defects can only be diagnosed by a professional. Independent attempts to get into a high-voltage system can lead to tragic consequences for life and health. If the problem is really in the electrical supply wires, then most likely it is better to replace them.
On a note!
If the device shorts, you need to pay attention to the fuses. Perhaps replacing the required element will return the headlight device to work
Reason #3: lack of contact
An auto electrician, first of all, will definitely check all approaches to the headlight. Sometimes it happens that simple oxidation of contacts or their disconnection leads to the headlight turning off.
Important!
If the problem is truly oxidation, then the block has been exposed to moisture. This means that it is necessary to check the places where water can enter the main space. The problem of headlight depressurization is described above. It may be necessary to check the rubber of the hood lid.
Installation
The installation of xenon in fog lights is accompanied by the installation of ballast, which occurs as follows:
- Choose a place where the device is protected from dirt, moisture and heat. Check how level the place is;
- place the ballast as close to the lamps as possible to avoid tension on the wiring;
- secure the ignition unit (xenon) so that it is stationary. This is achieved thanks to clamps or bolts;
- connect the lamps to the device.
The procedure is carried out with two devices in a similar way. Please note that in cars equipped with on-board computers, the optics sometimes light up incorrectly or do not function. In this case, install a voltage relay to stabilize the load on the wires when the headlights are turned on.
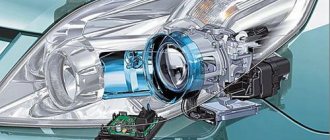
How do xenon headlights work?
To find out how adaptive xenon works, you need to study the general diagram of the device:
Photo: xenon connection diagram
The system is quite simple, and installation is carried out in stages. A feature that some drivers forget to consider is that after the lamps are installed, they need to be adjusted using special equipment.
Let's look at the pros and cons:
| Xenon advantages: |
|
| Flaws: |
|
The choice of lamps should be made in accordance with the technical characteristics of the vehicle, and depending on what color the driver needs the car - low beam or high beam.
The structure of this lamp (diagram)
The xenon lamp belongs to the gas-discharge type. Gas is pumped into the flask for further use under high pressure.
For the fine for xenon headlights in 2021, see the article: xenon headlights. Read about a sample form for filling out an application for a driver's license here.
Main features of the xenon lamp device:
| Main element | Glass flask, which has very strong, thick walls |
| The flask is filled with xenon, an inert gas. | Please note that some manufacturers add mercury vapor |
| Inside the lamp | There are two electrodes located close to each other |
| From the outside of the device | The electrodes are connected to two contacts - plus and minus |
| An ignition unit is connected to the system | Without it the lamp will not work |
| Last element | A bunch of wires that need to be connected to the car's power system |
The system is quite simple, but in order to install it correctly, you need to clearly understand where and what is connected.
The contacts located inside the lamp are connected to the ignition unit, through which a high charge of electricity is supplied - 25,000 Volts.
When electricity is applied, an electric arc is formed between the contacts. Located in xenon, this arc begins to burn brightly.
Standard xenon is installed during the production of cars - at the factory. Most often, manufacturers use 4300 K lamps.
Principle of use
Special reflectors are installed inside the xenon flask. They allow you to direct the light in the right direction. However, lamps with reflectors are slightly more expensive than lamps without them.
It should be noted that xenon flares up gradually. This is due to the time it takes to ignite the arc - typically five to seven seconds.
Ignition block
Main technical characteristics of the ignition unit for standard models:
| Required voltage | Not less than 8 and not more than 16 Volts |
| Energy consumption | Up to 55 Watt |
| Current supply to lamps | From three to six A |
In order for the lamp to work, it is necessary to obtain a voltage of 25,000 Volts, which is quite high. It is formed using the ignition unit.
A voltage of such great strength is generated for only a few milliseconds - this is enough to light a xenon lamp.
Operating principle of the ignition unit:
| Energy at 12 Volts | It comes from the general network to the transformer, where a reaction occurs, as a result of which the current increases. The voltage is then transferred to the capacitor where it accumulates to 500 Volts |
| Next step | Voltage transition to high voltage coil. Due to the induction method, the primary and secondary coils produce a voltage ten times higher. It exceeds the voltage that was generated on the capacitor |
| The lamp lights up | — |
| To keep the xenon burning | A voltage of 60 - 80 Volts is generated. It depends on how powerful the lamp is installed in the headlights |
The final voltage is only 35 to 55 watts and is comparable to the operation of a conventional halogen lamp.
What is it for?
The ignition unit performs the following functions:
- supplies high voltage to the lamp installed in the headlight to ignite the gas in the bulb. No vehicle equipment is capable of delivering, even briefly, a current of such strength that the xenon lights begin to burn and provide the necessary lighting;
- maintains the current necessary for correct operation of the lamp.
Depending on the visibility conditions on the roadway, the ignition control unit is capable of independently increasing or decreasing the current supplied to the lamp, which will lead to an increase or decrease in headlight light, respectively.
On standard xenon installed directly at the vehicle manufacturer, ignition units are included in the lighting equipment system.
When installing xenon headlights yourself, the devices must be purchased and installed additionally.
The simplest way
The simplest diagnostic method is suitable for both incandescent light bulbs and fluorescent and LED lamps. He suggests screwing the suspicious light bulb into another lamp and turning it on. Unfortunately, this is not always possible. Sometimes the threaded part of the base is made with a deviation from the standard size and, when screwed into the socket, does not close both electrical contacts. Or there are no more lamps with the exact same socket in the house.
When buying a light bulb in an electrical goods store, many people paid attention to how the seller checked it using a tester. The tester body has several connectors designed for diagnosing different types of light bulbs: incandescent, fluorescent and halogen
Its task is to check the integrity of the conductors inside the lamp, as evidenced by the sound signal. This same operation can be done at home using a multimeter or a multifunctional indicator screwdriver.
Tags: valeo 6g, neolux, power plan, help the deer
Comments 36
You need a battery, at least 12V from a screwdriver. It is quite enough for testing.
Only check with battery. Often, blocks up to 10A are destroyed at once (this happened on mine)
Yesterday I also checked the xenon at home, it blinked like a strobe light and did not light up. I installed it in my car today and everything works fine.
Power is not enough, power from battery
Just for fun, look at the serial numbers on the lamps, are they the same or not?
I think there is not enough current. Connect to the car's on-board network.
be careful with Valeo 6g, they are very delicate and can be killed by carelessness
Thanks for the warning.
Your block is very weak. It is not for xenon. In a car on Akum it's all a matter of hooking up
from this power supply unit. If it doesn’t work, if you want to do it at home, then at least use a power supply from your computer. from a charger for a car is also not an option, depending on your luck, just look at the power
The block consumes 12-15 A during startup, literally seconds, but this power is necessary for ignition. It will work from the battery
If you equate me with those who install “gay lamps” and drive around blinding everyone, then you are mistaken. I justify: PTFs are used outside the illuminated areas, where there is not a single soul. For example, along the intercity route, or towards summer cottages. Secondly, the fog lights are adjusted using standard adjustment + thin washers in order to increase the angle of inclination of the PTF towards the road surface. And I think there’s nothing to blame on age here. Because some foreign cars are more blinding than those who install xenon themselves. IMHO, that's all I have. I see no point in continuing an obviously useless discussion with you.
Checking the performance of xenon
First thing
You should make sure of the quality of the product you are purchasing and get the most complete advice from sales consultants and dealers. If you are buying a car and don’t know whether xenon is “factory” or not, then follow this: it is unlikely that VAZ will equip its cars with such headlights in stock versions. Also, “older” foreign cars did not have such light by default.
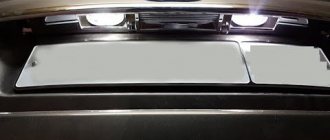
New foreign cars have stock xenon with the mandatory installation of headlight washers, since dirty glass contributes to poor reflection and damage to the lamp.
In addition, the manufacturer sets by default an automatic light beam height correction
. To check for the presence of the latter, you just need to slightly “rock” the car or see the behavior of the headlights when starting the engine. Of course, auto-correction is not required in tuning centers, but its presence speaks directly about the “factory” style.
For xenon, a corresponding headlight must be installed, and not just for halogen lamps.
The marking should be as follows:
the letter “D” means it is a xenon type, and the letter “H” is a halogen type. Accordingly, if there is inconsistency, then this is a makeshift installation and they are trying to deceive you. You can also read the article “Marking headlights for xenon”.
If one of the lamps does not light, then install another in its place in the ignition unit. If it lights up, it means the old one has burned out, if not, it means either the unit has flown or the reason is in the electrical wiring.
On a note
In addition to gas vapors, xenon also contains vapors of mercury, sodium, and scandium. But there is no need to worry, the dosages are so small that they do not pose any danger to humans. Now to the question: how to check a xenon lamp, our reader can safely advise other car owners.
Incorrect operation of headlights, first of all, threatens the safety of the driver and passengers. Lamps can fail at the most inopportune moment - the headlight simply stops burning, the color may change, and the xenon may not light up. There can be several reasons for malfunctions in the operation of lighting devices:
1. Failure of the lamp 2. Problems with the contact between the lamp and the unit (in the connectors) 3. Loss of power in the ignition unit 4. Failure of the ignition unit
There is a simple way to determine the nature of the malfunction. This way you can determine whether there is a breakdown in the ignition unit or whether the lamp has burned out. A visual inspection is performed initially - however, it rarely helps, only in cases of obvious damage to the lamp. Xenon does not have an incandescent filament - accordingly, it is unlikely that it will be possible to accurately determine the condition of the lamp by its appearance.
Sidebar: When the color of the capsule inside the lamp turns metallic, it may be severely worn. Which, however, does not mean the xenon is faulty.
How to check the xenon ignition unit at home
Is it possible to check the performance of the unit at home or in the garage? You can identify faults and repair units on your own, if you have special tools and know the procedure for carrying out work.
Test devices
The most common instruments used to check the functionality of the ignition unit are:
- multimeter;
- oscilloscope.
The multimeter consists of a control unit, complemented by a screen and wires that are connected to the equipment being examined.
A multimeter or tester allows you to measure:
- voltage in the electronic circuit;
- current strength;
- resistance.
How to check the xenon ignition unit with a multimeter?
To check the functionality of a device or individual elements, it is necessary to connect the tester wires to the equipment sockets, with the black wire connected to the negative socket, and the red wire to the positive socket.
An oscilloscope, unlike a tester, is a more professional equipment that allows you to determine voltage, current, pulse frequency, phase angle and other parameters of an electrical circuit.
The principle of operation of the device and the method of checking the performance of equipment with oscilloscopes are similar to a multimeter, but this device allows you to obtain more accurate readings, not only in numbers, but also in the form of a diagram (graph).
Order
So, to fully check the functionality of the ignition unit, you must proceed according to the following scheme:
- Without removing the device from its place, first of all it is necessary to wash the surface of the device with alcohol. This action is aimed at eliminating rust, which can lead to more unpleasant block failure.
- If flushing the unit does not resolve the damage, then the next step is to inspect the housing for cracks (depressurization). Identified cracks must be sealed and the functionality of the equipment must be checked after the used composition has completely dried.
- If the result after the manipulations is not achieved, then you need to completely disconnect the device from the car circuit and open the unit housing.
Inside the case there are various devices, the functionality of which can be checked with an oscilloscope or tester.
Equipment is checked with special instruments in the following order:
- at the first stage, the performance of transistors is checked (there must be at least 4 of them), which are most susceptible to moisture and dust;
- Next, the resistor is checked;
- capacitors are checked.
Detected burnt or broken devices must be replaced with analogues that fully meet the operating parameters.
After replacing and checking the functionality of the lamps, the unit must be closed and filled with sealant or treated with paraffin to increase service life.
If the work carried out did not help restore the ignition unit, then you can:
- contact professionals for a more thorough diagnosis of damage;
- completely replace the equipment.
Checking the xenon ignition unit
We have already determined that if one xenon lamp does not light, then the reason may be both in the light source and in the device itself that ignites the lamp. Thus, if you encounter this problem, it is worth knowing how to check the xenon ignition unit for serviceability.
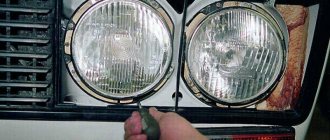
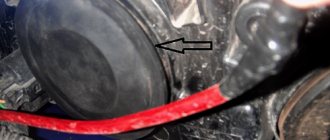
| To do this, you need to carefully remove the xenon, perform a visual initial inspection and determine if there are any flaws in the form of cracks on the lamp bulb (an example of a crack is shown in the figure on the left). If not, then carefully disconnect the wires leading to the lamp from the ignition unit. Two scenarios:
|
Thus, if the problem is in the block, then you will have to replace it with an identical device. Today there are a huge number of blocks from different manufacturers, both standard and universal. Accordingly, you can select any block that interests you. There are 5 generations and it is believed that the most durable and high-quality blocks belong to the 4th generation, which means it is better to give preference to them, and if possible, change two blocks at once.
Repair features
If the optics are faulty, the main question is: how to check the xenon ignition unit?
To know how to check the xenon ignition unit, you should remember that the procedure occurs only when the device is assembled and connected to the light bulb.
Its surface should not conduct current, and objects that are easily flammable must be removed. The multiplier voltage should have a value of 35 V. And it is forbidden to touch it without rubber gloves.
How to check the xenon ignition unit:
- open all its covers, disconnect the sealed layer;
- take a tester and check all 4 transistors on the device. If a breakdown is detected, replace the field strip (solder a working one instead of a non-working one);
- if a breakdown is not detected, solder the sealed layer in places where there is no flux activity. Use a pink indicator liquid that does not need to be rinsed off. To prevent pink spots from appearing on the surface, warm the gel before use;
Checking the xenon ignition unit with a tester
- When you have fixed all the problems, connect the device. If the optics work, you did everything right;
- If the headlights do not turn on, the reason lies in the operation of the transistor. If you find a faulty transistor, solder it into the block and turn it on. If the operation is correct, make the connection according to all the rules;
- After the verification procedure is completed, fill the device board with paraffin.
General information
Despite the fact that the main element remains the xenon-filled bulb, there are no less important technical devices, the main one of which is the ignition unit.
It comes in a variety of powers that can be combined with certain lamps, but the specific choice depends on the driver's needs and the expected brightness of the devices.
Thus, he must understand what devices will be needed for this, and what specific power should be selected to ensure maximum performance.
The ignition unit itself, which makes the lamps work, is technically complex and also consists of many devices that together provide the proper result.
Initial data
To ensure the operation of automobile lighting, an ignition unit is simply necessary, because only it can produce a voltage of 25 thousand volts necessary to ignite the lamp, but it does this for a couple of seconds, and then simply maintains a stable voltage of 80 volts.
But the peak starting energy supply must be coupled with a high level of safety, and the developers of the ignition units have provided all possible options, and even if the light bulb is removed during operation, the unit will recognize this and will not try to ignite again, so as not to harm the user.
Safety precautions before turning on
Moreover, the block itself is placed on a surface with a non-conductive coating, as well as as far as possible from objects that can easily catch fire.
Under no circumstances should you touch the unit with your hands when starting work, since the voltage in it at the moment of ignition is from 20 to 30 thousand volts, and this can cause fatal harm to a person, although in terms of power it is similar to the impact of a stun gun.
It is necessary to provide insulation for all wires and check the connections so that the wires fit securely to the power poles.
You need to select a lamp for a specific ignition unit so that they match in power, otherwise these two devices may not work correctly with each other.
Bi-xenon installation
Bi-xenon is the same lamp filled with an inert gas, only equipped with a special electromagnet.
It controls the focus of the lamp, which allows you to create “low” and “high” light. A conventional xenon lamp constantly shines at full power, and the power of bi-xenon lenses is regulated using a solenoid (electromagnet). The principle of installing bi-xenon with your own hands is approximately the same. It differs only in the presence of a voltage controller, which is connected to the lamp, battery and ignition unit. Its main function is to control and stabilize the voltage in the wiring. We wrote above how to install xenon yourself. Now let’s just look at the connection diagram for bi-xenon lenses and look at some of the nuances.
- The high-voltage wires from the bi-xenon lamps are connected to the corresponding wires from the ignition unit.
- The controller is connected to the power connector of the ignition unit.
- The third wire on the lamp is the electromagnet connector, which controls the light intensity. It also connects to the controller.
- The connector from the controller is connected to the standard lamp power connector. It has 3 contacts.
- We connect the controller to the battery power, “+” and “-” respectively.
After installation, do not forget to adjust the headlights so as not to dazzle oncoming drivers. Remember that well-adjusted headlights will ensure the safety of all road users.