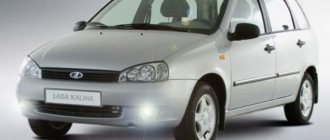
At night, visibility, and, consequently, the safety of driving a car, primarily depends on the condition of the headlights. If during the day the driver only needs vision to monitor the road situation, then at night or when driving through tunnels it is impossible to do without artificial lighting of the road. Driving at night with non-functioning lamps or missing headlights is prohibited by traffic rules. In many countries, regulations require that lights be turned on even when driving during the day. Knowing how to change a low beam light bulb on a Kalina allows the driver to fix the problem right on the road, without wasting time on a trip to the service station.
Replacement process
The lamp replacement process lasts 5-10 minutes. Experienced motorists can do it in two. No tools are needed. Let's start the replacement process:
- Open the hood.
- We remove the plug from the headlight where the replacement will be carried out. It is not necessary to adjust the headlights after replacing the lamp.
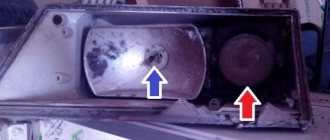
The plug is marked with an arrow
- We remove the plus and minus wires for powering the lamp.
The plug is removed, the cartridge is close
- We move the latch aside.
Move the latch aside
- We take out the lamp. This should be done carefully enough so as not to break the old light bulb.
Removing the lamp
- We carry out the assembly in the reverse order.
Thus, the lamp is replaced and the car is ready for further use.
Lamp selection
Bulb type H7, do not mix it up
The low beam lamp is marked - H7.
It is quite easy to find in the car market or in spare parts stores. The most common manufacturer remains OSRAM.
On the left is a Chinese lighthouse, on the right is a domestic OSRAM
These are domestically produced lamps that have gained popularity due to the price-quality ratio.
Other good manufacturers are:
- Bosch,
- Hella,
- Koito,
- Philips,
- Valeo.
These are already higher quality lamps, which are also more expensive than the popular OSRAM. Thus, the choice of lamps is quite wide, and every car owner will have something to choose from.
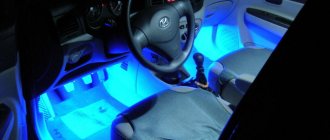
LED lamps for low beam
Controversial issue. It is difficult to choose the optimal ones in terms of quality.
Appearance of diode lamps
Light diode lamps view of the hood
Light diode lamps view from the hood
2161-5-13-16-05 (Copy)
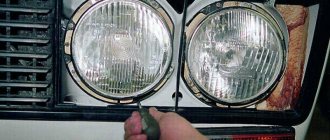
By turning the side and fog light lamp socket counterclockwise, remove the lamp socket with the lamp from the lamp housing.
By turning the side and fog light lamp socket counterclockwise, remove the lamp socket with the lamp from the lamp housing.
By turning the side and fog light lamp socket counterclockwise, remove the lamp socket with the lamp from the lamp housing.
How to replace the low beam lamp Kalina hatchback, sedan, station wagon
The replacement is absolutely easy. You don't need any special knowledge or skills to do this. Even an inexperienced car owner can cope with this task. The only thing is that you need to act consistently and clearly. So, replacing a lamp consists of the following steps:
- First you need to open the hood.
- Then turn off the power by removing the terminal from the battery.
- The washer reservoir should also be removed for convenience.
- Next, remove the rubber cover-cover.
- Then you need to pull out the light bulb by squeezing the latch with your fingers.
- Then the light bulb is pulled out and the terminal is disconnected from it.
This completes the procedure. It is very important to remember how the lamp was located and what wires were connected to it.
Otherwise, you may connect the new headlight incorrectly, which will require you to contact a professional. If you feel that this work is beyond your capabilities, it is better to immediately take the car to a technical service, where all the procedures will be performed for you. Of course, you will have to pay for this, but the result will be maximum.
Replacing low beam lamps on Lada Kalina
Before starting work on replacing low beam lamps, it is worth clarifying that the Lada Kalina is equipped with two types of engines, eight- and sixteen-valve, which have different designs, and, therefore, all dismantling/installation manipulations with equipment are somehow related with an engine, will have a slightly different character.
On a sixteen-valve engine, it is more difficult to change the lamps; on the right side, if you do not have sufficient flexibility in your hands or it is large, you need to remove the washer reservoir.
And one more point needs to be clarified: when replacing one lamp, it is very advisable to change the second one (that is, both left and right), and in no case should you take the lamp by the base , since in this case dark spots will remain or it will quickly burn out.
First you need to remove the rubber plug behind which the lamps are located.
Next, the wire contacts from the lamp are disconnected.
The next step is to release the lamp from the spring.
The defective lamp is carefully removed and replaced with a new one, fixed with a holder.
The wire blocks are put in place and the tightness is checked. After replacement, it is better to adjust the headlights.
conclusions
The installation and repair of the Lada Kalina headlight is quite simple and dismantling and installing the element will not take much time. Of course, if the housing is destroyed, the entire element will need to be replaced. As experience shows, if the fastening elements, the so-called “ears”, break, the headlight does not change, and the damaged part is simply “soldered”. It's much cheaper than replacing an entire element.
Granta and Kalina headlights are considered non-separable. If a crack appears on the glass, the headlight unit is replaced as an assembly. However, with a strong desire, it is still possible to disassemble it. Let's look at how to remove the glass and headlight mask with your own hands. The process is shown using the example of a Lada Granta headlight. On the Lada Kalina 2 headlight, all actions are performed in the same way.
Reasons for loss of low beam
There are several reasons for the low beam to malfunction, some of which lead to the usual burnout of the lamps. It should be noted that there is a likely tendency for a similar malfunction to recur on Kalina with an enviable frequency - one and a half to two months. Reasons for this:
- Lack of tightness of the headlight (dust or moisture entering the bulb settles on the reflector mirror and the lamp bulb, which leads to its overheating. You can learn more about the reasons and ways to eliminate fogging of headlights at the link);
- An upward change in voltage in the vehicle network (a voltage surge also causes the halogen headlight bulb to burn out).
There are other possible problems that cause the lack of low beam:
- failure of the fuse responsible for the proper functioning of optical devices;
- violation of the connection of the lamp plugs (oxidation or burning of contacts).
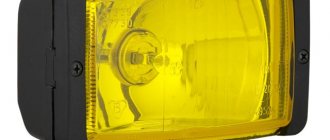
Which lamps are best to use in low beam headlights?
As a rule, on the Lada Kalina, halogen type H7 lamps from the German company OSRAM (12-volt, 55 Watt) are installed in the low-beam headlights. You can replace it with an equivalent lamp from a German manufacturer or choose, for example, a halogen light source from Philips Extreme Vision, which is distinguished by its brightness and exorbitant price. But you can approach this issue from a less expensive side, purchase, for example, lamps from GE SportLight or even simpler: buy domestic halogens. Despite the low cost, the products are in no way inferior in lighting brightness to their famous competitors.
Despite the low cost, the products are in no way inferior in lighting brightness to their famous competitors
Replacing the low beam lamp on Kalina is quite easy and simple. The main thing is to choose the right lamp, which must be marked H7 . The most common manufacturers chosen by motorists are OSRAM and Philips.
Xenon solutions
In appearance, one can notice the almost complete similarity of gas-discharge lamps with their halogen counterparts.
However, both light sources use different technology. In this case, a characteristic feature is the complete absence of an incandescent filament, since a different principle is used. What are the best H7 low beam lamps for the Duster? Perhaps this is exactly the case, since they have a special operating principle. The luminous flux is created due to the glow of the inert gas xenon, hence the name of the lamps themselves. It is under pressure in a glass flask. There is also a small metal plate located here, which heats the inert medium. Due to the absence of an incandescent filament, such lamps are vibration-free, which is confirmed by many tests. Compared to the classic halogen counterpart, the glow from xenon is three times brighter. This becomes especially important when driving a car in the evening and at high speed.
Among other advantages, it is worth highlighting the following:
- low power consumption - about 35 W;
- service life according to approximate estimates is 2800-4000 hours;
- lighting brightness – 3000 lumens;
- the luminous flux is as close as possible to sunlight.
Due to the characteristics of xenon lighting, the question of which H7 low-beam lamps are the best for Kalina should not arise at all. The driver clearly sees almost all objects on the road and side of the road (including road signs) at a great distance. When driving a car in conditions of dense fog or heavy rainfall, the so-called “light wall” is not created. The rays are able to penetrate such an obstacle, thanks to which it is the road that is visible, and not drops of rain or fog.
Why, in this case, having such irrefutable advantages, xenon lamps have not yet completely replaced their halogen counterparts from the market. It's all about the shortcomings. For such lamps to work, they need an additional ignition unit. To start them, a voltage of 25 kV is required, and during operation they consume less - 80 V. Another no less serious disadvantage is the high price. In addition, it is recommended to install such lamps only on those car models that are equipped with headlight range control, otherwise you cannot avoid dazzling oncoming drivers.
Installing a new one: sequential instructions
The procedure for removing and installing a headlight, which is located on the right or left side, is not particularly different from each other. It is only important to act strictly according to the instructions. When installing a new light bulb, you must only hold it by the base and do not touch it with your hands. When removed, you can completely hold it in your hands.
Note that for the Lada Kalina (16-valve engine) a lamp with an H7 socket is required. Install the new one as follows:
- Determine the seat so that the protrusion in the base coincides with the groove on the headlight. It must be firmly fixed. Only then will it be clear that the protrusion has fallen into the groove;
- press the latch against the lamp so that the center of the base is between the antennae of the latch;
- snap the latch into place;
- connect both wires to the clamp and close the lid tightly.
After completing this procedure, you need to turn on the headlights at close range and check their operation. If everything is fine, then the installation was completed correctly. Otherwise, you will have to take the car to a car service center and pay money for it. Lamps should only be purchased in special stores. It is advisable to give preference to well-known manufacturers and models with a guarantee. Osram H7 12V 55W headlights for the Lada Kalina Cross are very popular today.
2161-5-13-16-03 (Copy)
Using a wrench or a high 10mm socket, unscrew the three nuts securing the light (the third nut is located under the upholstery and is not visible in the photo).
Using a wrench or a high 10mm socket, unscrew the three nuts securing the light (the third nut is located under the upholstery and is not visible in the photo).
Using a wrench or a high 10mm socket, unscrew the three nuts securing the light (the third nut is located under the upholstery and is not visible in the photo).
Low beam lamps, their types and malfunctions
Lada Kalina is a budget project of the domestic AvtoVAZ plant, and as befits an economy-class car, it cannot please you with high-quality components that can last at least a couple of years without interruptions. Most often, low beam lamps fail. There may be several reasons for malfunctions. This:
- The headlight is not sealed, which leads to its clogging. Dust settles in the lamp and leads to destructive overheating.
- Increased voltage in the on-board network, which is directly related to the operation of low beam headlights. In order to find out what voltage the generator produces, you need to diagnose it using a tester. The voltage should not exceed 14.4 V.
- Overvoltage causes the fuse to overheat.
- Violation of the electrical circuits of the right and left lamps.
- Oxidation of contacts.
There are other reasons, but these are the most common.
In order to find out whether the lamp needs to be replaced, or whether the breakdown lies in other parts, for example, in a defective fuse ( F12 and F13 ), you must first check it with a multimeter, put it on a continuity test and touch the parallel contacts on the fuse or lamp if it rings Either it works properly, it is silent, then you need to change the faulty part.
It is important to find out whether voltage is supplied at all to all terminals. If voltage is not supplied, then you need to ring the wire until the cause of the breakdown is discovered .
Here it is worth clarifying that driving without low beam lamps is categorically unacceptable, since in the dark, such an omission can lead to a serious accident.
At the moment there is a wide range of lamps. Experienced motorists put the following on the Lada Kalina:
- Lamps from Osram, which cost about 310 rubles.
- Narva, which cost a little less, 290-300 rubles.
- An excellent option for the Lada Kalina are Philips H7 halogen lamps, costing 290 rubles. a piece.
There are also all kinds of modifications: all-weather lamps, improved visual effect, heavy-duty, designed for round-the-clock operation, etc.
How to replace the lamps yourself
Changing a light bulb in Kalina yourself is not difficult. The time spent on the work depends on the skill of the driver and the size of the hands. Some owners change light fixtures in 15-20 minutes without removing the headlight, while others suffer for more than an hour and ultimately dismantle the optics.
When replacing, cloth gloves are used. This helps protect the skin on your hands and also prevents contact with the bulb. When touched, fingerprints remain, which heat up when the light is turned on and after a while burn through the thin glass.
During work, the battery terminal is unscrewed to avoid a short circuit, which will lead to burnout of the fuse link in the fuse box.
Far module
Replacing the high beam lamp is easier than in the low beam module, since the cover is located closer to the radiator grille.
To perform the operation you will need:
- Turn off the Kalina engine.
- Open the hood lid.
- Remove the protective boot on the back of the flashlight.
- Carefully disconnect the plastic chip.
- Open the latch.
- Pull out the lamp.
Assembly is carried out in reverse order. When installing the terminal, you need to check the contacts and, if necessary, clean them using a flat-head screwdriver, sandpaper or a special chemical spray.
Low beam
Replacing a low beam lamp on a Lada Kalina depends on the experience of the owner and is divided into two types:
- Without removing the headlight.
- With module dismantling.
Most Kalina owners cannot replace the lamp in the left headlight due to limited space. In this case, you will have to ask a more dexterous friend or dismantle the lighting device yourself for convenience.
To change lamps on installed optics:
- Unscrew the filter housing near the left headlight and move it towards the engine.
- Disconnect the washer motor terminal, remove the screws and move the reservoir to the side.
- Open the light module seals.
- Remove the block with wires.
- Remove the spring clip.
- Remove the part.
Traditional headlight removal
Access to all upper and lower screws will only be possible if the front bumper is missing. After removing the screws, you can begin to remove the headlight unit, but first you should get rid of the pads and wires. First of all, let's look at the technology for removing the bumper.
You can learn how to adjust headlights yourself by reading the detailed material from our specialist.
Another common question is how to replace a low beam light bulb. Our expert will help you understand this problem.
Bumper Removal Guide
The bumper should be removed according to the following instructions.
- Unscrew the screws securing the fender liners. There should be only four of them. Use a Phillips screwdriver.
- At the bottom left and right you need to remove one more screw.
- From below you also need to unscrew the three bolts that secure the bumper.
- Remove the radiator grille and begin unscrewing the bolts that secure the car bumper.
- Under the license plate you will find a decorative plastic grille; you also need to temporarily get rid of it. To remove it, just unscrew two bolts and apply a little effort, since additional fastening is provided by clamps. Don't be afraid to push yourself harder.
- It remains to remove two screws in the area under the license plates.
- To further remove the bumper, grab its edges on the sides and tear it off the latches, pointing it towards you. This element is quite light in weight, so you can handle it even without outside help.
Removing headlights
Assuming the bumper is removed, further steps to remove the headlights are as follows.
- It is necessary to remove the bumper power beam.
- The lower bolts that secure the headlight must also be removed. You won't find them right away, so tilt the beam slightly to the side and use a 8-mm ratchet to unscrew the two bolts.
- There are also two top bolts. A Phillips screwdriver will help you deal with the first one, and a 8-mm wrench with the second one.
- Disconnect the power plugs responsible for adjusting the height of the light beam and the lighting itself. The electrical adjustment plug is secured by a latch; do not forget to bend it.
- All you have to do is grab the headlight housing with both hands and remove it.