Manufacturers usually install a heating system for front seats on top-spec cars. The basic versions do not provide such a function, although in temperate climates it is quite in demand. The owner of a budget car has no choice but to make heated seats with his own hands.
Advanced car enthusiasts practice 3 popular options:
- buy and put on a ready-made heater in the form of a cape or cover;
- purchase an installation kit mounted inside the standard pillows;
- Make your own heating elements from scratch and install them on your car.
What kind of seat heating you can install yourself: types of heating elements
The car accessories market today is capable of satisfying almost any requirements of motorists. This fully applies to products intended for heating seats, which are available in two types:
- Covers and capes.
- Built-in.
Cases and capes
Before you make heated seats yourself, you need to know that the first option is characterized by low price and ease of installation. All you have to do is put the cover on the chair, connect it, and the kit is ready to go. Typically the heater is plugged into the cigarette lighter socket, but terminal connections are also possible. However, this type of heating organization also has a number of significant disadvantages:
- low electrical and fire safety;
- uneven heating of the area;
- discomfort from wires;
- violation of the interior layout;
- impossibility of using covers on the rear seats.
There is one more problem. Many drivers plug in other gadgets into the cigarette lighter socket, for example, a GPS navigator, a video recorder, or a phone charger. Using a splitter is not a solution to this situation - the heating element consumes a significant amount of energy and the fuses may fail. In addition, there is a threat to the fire safety of the car.
Built-in models
Car owners who decide to organize seat heating with their own hands are confused by this option because of the installation difficulties. Here they can be reassured - detailed recommendations from experienced car enthusiasts will help everyone who knows how to hold a screwdriver in their hands to complete the installation. It is enough to carefully study the proposed technology and have a nominal set of tools. In addition, the advantages of embedded systems compared to capes are obvious:
- the possibility of equipping not only the front seats with heating, but also the rear ones;
- hidden connection, wiring is laid under the interior trim;
- direct connection to the on-board network, the cigarette lighter socket is accessible to other consumers;
- The profile of the chair and the interior components of the cabin do not change.
Since everything is clear with heating covers and capes and their installation raises absolutely no questions for anyone, below we will talk about built-in systems.
The best built-in systems
To choose high-quality seat heating, you should pay attention to the following brands:
This is interesting: How to choose or make a cup holder for a car
| Model name | Peculiarities | Cost, rub |
| Waeco MSH-300 | Heating is carried out by carbon elements. An electronic power supply is installed that allows the system to operate in 3 modes. | 16 000 |
| "Emelya UK2" | Wire type heaters. There are 8 working modes. Equipped with a spark protection system. | 4 000 |
| "Emelya UK" | The most budget option. 2 heating modes. | 1 4000 |
There are no permanent systems for child seats, since such installation of heated seats will be fraught with many difficulties. However, if necessary, you can make a heater for any type of seat yourself.
Briefly about the choice of heating elements
The range of elements that are mounted directly into the body of the chair is quite extensive. This allows you to make the optimal choice based on the design features of the interior and its components, as well as the financial capabilities of the owner. The most popular products are from Russia, China, Taiwan and Germany. Here are some examples of models:
- installation kits from Weaco (Germany);
- built-in blocks "Emelya" from (Russia);
- “VO” kits from the “Avtotherm” group (Russia);
- sets from Megalight (Taiwan);
- kits from Autoline International (China).
Naturally, all models differ both in terms of workmanship and price. Owners who already know how to properly heat seats with their own hands assure that the high cost of German equipment is compensated by its reliability and versatility. Its elements are equipped with overheating protection and have several operating modes.
Russian models of heating technology are practically not inferior to German ones; reinforced cable or carbon fiber is used as a heating element. The kit includes an electronic temperature controller and overheat protection.
Products from China are attractive in price, but most often that’s where all the advantages end. As our car enthusiasts note, the main problems with such kits are:
- broken power button;
- short circuit or broken wiring;
- uneven heating of the seat plane.
Do Three: let's get started!
- Cut out 2 rectangles from old unwanted jeans. They do not necessarily cover the seat surface.
- On one of them we draw how the heating wire will pass: in zigzags or waves. It is better to choose zigzags. This is easier to draw and bend. Although, who cares...
And now our fabric has become noticeably more interesting than before!
Tip: remember the popular television program about remodeling an apartment. Our principle is the same as with the installation of “warm floors”.
- Now the nichrome wire will lie directly according to the drawing.
- First you need to fold it in a zigzag. The fastest way to do this is with a block and nails.
- Drive two nails into a wooden block at a distance of 40 mm.
- Now we consistently and monotonously wind the wire between the nails in a figure eight pattern. Just enough turns to cover the entire pattern.
- Transfer the wire zigzags to the fabric.
- Using a machine we sew each zigzag 2 times. Above and below. The better we fix this design, the safer it will be to use. Attention: if the wires touch somewhere, there will be a short circuit!
- We close our workpiece on top with the second piece of jeans. We sew, leaving a hole for the wires to exit.
- You can sew a thermal reflector on the bottom. This will protect the seat from excessive overheating.
- On top, the most used place, it is better to line it with foam rubber and another layer of thick fabric. This is done so as not to accidentally tear the heating element.
- We finish around the perimeter with a few more lines on the sewing machine.
- Using a connector, we bring the wire through the “window” in the fabric.
We are testing. We need a 12 Volt DC power source, like what you would find in a car. You can use your computer's power supply.
After a minute of test run, the butt begins to burn. So, in the cold, in a cold car it will be just right! We praise ourselves for our accuracy and proceed to further work. Now our main task is on-site installation.
Practice: how to make stationary heated seats with your own hands?
So, the choice has been made and the heating kit has been purchased. All that remains is to prepare the necessary materials and tools. These include:
- a set of screwdrivers and wrenches for disassembling the chair;
- electrical tape and heat shrink tubing;
- plastic clamps;
- multimeter;
- scissors and a knife with replaceable blades;
- pliers;
- soldering iron;
- marker;
- glue 88 or double-sided tape (available in the installation kit).
To all this, we can add that the set of materials may vary depending on the configuration of the product. For example, if there are no wires or a fuse connector, then you need to purchase them. A stranded wire with a cross-section of 2.5 mm² is suitable for wiring.
Before you organize the heating of the front seats with your own hands, special attention should be paid to the placement of the control buttons that are included in the kit. It is important to study the method of their fastening and dimensions, since there is a possibility that the buttons will not fit into their normal place. Then you will have to choose another place or purchase control elements for a specific car. Further, all work is performed according to the following scheme:
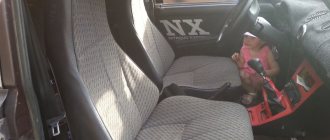
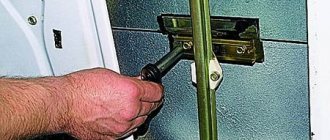
- dismantle the seats and carefully remove them from the car;
- disassemble the seats, remove the headrest and all plastic elements; work better at a desk;
- remove the seat upholstery, which in most cases is fixed from below with metal rings or plates; You don’t have to remove it completely - just make room for heating mats;
- remove the trim from the back, to do this you need to remove the plastic bushings for the headrests;
- lay the heating fabric on the foam base and mark its contours with a marker;
- if there is a temperature sensor, fix it on the foam rubber;
- stick strips of double-sided tape along the marked lines or apply glue 88;
- fix the heating mats on the back and seat; in this case, be sure to pay attention to the position of the wires - for the driver’s seat they should be on the right, and for the passenger seat they should be on the left;
- bring out the power wires;
- install the casing on a foam base; in places where necessary, use plastic clamps;
- reinstall all plastic elements and headrests;
- install the seats in their standard places and lay the wiring to the locations of the controls and power connections.
Important! Motorists who already know how to make stationary heated seats with their own hands are recommended to pay attention to the laying of the wires that go from the regulators to the heating mats. Under no circumstances should they be stacked; it is necessary to leave a reserve in case the chairs need to be moved back.
Sequence of work
- Remove and disassemble the chair;
- Using a multimeter, check the electrical circuits of the relays and heating elements for open circuits and short circuits;
- Find the faulty element;
- Eliminate the malfunction or replace it with a working part;
- Check operation by connecting to a power source;
- Assemble and install car seats in their original condition.
If you have knowledge of electrical engineering, electronics and relevant skills, you can find (for example on the Internet) an electrical circuit for the seat heating regulator and make it yourself.
Connecting heating elements
Every self-respecting manufacturer completes the installation kit with instructions for connecting the unit to the vehicle’s on-board network. If this stage causes certain difficulties or you are unsure of your abilities, then it is better to immediately contact electrical specialists.
For those who are confident in their own abilities, the following recommendations will be useful:
- using a multimeter, you should detect the 12 V power supply, backlight and ignition circuits;
- connect the positive wire of the thermal relay to the ignition switch connector, where power appears only after turning the key;
- connect the supply wire through a fuse to the positive terminal of the battery;
- connect the negative wire to ground;
- connect the button illumination wires to the cigarette lighter contacts;
- solder and insulate all connections;
- check the operation of the system.
For example, below is a diagram of the connections of the Emelya UK kit.
Important! With a correctly assembled circuit, the heating will function only when the ignition is on. Otherwise, forgetting to turn off the system, you risk starting the engine in the morning “with a pusher” or using a cigarette , because the battery will be discharged.
How to make your own built-in heated rear seats in a car?
This option is quite rare on budget class cars. For some motorists it is not of interest, but for those who have a large family, a warm rear sofa will not be superfluous. The technology for installing and connecting equipment is identical to that described above.
To implement built-in heated rear seats, you will need two heating kits. Despite the fact that the installation process is carried out by analogy with the front seats, it is worth briefly considering the main transitions:
- choose a location for installing control buttons;
- remove the trim from the back, it is not necessary to do this completely - it is enough to release only the front and side parts;
- fix the heating mats and remove the wires;
- remove the upholstery from the sofa using the same principle;
- secure the sensors and heating fabric, remove the power wires;
- lay the wires in the tunnel between the chairs under the cover;
- install the buttons and connect according to the diagram.
Some car enthusiasts recommend using seat belts as a “ground”; the contact is quite reliable. Each person places the power buttons at their own discretion. For example, this could be the back of the front armrest or door. This option allows passengers to adjust the temperature at their discretion.
Choosing a kit
Before you begin installing heated seats, you need to decide on the kit you need. The most popular products now are from German, Russian and Chinese brands.
Naturally, seat heating kits from leading German companies are considered the best in quality. But they also have a corresponding price. Of course, such systems are installed on both the front and rear seats.
High-quality kits should have at least several degrees of protection. Also, high-quality seat heating systems usually have more than one operating mode.
It is worth noting that among Russian companies there are brands that provide high-quality and relatively inexpensive products. Suffice it to recall such giants as Avtoterm and Teplodom. Seat heating systems from these companies have protection, as well as high-quality heating elements. For greater reliability, they use reinforced cable. They also have an overheat protection function that turns off the device when a critical temperature is reached.
Seat heaters from China traditionally have the lowest price. Unfortunately, in most cases, products from this country cannot boast of either a reliable design or a good protection system. There are, of course, exceptions, but their price is not much lower than their German counterparts.
When choosing a seat heating system, it is better to immediately buy a high-quality kit, since devices with a low price may have such defects as:
- failure of the control button,
- wiring burnout,
- short circuits,
- uneven heating.
Considering the time that you will have to spend on installation, it is better to immediately buy a high-quality kit so as not to waste your energy on repairs.