This dashboard can be assembled for any car; it is a universal device. We assembled a dashboard based on an existing one called Venator.
To create it you will need the following components:
- Arduino MEGA controller
- Tablet with Androir operating systems
- Wi-Fi module esp8266
- Power converter from 12 to 5 volts (you can use any car charger for mobile phones).
All car sensors are connected to the Arduino controller. In our case, it was also necessary to install a speed sensor in the gearbox instead of the speedometer drive cable. And also run a wire into the car interior from the ignition switch so that the controller could display the engine speed (this had to be done since the OKE did not have a tachometer installed).
Sketch (firmware) for the Arduino Mega controller
You can download the finished sketch in a file using .
unsigned long micros_sp = 0, micros_th = 0; volatile int tz; volatile int sz; volatile int sp; //speedometer impulses volatile int th; //tachometer pulses int analogInput ; //array of analog values int digitalInput; //array of digital values String resultString = ""; //string int i; //cycle counter
void setup(){ for(i=0; i digitalInput =0; } for(i=0; i analogInput =0; } Serial.begin(115200); Serial2.begin(115200); //com port initialization attachInterrupt( 0, speedometr, RISING); //interrupting the speedometer on pulse edges attachInterrupt(1, tahometr, RISING); //interrupting the tachometer on pulse edges } //***************** **************************************** * void loop(){ analogInput = analogRead(0); // B13 voltage analogInput = analogRead(1); // B24 fuel analogInput = analogRead(2); // B21 cooling temperature analogInput = analogRead(8); // analogInput = analogRead(7); // analogInput = analogRead(3); // analogInput = analogRead(4); // analogInput = analogRead(9); // analogInput = analogRead(10); // analogInput = analogRead(11) ; // analogInput = analogRead(12); // analogInput = analogRead(13); // analogInput = analogRead(14); // analogInput = analogRead(15); // analogInput = analogRead(6); //
DigitalInput = digitalRead(4); // ignition // digitalInput = digitalRead(5); // //****************************************************** ********************** digitalInput = digitalRead(53) + // digitalRead(51) * 2; // //****************************************************** ********************** digitalInput = digitalRead(5) + // A14 left turn digitalRead(6) * 2; // A13 right turn //*************************************************** ************************ digitalInput = digitalRead(8) + // A18 near digitalRead(9) * 2; // A17 distant //************************************************ ************************* digitalInput = digitalRead(10) + // A16 PTF front digitalRead(11) * 2; // A15 PTF rear //*************************************************** ************************ digitalInput = digitalRead(23); // A23 check digitalInput = !digitalRead(21); // B 9 — level digitalInput = !digitalRead(31); // A19 — handbrake digitalInput = digitalRead(25); // B 3 pad wear digitalInput = !digitalRead(45); // B10 - fuel lamp digitalInput = !digitalRead(51); // B12 — coolant level digitalInput = !digitalRead(47); // A24 - oil pressure digitalInput = digitalRead(27); // A20 fan lamp digitalInput = !digitalRead(29); // A23 charging digitalInput = digitalRead(33); // A 5 abs digitalInput = digitalRead(35); // A20 srs digitalInput = digitalRead(37); // A 3 belt digitalInput = digitalRead(39); //B 1 door digitalInput = 0;//digitalRead(22); // B 2 p digitalInput = 0;//digitalRead(24); // A22 r digitalInput = 0;//digitalRead(26); // A 7 n digitalInput = 0;//digitalRead(28); // B 6 d digitalInput = 0;//digitalRead(30); // B 5 s digitalInput = digitalRead(41); // A 8 reserve digitalInput = 0;//digitalRead(32); // A 9 reserve digitalInput = digitalRead(43); // A10 reserve digitalInput = 0;//digitalRead(34); // A11 reserve digitalInput = digitalRead(49); // B 4 reserve
ResultString = String(resultString + sp);
resultString = String(resultString + th*10); resultString = String(resultString + ","); for(i=0; i resultString = String(resultString + analogInput ); resultString = String(resultString + ","); } for(i=0; i resultString = String(resultString + digitalInput ); } resultString = String(resultString + ":\n"); // Serial2.print (resultString); Serial.print (resultString); resultString = String(""); tz = tz - 1; sz = sz - 1; if (tz == 0 ){th = 0;} if (sz == 0){sp = 0;} delay(50); } //******************************** *********************************************** void speedometr() { //measure the frequency at the speedometer input using the interrupt sp=(900000.0/(micros() - micros_sp)); micros_sp = micros(); sz = 10; } //************ **************************************** ***** void tahometr(){ //measure the frequency at the tachometer input by interrupt th=(2900000.0/(micros() — micros_th)); micros_th = micros(); tz = 10; }
Setting up the ESP-8266
Before connecting the ESP8266 Module to the circuit, it must be flashed and configured in Tcp2uart (tcp to uart) transparent bridge mode so that it transmits the received data from the com port to the tablet via Wi-Fi.
It is better to flash via a USB-UART converter, which must have a 3.3V source output to power the ESP8266. Also, this source must provide the required current of at least 200mA.
The CPIO0 contact determines the operating mode of the module. When the contact is not connected, the module operates in normal mode and executes AT commands. When the contact is closed to ground, the module is switched to firmware update mode. Switching the module to firmware mode requires that the CPIO0 pin be connected to ground when power is supplied to the module. If you close the contact while the module is running, the module will not switch to firmware update mode. Now you need to start Register the COM port of your converter and select the firmware itself fullflash_tcp2uart.bin (). Click Download and wait until the completion process reaches 99%. At this point it will stop and you can turn off the module. Next, you need to supply power to the ESP8266, or directly connect it to the Arduino controller according to the diagram. Once it appears on the power module, run a search for wifi networks on your computer. The ESP8266 network should appear. Connect to it. After this, you need to go to https://192.168.4.1/fsupload in your browser (Enter Name: ESP8266 Password: 0123456789) and download the WEBFiles.bin file to the device (it is in the archive with the firmware). All that remains is to configure the Tcp-Uart bridge. To do this, go to https://192.168.4.1 in your browser. Go to the TCP-UART Settings tab and set the settings as in the screenshot below:
Ready! Now, when the ESP-8266 module is connected to the Arduino, it operates in transparent bridge mode and transmits the necessary data via Wi-Fi.
Tablet Dashboard app
We thank the Drive2 portal user Frud for the published version of the application and description of the application installation method:
After installation, the application will already work. In order to enable its autoloading, you must do the following:
After installation, you need to go to the Android settings, in the “Home Screen” section, select the VenatorLite2 dashboard application. A very important point! You cannot go to Android settings from the dashboard application to return to the standard Launcher. Before installing the application instead of Launcher, you need to make sure that the settings can be accessed from the status bar. Otherwise, returning the standard launcher will be problematic.
NOTE!
Before installing autoload, it is advisable to configure and debug the application.
After launching the application, you need to go to the settings (click on the gear icon at the top right). Here you need to specify the IP address and port (In our example, these values are: address 192.168.4.1 and port 3333).
All that remains is to connect and test. If everything was done correctly, then when you turn on the device and apply “plus” to the 4th pin of the Arduino, the dashboard will turn on.
And here is what the dashboard installed in the OCU looks like: We wish you success in the implementation of this project
If in the morning, getting into your VW or AUDI car, you notice that the red LCD display of the on-board computer located at the bottom center on the dashboard displays information distorted by horizontal or vertical stripes, some of the pixels on the LCD display are blurry or simply do not work, the display only shows information to “cold” and when warming up it goes out and turns black - this means the display does not work, the dashboard needs to be repaired and the LCD display needs to be replaced.
The problem of a non-working or fading information display on German cars of the AUDI, VW, SKODA, SEAT, OPEL brands has been known for a long time. Sometimes the LCD screen of the on-board computer goes completely dark after an hour of running the car, and sometimes only a few lines of pixels fall out. If previously there was only one solution to such a problem - replacing the dashboard with a new one or a used one from a dismantling shop, now it is possible to repair and replace the LCD computer display located on the dashboard. If you decide to replace the dashboard with a used one from another car, you will have to rewrite all the keys, replace the transponders in the keys, adjust the mileage in the odometer and link the dashboard to the engine block. The cost of this work will be much more expensive than resoldering an LCD display.
If you want to change the panel to a used one. You will need to rewrite the keys, replace the transponders in them and adjust the mileage in the panel, and also connect the panel to the engine block. We do this work, but their cost is much more expensive than replacing the display.
The VW AUDI instrument display is half-shaped. The instrument panel, speedometer, odometers of new modern imported cars are literally crammed with various electronics, and if they fail, official dealers recommend replacing the instrument panel with a new one. Usually, a faulty dashboard can be found and fixed, saving significant money. There are various malfunctions of the instrument panel, speedometers, and odometers: due to time and shaking, cracks in the board traces, broken solder contacts, and burnt out board traces may appear. There are diseases to which the dashboards of cars of specific brands are susceptible: the backlight of the instrument cluster on the VAZ 2110 disappears, the speedometer or tachometer needle stops working, the information liquid crystal display on the instrument panel goes out after some time of operation. Non-functioning longitudinal and transverse lines of pixels on the information LCD display of the dashboard is a common problem in German cars of such brands as AUDI, VW, SKODA, SEAT, OPEL. On AUDI models A3, A6 and TT equipped with dashboards from the Italian concern Magnetti Marelli, which produces electronic devices for cars and motorcycles, problems regularly arise with the LCD display of the on-board computer not working. Blinking lights, fading instrument indicators, fading clock and odometer readings, twitching speedometer and tachometer needles are common malfunctions of Italian instrument panels. On the dashboard displays of the Italian company Jaeger Magnetti Marelli, a beveled cable is used.
For dashboards manufactured by VDO, it is possible to replace the LCD display of the on-board computer. During repairs, a new one is soldered in place of the old display. Displays with a direct loop are suitable for various models of cars of the German VAG group with a VDO dashboard. You can distinguish the panel by the back cover of the dashboard in black with the inscription VDO.
VDO displays with direct loop are used on the following vehicles: 1996-2003 Audi A3 (8L series) 1996-2005 Audi S3 (8L series) 1995-2001 Audi A4 (B5 series) 1995-2002 Audi S4 (B5 series) 1995-2001 Audi RS4 (B5 series) 1997-2004 Audi A6 (C5 and 4B series) 1997-2005 Audi S6 (C5 and 4B series) 1997-2005 Audi RS6 (C5 and 4B series) 1999-2005 Audi Allroad (C5 series) 1995-2005 Audi TT (S-Line and 1.8 T) They are also found on other cars: Volkswagen Passat B5 and B5 facelift (3B & 3BG) VDO, Volkswagen JETTA/BORA, Volkswagen T4 and T5, Volkswagen Golf 4, Volkswagen Polo, Volkswagen Sharan, Skoda Fabia, Octavia, Superb. Attention! LCD VDO display is not suitable for AUDI TT!
There are times when it is necessary to correct the odometer readings, wind up or increase the mileage on domestic and imported cars. We adjust the instrument panel readings using the OBD connector, removing the instrument panel, and disassembling the instrument panel if necessary. We repair dashboards, check odometer readings, and change mileage on most foreign and domestic cars. To activate some hidden functions, we update the dashboard software. So on Lada Granta and Lada Kalina 2 cars, after flashing the dashboard, additional readings of the engine coolant temperature, temperature outside the car, etc. appear on the on-board computer screen.
Call us and find out the cost of repairs, instrument panel flashing or mileage correction for your car. Our tel. in Kirov +7-922-900-70-60
,
The lenses of spy photographers included an updated Mercedes-Benz C-Class with a screen instead of the usual dial instrument panel. As a rule, new technologies are first tested on flagship models, and then they are offered for more affordable cars. Thus, LCD instrument panels until recently were installed exclusively on very expensive cars. And there is no doubt that this trend in the automotive industry will develop in the future.
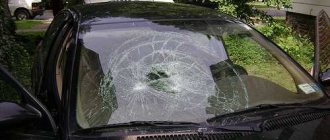
Why is torpedo repair needed?
The plastic panel, despite its special strength, can be damaged as a result of:
- Road accident.
- Direct mechanical impact (impact from a heavy object).
- Long service life.
- Prolonged contact with aggressive chemical liquids (detergents and cleaners, machine oil, gasoline, which can be brought in through dirty hands).
For a car enthusiast, in the event of a malfunction or deformation of the dashboard, there are two options: completely replacing the part or restoring the panel with your own hands. Purchasing both a new and used part means investing a lot of money. In addition, like any other part, the dashboard can vary significantly in shape, angle of inclination, texture and color, depending on the car model. That is why the option of self-repairing a plastic panel is more preferable today.
Marussia B1
The Marussia supercar became the first Russian car with a fully virtual instrument panel.
A feature of the B1 and B2 models was the arrangement of three identical displays on the front panel. The one on the far left served as a dashboard. The other two could display navigation maps, a multimedia system menu, and a picture from the rear view camera. The updated Mazda CX-5 is one of the brightest new products of this season: it has grown from the class of compact SUVs and is clearly aiming to compete with Lexus crossovers.
For a test drive at the Mazda Independence showroom on Selskaya Bogorodskaya, we were provided with an all-wheel drive car with a 2.5 engine (194 hp) with Supreme equipment in bright red color. The price for such a car is just over 2 million rubles. The equipment itself involves rich equipment: in addition to the traditional options for classmates, there is dual-zone climate control, heated rear window and rear seats, cruise control, a large color screen above the instrument panel, a rear view camera, a start button, a heated steering wheel and mirrors — by and large, everything is the same as its more expensive competitors.
What surprised you most during the test drive? Firstly, complete silence in the cabin is at the level of premium class cars, and secondly, the style of handling road irregularities, which you would expect more from a business class sedan. That is, Mazda completely breaks the stereotype about its rigid suspension. The comfortable suspension is combined with a serious ground clearance of 200 mm. The optimal combination for Ufa roads.
Mazda's interior is solid and comfortable (Photo: Valery Shakhov)
The dynamics of the car are impressive, especially in “sport” mode. The car accelerates to 100 km/h in 9 seconds, the maximum declared speed is 195 km/h. It should be taken into account that the car is quite heavy, weighing more than 1.6 tons - this is due to the use of high-quality soundproofing materials. The six-speed gearbox in normal mode behaves traditionally for an automatic transmission - small “dips” of power in low gears are felt, although this is not the case in “sport” mode. Perhaps the fact is that the car adapts to a specific driving style, as they explained to us at the salon, and during the test drive it did not have time to do this. In general, the sports mode transforms the car - it is unlikely to be in demand in the city, but to get the pleasure of driving a “car” on the track is worth choosing a Mazda.
Car economics
The price for the updated Mazda CX-5 starts from 1,431 thousand rubles. For this price, a car with a 2.0 engine and a 6-speed manual transmission is available. Cars with all-wheel drive and automatic transmission start at 1,721 thousand rubles. The maximum configuration costs 2159.6 thousand rubles.
The model we tested consumes 7.2 liters of 95 gasoline per 100 km on the highway and 9.2 liters/100 km in the city (it felt like a test drive, but in practice the consumption is higher, but for now we’ll chalk this up to low mileage). Transport tax is 9,750 rubles per year.
The cost of the first 3 scheduled maintenance will be about 31,000 rubles.
If we're talking about our roads. We tested the Mazda in deep puddles and sticky mud. At some point, the car began to slip in a puddle with a loose bottom, and this is where all-wheel drive and 195 horsepower came in handy. The new Mazda CX-5 is capable of off-roading, but still this car is designed for city roads and city residents.
Getting “stuck” in the mud in a Mazda is difficult, but realistic (Photo: Valery Shakhov)
The new CX-5 is a story not only about handling, but also about the latest fashionable and useful features in the cabin. It now has an additional head-up screen - it projects the image directly onto the windshield. That is, the driver does not need to be constantly distracted by the dashboard - he can monitor the road situation and simultaneously control the on-board computer, which reduces the risk of getting into an accident. The windshield displays not only speed information, but also road signs along the way.
When parking in reverse, the trajectory, which is automatically displayed on the large screen above the instrument panel, is very helpful (Photo: Valery Shakhov)
The side mirrors are also pleasing - in addition to the fact that they have no “dead spots”, there is a sensor on the mirror that warns of a car approaching from the side and starts flashing as soon as you turn on the turn signal. An extremely useful safety feature in the city is the SCDS safe braking system - when braking hard, the hazard lights and lane departure warning systems turn on.
Another point is that lovers of good sound in the cabin can choose a Bose audio system with 10 speakers.
The editor’s personal impressions are that the car is optimal for a city, especially for one like Ufa, where there are snow piles and uneven roads. It has high ground clearance, a powerful engine, a very comfortable suspension, and convenient dimensions. At the same time, it is easy to control, literally crammed with driver assistance systems and gives the comfort of a premium-segment car. Mazda CX-5 is not the cheapest option in its class, but considering that its functionality is close to its higher-end relatives, the manufacturer’s pricing policy becomes understandable.
In the second generation of the Mazda CX 5 crossover, the interior has undergone significant changes. Mazda professionals paid great attention to its architecture, as well as the location of each element. This made it possible to create an interior that was even more comfortable and accessible.
Painting
You can paint the torpedo using special paints for plastic or coloring compounds for car bodies. The paint is sprayed using a spray gun from a distance of 20 cm from the surface of the part. Restoring a car dashboard with paints in aerosol cans is rarely done, since they cannot be used to achieve uniform coloring. Such compositions are usually used for touch-up of individual panel elements.
Painting is carried out in a ventilated area, protected from dust and direct sunlight. The paint is applied in three layers:
- The first layer, the thinnest, is called the developing layer, since after its application the errors made during grinding are emphasized. Any defects that appear are carefully sanded with fine abrasive sandpaper. The first layer of paint is applied with minimal overlap, that is, adjacent stripes overlap only along the edge, and unpainted areas of the surface are not allowed.
- The second layer is applied on the not dried first one. Adjacent stripes of this layer should overlap each other by half.
- The third coat of paint is applied in the same way as the first.
The dashboard can be matte or glossy. Experts advise not to open the dashboard with varnish, as the glare of light creates an additional load on the driver’s vision and distracts him from the road.
If you want the surface of the devices to be shiny, varnish it. The varnish is applied in 2 layers, 20 minutes after painting. For plastic parts in contact with the hands of the driver and passengers, two-component polyurethane varnishes are suitable
They form a smooth, glossy surface, but do not leave fingerprints on them, which is important for a part that often comes into contact with the hands of the driver and passengers.
It takes several days for the dashboard to completely dry. After this time, it is inspected, defects that appeared during painting are eliminated and installed in the salon.
Innovations
The interior of the Mazda CX 5 in its modern form is designed under the motto: “Quality, convenience and silence!” The execution here is at a high level. In the CX 5, the interior has various design options. Only high-quality materials are used: genuine leather in two colors, fabric, soft plastic and aluminum. The crossover's interior has become more spacious and can comfortably accommodate five people. In the new CX 5, visibility is improved due to the rear roof pillars. Engineers also worked on sound insulation. Compared to its predecessor, the cabin is much quieter. Even the glove compartment and storage pockets in the doors are covered with sound-absorbing material. Buyers of the Mazda CX 5 2021 will appreciate the rich finishing materials, a modernized front panel with fashionable stitching, a heated windshield in the area of the wipers and steering wheel, new seats and innovative electronic components.
In the updated Mazda CX 5 2021 crossover, the interior features a modified front panel. It has become lower, there are new integrated air deflectors on the center console and a multimedia system screen mounted on top. The climate control unit has been carried over from the previous model without changes. The dashboard has the same dial gauges in classic round wells, but at the extreme end there is a color display of the on-board computer.
Recovery methods
There are several types of repair of a torpedo after airbags have deployed on a car, which are used in auto repair shops and are occasionally carried out by hand.
- Complete replacement. In this case, the dashboard and steering wheel on the car are replaced. It is equipped with working airbags. The electronic control unit must be reprogrammed. All errors in the car's brain are reset and the firmware is updated.
- Restoration with replacement of the banner. This is a more common restoration of the torpedo, which is carried out after the airbags have deployed. As necessary, the integrity of the structural elements of the old torpedo is restored, the covering material is removed, and a new cover is made from suitable materials according to the markings. At the same time, new squibs are installed and errors are reset.
- Rough repairs. The most incorrect recovery option. In this case, the space where the pillows flew out is filled with polyurethane foam, covered with a lid and fixed with glue. Only the appearance of the dashboard is restored. The pillows are not installed, but only a dummy is made.
While maintaining the integrity of the torpedo, restoration methods with replacement of the panel covering are usually used.
Controls
The central tunnel has remained virtually unchanged. One of the changes is that the gearshift lever is located higher compared to the previous model. Behind it, in a convenient area, there is a multimedia joystick that can be controlled without taking your eyes off the road. The voice control system will help you change the radio, navigation and phone book modes. The square armrest between the front seats has storage for small items and USB ports. The classic “handbrake” has been replaced by a modern electronic parking brake system and the AUTO HOLD function, the buttons of which are located on the central tunnel.
Electronic components
In the center of the front panel on top there is a new 7" touch screen for the standard MZD Connect multimedia system. The complex provides access to music files, a navigator and global network applications, and is also synchronized with your smartphone. Three-way control of the MZD Connect system is possible: an HMI commander on the central tunnel, a sensor and voice commands. This provides quick and secure access to any information and settings. Thanks to the optimal viewing angle, the screen does not interfere with the driver and allows the passenger to use it.
For confident driving in any situation, the Mazda CX 5 2021 is optionally equipped with a head-up display, which displays information from the i-ACTIVSENSE safety systems, navigation and speed mode. The image is projected onto a transparent display between the instrument panel and the windshield, which allows the driver to receive the necessary information without taking his eyes off.
Music lovers in the prestigious versions are offered a Hi-Fi audio system from the famous Bose brand. From ten speakers, high-quality and spacious sound of your favorite tracks bursts out to the rhythm of a subwoofer hidden inside the spare tire in the trunk.
Japanese experts understand how important a convenient location of controls is for the driver of the Mazda CX 5. At the same time, they provided complete comfort to the passengers of the crossover. Therefore, the interior of the CX 5 is functionally divided into 2 zones:
- Driving for safe and precise driving.
- Passenger, ensuring the comfort and safety of travelers.
In the Mazda cabin, new seats for the driver and front passenger have appeared with a comfortable profile, an elongated cushion and developed lateral support. The driver's seat is electrically adjustable in several positions, the only thing missing is position memory. After all, a family often uses one car for several drivers. When transferring, you will have to adjust the seat position to suit you again.
The second row of seats also has an anatomical shape with the Karakuri system - adjustable backrest tilt in two positions. The rear sofa is made according to a classic design with the ability to transform into two armchairs, separated by an armrest. The designers hid 3 levels of seat heating in the rear armrest. Rear passengers have their own air ducts for the climate system.
The rear seats fold in a 4/2/4 ratio and allow you to increase the volume of the luggage compartment.
Tuning seats VAZ 2107
Unlike earlier VAZ Seven models, the factory was equipped with anatomically shaped seats and headrests connected to the backrest. The front seats of the VAZ 2107 are quite fragile and quickly fail - the frame breaks, the backrests warp, and the upholstery wears off.
Standard VAZ 2107 seats are not particularly ergonomic or durable
On our “seven” the seats were exactly like this: wobbly and creaky. The adjustment mechanism also constantly jammed - before adjusting it to suit you, you had to spend a lot of effort.
The easiest way to tune seats is to install covers. Covers for VAZs are sold in almost any auto store; custom-tailoring is also possible.
Installing seat covers on the VAZ 2107 improves the appearance of the interior
Seat trim for VAZ 2107
After upholstering the seats, the interior of the car becomes very attractive. For this you can use:
- genuine leather;
- leatherette;
- suede;
- velvet;
- velours;
- flock;
- carpet;
- alcantara.
Natural leather is undoubtedly the most durable. But as you know, this is a very expensive material, and in hot weather it is uncomfortable to sit on leather seats. The most budget-friendly and fairly reliable upholstery is made from Alcantara and velor. Therefore, these materials are most widely used among car enthusiasts.
Based on the purpose of tuning and financial capabilities, you can do a complete reupholstery of the interior, including the ceiling, door trim, sun visors, steering wheel, and dashboard.
After you decide on the type of material, you need to choose its color. Traditionally, seat upholstery is made in the same color as the interior upholstery, but a harmonious combination of different shades can make the car interior more original and attractive.
The seats of the VAZ 2107, covered with artificial leather, look representative
Video: self-upholstery of VAZ 2107 seats
Changing seat mountings
When installing non-original seats on the “seven”, a situation may arise that the seats do not fit the mounts. In this case, you will have to resort to welding.
Experts believe that any seats that fit the dimensions can be installed on the “seven”. However, changing their mounting is a very labor-intensive job, so if possible, it is better to choose seats that do not require welding for installation.
Anyone who has ever driven a classic remembers well and knows which seats are in the front. In my case, taking into account the fact that the car is 20 years old, the seats have become unsuitable for use. After some thought, I decided to take a more complicated and expensive route, namely installing seats from a used foreign car. In general, I ended up taking it from the Passat, but only the front ones. In general, when I bought the chairs, I basically knew that the fastenings of the vv and the vase were different and very, very different. As you already understood, there were problems with this. We thought for a long time about how to get out of the situation and came to the conclusion that we needed to make some kind of swap of the sleds from the old chairs with new seats. In general, we started by completely cutting off the stand, the one near the tunnel, and making a new one in order to achieve the same level as the one near the door. When I brought them to the chairs, there were ears for fastening wheels for the sled, but they were too long (to be installed to the floor) and I had to cut them off and sacrifice the driver’s seat elevator mechanism. It’s unpleasant, of course, but what can you do?
RyslanZinchenko
https://www.drive2.ru/c/288230376152277729/
Installation of seats from another car on a VAZ 2107
Seat covers are a great tuning option, but if they are already loose, they will have to be replaced. On the “seven” you can install both new original seats and seats from foreign cars. Seats from a 1996 Mercedes W210 and a 1993 Toyota Corolla are suitable. Seats from SKODA and Fiat are suitable, but to install them you will need to make two additional holes.
In addition to the above, Peugeot and Nissan seats are used, but they do not match and require modification of the fastening. The seats from Volkswagen fit almost without modifications, but they are too high for the VAZ 2107, therefore, despite the increased comfort, installing them is not recommended.
Peugeot seats fit the VAZ 2107, but to install them you need to slightly modify the fastening mechanism
Replacing seats is considered a change to the design of the vehicle and, in accordance with Russian legislation, requires mandatory registration with the State Traffic Safety Inspectorate.
Luggage compartment
The luggage compartment of the Mazda Cx 5 will delight those who like to use their crossover as a cargo carrier. The volume in the new generation reaches 442 liters. And with the rear seats folded down, the volume increases to an impressive 1600 liters. The luggage compartment is decorated not with plastic, but with carpet, which reduces noise.
The tailgate has an electric drive, the button of which is located on the front panel. It is possible to control the opening of the rear door remotely from the key.
Otherwise, they tried to preserve the interior details, for the same reason that they did not completely change the exterior. In Japan, apparently they know the Russian saying: “They don’t seek good from goodness!”
Result
Mazda's new philosophy compares driving a car to riding a horse. When a certain harmony is achieved, and the car reacts to the driver’s command instantly, like a horse to the movements of the rider. Mazda CX 5 provides a convenient control interface where you can configure and adjust security, communication and navigation systems without being distracted from the road, even on rough terrain. This is a critical control component in today's high-tech automotive world that most of its classmates lack.
At a Mazda dealership, you will be offered innovative options and trim options for the car's interior.
Demand for color
Designers advise painting the dashboard in the same color as the interior, choosing a slightly lighter shade. This reduces the strain on the driver's eyes. To make the interior of the cabin original, you can use one of the current colors: anthracite (charcoal color with a dusty effect) or titanium (golden hue with matte or dazzling glossy effects).
Repairing a car dashboard using “liquid rubber” paint is popular. When dry, this composition forms a smooth, rich matte surface, pleasant to the touch and resistant to negative influences.