Replacing rear brake pads on a Chevrolet Lanos
Safety comes first. Motorists should drive with this motto. For Chevrolet Lanos, the rear brake pads are replaced if they have been damaged for several reasons. The choice of pads should be made carefully, and according to the catalog numbers given by the manufacturer.
Video
The video will tell you how to change brake pads on a car.
We change the rear brake pads on a Chevrolet Lanos with our own hands
Brake pads can be replaced when they wear out. But there are other situations when such work may be required. For example, if the pad lining breaks on the track. When this happens, the rear pads can jam or completely lock the wheel.
The video below will tell you about replacing brake pads on a Chevrolet Lanos:
Replacement process
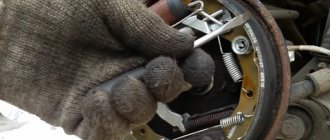
To replace the rear brake pads of a Chevrolet Lanos, you need to prepare tools. For work you will need: a jack, a wheel wrench, pliers and a flat-head screwdriver. When everything is prepared, you can proceed directly to the process:
- Engage 1st or 3rd gear at the gearbox.
- Place wheel chocks under the front wheels.
- Raise the rear of the car, where the pad will be changed, using a jack.
- We dismantle the wheel.
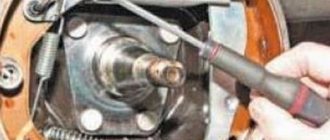
We remove the wheel. Using a chisel and hammer...
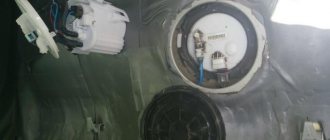
Remove the cap from the brake reservoir.
...press out the protective cap of the wheel bearing.
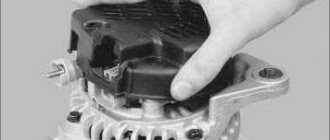
We dismantle the top cover of the brake drum.
Use a screwdriver to straighten the cotter pin...
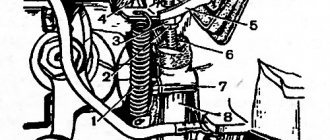
We move the working piston inward and fix it in this position.
...and use pliers to remove it from the trunnion hole.
We squeeze the sliding parking brake levers inward.
Using a 24mm socket, unscrew the castle nut of the hub bearing.
Compress the spring and unhook the handbrake cable.
Remove the lock washer. Before removing the brake drum, lower the parking brake lever all the way - the car must be released.
Turn the pressure spring a quarter. In this case, it is worth holding the support stand.
Remove the brake drum assembly with bearing. Do not press the brake pedal after removing the brake drum, as the pistons may come completely out of the wheel cylinder. We clean the brake mechanism parts from dirt. Do not use gasoline or diesel fuel to clean brake parts.
Now, you can remove the cup, spring and support post.
Remove the brake drum assembly with bearing. Do not press the brake pedal after removing the brake drum, as the pistons may come completely out of the wheel cylinder. We clean the brake mechanism parts from dirt. Do not use gasoline or diesel fuel to clean brake parts.
All operations described below must be done with the second block in the same drum.
Using a screwdriver, disconnect the front end of the upper tension spring from the lash adjuster lever earring and remove the spring. We move the upper stops of the brake pads away from the pistons of the wheel cylinder.
By stretching the upper spring, we remove the pads from the slots.
Remove the shackle of the clearance adjuster lever.
Now, stretch the lower spring and remove the pads from the restrictor plate.
Remove the slack adjuster lever along with the spring.
Next, we dismantle the pads along with the springs.
Remove the spacer bar assembly.
We unhook the springs from the pads, first the upper one, and then the lower one.
Please note that the ratchet nut of the spacer bar, the shackle and the adjuster lever of the right brake mechanism are silver, and the left mechanism is black. The threaded tip of the spacer bar is marked: RH - for the right mechanism; LH - for the left mechanism. Before installing new pads, it is necessary to reduce the length of the spacer bar by screwing the ratchet nut all the way onto the threaded end. After installing the brake drum, tighten the rear wheel bearing nut and adjust the bearings. Adjust the position of the brake pads. To do this, press the brake pedal 10–15 times.
- If necessary, add fluid to the brake reservoir.
- Wear of the friction part. It can only be seen if you take the drum apart. According to the manufacturer's recommendations, the friction part should not be less than 2 mm.
- If brake fluid gets on the linings, it also leads to replacing the pads.
- The friction part is cracked, chipped or chipped. This indicates that the pad needs to be replaced.
Before using the handbrake, right in the garage, it must be gently pulled and released several times. This will help the new pads adjust.
Causes of malfunction
The causes of rear brake pad failure are no different from the front ones. But it’s worth dwelling on them to know them:
All these reasons become decisive in the decision to replace the rear brake pads.
Replacing brake pads on the rear wheels of a Chevrolet Lanos
We replace the pads in case of maximum permissible wear of their linings or the rear wheel brake drum. The pads also need to be replaced if the linings are oily, have deep grooves and chips on them, or if the linings are detached from the base of the pads. The minimum permissible thickness of the overlays is 0.5 mm. The maximum permissible inner diameter of the drum is 201 mm. The brake pads of the rear wheels must be replaced only as a set - all four pads. Replacing the pads of only one brake mechanism can lead to the car pulling to the side when braking. We show replacing the pads on the left rear wheel. The brake pads of the right rear wheel are replaced in the same way. We remove the wheel.
Using a chisel and hammer...
...press out the protective cap of the wheel bearing.
Use a screwdriver to straighten the cotter pin...
...and use pliers to remove it from the trunnion hole.
Using a 24mm socket, unscrew the castle nut of the hub bearing.
Remove the lock washer. Before removing the brake drum, lower the parking brake lever all the way - the car must be released.
Remove the brake drum assembly with bearing.
Do not press the brake pedal after removing the brake drum, as the pistons may come completely out of the wheel cylinder.
We clean the brake mechanism parts from dirt.
Do not use gasoline or diesel fuel to clean brake parts.
Using a screwdriver, disconnect the front end of the upper tension spring from the lash adjuster lever earring and remove the spring. We move the upper stops of the brake pads away from the pistons of the wheel cylinder.
Remove the shackle of the clearance adjuster lever.
Remove the slack adjuster lever along with the spring.
Remove the spacer bar assembly.
Using pliers, turn the spring cup of the block support post until the groove in the cup aligns with the shank of the strut.
Remove the cup with the spring and remove the support post from the hole in the brake mechanism shield.
We disconnect the tip of the parking brake cable from the drive lever and, having disconnected the end of the lower tension spring from the block, remove the rear block with the lever assembly. Remove the lower tension spring. We remove the cup with the spring of the front pad support strut in the same way as the rear one...
...and remove the front block. We check the technical condition of the parts and clean them.
If a collar has formed on the inner diameter of the brake drum... ...remove it with a scraper.
Using a caliper we measure the internal diameter of the brake drum, the value of which should not be more than 201 mm. Before installing new pads, clean the threads of the tip of the spacer bar and ratchet nut and apply a thin layer of grease to the threads. Install new rear wheel brake pads in reverse order. Note…
...that the spacer bar ratchet nut, shackle and adjuster lever for the right brake mechanism are silver, and the left brake mechanism is black. The threaded tip of the spacer bar is marked: RH - for the right mechanism; LH - for the left mechanism. Before installing new pads, it is necessary to reduce the length of the spacer bar by screwing the ratchet nut all the way onto the threaded end. This must be done in order to install the brake drum. After installing the brake drum, tighten the rear wheel bearing nut and adjust the bearings (see Adjusting the rear wheel bearings of a Chevrolet Lanos). Adjust the position of the brake pads. To do this, press the brake pedal 10–15 times. In this case, clicks will be heard in the brake mechanisms of the rear wheels from the operation of the mechanism for automatically adjusting the gaps between the pads and brake drums. When the clicking stops, the adjustment is complete. We adjust the parking brake (see Adjusting the parking brake of a Chevrolet Lanos). We check the ease of rotation of the suspended wheels with the parking brake lever fully lowered. We check the fluid level in the tank and, if necessary, bring it up to normal.
Pad selection
The choice of rear brake pads for Lanos should be approached carefully, because not only braking while driving, but also how the parking brake will work depends on them.
96226110 – this is the original catalog number of the Chevrolet Lanos rear brake pads. The average cost in the Russian Federation is 2000 per set.
There are quite a lot of manufacturers that produce analogues, but we will consider only those that, based on experience, are installed by car owners.
| Manufacturer's name | vendor code | Average price in rubles in the Russian Federation |
| Denckermann | B120077 | 1000 |
| Pilenga | BS-P 8835 | 1500 |
| Mando | MLD04 | 1500 |
| Koreastar | KBSD-003 | 1500 |
| NiBK | FN11622 | 1500 |
| Jurid/Bendix | 362218J | 1800 |
| TRW | GS8543 | 1800 |
| Delphi | LS1622 | 1800 |
| Brembo | S 59 513 | 1800 |
| Goodwill | 2115 RB | 2000 |
| Nipparts | J3500900 | 2000 |
| Valeo | 562078 | 2000 |
| Textar | 91044900 | 2000 |
| Blue Print | ADG04116 | 2000 |
| Ferodo | FSB4017 | 2000 |
| Sangsin | SA055-N | 3000 |
All the manufacturers presented in the table produce high-quality spare parts that fit perfectly into the standard Lanos seats.
Tuning
Many car enthusiasts want to improve the rear brake; to do this, they replace the standard drums with ventilated disc brakes. This operation is done quite simply, but in frequent cases, the hub needs to be replaced.
The old rear drums are thrown out and replaced with brake discs, calipers and front pads. This significantly improves the car's braking. These and Sparko offer a full set of rear ventilated brake discs.
Will be useful: Will cable cars be able to overcome traffic jams?
As practice shows, disc brakes are 30% more efficient in use, and replacement is carried out in the same way as front brakes. In this case, you do not need to buy separate pads for the rear and front parts. It is enough to buy 4 sets of front pads (each set contains 2 pads).
Daewoo Lanos › Logbook › Daewoo Lanos HatchBack: replacing the brake drum
When performing the next replacement of the rear brake pads (RBB), or carrying out other repair work, motorists often notice that replacing the pads will not yield anything as a result, that is, more serious work will be required, which concerns not only the pads, but also the brake drum itself.
Excessive wear of the brake drum can be identified by characteristic grooves on its inner side, braking becomes ineffective, and replacing the brake pads does not lead to anything. Today I will talk about how to independently replace a brake drum using the Daewoo Lanos as an example. The article will also be useful to owners of Daewoo Nexia, Chevrolet Lanos, as well as all models that are based on the platform of the cars described above.
So, replacing a brake drum yourself is a detailed guide.
Before we begin, let’s traditionally go through the tools. You will need: A wheel wrench. Support stand. Jack. Metal grid. The key is "24". Pliers and a flathead screwdriver.
A small digression: replacing the brake drum is inevitable when its internal diameter is greater than or equal to 201 mm.
Replacing brake drums must be done in pairs, that is, on both sides at the same time. Replacing the brake drum on the left side while leaving the right drum intact is a big mistake. In addition, along with this event, it is recommended to replace the wheel bearings; read how to do this here. And lastly, when you change the brake drums, don’t be lazy and replace the brake pads.
Now that the tool and all the necessary accessories are available, you can safely begin carrying out repair work to replace the brake drums. It is necessary to install wheel chocks under the front wheels and set the gear shift lever to the first position. Next, remove the bolts that secure the rear wheel to the drum; it is better to do this before jacking up the car. Place the jack in the special grooves and jack up the rear of the car so that the wheels hang in the air without touching the ground. Just in case, install wheel chocks or special stops under the wheels that remain on the ground to prevent the car from rolling. Now completely unscrew the mounting bolts and remove the rear wheel.
6. If necessary, clean the part of the drum that is in contact with the hub from dirt and rust, use a metal brush to do this.
7. Remove the protective cap from the hub.
8. Align the locking pin tabs and remove the castle nut cotter pin.
9. Remove the bearing thrust washer.
10. Remove the outer wheel bearing, it has a conical shape.
11, Now you can remove the brake drum itself, be extremely careful, there is no need to rush here. If you encounter difficulties with removal, do not rush to use a hammer or brute force, such actions can only harm the brake system and the wheel hub itself. Light tapping on the wooden attachment is allowed.
12, Remove the old brake pads, after which you can install new ones, I wrote about how to do this in my recent article
13. Take the new brake drum and install it in the reverse order of removal.
14, Adjust the wheel bearing and install the wheel in place.
15. Tighten the wheel bolts, after lowering the car to the ground, tighten it.
New brake drums and brake pads will be ineffective at first and this must be taken into account; avoid sudden acceleration and braking. Keep your distance and allow for the fact that the brakes will work with 70% efficiency, so brake in advance to avoid unpleasant situations. Also, remember that it is very easy to burn new brake pads, after which they will never be 100% effective.
Replacing the rear wheel bearing Chevrolet Lanos 2005 – 2009
Tools:
- Wheel key
- Screw jack
- Wheel chock (shoe)
- Chisel
- Large hammer
- Kerner
- Pliers
- Medium flat screwdriver
- Open-end wrench 24 mm
- Mandrel for pressing bearings into a 39 mm hub
- Mandrel for pressing bearings into a 49 mm hub
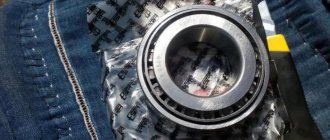
Parts and consumables:
- Grease
- Rags
- Rear wheel bearing oil seal (GM 94535474)
- Rolling bearing race (GM 94535210)
- Rear wheel inner bearing (GM 94535218)
- Rear wheel bearing (GM 94535209)
1. Loosen the wheel bolts on the Chevrolet Lanos.
2. Engage 1st gear and install wheel chocks (shoes) under the front wheels. Raise and place the rear of the vehicle on secure supports.
3. Remove the corresponding wheel.
4. Using a thin chisel and hammer, carefully press the protective cap out of the hub and remove it.
Wheel hub protective cap.
5. Using a screwdriver, straighten the bent leg of the cotter pin, straighten it and remove the cotter pin from the pin hole.
How to remove the rear drum on a Lanos
The brake drum is removed to replace it if the working surface is damaged or worn (the maximum permissible drum diameter is 201.0 mm), as well as to monitor the condition of the brake mechanisms, replace brake pads and working cylinders.
The brake drum is made integral with the rear hub.
Perform the work on a vehicle with the rear wheels hanging (on a lift or a vehicle supported by a jack). The parking brake lever must be lowered all the way down (the car is released).
You will need: a wrench for the wheel bolts, a 24mm socket, a thin chisel, a hammer, a caliper, two mounting blades.
1. Engage 1st gear and install thrust blocks under the front wheels.
It will be useful: How to make cruise control with your own hands?
2. Remove the decorative cap of the rear wheel (see “Replacing a wheel”, page 38).
3. Hang up the rear wheel and place the rear part of the car on a support on the side of the drum being removed. Remove the rear wheel (see “Replacing a wheel”, page 38).
4. Using a thin chisel and hammer, carefully press the protective cap out of the hub.
5. ...and remove it.
6. Using a screwdriver, bend the bent tab of the cotter pin and straighten it.
7. . and remove the cotter pin from the pin hole.
8. . Loosen the rear hub nut.
9. ...and unscrew the nut.
10. Remove the thrust washer from the axle.
eleven. . inner ring of the outer bearing.
12. . and remove the brake drum along with the inner wheel bearing and oil seal.
13. Measure the diameter of the working surface with a caliper. If it exceeds the maximum allowable, the drum must be replaced.
13. Inspect the working surface of the drum. It should be even, smooth, without ring marks and clearly visible ovality (ovality should be no more than 0.5 mm, it can be determined by the unevenly worn surface of the drum). If the ring marks are very deep or uneven wear on the working surface is clearly visible, replace the drum.
Replace brake drums in pairs (left and right at the same time)
Inspect the surface of the brake pad linings.
If traces of lubricant are found on them, it means that the hub seal is damaged and must be replaced (see “Replacing the rear hub bearing,” page 173).
If the linings are wet with brake fluid, it means that the seals of the working cylinder are leaking, replace it (see “Replacing the working cylinder of the rear wheel brake”, page 199).
15. Check that the hub bearings rotate easily and quietly. Replace the bearings if necessary (see “Replacing rear wheel bearings”, page 173).
16. Similarly, remove and check the right brake drum.
17. When installing the old drum, use a file to remove the collar on the working surface of the drum, formed as a result of wear.
18. Reset the clearance adjuster (see paragraph 20 “Replacing the brake pads of the rear wheel brake mechanism,” page 197).
19. Bring the brake pads together with two mounting blades.
20. Install the drum in the reverse order of removal. Adjust the rear hub bearings (see “Adjusting the rear hub bearings,” page 173).
21. Adjust the gap between the brake pads and the drum by pressing the brake pedal 10-15 times. Each time you press the knob you should hear a click. As soon as the clicking stops, the gap is set.
22. Press the protective cap into the hub.
23. Install the wheel and decorative cap (see “Replacing the Wheel,” page 38).
24. Check that the wheel rotates easily.
Light brushing of the drum against the pads is allowed.
Removing the brake drum - Chevrolet Lanos/Sens/Chance Club Forum
Chevrolet Lanos - replacing pads (rear, drum)
If traces of lubricant are found on them, it means that the hub seal is damaged and needs to be replaced, see Remove the protective cap from the hub.
Chevrolet Lanos, replacement of rear brake pads (drum) avtoremont13.ru Electro-Light & Jordan Kelvin James -…
Similarly, remove and check the right brake drum.
Press the brake pads together with two mounting blades. Adjust the gap between the brake pads and the drum by pressing the brake pedal 10-15 times. If the ring marks are very deep or uneven wear on the working surface is clearly visible, replace the drum.
Replacing pads in the rear brake drums of Daewoo Lanos
The average service life of Daewoo Lanos is about 30,000 (km) . The signal for an emergency replacement of the pads is the threshold minimum thickness of the working linings, which is 1.5 (mm) .
Competent drivers inspect rear brake drums at least once a year . If Daewoo Lanos has to drive around often and for a long time, then the brake drums require inspection twice a year: in spring and autumn . Inspections are carried out for the most part not for a scrupulous inspection of the elements of the brake system, but to clean out abrasive from under the drum cover, which remains from wear of the pads and the drum itself.
Replacing the pads in the rear drums of Daewoo Lanos, although not difficult, is still included in the list of the most important jobs . The fact is that in the process of replacing the pads, the brake mechanism must be adjusted. Incorrectly adjusted position of the pads and incorrect tension of the parking brake can lead to serious troubles on the road. It is for this reason that rear brake pads should be replaced by a technician with at least 3-5 years of driving experience .
When it may be necessary to replace the rear pads on a Chevrolet Lanos
Fair wear on the pads.
In the first case, when it is necessary to replace the pads as a result of their wear , the permissible thickness of the lining should be within 1.5 millimeters. For this purpose, a special window is provided, which is located in the support disk. Using it you can control the wear of the linings.
Such a window is not very well located, and therefore many determine the degree of wear by sound. In this case, metal-on-metal friction will be heard.
There is also a third case when the pads may need to be replaced. This is when lubricant or brake fluid gets on their surface . Such work can be carried out even if the pads are not worn out, but brake fluid has got on them. Of course, such work can be done at will, but safety regulations require it.
The process of replacing rear brake drum pads on Daewoo Lanos
- We stop and turn off the car on a flat and solid platform. We install wheel chocks under the front wheels.
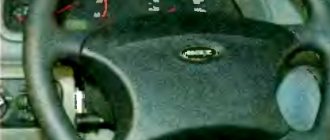
- First you need to loosen the parking brake . The tension adjustment nut is located in the molding body, immediately behind the ashtray. Remove the ashtray cover .
- We pry up and remove the ashtray body . This can be done with a small flathead screwdriver.
- Using a socket wrench (tubular wrench) 10, loosen the adjusting nut . There is no need to completely unscrew the fasteners .
- Let's move on to the rear wheels. Let's start with the driver's side. Loosen the wheel bolts .
- Using a jack, we lift the left rear part of the Daewoo Lanos and install a safety stop.
- Remove the wheel by completely unscrewing the bolts.
- Remove the boot (cap) of the hub nut.
- We take out the cotter pin that secures the hub nut.
- Unscrew the hub nut.
- We unscrew the secret screw that secures the brake drum cover (if there is one).
- Remove the drum cover . Please note that it happens that the parking brake cable jams and releases the pads even when the handbrake adjusting nut is unscrewed. In such cases, you just need to cut the cable at the entrance to the drum . Of course, after that you will have to change the parking brake cables.
- First of all, remove the upper spring . We resort to using a screwdriver or pliers.
- We remove the side return spring of the Daewoo Lanos brake. There is the same one below, let's remove it too.
- We take out the pad clamping springs . That is, each of the pads is fixed to the hub with a special clamp . To remove it, you need to press the spring and turn the lock so that it disengages from the pressing surface.
It will be useful: How to paint a bumper with your own hands?
- Remove the end of the parking brake cable from the shoe lever.
- We take out the old pads.
- From the old pads you need to remove the earring, flag and adjusting mechanism . Please note that the shoe clearance adjustment mechanism must be thoroughly cleaned and the ratchet mechanism must be developed so that the nut moves easily along the thread .
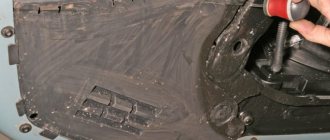
- Carefully clean any remaining abrasive from the drum cover and hub. It is better not to breathe this dust, since the pads contain asbestos, which has an extremely negative effect on health .
We assemble the Daewoo Lanos brake assembly in the reverse order:
- We fix the pads with clamping springs
- We engage the end of the parking brake cable into the engagement of the shoe lever.
- Installing the earring and flag
- Replace the brake pad clearance mechanism
- Installing the side and bottom springs
- Installing the upper spring
- Thoroughly wipe the working surfaces of the pads with an alcohol wipe.
- Replace the brake drum cover (its working surface must also be treated with alcohol)
- Please note that the cover may not be installed immediately due to incorrectly set pad clearance. In this case, it is necessary to tighten the pads manually using the adjusting mechanism .
- After installing the wheel, we carry out all the above operations on the opposite side.
- We adjust the tension of the parking brake cable (with the nut under the ashtray).
- We do a test drive and check the operation of the rear brakes.
What was used when replacing the rear brake drum pads of Daewoo Lanos?
- Set of wrenches (open-end, socket, socket)
- Screwdriver Set
- Pliers
- Jack
- Wheel chocks
- Safety stands
- W.D.-40
- Wire brush
New brake pads will also be needed . Please note that the pads for the left and right sides are not interchangeable , that is, pads are needed to be installed specifically on the right and left wheels separately.
In some cases, along with the pads, the springs and ratchet mechanism may also need to be replaced . Repair kits for servicing rear brake drums are available for sale .
Additionally, repair of the release cylinder . There are special repair kits for servicing this unit. Sometimes the pads are changed in tandem with parking brake cables ; they can also be purchased (cable for the left side and cable for the right side).