Technical recommendations for adjusting the clutch on Lada Kalina
Car enthusiasts were looking forward to 2004.
This year AvtoVAZ released a new car, Lada Kalina. It was positioned as a worthy replacement for more expensive foreign models in this class. The desire of people to see Kalina quickly was as strong as the disappointment that befell them. It did not live up to the wishes of the people and became another inglorious moment in the history of the plant. The car caused a lot of criticism, both from an appearance and comfort, and from a technical point of view. One of Kalina's weakest points is the clutch.
Although, looking at the description of its design, it would never have occurred to me that problems might arise with it during operation.
Photo: jeka3000 (Public domain)
Kalina clutch design
Single-disk - is of the dry type, has a central pressure spring. The pedal and clutch disc are connected by a cable. For this, a special ratcheting mechanism is used that automatically adjusts the length of the cable.
Time leaves its mark on everything, including the linings of the driven disk - they wear off and become thinner. The ratchet mechanism compensates for this wear by tightening the cable. This happens by turning the release fork, which forces the spring located in the bushing of the adjustment mechanism to compress. That, in turn, tightens the clamps of the toothed tip of the cable. The tip is released and tensions the cable.
The purpose of the ratchet mechanism is to make life easier for owners. It saves them from having to waste time and effort on self-adjustment. But this is in theory. Practice has shown that a car cannot be operated without adjusting the clutch.
When adjustment is necessary.
Warning: Inspection and adjustment work must be carried out with the engine turned off.
1. Press the pedal several times in a row and listen for any extraneous noise (clicks, squeaks, etc.)
Pay attention to how the pedal moves: does it stick or not?
If it is not possible to determine by eye whether it returns freely to its place, but there are suspicions, then do the following:
- press the clutch fully by hand;
- release, but your hand should be on the pedal in order to feel its movement, but not interfere with it.
If it jams or returns to place with characteristic twitching, then adjustment of the Kalina clutch is necessary.
2. Take a ruler and measure the distance from the floor to the outside of the pedal. Press the pedal until it hits the floor. Release and remove the size again: if the distance is more than 14.6 cm, then the pedal travel needs to be adjusted to the standards.
3. Parameters, deviation from which requires adjustment:
- full pedal travel – 14.6 cm (less can be done, but not more than the specified value);
- the lower cable guide can move relative to the release fork lever by a maximum of 2.7 cm;
- runout of the driven disk linings – no more than 0.5 mm;
- the distance between the working surfaces of the linings and the rivets that hold them is 0.2 mm. (less than that is unacceptable).
Adjusting the Kalina clutch.
1. Remove the air filter.
2. Pull the end to give the cable maximum tension.
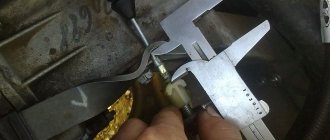
3. Take a caliper and measure the distance between the leash and the fork lever. If the distance does not correspond to the recommended above 2.7 cm, use a leash to correct the dimensions. To do this, rotate it along the thread of the tip.
4. After setting the dimensions, press the clutch several times and take new measurements. If you're wrong, correct it again. And so on until you achieve the desired results.
Kalina's clutch tends to fail at critical moments. But, as you can see, the simplicity of its adjustment becomes a balm for the soul.
To be more precise, we will talk about adjusting the clutch cable
on Lada Kalina. The Kalinovsky cable is much easier to adjust than the same cable on the 9, 10, 15. All because of the installed auto-compensator, which does this work for you. So if the autocompensator does everything itself, then why bother with it at all? Let's figure it out.
The fact is that for the correct operation of this machine, the clutch cable must be installed correctly. Correct installation is determined by measuring and adjusting several distances. The first is between the clutch fork and the plastic cable end. We pull the cable to the maximum possible distance, holding on to this plastic tip and using a caliper we measure the gap - it should be 27 mm (as in the book). To get to the fork you need to remove the air filter. If the distance is not the same, we adjust it to the norm using the same plastic tip.
How to adjust the clutch on a Niva?
How to properly release the clutch. How to learn how to properly release the clutch smoothly? tips for beginners. How to avoid burning your clutch in traffic
Conclusion
Although the adjustment work is not a difficult task, it requires some attention and patience. However, with the right approach, success will not keep you waiting. Good luck with the renovation.
During the operation of the car, sometimes it becomes necessary to adjust the clutch drive. This happens because over time, the pedal stroke changes as a result of natural operational wear of the rubbing parts of the clutch (driven and driven disks, flywheel surface) and (or) pulling of its cable.
In another case, the need to adjust the clutch drive may arise due to previous incorrect adjustment. It is possible to reduce or increase the working stroke of its pedal. As a result, malfunctions occur in the operation of the drive - the clutch begins to “slip” or “drive”, gear shifting becomes difficult, jerks appear when starting from a standstill, fuel consumption increases, etc.
Here we will consider a simple adjustment of the clutch drive (clutch pedal travel) on VAZ 2108, 21081, 21083, 2109, 21091, 21093, 21099.
Tools required for adjusting the clutch of VAZ 2108, 2109, 21099
— tape measure with a clearly readable scale
— two 17 mm open-end wrenches
open-end wrenches for 17 and a tape measure - all you need to adjust the clutch drive on eights, nines and ninety-nines
Preparatory work
— fix the car (put chocks under the wheels)
— remove the battery (you don’t have to remove it, but it’s easier to make adjustments with the battery removed)
- press the clutch pedal several times
Checking the working clutch pedal
Let's measure the travel of the car's clutch pedal. Before doing this, we move the carpet on the floor of the car back so that the measurements are more accurate.
- use a tape measure to measure the distance from the floor of the car to the bottom edge of the clutch pedal
The image shows how best to do this.
the actual distance from the bottom edge of the clutch pedal to the floor under the driver’s feet, measured using a tape measure
It should be approximately 18-20 cm.
— press the clutch pedal all the way with your hand and measure the distance from the floor to the bottom edge of the pedal.
the distance from the floor under the driver’s feet to the bottom edge of the clutch pedal when it is pressed all the way - the clutch is “disengaged”
It should be 6-7 cm
- subtract from 18-20, 6-7, it turns out 13-14 cm
This is the norm for the full travel of the clutch pedal of VAZ 2108, 2109, 21099 cars and their modifications. Many repair manuals indicate a working stroke size of 12.5-13.5 cm, which is also very close to our measurement.
If the clutch pedal travel differs more or less, it is necessary to adjust the clutch drive.
Adjusting the clutch drive VAZ 2108, 2109, 21099
The clutch drive adjusting nut is located in the engine compartment of the car on the drive cable sheath, inserted into a special bracket mounted on the gearbox housing. It is protected from unscrewing by a lock nut located there.
clutch drive adjusting nut and its locknut on the bracket
— Holding the adjusting nut with one 17 mm wrench, use another 17 mm wrench to loosen the lock nut a few turns
loosening the locknut using two open-end wrenches 17
— We rotate the adjusting nut clockwise with one key, holding the locknut with the other - this is to increase the clutch pedal travel (the pedal will rise) or counterclockwise to decrease its travel (the pedal will lower to the floor)
rotation of the adjusting nut - adjustment of the clutch drive
How much to reduce or, conversely, increase the pedal stroke is determined based on the results of the check described above.
- Lightly tighten the locknut
— Press the clutch pedal several times and check again
If the resulting figure does not fit within the norm, we carry out the adjustment again. And so on until we achieve the required result.
— After completing the adjustment, tighten the locknut
Notes and additions
— When the clutch is correctly adjusted, its pedal should be approximately at the same level as the brake pedal.
The clutch pedal is approximately at the same level as the brake pedal - the drive is adjusted correctly
— The maximum permissible working stroke of the clutch pedal for VAZ 2108, 21081, 21083, 2109, 21091, 21093, 21099 cars is 16 cm.
Five more articles on VAZ cars
Lada Kalina clutch adjustment video
Like all “basins”, Kalina is not at all flawless. Over its more than ten-year history, the model has been refined more than once, but it has not been possible to get rid of some problems. Among the “Kalinovodov” it is recognized that the torque transmission mechanism, due to its design features, is the weak link of the car. Despite all the modernization in this area, car enthusiasts have to periodically adjust the clutch.
Features of the VAZ 2112 clutch
The machine is equipped with a dry-type single-plate friction clutch with a central pressure spring. Before adjusting the clutch on Kalina, any motorist must take into account that the control pedal is connected to the disc via a cable with a special ratcheting mechanism.
How does automatic cable tightening work?
As a result of intensive use, the friction linings of the disc gradually wear out. The ratcheting mechanism built into the drive design allows you to compensate for wear for a certain period of time - it gradually tightens the cable. During operation of the device, the fork rotates and the bushing spring is gradually compressed. As a result, the cable end clamps are compressed, after which the latter is released and tensions the cable.
The purpose of this design is to facilitate the maintenance process. According to the plans of VAZ engineers, the mechanism should save the owner from the need to make adjustments himself. But this is all only in theory, but in practice it turns out that you cannot do without adjusting the clutch.
Before adjusting the clutch on a Kalina car, you need to determine the moment when the automatic cable locking no longer functions. This is not difficult, especially since the machine itself signals problems:
- Loss of traction, friction clutch does not provide a reliable connection between the flywheel and the disk. The consequence of such a defect will be the loss of a significant part of the torque force.
- The clutch control pedal does not return to its initial position, which, in fact, is a consequence of the first point.
- Poor clutch disengagement - the pedal is not pressed all the way, which makes changing gears difficult.
The symptoms, however, are similar to those when clutch adjustment is needed on a VAZ 2107, so experienced car enthusiasts can skip this unit and proceed directly to the test.
How to check the clutch?
To make sure that the mechanism needs to be adjusted, you should perform a number of basic checks:
- Press the pedal several times and release - any extraneous sounds are unacceptable. For better control, you can press with your hand, this way you can feel the pedal stroke more fully.
- Check the pedal for sticking; if it returns with noticeable twitching, then adjustment is necessary.
- Check the full travel of the pedal using a ruler or tape measure. Press and release the pedal several times, then measure the distance of its outer edge to the floor; if it is more than 146 mm, then the mechanism needs to be adjusted.
- Check the movement of the cable guide relative to the clutch release fork; the maximum distance between these elements is 27 mm.
- If the runout of the driven disk linings is more than 0.5 mm, adjustment is also required.
When performing checks, it is important that the car engine is turned off. You need to start working no earlier than the engine has completely cooled down.
The setup method is simple and does not require a visit to a car service center, because you can do everything yourself. The step-by-step scheme for completing the work is as follows:
You should start working no earlier than the engine has completely cooled down. The setup method is simple and does not require a visit to a car service center, because you can do everything yourself. The step-by-step scheme for completing the work is as follows:
- Before adjusting the clutch drive on Kalina, you should open the engine compartment hood and remove the air filter.
- Visually assess the condition of the cable casing and replace it if damaged.
- Pull the tip toward you until the cable is fully tensioned. After this, check the distance between the fork and the leash with a caliper.
- If the measurements show more than 27 mm, then the distance is corrected by rotating the leader along the thread of the tip.
- Press and release the clutch pedal several times and repeat the measurements.
- If necessary, repeat the adjustment until the required standards are achieved.
The technology for setting up the clutch on Kalina is not as complicated as installing the clutch on a VAZ 2110, and therefore is quite feasible in a garage without the involvement of specialists. And this fact pleases domestic motorists, because the clutch plays an important role in driving a car.
Autobann.su
Diagnosis of clutch faults
Lada Kalina is equipped with a “dry” clutch with one disc and a central pressure spring. The disc is connected to the clutch pedal (CP) using a cable. The interaction is carried out using a cable, which is the weak point in the node. Adjustment is carried out using a ratchet mechanism, which is a rod with a thread and a control nut.
Clutch diagram for Lada Kalina
Over time, the linings on the disc wear out and become thinner. Wear largely depends on the driver's driving style. For those who like to tear it apart, the unit will not last long and will need to be repaired. Using a ratchet mechanism, insufficient thickness of the lining is eliminated by tightening the cable. This happens by turning the release fork, it forces the spring located in the bushing to compress. The spring acts on the tip clamps, releases it and, thus, tensions the cable.
Correct adjustment of cable length
Thanks to the ratchet mechanism, the length of the cable is automatically adjusted. But despite this, sometimes you have to adjust it manually.
There are obvious signs by which you can diagnose whether the clutch assembly needs to be adjusted, namely:
- problems when shifting gears;
- extraneous sounds when squeezing the PS: creaking, friction, clicks;
- the clutch does not disengage/engage completely;
- poor traction;
- jamming when moving the PS.
The video by Sergei Tsapyuk explains the reason for the pedal being too tight and how to fix the problem.
Using simple steps, you can identify other signs indicating that the clutch on the Lada Kalina needs to be adjusted:
- start the engine;
- press the PS several times, listening to the sounds, whether there are any creaks or clicks;
- press the pedal to the floor, release it and measure the distance from the floor to the pedal - full stroke PS: it should not exceed 14.6 cm, if you need to tighten the cable more;
Measuring the distance between the floor and the pedal
- the free play of the PS should be 2.5 - 3 cm;
- the runout of the linings on the driven disk should not be more than 0.5 mm, and the gap between the linings and the rivets holding them should not be more than 0.2 mm.
If the above symptoms are detected, then it is necessary to either adjust the clutch or replace it.
Lada Kalina clutch adjustment video
Car enthusiasts were looking forward to 2004. This year AvtoVAZ released a new car, Lada Kalina. It was positioned as a worthy replacement for more expensive foreign models in this class. The desire of people to see Kalina quickly was as strong as the disappointment that befell them.
It did not live up to the wishes of the people and became another inglorious moment in the history of the plant. The car caused a lot of criticism, both from an appearance and comfort, and from a technical point of view. One of Kalina's weakest points is the clutch.
Although, looking at the description of its design, it would never have occurred to me that problems might arise with it during operation.
Photo: jeka3000 (Public domain)
Changing the clutch cable on a Lada Kalina with your own hands
The clutch cable of the Lada Kalina, as on any car, is one of the irreplaceable and important parts that performs the function of turning the clutch on and off when changing gears.
A malfunction of this unit can affect the operation of the power unit, and untimely replacement will lead to increased wear of other structural elements. Video on replacing the clutch cable on Kalina: 1. From the passenger compartment under the instrument panel (for clarity, the work is shown with the panel removed) unscrew the fastening nut the cable sheath stop to the pedal bracket and remove the stop from the pin.
2. Using a screwdriver, remove the locking bracket and the housing of the driven disc lining wear compensation mechanism from the clutch pedal rod.
3. In the engine compartment, remove the clutch cable sheath seal from the hole in the partition located between the passenger compartment and the engine compartment. 4. By pulling the cable forward in the direction of vehicle travel, pull the cable out of the recess on the clutch release fork.
5. Unscrew the leash from the cable end, remove the guide sleeve of the cable sheath from the hole on the gearbox bracket and remove the cable from the car by pulling it out of the hole in the partition.
6. To install a new clutch cable, start by passing the cable through the hole in the front panel, secure it to the clutch pedal rod, and also secure the wear compensation mechanism housing. 7. Attach the cable sheath stop to the pedal bracket stud. 8. Install the cable sheath seal into the hole in the partition. 9. Pass the cable through the hole in the bracket on the gearbox and install the guide sleeve of the cable sheath into this hole. 10. Screw the leash onto the lower end of the cable, ensuring that the tip protrudes relative to the end of the leash by 0-1 mm.
Replacing and adjusting the clutch cable on a viburnum
Welcome! Clutch cable - thanks to it, you can control the clutch fork, and at that moment it can disconnect the clutch from the flywheel, thanks to the release bearing, a cable is used on all front-wheel drive cars, because their gearbox is located deep in the front, on classics Together with the cable, the main and slave cylinders of the clutch are used (there is no clutch cable), these cylinders work differently, unlike the cable (the cable simply pulls), but the result is the same (the clutch is disconnected from the flywheel due to the release bearing) and the effect occurs due to one and the same unit, namely thanks to the clutch pedal.
Note! To carry out the replacement work, you will need to use: Be sure to use wrenches, as well as in addition to them, any other wrenches that can be used to unscrew bolts and nuts can also be used, in addition to this, you will also need a caliper or instead a ruler and stock up on pliers!
Summary:
Where is the clutch cable located? We won’t be able to show you in detail where it is, because it is located at the bottom and the angle that was taken in the photo below simply won’t allow you to look into that place, but we’ll still try to describe where it is, first, find the box, it’s for For clarity, the red arrow is indicated in the photo, this gearbox is connected to a cable that comes from the passenger compartment, so you can already make an approximate conclusion about where the cable goes, in addition to all this, pay attention to the blue arrow, which also shows approximately the location of the clutch cable in under the hood of the car.
When should you change the clutch cable? Any cable, including the cable that goes to the handbrake, which goes to the gas (the throttle cable is correctly called) must be replaced if it breaks (If it breaks, you will not be able to use the system to which the cable goes, for example, the gas cable breaks, the car no longer will go, the clutch cable has broken, the clutch system will no longer work in the same way), with strong stretching, which by the way will greatly disrupt the operation of the clutch system (the clutch may not be completely disconnected from the flywheel, thereby changing gears will be harder and with a crunch), as well as it changes when souring, and souring of the cable is possible only if the car has not been used for a long time or is used in extreme winter conditions; when souring, the clutch pedal will be very difficult to press and will not be willing to return back, which can soon lead to an emergency situation on the road and therefore this the cable needs immediate replacement.
When adjustment is required
Clutch adjustment
Clutch adjustment is only performed when the engine is switched off. It is required if there is a deviation from the following values:
- full pedal travel does not exceed 146 mm;
- movement of the cable lead relative to the release fork lever - within 270 mm;
- runout of the dependent disc linings does not exceed 0.5 mm;
- the distance between the pads and the rivets that hold them is 0.2 mm or less.
There are several ways to check if your car needs a clutch adjustment.
- You should press the pedal several times in a row and listen for any extraneous noise. If the clutch pedal sticks or squeaks, it is advisable to make an adjustment. In some cases, car owners are unable to visually assess whether the pedal returns to its place freely. In such situations, it is recommended to do the following:
- press the clutch with your hand until it stops;
stop applying force, but leave your hand on the pedal in order to feel if there is movement.
If the clutch pedal sticks and clicks, or it returns to its original position with characteristic jerking, you need to adjust the clutch.
One of the disadvantages of the Lada Kalina is problems with the clutch. To avoid visiting a car service center and save time and money, you can diagnose the malfunction and adjust the clutch on the Lada Kalina yourself in the garage. The article describes step by step how to adjust the clutch, and also includes a video that demonstrates the entire procedure.
First adjustment method
There are two ways of regulation. Let's look at the first one:
- Pick up the tip and pull it forward as far as it will go.
- Arm yourself with a caliper and measure the distance from the fork to the leash. The norm is 27 mm, no more, no less.
- If a problem is still observed, adjust the length of the cable by tightening the thread.
- Press the clutch pedal three times and make sure everything is working properly.
Repeat the operation until the pedal travel is normal and the clutch operates optimally. You also need to take repeated measurements using a caliper. The distance between the extreme points should be no more than 146 millimeters. If you notice that the distance is still greater than the specified value, you will have to install a new cable (therefore, we advise you to keep a spare one on hand).
How to repair the clutch on a Lada Kalina yourself
Device and principle of operation
The clutch is designed to transmit torque. The clutch drive is the connecting link between the gearbox and the engine, serves to switch gears in the gearbox, and provides braking and starting. The vehicle moves through the clutch pedal (CP) using a lever mechanism.
There are many options for choosing a device, so you need to familiarize yourself with its design and operating principle.
The Lada Kalina has a dry type device with a central pressure spring and one disk. The length of the cable is adjusted using a ratchet mechanism. The principle of its operation is as follows:
- when the cable is tensioned, the drive fork is rotated, the spring is compressed;
- following its compression, the clamps located at the tip of the cable are compressed;
- the tip is released and the cable is tensioned.
Despite the presence of a ratcheting mechanism, the clutch on the Lada Kalina requires adjustment from time to time. But this operation, as well as replacing the unit, can be handled by any car enthusiast.
Types of unit malfunctions and traditional methods of first aid on the road
- Slipping. At first it appears in higher gears, then it begins to be observed in lower gears. In this case, the engine gains speed, but the speed does not change, and eventually the car stops. Along with slipping, an untidy burning smell appears. If these two symptoms appear, you need to replace the clutch cable. The problem may be different, for this you need to carry out additional diagnostics. The main reason for slipping is free pedal movement.
- The clutch does not engage. This situation occurs when the first gear is engaged, and a grinding noise appears from the gearbox. The cause of the malfunction is increased free play of the PS. If you do not pay attention to this, the gearbox may fail in the near future.
- When you press the clutch pedal, the car moves jerkily. Smooth operation is disrupted when the components of the unit are significantly worn. You need to replace worn parts as quickly as possible.
- Pedal failures, incorrect movement. When you press the pedal, it becomes sluggish, unruly, the clutch does not return and does not engage completely. A specific noise is heard and the pedal does not return to its original position. The reason is either the spring or the cable. To fix the problem, you will need to replace the faulty elements.
If on the way the pedal suddenly fails and the car cannot drive under its own power to the nearest service station, the driver has three action scenarios:
- ask a friend or driver of a passing car to tow the stalled car to the nearest service station or garage;
- call a tow truck.
If you were unable to use the first two options, you can try to restore the clutch yourself in order to make it to the service station in such a car. In this case, the driver must perform the following actions:
- turn off the engine;
- set the gear knob to the first position;
- Turn the ignition key to start the engine and simultaneously press the clutch pedal.
The car will start to drive slowly; you should not engage second gear. It’s possible to get to the service station this way. If you try to engage second gear, it will instantly damage the gearbox. Transmission repairs are very expensive.
How to use the clutch correctly
The service life of a car largely depends on how it is cared for and used correctly. Regarding the clutch, the driver must know the following operating rules:
- The clutch should be engaged smoothly, and it should be released more abruptly, but do not drop the pedal.
- You should not keep the car on the wheel when climbing. In this case, it is better to use the handbrake.
- In winter, engine oil thickens, making it difficult for the starter to turn the gearbox input shaft. Therefore, it is strictly forbidden to start the engine with the clutch engaged. Starting should be carried out either with a warm engine or with the clutch disengaged. If the engine is not warm enough, it may stall.
- It is advisable to change gears quickly so that there are no “throws” of the gearbox.
- You cannot move for a long time with the clutch pedal pressed to the floor, this leads to malfunctions in the clutch assembly. Your foot should not be kept on the pedal, using it as a stand, but next to it.
Design and operation of the Kalina clutch
The unit is a dry-type mechanism, single-disc, with a central pressure spring. Switching off when pressing the pedal is carried out by a cable equipped with a ratchet. This part allows the cable to automatically change length depending on the wear of the disc linings and ensures a constant backlash-free fit of the clutch with the release bearing to the basket.
The pressure plate together with a diaphragm-type spring are enclosed in a casing. All together is usually called the clutch basket. Between this mechanism and the flywheel there is a driven disk. Its hub is connected to the gearbox input shaft.
When you press on the pedal, the cable tightens, turning the fork. Its lower bushing is pressed into the clutch housing, the upper bushing is removable. The force when turning the fork is transmitted through the clutch and clutch release bearing to the pressure spring and pressure plate, turning off the mechanism.
When the pedal is released, the clutch must fully transfer the engine torque to the transmission. Pressing the pedal normally completely disconnects it from the engine. Signs of the need to adjust the clutch on Kalina include:
- exceeding the full pedal travel (normally 146 mm from the lowered position to the stop on the floor) - adjustment of the clutch cable is necessary;
- when the pedal is pressed, the gear shift occurs with a grinding or crackling sound - the clutch does not disengage completely;
- when starting the engine, you can hear a howling sound in the crankcase - wear of the release bearing;
- jerking when starting to move indicates insufficient smoothness of clutch engagement;
- When driving in 3-4 gears, when you press the gas, engine speed quickly increases, and acceleration slows down - disc slipping, possibly due to wear on the linings or insufficient cable length.
As a rule, it is necessary to adjust the operation of the clutch after it has been repaired to bring the automatic adjustment mechanism into working condition.
This operation may also be required if Kalina has not been used for a long time or worked in winter.
In such cases, the wear compensator may lose some of its functions and cannot cope with adjusting the length of the cable.
How to adjust the clutch cable
So, it’s already clear that you need to adjust the clutch on the viburnum, it’s just not clear how to do it. There is nothing complicated here and it is not necessary to resort to the services of car services, because you can do it yourself. Let's consider the entire procedure step by step for a better understanding of the process:
- Open the hood and remove the air filter;
- Visually evaluate the cable and, if it is in unsatisfactory condition, replace it with a new one;
- Using a caliper, measure the distance between the driver and the fork lever;
- If the obtained value is higher than 27 mm, then it must be corrected by rotating the driver along the thread of the tip;
- Press and release the pedal several times and repeat the procedure;
- It is necessary to repeat until the results align with the regulated value.
You see that the procedure is quite simple and it won’t be difficult to do it yourself. But still, if you were unable to adjust the cable, then contact a car service, because a breakdown is possible directly in the unit itself, which means that it is necessary to replace any element or the entire unit as a whole. And although the Lada is easy to repair, complex work is best done by trained specialists.
Clutch device
The clutch of this model from AvtoVAZ is single-disk and belongs to the dry subtype. It is equipped with a pressure spring located in the center. The pedal is connected to the clutch disc using a special cable, the length of which is adjusted by a ratchet mechanism. This can be seen if you watch a video demonstrating the design of Kalina.
The lining of the dependent disc wears off and becomes thinner during use. The malfunction is eliminated using a ratcheting mechanism, which compensates for wear by tensioning the cable. The tension causes the release fork to rotate and compress the spring, which is located in the bushing of the control mechanism. The spring, in turn, compresses the clamps located on the toothed tip of the cable. As a result of all these manipulations, the tip is released and the cable is tensioned.
The ratcheting mechanism eliminates the need for car owners to waste time and effort on adjustments. But this is only in the theory developed by Kalina's designers. In reality, when operating a car, you need to know how to adjust the clutch yourself.
How to deal with a tight clutch pedal
Most drivers do not want to put up with this state of affairs and try in every possible way to improve the performance of the clutch.
Among the most common recipes for dealing with a tight pedal are the following:
- Replacement of the basket and all clutch assembly elements with a known quality product. The best option would not even be a new Valeo, but the assembly recommended by the manufacturer. Often, for many car enthusiasts, the situation became a revelation when, after replacing cool branded baskets with conventional Russian options, the clutch pedal turned from extremely tight to an option with a comfortable level of effort;
- It is considered cheaper and more accessible to pack all rubbing surfaces with lubricant. To gain access to blind lubrication points, there is a diagram indicating drilling locations, where transmission oil is subsequently pumped with a syringe or oiler;
- Replacing the cable with a stronger model, regularly filling brake fluid or engine oil with a syringe under the casing. If spindle or similar oil still gives a good effect, pouring brake fluid or WD-40 is pointless and useless. They only contribute to the destruction of the outer sheath of the cable.
In addition to cable drives, hydraulic systems also suffer from similar problems. But, unlike the cable, due to the high force on the clutch release fork, the cylinder cuffs are destroyed first, and brake fluid leaks.
The video shows what a stiff clutch pedal is and how to fix the problem:
Correcting the mechanism
If various extraneous sounds appear when the clutch is disengaged during vehicle operation, you need to check the gap on the drive fork and, if necessary, adjust it. Clutch cable adjustment is performed in the following order:
- Remove the air filter and pull out the cable by the tip to its maximum length.
- Using a caliper, measure the distance between the tip and the fork. Normally, this distance should not deviate from 2.7 mm.
- If discrepancies are found, turn the driver on the thread until the desired value is established. Release the end of the cable: it should press tightly against the fork.
- Press the clutch pedal 3-4 times to activate automatic cable length correction, measure again.
The clutch on Kalina may make squeaks and noises even after adjustment. They can be caused by the tip driver rubbing against the fork. The noise in this case comes from the engine side and is eliminated by applying lubricant to the contact point between the cable tip nut and the fork. Other possible causes - pedal creaking, cable grinding when rubbing against the casing - can be eliminated by applying lubricant. In some cases, the source of the noise may be the clutch pedal sensor.
Let's sum it up
We made sure that adjusting the clutch is not a difficult procedure. Adjusting the clutch cable involves carrying out all work with the Lada Kalina 2 engine turned off. When, after performing the entire list of manipulations, extraneous effects (noise, etc.) are still present, then you should go to a service center for a more in-depth diagnosis and elimination of the causes and factors that violate the correct clutch functionality.
Popular domestic model
Lada Kalina is very popular among Russian car enthusiasts, but most of its owners note that the model has a number of significant shortcomings. In particular, criticism is caused by the appearance, comfort and technical equipment of the machine.
Many claims have been made regarding how the Lada Kalina clutch works . Although, reading the instructions for this vehicle, it is difficult to believe that any malfunctions could occur when the clutch operates.
