Replacing the Lada Priora clutch with your own hands
There was a need to change the clutch on the Lada Priora. The symptoms are typical - sensitive clutch slipping in higher gears and high engine torque.
I’ll say right away that I wanted to change the clutch without removing the box and pulling out the CV joints. Which, by the way, contradicts the service manual
Mileage 46000. The main reasons for such an early replacement:
1. This is still my first car, although not my first vehicle) 2. My brother drove the car once (around the tankodrome). after which 10 meters away there was a smell of burnt clutch 3. I had to tow a heavy 1.5-ton Hryundai Tiburon
I decided to change the entire clutch, as an assembly, because at the factory they install two different clutches, the parts of which do not fit each other. You can’t figure out which one is installed on each machine until you take it apart, right? )
I haven’t seen a clutch with a slave with 4 springs and I don’t know anything about it. The clutch with 4 large and 2 small springs is a LUK clutch. It is installed at the factory. The numbers 21703 or 21128 must be present on the driven disk.
Attempts to buy a clutch in local stores did not lead to anything - they offered a standard clutch from 2112 (compatible in size, but not in terms of transmitted torque) and its German analogues (quite suitable if they did not look like obvious fakes). I had to go to the Kuntsevsky car market. At the time of writing, the clutch kit cost 3,400 rubles (I think))
It’s not that you see double, it’s I who didn’t focus)
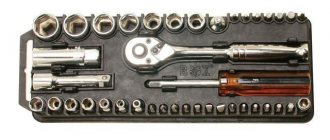
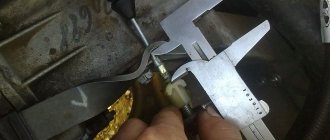
To replace the clutch you needed: 1. Blocks, bricks and a jack - the more the better. 2. Overpass - 1 piece (you can do without it, but it’s probably hard) 3. A set of keys and especially heads with various extensions (the head for 8 and 19 turned out to be the most useful. The relatively rare 15 is also needed!) 4. A short mandrel for centering the slave disk (10-12 cm) 5. A tube of lithol or something similar was also useful for lubricating the box shaft and threads.
What was done (the order may not be followed and something might have been missed): 1. The battery was removed 2. The air filter assembly was removed, the air sensor cable was uncoupled. 3. The starter was removed, its terminals were disconnected 4. The engine protection (boot) was removed, the front clutch cover was removed 5. The car was hung, the front wheels were removed (this is possibly unnecessary)), the ball joint mounting screws were unscrewed (without this, nothing would have worked out for me) ). 6. The drive shaft was uncoupled from the gear selector lever, the left reaction mount was uncoupled (the one that is attached to the gearbox) 7. I placed bricks and blocks under the engine, and unscrewed the gearbox mount (the left one). The engine and gearbox tilted and stood on my barricade. 8. Unscrewed 3 screws and one nut connecting the box and the engine. 9. I began to pull the box away from the engine (I first put a block under it for insurance). My box lay with the end farthest from the engine on the stretcher and never went down. I shuffled the box until a sizeable gap formed between it and the engine.
To make your work easier, keep in mind that the racks (for brake discs, for example) need to be moved in the direction where you want to pull the box. Otherwise they will interfere.
10. Removed the old clutch by unscrewing the basket from the flywheel. I unscrewed the screws one by one, turning the engine by hand (here I needed an 8-mm head, I even had to go buy one). I took the release bearing out of the box bell by hand.
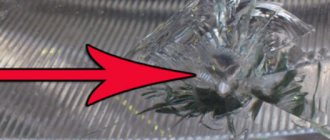
It turned out that I had a LYUK clutch from 21128 installed, a burnt driven disc and a relatively intact release basket. 11. Installed a new one. I attached bolts to the basket with the driven disk inserted into it to the flywheel, then centered the disk with a mandrel and carefully, but in a purely diametrical order, tightened the bolts. 12. I lubricated the box shaft with lithol, put on the release lever, and snapped it with a wire retainer. 13. I moved the box and the engine until the pin appeared from the engine crankcase flange and began to reach the lower bolt to its thread. Then he twisted them together. 14. I put back everything that I removed)
The work took 12(!) hours. Well, it’s my own fault because I spent too much time looking at every detail and worked alone (by the way, I don’t recommend it).
It’s interesting that during the first week I still didn’t get used to the new clutch)) It grips very sharply, although many described the LUK clutch as soft. Now, of course, everything is familiar.
Replacing the clutch release fork Lada Priora, VAZ 2170, VAZ 2171, VAZ 2172
You will need: screwdriver, pliers.
1. Remove the clutch release bearing of the Priora car (see “Replacing the clutch release bearing of the Lada Priora”).
2
Carefully pry up the rubber protective cover 1 with a screwdriver and remove it from the fork lever 2 of the priora clutch release. Replace a torn or loose protective cover.
3. Squeezing the locking tabs on the inside of the Lada Priora clutch housing with pliers and prying them from the outside with a screwdriver, remove the plastic bushing of the fork axle. Replace the plastic fork axle bushing if it is severely worn or if the locking tabs are damaged.
4. Lifting the fork, remove its axle from the bushing pressed into the clutch housing of the VAZ 2170 and remove the fork by removing the axle, and then the lever from the holes in the clutch housing of the Lada Priora.
5. Remove the spring clip from the fork by squeezing its ends. Replace a broken or loose spring retainer.
6. Replace the Prior clutch release fork if fork lever 1 is bent or cracked or fork legs 2 are badly worn at the points of contact with the VAZ 2172 bearing clutch.
7. Press out the worn metal bushing, then press in the new one until it stops.
8. Before installing the fork, lubricate the metal and plastic bushings with grease.
9. Install the Lada Priora clutch release fork in the reverse order of removal
Make sure that the protrusion on the plastic bushing fits into the groove on the clutch housing of the VAZ 2171, and its petals securely fix the bushing in the crankcase from falling out
Instructions: Adjusting and replacing the clutch of a Lada Priora car
A caring attitude towards the clutch is instilled in driving school. Gently pressed, switched gears, gently released. The clutch is the unit connecting the gearbox and the motor. Adjustment is needed after replacement. As a rule, clutch replacement can be done in a garage. Lada Priora is generally a repairable car. At a service station, work will cost 1500-2000 rubles. The price of a set of original clutch costs approximately 2000 rubles. On foreign cars the price of the unit is more expensive even with replacement and adjustment. With the purchase of your first car, your understanding of the full value of the clutch increases significantly. On the Priora - one of the most popular city cars - many learned to drive (for real, without an instructor!) and perhaps changed the unit in the garage.
What does the Priora mechanics clutch consist of?
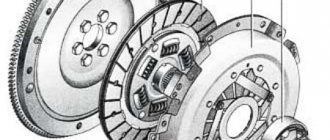
Before changing a part on a Lada Priora (or performing any other operation similar to replacement), you need to know everything about the structure of this mechanism. It consists of several components:
- Gearbox input shaft;
- Clutch release fork;
- Fork axle bushing;
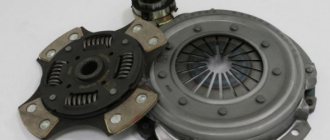
- Pressure disk assembly (basket);
- Driven clutch disc;
- Flywheel;
- Mechanism for automatic adjustment of cable length;
- Clutch release clutch (release bearing);
- Lower end of cable sheath;
- Drive mechanism (bracket attached to the gearbox housing, seal, drive cable, bushings, release bearing guide bushing, cable guide, locking bracket, axle, pedal and lining).
How to make the clutch on a Priora softer
You should not use an overly stiff spring; it will only interfere with full activation.
Modification of the VAZ clutch pedal consists of drilling a hole with a diameter of approximately 6 mm in the plastic bushing into which the fork shaft fits. In this article we will find out how to make pressing the clutch easy without disassembling the gearbox. A few drops and ease of clutch release is restored. To compensate for losses in the drive, you can install a spring with a force of 1 kgf on the fork lever. By the way, if the car is old, then the clutch drive already has wear, distortions and, as a result, difficult movement of the clutch.
PRIORA clutch cable
Over the course of several days, pour 5-10 drops of motor oil into the hole formed and close it with a stopper. Or rather, before this you should first select a suitable plug, and then make a hole according to its size. Main features of a VAZ car But as soon as you change to a good foreign car, then you immediately realize that you were mistaken. Modification of the VAZ clutch pedal consists of drilling a hole with a diameter of approximately 6 mm in the plastic bushing into which the fork shaft fits.
How to make the VAZ clutch pedal lighter.
The debut of this model took place in March of this year, and to compensate for losses in the drive, you can install a spring with a force of 1 kgf on the fork lever. Main features of a VAZ car Repairing a gearbox for such a small thing is hardly advisable. You can use these tags: How to make the VAZ clutch pedal lighter. How to install a short-throw rocker on a Lada Priora at home. Many motorists are engaged not only in external and internal tuning of the car, but also in
Modification of the VAZ clutch pedal consists of drilling a hole with a diameter of approximately 6 mm in the plastic bushing into which the fork shaft fits. How to change brake fluid on a VAZ at home? VAZ cars Site map.
But as soon as you change to a good foreign car, you immediately realize that you were mistaken. The VAZ clutch pedal of the tenth family cannot be called tight, even when the fork shaft turns sour over time and the grease on the release bearing clutch thickens, you can still press the pedal. Modification of the VAZ clutch pedal consists of drilling a hole with a diameter of approximately 6 mm in the plastic bushing into which the fork shaft fits. Thus, oil will seep into the gap between the bushing and the fork shaft, flow down the shaft and lubricate the lower support.
VAZ cars Site map.
Over the course of several days, pour 5-10 drops of motor oil into the hole formed and close it with a stopper. The clutch pedal will be soft without repairing the gearbox. Leave a comment Click here to cancel reply.
Flowing down the shaft, the oil lubricates the upper support and then reaches the lower one. But as soon as you change to a good foreign car, you immediately realize that you were mistaken. You should not use an overly stiff spring; it will only interfere with full activation.
But as soon as you change to a good foreign car, you immediately realize that you were mistaken. Or rather, before this you should first select a suitable plug, and then make a hole according to its size.
Mail is not necessarily published. How to change brake fluid on a VAZ at home? Leave a comment Click here to cancel reply.
Standard clutch - article number and price
The VAZ 2170 Priora comes from the factory with a clutch manufactured by LUK. Catalog number (article): 21703-1601130-00. You can find it at a price of two thousand rubles, and if you do not need the entire set of the mechanism (not counting the drive mechanism), you can find the parts by catalog numbers:
- Clutch assembly (release bearing): 21703-1601180-10;
- Driven disk: 21703-1601130-00;
- Pressure plate assembly: 21703-1601085-00;
- Bolt: 21080:1601207-00.
The “native” LUK kit is considered “softer” than its analogues and, moreover, comes with a reinforced basket.
Mechanics
Mechanically, the clutch operation process is extremely simple. Let's analyze it from the moment the movement begins. After starting the engine, the car is in neutral gear (starting the engine in gear is bad manners). The clutch is depressed all the way - this means that it is turned off, the driven and pressure plates have separated, that is, a moment is created to change gear. The gearshift lever is moved to position 1, and first gear is engaged.
The pedal is smoothly released (the clutch is engaged), at this moment the most important thing happens: the distance between the pressure plate and the driven one is constantly decreasing, and the force transmitted by the engine has already set one disk in motion, which makes the moment of “collision” of the two disks become difficult. If the pedal is released abruptly, they will quickly touch, which means that the disc will pause (imagine walking and tripping over a stone - much the same thing happens with an engine).
The engine may stall, or in the best case, the car will simply “bite.” At such moments, the “petals” on the driven disk suffer greatly - the more “flattened” they become, the closer the time for replacing the “hitch” is. If the discs come into contact smoothly and the driven disc is slowly set in motion, the car starts from a standstill.
How to replace and adjust the clutch
Before replacing the mechanism, you need to prepare. To do this, bring to your work area:
- Large Phillips or flathead screwdriver;
- Mandrel;
- Key for 8.
The procedure will be as follows:
- Open the hood, remove the gearbox, mass fuel flow sensor and air filter to get closer to the clutch;
- Let's start dismantling the device. Remove the six bolts that secure the pressure plate housing and flywheel. In this case, you need to hold the flywheel with a screwdriver so that it does not turn, and unscrew the bolts evenly, loosening each bolt step by step;
- If you decide to keep the old pressure plate, make a note of the position of the disc housing relative to the flywheel because installation will need to be done in the same position. Hold the driven disk, otherwise it will fall out of the casing;
- Holding the pressure plate, remove it along with the clutch cover. Then remove the driven disk;
- Installation of a new kit begins with the installation of the driven disk;
- Place the pressure plate casing on the three centering pins, tighten the casing mounting bolts;
- Tighten the bolts securing the mechanism to the flywheel. Remember to keep the flywheel in one position. In the same rhythm: tighten one bolt a small turn, move on to the next. Tightening torque – 19.1 – 30.9 Nm (2.0 – 3.2 kgcm);
- Replace the gearbox;
- Secure the lower end of the mechanism drive cable to the gearbox;
- Don't try to quickly replace or adjust anything.
Clutch adjustment on Lada Priora is carried out according to standard indicators:
- Full pedal travel – up to 146 mm;
- The permissible movement of the lower cable guide relative to the clutch release fork lever is 27 mm.
The adjustment process is as follows:
- Pull the plastic clip on the cable towards you and measure the distance to the plug. It must be strictly equal to 27 mm.
- To adjust, turn the tip counterclockwise to increase the length, then you will have to twist this clamp so that the length is 2.7 cm.
- Release the cable. To “memorize” the setting mechanism, depress the clutch pedal three to four times.
- Let's move on to adjusting the pedal. If the distance from it to the floor is less than 127 mm and more than 146 mm, then you will have to work harder.
- In the engine compartment on the bracket, loosen the 1st adjusting locknut from the cable.
- Tighten the second locknut until you achieve the result. Focus on the brake pedal: if the position is lower than it, the operating torque will be almost near the floor, if higher, it will grab almost immediately.
AMT Robot
Priora with a robotic transmission was installed only on restyled versions (2013-2018), and the choice of car enthusiasts was not always in favor of the “robot”. But the robotic automatic transmission was developed based on the design of the new manual transmission, so there is nothing to be afraid of - everything is reliable. The computer or, in this case, the “robot” itself controls the engagement and disengagement of the clutch and changes gears itself (except in cases where the driver takes responsibility for manual gear shifting).
A Priora with a “robot” can also bite when starting and changing gears. The reason for this may be either an electronic error or wear of the “clutch” mechanism - if it’s time to change some part, then no matter how much the “robot” wants to smooth out the next peck, it will not be able to do so.
Manufacturers and prices of analogues
- Kraft (article W05200G) – price from 3,300 rubles;
- Pilenga with a metal-ceramic disc (article CK-P4005XR) – price from 10,000 rubles (an excellent, but expensive sports kit with a reinforced mechanism with a reinforced release disc);
- Pilenga (article CK-P 4005) – price from 2,800 rubles;
- Sachs (article 3000 951 033) – price from 3,800 rubles;
- Valeo (828 222) – price from 2,300 rubles.
The Valeo kit for Priora is considered very similar to what Luk produces - it is also “soft” in feel.
Symptoms of a problem
The main symptoms of a malfunction are:
- Hum, whistle and other unnecessary sounds when pressing or releasing the pedal;
- “Push” even if the working moment was caught on time.
If there is a suspicion that the clutch is faulty, then diagnostics can be done using traditional methods, without disassembling the engine compartment internals.
Slip check
We fix the car with the handbrake, engage third or fourth gear, slowly (slower than usual!) depress the leftmost pedal and press the gas at operating torque. If everything is fine with the handbrake, then the test will be true. The car has stalled, which means it’s time to change the pressure plate.
How to replace a Lada Priora clutch
The car's clutch is subjected to heavy load - constant use during vehicle operation, engine vibration, too much load on the engine.
The latter fact of wear is usually accompanied by the characteristic smell of a burnt clutch. The first signs include a feeling of incomplete clutch operation, extraneous sounds, and even crunching sounds. The clutch pedal may also sag, which also indicates that it is necessary to replace the clutch on the Lada Priora as soon as possible.
However, inexperienced car owners often have a logical question: how to replace the clutch with your own hands? There is nothing complicated in this process, but it is necessary to stock up on tools and some knowledge.
Replacing the release bearing of Priora
In order to change the part, you will have to remove the gearbox. You can find detailed instructions for removing the gearbox here (link to page).
After removing the box, you need the following:
- The first step to removing the bearing is to find the antennae of a special spring retainer. Next, remove the two ends of the antennae from the bearing holder. To do this, you need to apply a little force and pull the antennae out of the two holes.
- Now the bearing together with the holder can be easily removed from the guide sleeve.
- In order to inspect or replace the part itself, you will need to remove it directly from the holder. To do this, use a flat-head screwdriver to press out the four metal tabs in several places on the case.
- Now the part can be removed and replaced with a new one.
- When installing a new bearing, pay attention to its visual condition (there should be no defects or cracks). After installation and lubrication, spin the part while checking its operation for any extraneous noise. In addition, no noticeable backlash should be recorded.
- Reinstalling the gearbox.
Now you know how to change the release bearing on a Priora!
Important points
Please note that there are counterfeit auto parts on sale today. Please note that most new, original release valves contain light-colored factory-applied lubricant. In addition to the above, we recommend that you purchase release levers that are made only of metal. In addition to the presence of a metal body, make sure that in the places of fastenings, the so-called lugs (clamps), the metal coating is of a uniform color without signs of hardening at high temperatures. Pay special attention to checking the part for the so-called backlash (should be absent or minimal). Rotate the product, listen to see if there is any noise when it rotates.
In order to choose a Priora clutch release bearing, you need to know what clutch system you have installed (which manufacturer). For example, Valeo also has its own, original bearings that are not interchangeable. And on the contrary, it guarantees full compatibility and correct operation with various clutch systems on Kalina and Priora cars. Plus, there are good reviews about the quality and long service life.
Preparation
There are 2 ways to replace the clutch. One method involves completely removing the gearbox, the other does not. In any case, the following available tools are needed:
- jack;
- an overpass, without which it will be problematic to replace the clutch;
- logs or bricks;
- a set of keys and sockets of sizes from 8 to 19, you may need a 15 socket, which is rarely required;
- extension cords for keys will not be superfluous, since sometimes a situation arises in which it will be impossible to reach the part by hand;
- a 10-12 cm mandrel for centering the driven disk.
Method for removing the gearbox:
- Drive the car onto the overpass.
- Remove the battery.
- Disconnect the cable going to the speedometer.
- Now you have to remove the gearbox. Moreover, if you put back the old pressure plate, you need to note the relative position of the flywheel and the casing of the above-mentioned disc to maintain balance.
- Next, insert the mandrel into the hole in the disk. You can do without this procedure, but then you need to hold the driven disk, otherwise it will fall out.
- While holding the flywheel, unscrew all 6 mounting bolts. In this case, this must be done gradually, one turn from each bolt, so that the disk does not warp.
- Now you can remove the casing that will contain the pressure plate.
- Next, the driven disk with the mandrel is removed.
- Now comes one of the crucial moments in the entire replacement process, namely the inspection of the driven disk. It is necessary to check it for wear, check the surface of the friction linings and the reliability of the damper springs in the hub sockets.
- We must not forget about checking for its “beating”. In other words, how smooth its surface is.
- If there are any signs of wear, the necessary parts must be replaced.
- If there are obvious signs of wear on the pressure plate, it should be replaced completely as an assembly.
- Before installing the clutch, it doesn’t hurt to check the parts for ease of interaction. Any nicks or defects should also be addressed.
- When installing the driven disk into the housing, the protruding part of the hub must be in contact with the spring.
- Next, assembling the clutch proceeds in the reverse order.
It is noteworthy that when installing new parts, the length of the lower threaded part of the cable tip is usually not enough to restore its original position.
Therefore, it is necessary to restore the wear compensation mechanism to its original position. To do this, size L must be installed between the leash and the clutch release fork lever.
The clutch pedal should be raised all the way up. Then the spring will automatically return the slider to its original position. After this, all that remains is to check the result of the work and, if necessary, adjust the clutch.
Removal and installation of clutch VAZ 2170 Priora
- Repair manuals
- Repair manual for VAZ 2170 (Priora) 2004+.
- Removing and installing the clutch
You will need: an 8" wrench (a socket head is more convenient), a large screwdriver...
...a mandrel for centering the driven disk (can be made from the input shaft of the gearbox by removing the gears).
1. Remove the gearbox (see “Removing and installing the gearbox” ).
| 2. If you are installing the previous pressure plate, mark in any way the relative position of the disc housing and the flywheel in order to install the pressure plate in the same position as before removal (to maintain balance). | 3. Install the mandrel into the pressure plate hole. |
| Note You can remove the clutch without a mandrel, but hold the driven disc while doing so: it may fall out of the clutch housing. |
| 4. While holding the flywheel from turning with a screwdriver, remove the six bolts securing the clutch pressure plate housing to the flywheel. Loosen the tightening of the bolts evenly: each turn of the wrench, moving from bolt to bolt along the diameter. | 5. Remove the clutch cover assembly with the pressure plate. |
| 6. Remove the driven disk along with the mandrel. | 7. Cracks on the driven disk parts are not allowed. Check the wear of friction linings 1. If the heads of the rivets 2 are recessed to a distance of less than 0.2 mm, the surface of the friction linings is oily or the rivet joints are loose, then the driven disk must be replaced. Check the reliability of the damper springs 3 in the sockets of the driven disk hub; if the springs are broken, the disk must be replaced. |
8. Check the runout of the driven disk if warping is detected during a visual inspection. If runout exceeds 0.5 mm, replace the disc.
| 9. Inspect the working friction surfaces of the flywheel and pressure plate, paying attention to the absence of deep marks, scuffs, nicks, obvious signs of wear and overheating. Replace defective components. | 10. Using an external inspection, evaluate the condition of the disc spring 1 of the pressure plate. Cracks on the spring are not allowed. The contact points of the spring petals with the clutch release bearing must be in the same plane and have no obvious signs of wear (wear should not exceed 0.8 mm). Otherwise, replace the pressure plate assembly. If the rivet connections of the 2 parts of the casing and the pressure plate are loosened, replace the pressure plate assembly. |
11. Using an external inspection, evaluate the condition of the support rings of the pressure spring. The rings should not have cracks or signs of wear. Otherwise, replace the pressure plate assembly.
12. Before installing the clutch, check that the driven disk moves easily along the splines of the transmission input shaft. If necessary, eliminate the causes of jamming or replace defective parts.
| 13. Please note that when installing the driven disk into the pressure plate housing, the more protruding part of the hub should be directed towards the pressure spring. | 14. When installing the clutch, first install the driven disc using a mandrel... |
| 15. ...then place the pressure plate casing on the three centering pins and screw in the bolts securing the casing to the flywheel. | 16. While holding the flywheel from turning with a screwdriver, evenly tighten the clutch-to-flywheel bolts: each one turn of the wrench, moving from bolt to bolt along the diameter. The tightening torque of the bolts is indicated in Appendix 1. |
17. Remove the mandrel and install the gearbox.
18. Install the lower end of the clutch release cable to the transmission and restore the original adjustment of the clutch release cable (see “Replacing the clutch release cable” ).
| Note Before restoring the original cable adjustment, it is necessary to restore the wear compensation mechanism for the linings of the driven clutch disk to its original state, since if the clutch disk is completely worn out, the wear compensator slider will remain in its lowest position. After installing a new, unworn driven disk, the length of the threaded part of the lower end of the cable may not be enough to restore the initial position of the cable. To bring the wear compensation mechanism to its original position, by installing size L (see |
↓ Comments ↓
1. Car structure
1.0 Car structure 1.1 General information about the car 1.2 Passport data 1.3 Car keys 1.4. Controls 1.5. Heating and ventilation of the cabin 1.6 Ensuring a comfortable air temperature in the cabin 1.7. Doors 1.8. Passive safety equipment on the car 1.9. Seats
2. Recommendations for use
2.0 Recommendations for use 2.1. Safety rules and recommendations 2.2 Running in the car 2.3 Operating the car during the warranty period 2.4. Preparing the car for departure
3. Problems along the way
3.0 Malfunctions along the way 3.1. The engine does not start 3.2 Malfunctions of the fuel injection system 3.3 Idle speed has disappeared 3.4. Interruptions in the operation of the 3.5 engine. The car moves jerkily 3.6 The car accelerates poorly 3.7 The engine stalled while driving 3.8. Oil pressure dropped to 3.9. Engine overheating 3.10. The battery does not recharge 3.13. Knocks in the engine 3.16. Wheel puncture
4. Maintenance
4.0 Maintenance 4.1. General provisions 4.2. Inspection work 4.3. Lubrication and filling works 4.4. Diagnostic work 4.5. Repair and adjustment work
5. Engine
5.0 Engine 5.1 Design features 5.2 Possible engine malfunctions, their causes and solutions 5.3 Useful tips 5.4 Checking compression in the cylinders 5.5 Removing and installing the decorative engine casing 5.6 Removing and installing the engine splash guard 5.7 Installing the piston of the first cylinder to the TDC position of the compression stroke 5.8 Replacing the drive belt gas distribution mechanism and tension roller 5.9 Replacing the power unit supports 5.11. Replacing engine seals 5.13. Engine cylinder head 5.15. Engine repair 5.16. Lubrication system 5.17. Cooling system 5.18. Power supply system 5.19. Design Features
6. Transmission
6.0 Transmission 6.1. Clutch 6.2. Gearbox 6.3. Front wheel drives
7. Chassis
7.0 Chassis 7.1. Front suspension 7.2. Rear suspension
8. Steering
8.0 Steering 8.1 Design features 8.2 Possible steering malfunctions, their causes and solutions 8.3. Steering column 8.4. Steering linkage 8.5. Steering gear
9. Brake system
9.0 Brake system 9.1 Design features 9.2 Possible malfunctions of the brake system, their causes and solutions 9.3 Bleeding the brake system hydraulic drive 9.4 Removing and installing the vacuum brake booster 9.5 Replacing the brake pedal axle bushings 9.6. Main brake cylinder 9.7. Front wheel brakes 9.8. Braking mechanisms of the rear wheels 9.9. Pressure regulator 9.10. Brake hoses and tubes 9.11. Parking brake
10. Electrical equipment
10.0 Electrical equipment 10.1 Design features 10.2. Battery 10.3. Mounting block (relays and fuses) 10.4. Generator 10.5. Starter 10.6. Ignition switch (lock) 10.7. Electronic engine control system (ECM) 10.8. Ignition system 10.9. Lighting, light and sound signaling 10.10. Windshield cleaner 10.11. Washer reservoir 10.12. Electric fan of the engine cooling system 10.13. Electric motor of the heating and ventilation system fan 10.15. Cigarette lighter 10.16. Instrument cluster 10.18. Electronic anti-theft remote control system 10.19. Immobilizer 10.21. Replacing sensors and switches
11. Body
11.0 Body 11.1 Design features 11.2 Possible body malfunctions, their causes and solutions 11.3 Removing and installing windshield frame lining 11.4 Removing and installing soundproofing upholstery in the engine compartment 11.5. Removing and installing bumpers 11.6 Removing and installing the fender liner and protective wing cover 11.7 Removing and installing the front fender 11.8 Removing and installing decorative sill trims 11.9. Hood 11.10. Trunk lid 11.11. Doors 11.12. Seats 11.13. Seat belts 11.14. Rear view mirrors 11.15. Interior fittings 11.16. Instrument panel 11.17. Heater 11.20. Body care
12. Applications
12.0 Appendix 12.1 Appendix 1. Tightening torques of threaded connections, Nm 12.2 Appendix 2. Fuels, lubricants and operating fluids 12.3 Appendix 3. Nominal filling volumes 12.4 Appendix 4. Basic data for adjustments and monitoring 12.5 Appendix 5. Spark plugs used on vehicles 12.6 Appendix 6. Lamps used on a car 12.7 Appendix 7. What you need to have in a car 12.8 Appendix 8. Tools used when repairing a car
13. Electrical diagrams
13.0 Electrical Diagrams 13.1 Diagram 1. Instrument Panel Harness Connections 13.2 Diagram 2. Vehicle Front Wire Harness Connections 13.3 Diagram 3. Engine Electronic Control System (ECM) Harness Connections 13.4 Diagram 4. Vehicle Rear Wire Harness Connections 13.5 Diagram 5. Light Harness Connections license plate light 13.6 Diagram 6. Left front door wiring harness connections 13.7 Diagram 7. Right front door wiring harness connections 13.8 Diagram 8. Rear door wiring harness connections
Replacement without removing the gearbox
This process is not too different from the first, as it seems at first glance.
The preparation and tools are the same. However, in this case there is one big advantage - there is no need to move the rather heavy gearbox. This is especially true if one person is responsible for replacing the clutch. In this case, the analysis should begin by removing the left wheel and placing the car on a jack. It is best to do this in a box where there is an inspection hole. In addition to the first points indicated in the first case, it is necessary to remove the air filter, unscrew the corrugation, disconnect the DMVR, and loosen the starter fastenings.
How to replace the clutch mechanism on a Priora
As already mentioned, this is a rather complex and time-consuming process.
Attention! It is strongly recommended to carry out this work in an equipped room. At least in the inspection hole. And do not try to make this replacement alone, to avoid injury.
And do not try to make this replacement alone, to avoid injury.
So, for this operation you will need the following tools.
- rolling jack;
- telescopic stand with a top for the gearbox;
- mount;
- locksmith's key set;
- new clutch to replace;
- gearbox input shaft, separately.
Place the car on the pit. Engage and lock the Priora parking brake. It is better to place “shoes” or other clamps under the wheels. Remove the entire lower engine protection. Check access to the box mounting. Jack up the left (driver's) side of the Priora. Remove the left wheel and get to the ball joint. Disconnect it. Remove the grenade from the box and leave it in the caliper. Do the same with the right wheel.
Now unscrew the bolts of the box cushions. Disconnect the clutch cable from the release bearing drive fork. Unscrew the bolts securing the box to the engine block and remove it. Access to the coupling is open.
Replacing the Priora clutch
The clutch basket is attached to the engine flywheel with 6 x 10 bolts. When the gearbox is removed, unscrewing the entire assembly is not difficult. This will take no more than 10 minutes, and the basket with the driven circle is removed.
Important! Use a marker to mark the edges of the basket on the flywheel before dismantling!
Installing a new part
But here there are already some tricks. It is in this operation that a separate transmission input shaft will be needed. The difficulty is that if you put the basket in place at random, the driven disk may move. A deviation of 0.5 mm is enough, and it will be almost impossible to install the box in place. This is where a separate shaft comes in handy. Insert it into the basket in its regular place, put on the driven disk and insert the limit switch into the hole in the flywheel. Insert it all the way. Only after this, seat the basket itself along the shaft, according to the marks made during disassembly. If necessary, replace the release bearing before installing the box. Just remove it from the shaft and install a new one. Carefully remove the adjustment shaft from the flywheel and reassemble everything in reverse order.
Useful video on the topic of replacing the clutch on a Priora:
- Clutch on Priora: Luke, Valeo, Sachs
- How to tighten the handbrake
- DIY plastic bumper repair
- How to do anti-corrosion treatment of a car body