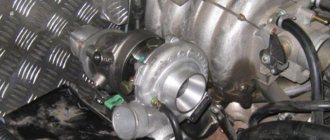
Removing the rear bumper of Niva Chevrolet (VAZ-2123)
Disconnect the wire terminal from the negative terminal of the battery. We remove the license plate. Remove the license plate lights (see “Removing the rear license plate light, replacing the lamp,” p. 303). Prying it with a screwdriver.
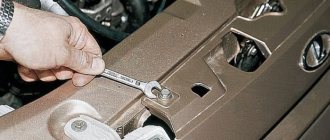
Using a Phillips screwdriver, unscrew the two self-tapping screws securing the bumper on the right side. Similarly, unscrew the two screws securing the bumper on the left side.
.using the same tool, unscrew the five bolts of the upper bumper mounting.
Using a Phillips screwdriver, unscrew the four self-tapping screws securing the light wire holders.
.and remove the bumper from the car.
We install the rear bumper in the reverse order.
In the interior developments of the Italian design studio Bertone, special attention was paid to Chevrolet Niva bumpers. We are talking about the modernization of the car, which took place in 2009. If we consider separately the initial version of the Chevrolet Niva and the version after restyling, it is not so easy to notice the differences. However, they are quite significant and primarily affected the front and rear bumpers.
Restyled Niva-2009
The launch of the first Chevrolet Niva model occurred in 2002. Until 2009, about 300,000 cars rolled off the assembly line. Market analysis showed that the product of the united company “GM-AvtoVAZ” won the hearts of Russian consumers, but it was impossible to stop there. Although the “experience” of the new Niva was practically insignificant compared to the number of years that representatives of the classic family lasted in production. The company's management decides to modernize the model by changing the interior. They decided to leave the technical part without any major changes.
At the end of 2008, the GM-AvtoVAZ company submitted an order to the Bertone design studio. The performers had specific tasks:
- Create a modern design that matches the Chevrolet style, while minimizing financial costs.
- While maintaining the geometry of the body, emphasize the kinetic characteristics of the car. Modernize the interior.
- The headlights, taillights, and radiator grille have undergone changes. But the Chevrolet Niva bumpers played a key role in finding the style.
Front bumper
The lines of the front buffer on cars produced before 2009 corresponded to classical ideas about the purpose of this body part. The plastic cladding was distinguished by the correct shape, which was inherited by European cars of the late 90s. It was conventionally divided into two parts. The upper part is represented by a simple plastic box with a casting for attaching a license plate. At the bottom there are air intakes and rectangular fog lights.
A gap formed between the bumper and the radiator grille, which revealed errors in the body assembly. In fact, this gap was not a mistake by the assemblers at all and was part of the design idea. Already in the reviews of the first owners there were such shortcomings as the lack of radiator protection and the relatively trivial design of the front bumper as a whole.
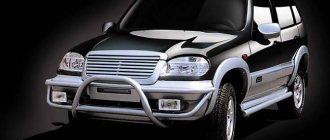
After restyling, the front buffer began to consist of more sections, which gave the car a modern style. The upper part is now made together with the radiator grille. As a result of this decision, the ill-fated gap completely disappeared. The air intake in the new version is covered with a decorative grille. It not only serves as part of the external design, but also has practical significance. The lower part of the radiator is protected from flowers, grass and other debris. Pursuing a commitment to the Chevrolet Captiva style, the designers decided to change the PTF frame. Round fog lights are installed on modern cars of the European and Asian automobile industry. The lower part of the front bumper is made of black plastic. There is one more detail that appeared after restyling. This is a bottom mounted amplifier.
Such amplifiers are designed to protect the radiator and engine crankcase. Usually installed on powerful SUVs.
Here they serve only a decorative function, but with them the car has its own special style. The amplifier emphasizes the status of an SUV.
Front grille and its purpose
What is needed, its main purposes on Shnivy are:
- Primarily, it serves to protect the radiator from damage that occurs due to off-road driving and on bad roads, where the smallest gravel stone or branch can simply pierce the radiator . All drivers understand what a fragile structure the radiator has, and it is also an important part in the operation of the engine.
- It was also created to improve the aerodynamics of the car, which contributes not only to quick acceleration on the highway, but also to keeping the car on the road. As we know, poor aerodynamic characteristics contribute to higher fuel consumption and poor gravity to the ground.
- The beauty of the appearance of the front of the Chevrolet Niva, which makes the car unique and memorable on the road.
The front grille consists of 3 parts: a lining with the Chevrolet badge, a special protective mesh located in the background, and fastenings to the structure.
Rear bumper
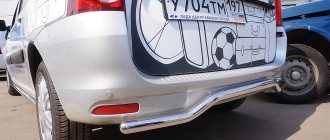
The rear bumper of the restyled Chevrolet Niva model does not have many distinctive elements, but there are practical innovations. The first thing that catches your eye is the horizontal insert in its upper part. Theoretically, it should serve for convenient loading or unloading of the trunk. But even if the owner doesn’t find any use out of it, it looks quite stylish. When the trim is painted in body color, the insert remains black. The rear bumper, like the front, has a lower part made of black plastic. The imitation buffer protection is also a license plate bracket. The air intake slots, even if they are not functional, give the car a semblance of GT styling.
By the way, in the updated version, body kits appeared on the wings and sills. The bumpers have smooth transitions under the linings, which creates a unified picture around the perimeter of the body.
How to remove Chevrolet Niva bumpers
In order to dismantle the buffer from the car, you do not need any special devices, however, it is recommended to carry out the work using a lift or inspection pit.
Removing the new front bumper
- Remove the three screws at the top of the radiator grille (in the area of the hood latch).
- Unscrew the two bolts under the license plate.
- The bottom of the bumper is attached to the cross member with two bolts. They need to be unscrewed. But before this, it is necessary to dismantle the cover simulating the amplifier.
- After removing the front wheel, you should unscrew the 6 screws of the front part of the arch protection and 2 nuts with which this protection is additionally tightened.
- There is a decorative trim under the headlight. It needs to be moved to the side. This will give you access to two more screws.
- On the opposite side the work is duplicated. After this you can remove the bumper.
Removing the old front bumper
The algorithm for removing the front bumper from a car produced in 2002-2009 is somewhat different.
- First, the radiator grille is dismantled, since it is installed separately.
- The headlight covers are secured with screws that must be removed.
- It will not be difficult to find 4 bolts from above. They need to be unscrewed.
- Unscrew the 4 nuts from the bottom of the bumper.
- Unscrew the screws of the side fastenings.
- Remove the license plate and unscrew the mounting screws.
- Remove the bumper.
Removing the rear bumper
Removal of the rear bumper for all samples follows the same procedure.
- The mudguards are removed.
- Unscrew the screws on each side that secure the fender liners to the bumper.
- To remove the reflectors, you need to squeeze the latches from the inside. Under the reflectors, unscrew one bolt at a time.
- Remove the number and unscrew the 2 bolts underneath it.
- Unscrew the two nuts from the bottom.
VESKO-TRANS.RU
AutoNews / Reviews / Tests
- Home
- Auto garage
- How to Remove the Rear Bumper of a Niva Chevrolet
How to Remove the Rear Bumper of a Niva Chevrolet
Place the car on a lift. Raise the hood, disconnect the ground wire terminal from the battery. Unscrew three screws 1 (Fig. 8-11) of the upper bumper mounting.
Removing the bumper on Niva Chevrolet
Rice. 8-11. Attaching the bumper to the upper cross member of the front end:
Unscrew two bolts 1 (Fig. 8-12) securing the bumper (in the license plate area).
Rice. 8-12. Attaching the bumper to the upper cross member of the front end:
3.5. shiny overlay.
Unscrew two nuts 1 (Fig. 8-13) of the lower bumper mounting.
Rice. 8-13. Attaching the bumper to one of the front cross members (bottom view):
Unscrew 6 screws 1 (Fig. 8-14) and two nuts 3.5 securing the protective casing, right/left, front wheel arch and remove the protective casing 3.
Rice. 8-14. Attaching the bumper and right/left wheel arch protective cover:
Disconnect block 1 (Fig. 8-15) of the front wiring harness from the fog lights.
Unscrew one screw 1 (Fig. 8-16) of the unfamiliar wheel arches, fastening the headlight covers 1 (Fig. 8-17).
Rice. 8-15. Placement of fog lights right/left:
Installing a bumper on a Chevy Niva
Rice. 8-16. Attaching the headlight cover to the bumper:
Remove trim 1 (Fig. 8-17) of the right and left headlights, overcoming the resistance of the double-sided adhesive tape.
Preliminary preparation for dismantling
Before you start removing the bumper on a Chevrolet Niva, you need to study all the design features of this structural element of the car. The fact is that it is made of 90% plastic. Such plastic may be reinforced in some cases, but not in others. It all depends on what kind of restaling the manufacturer carried out on the Chevrolet Niva. The plastic, in turn, rests on a metal cross beam. That is why errors during dismantling can lead to damage to the buffer itself and the energy-absorbing beam.
Before starting dismantling, it is necessary, in order to avoid electric shock, to remove the battery terminal. In order not to experience difficulties in finding fasteners during work, it is worth preparing their diagram in advance indicating the exact number of fastening elements. If you prepare for the work in advance, they can be completed within half an hour.
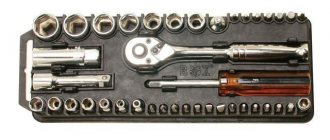
Necessary tool
In order to perform the necessary work as efficiently as possible, you first need to put the car on a lift. As a last resort, it can be sent to the inspection pit. In addition, you need to select the following set of tools:
- wrenches for "ten" and "twelve".
- hammer.
- screwdrivers, flat and Phillips.
- in the case when all the attachment points are rusty, you will need an angle grinder.
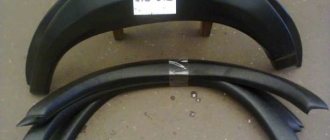
Self-production of thresholds
For some reason, store-bought products may not suit car enthusiasts, so some car owners make them themselves. To do this, take two tubes with the diameter you need; for greater reliability, a special insert is made on them, which can protect the driver from slipping during rain or snow. They are secured using a step and bolts, and the step itself is connected to the threshold by welding. As you can see, you can make thresholds for a Chevrolet Niva with your own hands without any problems.
For additional protection of the thresholds, as well as to give them a better design, special linings are installed, which come in several types:
- Plastic. This type is the most common. Their main advantage is low price, quality and aesthetics.
- Chrome plated. They are more reliable and attractive; when installing them, you can be sure of their durability.
- Decorative. As a rule, they are made of fiberglass and are very popular. Quite high quality products that are quite reasonably priced.
- With backlight.
To install door sill covers on a Niva Chevrolet, you need to study the instructions that come with them, then degrease the surface with acetone and attach the cover.
To summarize, we can conclude that there are a large number of accessories that can be used to further protect the car body. Since the choice is quite large, when choosing, you can rely on your personal preferences and financial capabilities.
Front damper Chevrolet Niva
Removal of the front bumper of a Chevrolet Niva occurs on the basis of a certain algorithm that must be followed during the work.
Detailed step-by-step dismantling
1.The wheels of the car are removed in order to have access to the device mounts. 2. dismantle parts of the upper and lower bumper trim. To do this, you need to unscrew the bolts securing the cover and remove it.
3. Having unscrewed the four screws, dismantle the cooling radiator lining, being careful not to damage the radiator. 4. Using a Phillips screwdriver, remove the headlight trim, being careful not to touch the optics.
5. Using a 10mm spanner, unscrew the upper bolts securing the front bumper beam. 6. dismantle the state number.
7. Loosen the terminals of the lighting wires, unscrew the bolts, and dismantle the fog lights. This is done so that they do not interfere with the removal of the buffer.
8. remove fasteners
9. To avoid damage, disconnect and remove the temperature sensor mounted on the beam.
Rear buffer: design features
Changing the described device installed on the rear of a Chevrolet Niva is also quite simple. It is worth noting the fact that recommendations like “unscrew three screws” will not be enough here, since the front and rear buffers differ significantly from each other in design. For example, there is no radiator grille, and parts of the bumper are attached differently. As a result, more effort will have to be spent on dismantling work.
Step-by-step dismantling algorithm
Removing the rear bumper of a Chevrolet Niva is also carried out according to a pre-developed algorithm:
- The car is de-energized by disconnecting its battery from the network.
- the screws designed to hold the trim, as well as the nuts used to secure the mudguards, are unscrewed.
- Unscrew the screws located in the upper part of the trim and holding the Chevrolet Niva buffer mount.
- clamp the clamps and dismantle the reflective elements.
- Using a ten key, unscrew the bolts and nuts holding the structure located under the state number and the reflective elements.
- Using the same key, unscrew the fastening bolts located in the lower part of the rear buffer beam trim.
- disconnect the wiring terminals of the vehicle license plate lighting fixtures.
- the trim is moved to the side and the bundle of wire is removed through the body hole.
- The lining is dismantled, for which the upper and lower bolts securing the beam to the car body are unscrewed.
- The Chevrolet Niva rear bumper mount is removed and it is dismantled.
Reinstalling the rear buffer
The rear buffer is installed in place, like the front one, in the reverse order. At the same time, if the decorative trims located under the headlights were removed during dismantling, it is recommended to put them in place without fully tightening the screws or bolts. Next, after installing the buffer and tightening the four screws located under the headlights, insert the pads with snaps into the holes under the bumper. After this, its edges are pulled down and the screws securing the nozzles are tightened. After all elements of the rear bumper are installed, the remaining fasteners are mounted and tightened
The energy-absorbing device of the car, both front and rear, has a rather complex design, but it is easy to remove and put them in place. To do this, you need to follow the algorithm laid down in the car’s operating instructions. In addition, it is necessary to approach such work responsibly, since the slightest inaccuracy can lead to damage to both the buffer itself and the entire car body.
Installing a winch on a Chevrolet Niva - DIY car repair
body and external tuning of Chevrolet Niva (VAZ). Installing a niva winch bracket on a Chevrolet Niva
And also interesting: Liquids used and filling volumes Niva VAZ 21213, 21214 and 2131 “
The license plate is mounted and the car, complete with winch, is ready to overcome new obstacles and road surfaces. Thirdly, the location is inconspicuous. Therefore, it makes sense to compensate for the lift with a shock absorber with increased travel.
We’re also figuring out where to place the supports for the air conditioner radiator. In general, after many fittings, manipulations and alterations of the A/C radiator mounts, we drill new supports for the A/C radiator. Mark the holes for the hawse. Let's stop at this stage for now. Here the scheme has been worked out and tested more than once. Reinforced springs taking into account the additional weight of the winch and elevator.
A duralumin spacer under the upper ball joint, moving the mounting point of the standard shock absorber. We make a pattern and mark holes on the wing.
Since the corrugation included in the snorkel kit is quite large in diameter, you will need to cut some of the amplifiers again.