The dashboard does not work.
The problem is this: the display stopped working (tachometer, speedometer, temperature, fuel, reverse gear indicator), the interior lighting when opening the doors, and the central locking. Error 14 is on - speed sensor. what could have happened????
Nissan Presage 1999 KA24, U30
Check the board itself or the fuses. Either the scoreboard is covered, or there is no power supply to it. The error on the speed sensor comes out because the signal from the sensor to the engine control units. and the machine goes through the instrument panel. The battery is also charged through the instrument panel, more precisely through the charging indicator lamp. Once I started the car without a panel, after half an hour it died out due to a dead battery. Look at the instrument panel itself, fuses, check all connectors and power circuits. According to symptoms, you have lost power to the instrument panel.
Presag 1999, KA 24DE, 2WD now with LSD (was) Presage 2008, QR25, 2WD Vladivostok
Checked all fuses intact
Nissan Presage 1999 KA24, U30
Look at the main connector, it’s so big, somewhere at the passenger’s feet, it has a clamp. I have a designer one, one half was damaged during transportation and it came off, the tachometer, speedometer didn’t work, and I don’t remember anything else. I tied everything off with electrical tape and everything works.
PRESAGE YD25DDTI 98G 4WD
In short, when you put it on the alarm with the door open, everything remains to work, you put it on the alarm with the door closed, the central locking closes, and after removing it from the whitefish, nothing works again. There is a capacitor on the tidy board, you bridge it for a second and everything works again until the next alarm. And when you put it on a whitefish with a running engine, nothing disappears either; after removal, everything works.
Nissan Presage 1999 KA24, U30
Buddy!!!!!! HELP!!!!!!!! Tell me what the problem is, I have a similar situation!!!!!!! I drove, drove, drove and arrived, I don’t know what to do next, I went to all the diagnostics, gave a lot of money, no one, nothing, and no way!!!!! Some say that the panel is full, others the power supply is not working, and still others say that the block has fallen out!!!!!!!! Tell me, dear man, how to defeat this infection!!!!!! PLEASE. Otherwise, WOSHPE PINZETS, I’ll soon take it to the trash heap!!!!!!
Posted by
OchcarikBuddy!!!!!! HELP!!!!!!!! Tell me what the problem is, I have a similar situation!!!!!!! I drove, drove, drove and arrived, I don’t know what to do next, I went to all the diagnostics, gave a lot of money, no one, nothing, and no way!!!!! Some say that the panel is full, others the power supply is not working, and still others say that the block has fallen out!!!!!!!! Tell me, dear man, how to defeat this infection!!!!!! PLEASE. Otherwise, WOSHPE PINZETS, I’ll soon take it to the trash heap!!!!!!
I changed the tidy and everything is buzzing, they have a controller in the tidy.... Fucking Japs
Nissan Presage 1999 KA24, U30
How much does your tidy cost? Because I can’t find anything at all in the Urals, but they don’t take it to order. Why dont know
Posted by
OchcarikHow much does your tidy cost? Because I can’t find anything at all in the Urals, but they don’t take it to order. Why dont know
I need to find out the photo of the tidy, post it.
Nissan Presage 1999 KA24, U30
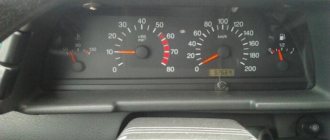
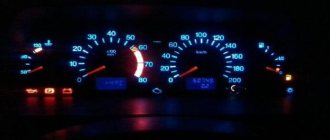
Car Pressage 1999 Body U30 engine KA24. Problem. The Tachometer, Speedometer, Fuel Level Sensor, Temperature Sensor do NOT work on the dashboard, the open door and headlight warning lights do not sound, and the central locking has also stopped working. After much research, I found out that if you disconnect the brown chip from the device and plug it back in, the functionality of all these controllers is restored. But it is restored exactly until you remove the ignition key. After the key is pulled out and does not return to the lock within 1-3 minutes, all faults reappear. If the key is not pulled out (I tried leaving it in the lock overnight), the device works properly. It does not matter in what position the key is in the lock. The main thing is not to pull it out. The question is how to treat this sore.
Does the engine start when the panel is not working? You need to study electrical circuits - if you are not good with wires, replace the panel from some donor.
Nissan Presage 2002 TU30 QR25DE 2WD LPG
Check the two fuses in the passenger compartment under the steering wheel. The leftmost column is the topmost. And the second column from the right is the fuse in the middle. You have a problem with the power supply to your instrument panel. If the fuses themselves are intact, then the panel needs to be replaced. The key in the lock closes a small circuit to the buzzer of the key left in the lock. This results in an artificially created power circuit. There may be a breakdown in the instrument panel circuitry. Most likely the panel is thrown out
Presag 1999, KA 24DE, 2WD now with LSD (was) Presage 2008, QR25, 2WD Vladivostok
people help with advice. Nissan Terrano2 1994 changed the bulbs to LEDs, drove for a month and then it started. First, the light on the door that was not closed came on, I reached into the limit switches - everything was ok, then, like a Christmas tree, everything began to blink, it blinked for two days and with the lights on, one diode on the tachometer remained on, well, I thought that the LEDs were loose, and I climbed... I checked the diodes, put them back, now one on the speedometer is on. The instruments themselves (fuel and temperature show). Now opening the doors. does not light up at all, the emergency light is on the left diode. WHERE TO CLIMB, ADVICE
Hi all! and I have a Presage 2000 Ka 24 de front-wheel drive. I bought myself an optitron a long time ago and there it was written in felt-tip pen TU-30 i.e. from Basarika, and it doesn’t show the temperature. The arrow rises and falls when the ignition is turned on. I found from the diagram that the pinout was slightly different and changed the wires, but it didn’t help. I abandoned this matter, and yesterday it dawned on me, maybe if I stretch the wire from the temperature sensor and attach it to one of the three bolts that have terminals on the temperature scale needle. The crux of the matter is the socket will not burn out? I even think that this terminal on the device can be isolated from the circuit. or, for example, buy a temperature sensor, cut the pipe and a separate temperature sensor and apply voltage from it to the arrow. tell.
Nissan Pressage 2000, 2WD, KA24DE
Does the “optitron” device itself work on your Pressage? Or is it just the temperature sensor not showing?
Nissan PRESAGE U30 1999 KA-24 DE engine (now VQ-30DE), LPG
Tu 30 is not a bassara, it is a restyled presage with a qr25 internal combustion engine. The qr25 has one temperature sensor and it goes directly to the internal combustion engine control unit. And from it a signal goes to the instrument panel. And not like on the ka24 there are two sensors, one on the computer and the other on the instrument panel. The panel from qr25 will not show the temperature on qr24
Presag 1999, KA 24DE, 2WD now with LSD (was) Presage 2008, QR25, 2WD Vladivostok
please tell me, I’ve already looked through everything, maybe someone has encountered a similar situation. Nissan Tiana 2006 After starting the engine, the dashboard works for about 3 seconds, then all the indicators drop to 0! what could it be???
What to do if the VAZ-2115 instrument panel does not work
As mentioned above, it is necessary to establish the cause of the instrument panel malfunction. If they are significant and cannot be repaired, then in this case it is necessary to install a new PCB. For a better outcome when installing the panel, you need to know and follow the following instructions:
- Replacement of the instrument panel is carried out strictly in accordance with the pinout.
- First you need to disconnect the cable going to the cigarette lighter.
- Dismantle the control panel. It is necessary to unscrew 2 screws located along the edges, top and bottom of the instrument panel.
- The next step will be to dismantle the lining. The difficulty is that it is held in place by clamps, so you need to swing it a little.
- After this, all wires going to the instrument panel are disconnected (light alarm connector, clock, speedometer, fuel level sensor).
- The very last step is to dismantle the control panel. All the bolts that secure it are unscrewed. At this stage, you should perform actions very carefully, as you can really damage the wiring.
Reasons for the failure of the instrument panel
Any component and unit on a used domestic car becomes unusable after a certain time. Poor road and climatic conditions, poor quality materials, untimely maintenance - all this leads to gradual wear and tear of all elements of the car. In a situation with a breakdown of the dashboard, everything is more complicated, because... There are no special rules for maintaining the panel. The only thing that can prevent early failure is to prevent moisture from entering the instrument body.
If the tidy on a VAZ 2114 does not work, it is worth carrying out a quick repair. The main reason is a non-working coolant temperature indicator. If the engine overheats, there is a high risk of getting it repaired. Let's consider each of the possible causes of the malfunction.
Fuse blown
In the absence of mechanical impact on the panel, its sudden breakage is very surprising. An inexperienced driver will rush to contact a service center, or will try to disassemble the body on his own in order to find out the location of the breakdown. Note that the first action that needs to be performed when all elements on the panel are inactive at the same time is checking the fuse. Depending on the year of manufacture of the vehicle, the mounting blocks with fuses may differ. In the old-style block, the fuse is located in the bottom row . If you count from left to right, then the desired element will be the ninth in a row .
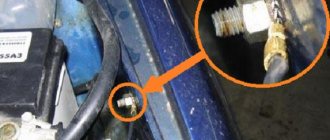
On later 2114 models, cars began to be equipped with modified mounting blocks. The safety element responsible for the tidy is located on the right side , the first in a row (from top to bottom) . In the photo it is located directly under the sliver.
Regardless of the year of manufacture, 7.5 Ampere elements were installed in the right place. If the instrument panel fails, first carry out the procedure to replace the fuses. As a recommendation, we point out that kits with spare parts are sold in all automotive stores.
Wiring damage
The next point that is worth checking if there is a malfunction is wiring diagnostics. Power for the panel elements comes through wires and plugs hidden behind the housing. To check the wiring, you need to dismantle its assembly, and then take power measurements with a multimeter.
The diagnostic process is quite simple, but for those who want to consider the instructions for using the multimeter in more detail, we recommend visiting the YouTube video hosting site. A break in the power supply circuit of the panel devices causes its complete breakdown, or the failure of only some elements. In any case, checking the wiring is the second thing to do after replacing the fuse. If the devices on the VAZ 2114 do not work, then the reasons lie in the following points.
Damage to the board
The most important part of the design is the board. Even partial damage to its surface causes serious disruptions in the readings of the tachometer, speedometer, temperature and fuel level. The board burns out due to a short circuit. Re-soldering contacts on the VAZ board is a waste of time. The fact is that after such a repair the board will not last long and will fail again. The solution to the problem is to completely replace the element with a new one.
4. Malfunction of the entire fuse box
Another reason why the instrument panel does not work may be a malfunction in the mounting block. Burning of the contact point leads to permanent burnout of the safety element. This interferes with the correct operation of the device. This problem is eliminated by replacing the entire block assembly. There is nothing complicated in this procedure, and the cost of ready-made replacement options is low. You can also try to restore the fuse box by resoldering the tracks.
A non-working VAZ 2114 dashboard is a problem for the driver. When it malfunctions, it happens that the wipers do not work. All of these are links in one fault chain, so if you observe a simultaneous failure in two of these nodes, carry out diagnostics.
The direct cause of the malfunction can be indicated by the on-board computer (if equipped). Built-in capabilities diagnose all systems and determine the source of the problem.
Fix problems immediately after they are discovered, because... If the instrument arrows do not show, it is difficult to determine some indicators of the car’s condition.
Reasons why the PP stopped working
In fact, there are not so many of them and the most common are:
- The easiest one is poor contact between the panel and the electronic control unit. The problem is solved by replacing the plug or simply cleaning the contacts.
- A breakdown in the instrument panel itself or malfunctions. To solve the problem, all connectors are reconnected, taking into account the correct connection diagram.
- Malfunctions of the tachometer, speedometer, fuel level controller. In this case, the cause is mechanical or electrical. To troubleshoot problems, replace regulators or check the operation of fuses.
- The illumination of the VAZ-1215 software stopped working. In this situation, it is necessary to find out the cause of the problem.
It is unlikely that a simultaneous failure will occur in the operation of the sensors on which the operation of the PP directly depends. If we take into account that they do not work directly with devices, but through an ECU (electronic control unit), then, accordingly, malfunctions will lead to the PP stopping working. In addition, it is worth noting that the engine will also stop working.
There are situations when all devices on the panel stop working simultaneously. In this case, the car driver must check the condition of fuse F16, which has a power of 16 A.
To check, you must turn on the hazard signal or turn signal. If they don't work, it means the fuse has blown. Therefore, we can conclude that a short circuit has occurred. To fix the problem, check the electrical circuit.
However, it also happens that the fuse is intact and in working condition, but the instrument panel on a VAZ-2115 car stops working. Here the reason is much more difficult to find out. The solution to the problem is to remove the instrument panel and check whether voltage is flowing from this fuse to the terminals of the white and red blocks. The white block supplies power to the speedometer, tachometer, and temperature gauge. And the red one is the fuel gauge.
If, as a result of checking, the terminals show a voltage of +12 V, then this indicates that the PCB does not work as a result of poor contact of the wire that goes to the ground of the car. If the +12 V voltage is not reflected at the terminals, then it is necessary to disassemble the mounting block and look for the cause of the problem.
Characteristics of panel types
The panel located in front of the driver, containing a set of warning lamps, is called a panel.
It has another name - torpedo and consists of the following components:
- The unit that records the speed of the car – the speedometer.
- A device that keeps track of the number of revolutions - a tachometer.
- Two indicators: coolant temperature and fuel level.
- Indicator lamps of different colors.
- Six separate lamps responsible for illumination.
- A number of backup sockets where lamps can be turned on.
- One red block. On the electrical diagram it has X
- Another white block, marked X
Europanel for VAZ 2110Panel for VAZ 2110 old model
On the VAZ 2110 there are 2 types of dashboards: old model and Europanel.
The differences between them are as follows:
- old panels have a symmetrical arrangement of devices;
- In the Euro device, the fuel gauges and the amount of heating of the coolant are shifted to the right.
VAZ 2114 – why doesn’t the dashboard work?
Why does the VAZ 2114 dashboard not work? There can actually be many reasons, here are some of them:
- Blown fuse
- Burnt tracks on the board cannot be repaired. In this situation, everything can be solved by installing a new circuit. You shouldn’t be afraid of this, its cost is not high, and you can replace it yourself.
- A break in the electrical wiring can be called the most complex, unpleasant and difficult to identify type of breakdown. In this case, power is not supplied to the instrument panel or one of the indicators, and it stops working. The fault is determined using a multimeter. The required wire is called back, the location of the break or poor contact is determined and, if necessary, replaced or cleaned.
If the dashboard lighting suddenly goes out, check the lamp brightness adjustment knob. It is quite possible that the child who was sitting in your car before unscrewed it, setting it to minimum.
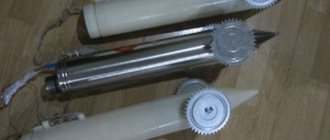
Troubleshooting VDO Instrument Panel Resistor
The problem described below appears only on VDO dashboards manufactured in 2006-2007 under article number 1118-3801010. It was installed from 2004 to 2011 on the Kalina, VAZ 2110, 2111, 2112, 2113 and 2114 models. We can recognize the manufacturer by its logo located under the inscription “km/h”:
Removed VDO instrument panel
This is due to a manufacturing error . On the dashboard board there are two resistors labeled “E6E”. One of these resistors was soldered crookedly . As a result of such defects, over time, cracks form in the solder due to which contact is lost and the on-board computer stops responding to the joystick of the steering column switch.
If the steering column switch is working properly, then this is definitely a problem in the “E6E” resistor!
What is needed to eliminate the VDO instrument disease
To complete the work you need:
- Soldering iron with fine tip.
- Solder (tin).
- Tweezers.
- Magnifying glass.
- Table fork.
- Screwdriver with star tip.
To diagnose this problem, you need to disassemble the dashboard. To do this, the dashboard is removed from the car and disassembled. And then the problem area on the board is inspected and soldered.
Disassembling the VDO dashboard
To disassemble the VDO panel, you need to snap off the front transparent plastic part of the panel, which is held on by six clips along the contour. Afterwards, the four star bolts are unscrewed and then the back cover is removed. After this, you need to snap off the black casing that remains on the front of the instrument panel. It is also held in place by plastic clips. This will allow you to remove the top glass and bottom cover from the dashboard.
Instrument panel with glass and bottom cover removed
To disassemble completely, remove the arrows and then unclip the latches from the board.
Removing the hands
You can use a table fork to remove the arrows on the instrument panel from their seats. Before shooting, it is important to remember their location! The fork must be inserted under the arrow and, by gently pressing and rocking, tear it out of its seat.
To avoid scratching the instrument scale, it is advisable to place some soft cloth or a cotton pad under the plug.
The location of metal clamps in the center of the board and plastic ones at the edges
Then we proceed directly to removing the board from the remaining part of the instrument panel. To do this, you need to snap off the four metal clips in the center, as well as the four plastic clips along the contour. In the photo, these fasteners are circled in black.
Arrangement
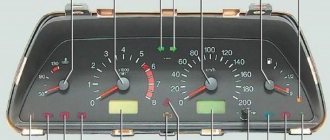
So, what can you see on the instrument panel in this car? The combination consists of several components:
antifreeze temperature indicator in Celsius; tachometer - number of revolutions of the power unit; right and left turn indicators; speedometer - vehicle speed; fuel reserve - volume of fuel in the tank; image of a gas station - signal about the need to refuel; control indicator for starting dimensions; brake fluid level indicator; starting high beam headlights; knob for adjusting the clock; display showing the total and daily mileage; hazard warning indicator; screen with a clock; battery charge level; check engine - indicates an engine malfunction; indicator indicating the handbrake is turned on; oil pressure level; light bulb air damper - available exclusively on carburetor engines.
Causes and Troubleshooting of the Control Panel
When the instrument panel does not work on a VAZ 2110, this may be due to its complete failure or a malfunction of individual indicators. In special cases, along with the lighting fixtures, the left-side side lights and the rear license plate illumination stop working. The reason is the failure of the fusible element.
Fuse problems
Failure to operate the instrument panel occurs if the ampere fuse has blown. It occupies 15th place in the mounting block and is marked F6. If this happens, it is necessary to look for the reason for its failure. Simply replacing the element with a new one will not solve the problem. We can say with confidence that it will also burn out immediately. The cause is a short circuit in the circuit. It is necessary to find and eliminate it.
Chaotic movement of arrows on the instrument panel
It happens that the dashboard on a VAZ 2110 does not work, the arrows on the tidy jump and behave unpredictably. Within a few seconds they show either the maximum or minimum value. This means that it is necessary to check the contact with ground. This applies to the tachometer and fuel gauge. The ground wire fastening connects the instrument panel to the partition that separates the engine compartment from the interior space. To find this place, the radio is removed.
If an alarm is installed, such fasteners are transferred behind the interior trim, to the place where the driver’s left foot is located. When purchasing a car, this information is provided to the driver.
Sometimes the arrows start jumping after installing the radio. This happens because the tidy wire was not securely fastened. While the vehicle is moving, contact is lost. To eliminate such a breakdown, you just need to secure it more securely. After this, the arrows will display the correct information and stop jumping.
Cigarette lighter failure
It happens that the instrument panel of a VAZ 2110 does not work due to the cigarette lighter. Its socket is often used to connect various devices of higher power. This is where phones are charged, tablets or other equipment are turned on. There is a significant amount of current consumption. As a result, fuse f6 blows.
If the fuse is working, you should look for another reason. To do this, you need to unscrew the shield mount and pull it out. The wires leading to it are left in place. The voltage is checked at the contacts, which are numbered in the diagram: 6,9,10. The voltage everywhere should be 12 volts. The wire leading to ground, which is located on block X1, is checked. Its color is white.
Problems with the speedometer
If the instrument panel does not work on a VAZ 2110, this may be due to a broken speedometer.
This is expressed in the following manifestations:
- the arrow is completely motionless;
- trembling of the arrow followed by its stop;
- The speedometer operates only until the engine is completely warmed up.
The VAZ 2110 with injection nozzles has an electronic speedometer. If the device fails, then it simply needs to be replaced.
However, more often the reason is different:
- The signal to the speedometer comes from the sensor. A possible reason for its absence is contamination of the device. Then it is removed, washed and dried.
- Lack of good contact. The wiring is visible throughout.
- When the sensor itself fails, it is replaced.
How to identify a malfunction
There was no indicator screwdriver, just a small flashlight and some thin copper wire. It was decided to identify a blown fuse in the mounting block by dialing. For this diagnostic method, it was necessary:
- disassemble the flashlight;
- cut one wire (in the flashlight circuit);
- add two small pieces of wire (about the same cross-section) to the ends of the cut wire;
- close the flashlight key (turn on the flashlight).
As a result, the result was a homemade device for testing individual circuits and, in particular, for testing fuses in the mounting block located under the hood on the driver's side. You, of course, understood how to use such a “device” (two wires with bare ends are taken, which are subsequently connected to the fuse contacts). The two wires brought out from the flashlight serve as “device probes”, when closed, the flashlight light comes on.
A blown fuse was subsequently found (identified) in the mounting block, this is a 7.5 A fuse F10, which is responsible for lighting:
- devices,
- engine compartment
and car number.
There was no spare fuse of the same type in reserve and, accordingly, the question arises: How can I replace the fuse?
How can I replace the fuse?
In the current hopeless situation, it was necessary to install a piece of thin copper wire instead of a fuse, after which the instrument panel and other current consumers began to work properly. Of course, this is not the best way to fix the problem, but nevertheless, after fishing we arrived home safely. Upon arrival home, the car driver installed a working fuse of the appropriate color.
Replacing the fuse on a VAZ 2115
Each fuse that is included in the electrical circuit of the car must correspond to its rated current value, which thereby protects current consumers for a particular circuit from malfunction.
fuses for vaz 2115
To make it easier to find a fault both in the lighting and in other consumers, the manufacturer provides colors for the fuses. The schematic representation of the mounting block (Fig. 1) clearly shows the location of the fuses and relays included in the electrical circuit of the car.
rice. 1
Fuse colors
There is no need for any explanation regarding the color marking of the fuses; everything already looks quite clear. Each fuse with a certain color will correspond to the maximum current value.
Let’s say that if the power windows malfunction, you must first check fuse F6 with a maximum current value of 30 Amps, and then (depending on the circumstances), check the remaining connections in this circuit.
That's all for now. Follow the section.
Why the panel on the VAZ 2114 does not work
On every car, there is such a thing as: an instrument panel. It helps the driver determine the current speed of movement, the number of kilometers traveled, the speed of rotation of the crankshaft, and on more modern models, the level of necessary fluids and the condition of some systems. On a VAZ 2114 car, the instrument panel includes four dial indicators, twelve indicator lights, and two small screens.
For better visibility of the signs, especially at night, a backlight is installed that illuminates the entire shield. As practice shows, the instruments on the dashboard, including the backlight, break down quite rarely, but still, what should you do if this suddenly happens to your VAZ 2114?
ONE OR MORE LIGHTS ARE NOT BURNING
In this case, there can be two situations:
- The backlight of the VAZ 2114 instrument panel does not light up;
- One or more warning lamps are not working.
Let's consider the first variant of malfunctions, when the backlight of the VAZ 2114 instrument panel does not work. You must begin checking the functionality of the backlight by checking the serviceability of the fuse in this circuit. This only applies when all the backlights are off.
The fuse box on this model, as well as on the VAZ 2113 and VAZ 2115, is located in the engine compartment on the driver's side. You need to remove its cover and find the fuse responsible for the backlight, this is F10. It is designed for a current of 7.5 A. If it burns out, replace it with a new one and check the operation of the backlight paws.
Further events can develop as follows: either everything works or it doesn’t. If the instrument panel backlight works, the test ends here, otherwise it is necessary to continue troubleshooting. It may be due to poor contact of the connectors or an open circuit in the power supply of the backlight lamps.
To find and eliminate these problems, you need to remember the basic concepts of the laws of electrical engineering, and have a car LED electrical circuit tester, tester or voltmeter. If there is neither one nor the other, then it is better to seek help from an auto electrician.
The situation is much simpler when one or more, but not all, backlights are off. Burnt out light bulbs are simply replaced with known good ones. From the practice of auto electricians, we can conclude that in most cases a fuse or light bulb blows. It rarely comes to troubleshooting using instruments, but sometimes it happens. You should be aware that if a replacement (new) fuse blows repeatedly, you should look for a short circuit in the electrical circuit.
In the second case, they do approximately the same, but take into account that there are no fuses for each indicator lamp. They try to replace the light bulb with a new one, if it doesn’t light up again, then the contacts need to be checked. As a rule, this is enough to troubleshoot problems. Otherwise, it is better to ask a specialist for help, because the sensor that works in conjunction with this warning lamp may be the culprit.
Dashboard lamps
The reason is the fuse
It is recommended to start your search with this element, because in most cases the fault lies here. If this component is “involved,” then first you have to figure out which of all the fuses is responsible for the dashboard lighting, find out its location and replace it with new ones.
After the fuse has been changed, you need to check how the instrument panel functions. If there is no light, then the cause needs to be looked for further.
Removing the old and installing a new panel
The process of replacing a Europanel does not require inviting highly qualified craftsmen.
Accompanied by preliminary preparation:
- battery power is turned off;
- The steering wheel and the facing part of the column are removed;
- sometimes the seats come out.
Removing the old panel
Dismantling instructions:
- The shields located at the feet of people sitting in front are dismantled.
- The curved plug is removed from under the handbrake;
- The window regulator cover is removed and the cigarette lighter connector is removed.
- The cover is removed from the gearbox lever. The air ducts going to the rear seats are removed.
- The plastic covers of the roof pillars are removed. The radio is pulled out.
- The plugs are removed from the top of the panel. The nuts that appear are unscrewed.
- Then the bolts located along the contour of the lower edge, as well as at the feet of the driver and passenger, are unscrewed;
- The mounting block is dismantled and the plastic casing is removed.
Installation of a new panel sample
Both panels have different dimensions, therefore, installation is carried out using 3 methods:
- a new instrument cluster is adjusted to the existing panel dimensions;
- the panel is being completely replaced with a new sample;
- Installation of the Euro-plate is underway.
The latter method is rarely used. This is due to the fact that installation requires combining the wiring. Work is being carried out on a panel removed from the car.
If the panel on a VAZ 2110 does not work, you need to check the condition of each indicator. Make sure the safety elements are reliable. Next move on to checking the sensors. If a breakdown is detected, repair it. If the unit cannot be repaired, replace it.
Installation of a new instrument panel on a VAZ 2110
Due to the different geometry of the combination of the new and old sample, three installation methods are possible:
- with adjustment of a new type of combination to the dimensions of the instrument panel;
- installation of a completely new instrument panel;
- with the installation of the so-called Euro pad (an extremely rare case, since the part is not on sale).
The fitting procedure is as follows:
- Trim the mask along the bottom edge. Trimming is done with a knife, soldering iron tip or other tool. The upper part is adjusted by heating with hot air.
- Putty the transitions of the mask, using the new devices as a template.
- Sand the transitions, sealing possible defects with putty.
- Perform final surface grinding.
- Coat the part with primer and paint it in the desired color.
- Install parts on the car.
Photos of the process of fine-tuning the VAZ 2110 mask for installation of a new sample combination.
Installation of the Euro trim is carried out on the removed instrument panel. Instead of the removed old shield from the VAZ 2110, it is possible to install a part from Priora. But for all components to work properly, you will need to connect parts of the old and new wiring, which is a difficult task.
Device connection diagram
The wire connection is shown in the diagram. Since factory wiring adapters are not available, owners make homemade harnesses. To assemble it, you will need a plug for the new dashboard and two plugs removed from the old type combination.
Standard connection diagram for a new “tidy”
Why the instrument panel of the VAZ-2114 does not light up and what to do
The panel on which all the instruments are located is a very important part of the car, since with its help you can really control how the injector works, the speed of movement and the operation of the braking system. In addition, the panel will help you understand why the car does not start. If the instrument panel does not light up, then it is impossible to easily take readings from them on a VAZ-2114, especially at dusk. The numbers will merge, and the motorist risks getting into an emergency. We'll tell you how to get rid of this problem.
Why might the dashboard lights not light up?
There are many reasons for this malfunction. The electrical wiring of the VAZ-2114, like all domestic cars, is not the strongest part.
The most common reasons for backlight failure:
- failure of a group of LEDs;
- the light bulb burned out;
- the appearance of oxide on the connectors;
- broken or shorted electrical wiring;
- fuse failure;
- faulty common contact board;
- dimensions are damaged;
- lack of supply of “mass” to the body.
A voltmeter and tester will help you find the cause of the malfunction. With its help, you can check sections of electrical wiring and lamps. The device will also help you find out which fuse has failed. In most cases, you will have to remove the dashboard. We will talk about this procedure further.
How to fix problems
Prepare for work a set of screwdrivers (straight and curved), keys 8 and 21, special plastic tweezers for removing fuses and a tester.
Next, disassembly should be carried out according to the instructions:
- Disassembly begins with removing the cover. To do this, you need to unscrew 3 screws. There is a protrusion under it that needs to be removed from the body bracket.
- To remove the screen you need to unscrew 5 screws, they are located in the console lining on the right.
- Remove the terminal from the battery (usually the negative terminal is recommended) to disconnect the power to the car. Only after this, disconnect the wiring harness block from the cigarette lighter.
- Remove the handle from the lever. Disconnect the fastening of the electric fan located on the heating unit.
- After this, remove the bolts on the steering block brackets. Remove the light guide, lamp sockets and decorative insert of the instrument panel.
- Using a 21 key, remove the hydraulic corrector illumination lamp.
- Remove the screws from the bottom and top so that you can remove the dashboard.
It is important that the electrical circuit is in a place safe from dust and moisture. Cover it with a cloth or thick film to prevent the entry of aggressive substances.
Test the light bulbs first. If they fail, they must be replaced with new ones; in most cases, this is enough to restore the panel’s functionality. However, do not exclude other causes, for example, check connections and conductors for the presence of oxide. Carbon deposits often form on lamp sockets, which also leads to a lack of panel illumination.
If only the instrument panel stopped working, but all the lamps showed operability during testing, then the reason is hidden in the fuse block. In this case, check each fuse and replace the ones that are broken. When purchasing components, you must be guided by the marking of the failed fuse. You should not replace it with homemade products or components with higher current strength.
If the fault lies in damage to the board itself, which is extremely rare, then you simply need to replace this element.
How to replace the backlight
Sometimes it is necessary to disassemble the dashboard if a car enthusiast decides to modify it. The backlight may simply not suit the car enthusiast with the color of the lamps and the intensity of their work. In order to completely update the backlight, you will need to calculate the number of lamps for each sensor and purchase them.
When installing LEDs into sockets, it is important to observe their polarity. You may need to carefully grind down the sockets to get the bulbs to fit into place. After you assemble the new backlight, check its functionality by connecting it to power. You can check the build quality with a special device.
The next step is to connect the new backlight to the main board and to the lamp circuit. Carefully secure the LEDs so that they do not interfere with your installation of the panel. When assembling, check the position of the instrument needles; they must be set to zero during assembly. The arrows should not bend or deform.
Next, all you have to do is secure the entire structure with screws and carry out the final reassembly. It is important not to try to assemble the panel completely at once; do not fasten the decorative parts so that you do not have to remove them again. After connecting the instrument panel to the electrical circuit, check the build quality and operation of the sensors using the on-board computer. If everything is normal, then finally secure the panel and complete the assembly.
VAZ 2115 stops do not work
The VAZ 2114 (2113) car is equipped with brake lights in the rear lights (one in each light). Plus, an additional brake light in the spoiler on the rear door.
There are few reasons why the brake lights of a VAZ 2114, 2113 car do not work. Let's list them all and try to figure out this problem ourselves.
Stop lights (brake lights) of VAZ 2114 (2113) do not work, reasons
Either one brake light or two at once may not work.
The brake light bulb in the rear light is burnt out.
Most often, only one lamp burns out, but sometimes two lamps burn out.
Brake light (stop) lamp in the rear light of a VAZ 2114 (2113) car
In this case, you will have to replace the lamp with a new one or a known good one. The brake light uses a P21W lamp. Similar lamps for the turn signal, reverse light, and fog light are in the same rear light. They can be used to check the brake light by replacing it.
The contacts in the stop lamp socket have oxidized
In this case, a “break” occurs in the electrical circuit of the lamp. Most often, in this case, one brake light will not work, while the other will be on.
Cartridge and contacts of the brake light lamp in the rear light of VAZ 2114, 2113
To restore contact, you need to turn the light bulb in the socket several times, or remove it and clean the oxidized contacts with fine-grained sandpaper.
The wiring block for the rear light is faulty (chip)
Either it is not securely fastened, or the contacts have oxidized. In any case, there will be an open circuit in the electrical circuit.
It is necessary to remove and put the block on the terminals of the rear light board several times to restore oxidized or unreliable contact. Subsequently, you can clean the pins on the board and the wire tips in the connecting block.
The fuse in the mounting block has blown
If the fuse is blown, both brake lamps in the taillights will not light.
The electrical circuit for turning on the brake lights of the VAZ 2114 (2113) is protected by fuse F3 (7.5A) in the fuse and relay mounting block. Check the integrity of the fuse. If faulty, replace with a new one. If the fuse is blown again, you should look for a short circuit in the circuit. According to the connection diagram shown below.
The track in the rear light board has crumbled
As a result, the electrical circuit will be broken (“open”), and the brake light lamp will not light up.
Tail light board tracks for brake light
It is necessary to remove the rear light board where the brake light is not illuminated and inspect it for damage to the tracks. If you cannot visually detect the location of the damage, you should “ring” the tracks with a multimeter or test lamp. Wiring is soldered to the damaged track and the board continues to function. For details, see the article “Checking the rear light board.”
The rear light ground is missing
In this case, one or two lights may not work. The negative wire of the lamp of each of the rear lights comes out of its connecting block of wires (chips) and is attached to the body next to it. Over time, this connection oxidizes and the contact disappears (the circuit opens).
It is necessary to unscrew the nut securing the tip of the negative wire to the body. Clean the pin and tip. After which the contact will be restored and the stop will light up.
Brake light switch faulty
If it malfunctions, both brake lights will not light up. The switch is located under the brake pedal and, after pressing it, closes the contacts of the electric stop circuit.
We remove two wires from it - white-red and pink-red, and connect them together with a piece of wire. The brake lights are on fire - we change the sensor, no, then we check the electrical circuit. In addition, we check the adjustment of the free play of the brake pedal, since the position of the switch may be broken, it does not work completely and the contacts do not close.
“Open” in the electrical circuit of the stop lamps
The cause of the “break” may be insecurely fastened wire harness chips, oxidation of the contacts in them, breaking of the circuit wires or their damage as a result of repairs.
Using a multimeter in voltmeter mode, you can check the presence of voltage in various parts of the electrical circuit and determine the damaged area. The best way to do this is to use a diagram.
Stop lights (brake lights) in the rear lights of a VAZ 2114, 2113 car, wiring diagram
First of all, we check the presence of voltage at the tip of the red wire in the rear light blocks to understand the malfunction in the lights or circuit. Then we check for voltage at the tip of the white-red wire of the brake light switch under the brake pedal.
Wiring
If the cause of the malfunction lies here, then most likely the wire has broken. You can check this by ringing each of them with a multimeter, since a break in even the smallest one will cause the backlight to stop working.
Also, do not exclude the possibility of oxidation of the wires, but in this case all indicators will fail. To fix this problem, the wiring harness on the fuse box and light panel is unfastened. Then the contact group is cleaned and everything is mounted back. Again, after installation, you should check whether the dashboard functions.