Dimensions of openings and clearances of mating parts of the car body of the VAZ-2121 model
Engine and suspension mounting points on the body of a VAZ-2121 model car
Mounting points for the engine and suspensions on the body 21214 and 2131
1 – fastening of the front suspension cross member; 2 – mounting of the anti-roll bar; 3 – fastening the rear suspension of the power unit; 4 – transfer case fastening; 5 – fastening of the lower longitudinal rods; 6 – fastening of the upper longitudinal rods; 7 – attachment point for the rear suspension transverse rod. ( )* – size given for body 2131
Engine and suspension mounting points on the body 21214M, 2131M
7 – fastening of rear shock absorbers; 8 – attachment point for the rear suspension transverse rod. ( )* – size given for body 2131M
Dimensions of openings and clearances of mating body parts 2121,21213, 2131
| A | B | IN | G | D | E |
| 1112±5 | 1320±5 | 955±4 | 782±2 | 883±2 | 1710±6 |
| AND | 3 | AND | TO | L | M |
| 938±2 | 1420±4 | 575±2 | 1420±4 | 780±2 | 1395±5 |
| N | ABOUT | P | R | WITH | T |
| 950±4 | 1250±5 | 1090±5 | 855±4 | 480±2 | 570±2 |
Points of attachment of components and assemblies to the body and dimensions between them - VAZ-21213 (clickable)
Sections of body parts
Clearances of the door, hood, lock door with mating parts (indicated in mm.)
Large poster with control points, angles, degrees
Video
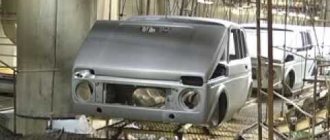
DIY buggy from NIVA
I really wanted to make a buggy with my own hands from a cornfield with all-wheel drive , and, according to the idea, it should be lighter than the standard one and have a completely independent suspension. There are several buggies where both front suspensions from Niva are used as suspension. I consider this a half-measure, since the entire front suspension assembly weighs as much as 130 kg. My fist after weighing is 2.4 kg, Niva’s is 6! The only thing that needs to be done is to preserve the layout of the units from the donor - the most standard spare parts.
Everything else is my fantasy at someone else’s expense. The main purpose of the car is fishing and trips to the forest. UAZ tires, Cordiant Off Road on overcooked Niva wheels. 1.7 engine, 4-speed gearbox, cardan shafts, RPM - everything is standard.
After I agreed with the client on the general concept of the machine, I had to make several sketches on paper and transfer everything to the computer. I work in AutoCAD and the ultra-modern paper-pencil system:
Since there was no welding table, we had to make a base from what was at hand - a rolling table and two channels, which were brought into the plane and allowed us to make an even frame. The difference in the suspension mounting points (when measuring diagonals) is 2-3 mm, although in reality you didn’t have to bother with that.
Protection of the engine compartment from dirt and rust on Niva (VAZ 2121, 2131)
Have you noticed where rust appears in the Niva’s engine compartment? The spare tire disc, side members, the area under the brake fluid reservoir, the battery area, etc. become rusty. This happens due to water and dirt getting under the hood of an SUV. Let's consider an integrated approach to protecting the Niva's engine compartment from moisture.
Installing an additional hood seal
When it rains, water enters the engine compartment through the gaps between the hood and body near the edges of the windshield. This can be prevented by an additional seal, which should be installed as a continuation of the standard one.
- Clean and degrease the surface where the seal will be installed;
- Apply sealant to the seat;
- Install an additional seal (a piece from the Niva rear door seal will do, catalog number: 21213-6307024-30).
Apply the sealant with your finger and remove the excess.
Modification of the drainage tube (extend)
The standard tube drains water in such a way that it gets onto the metal of the body, where rust appears over time. Our task is to lengthen the drainage tube using a dropper so that the water leaves bypassing the spar.
The whole process is also shown in the video:
Protection of side members from water and dirt
Water can also get onto the side members from the wheels of the Niva. Standard fender liners (lockers) are not able to protect them fully. We finalize the design by installing plugs made of pieces of plastic or rubber into the opening:
Comprehensive modifications will help protect the Niva’s engine compartment from moisture and dirt, which will significantly extend the service life of parts. Have you modernized the engine compartment this way? Let us remind you that the website provides other instructions for improving the domestic SUV, for example, installing a gas stop on the hood, or how to protect the Niva’s gas tank from thieves.
Source
How to choose a part: average prices
When choosing spare parts for Niva, look at the article number. The part must fit exactly your car model. Don't take the bottom from a Chevrolet Niva. It has different dimensions, which means the part will have to be trimmed.
When buying a new spare part, remember that the factory bottom does not have a number of elements:
- hairpins;
- fastening elements;
- bracket for the hand brake cable.
They will have to be moved from the old flooring. If you are not sure of their safety, it is better to immediately order all the related parts. The average price of the bottom in the capital is 5,000 rubles. If you want to buy a spare part cheaper, contact a VAZ car dismantling center.
Repairing the bottom yourself requires patience and time. Spare no effort in processing the metal and cleaning it from rust. Poor preparation and careless attitude towards post-repair work will negatively affect the service life of the new body element.
Protection from the crankcase to the transfer case to the field
Author: admin · Published 12/21/2015 · Updated 05/24/2016
Do-it-yourself protection of the crankcase, bottom, and units in the field. Simple and cheap. For this we need:
- Sheet metal from 3 to 5 mm.
- Drill, drill bits
- Bulgarian, circles
- Rust converter and paint
- Mounting bolts and nuts
- Hammer, keys
- Roulette
- Brackets and bushings of the VAZ 2121 stabilizer
Everything was measured according to our own vision of good protection, the length and width can be varied as desired.
Let's start with protecting the RPM (Front Axle Gearbox).
We cut a piece of metal according to the shape, make 4 holes for mounting on the stabilizer. We make the necessary bend to go around the front beam and overlap the standard engine protection
Treated with a rust converter
We paint and attach to the car
Next, let’s slightly modernize the standard crankcase protection:
It can be attached to the standard protection by welding or bolts. Next, we proceed to protect against RPM to the end of the transfer case. Having carefully measured everything, we proceed to adjusting the sheet to the dimensions we need.
First we make only 2 holes for attaching to the stabilizer
We manufacture protection hangers
We paint and attach:
The side mounts are standard gearbox mounts. The rear fastenings are on studs, which were made in advance. To simplify the process, the rear mount can be made on the transfer case cushions.
The general view turned out like this
The protection has a big plus, it is light. For example, the largest rear part weighs just over 5 kg
And it does not protrude below the muffler, which has no effect on the ground clearance.
In addition to its direct purpose, protection can also be useful as a “ski.” The flat bottom of the car allows you to move along the track and the protruding parts (units) of the bottom do not play the role of an “anchor”, do not cling to the ground and thereby do not slow down the car.
Source
Preparation for repair
It is quite possible to carry out repairs to the bottom of any Niva model yourself. Before welding a complete bottom or installing patches, dismantle the interior.
- Remove the seats.
- Remove the carpet.
- Remove the old sound insulation.
- Move the electrical wiring to the side to avoid touching the wires during repairs.
Tools you will need:
- hammer;
- welding machine;
- screwdrivers;
- electric drill;
- Bulgarian.
After removing the sound insulation, the metal is thoroughly cleaned and wiped dry. Problem areas are cleaned with a grinder. It can be replaced with fine-grained sandpaper. Then the metal surface is degreased and treated with an anti-corrosion agent.
Do-it-yourself engine protection for VAZ 21213
For a long time I was planning to build myself a crankcase protection, and finally I figured something out.
I used this pattern to cut the sheet. I made the pattern out of cardboard, then redrew it, it seemed like the dimensions all matched, and I didn’t have to adjust the protection to the location.
1. At the rear, I attached an angle No. 50 to the longitudinal link mount, through steel plates 4 mm thick:
2. On the corner, from the inside, I welded two M8 nuts.
3. The protection sheet was first cut along the fold lines with a grinder to about half the depth, and after bending it was boiled:
4. The mounting holes were marked in place. Two holes in front with standard thread:
One in the center, fastened with an M8 bolt into a standard bracket on the beam with a flush-mounted hexagon socket bolt:
At the back there are two M8 bolts to the nuts on the corner:
5. Inside, on the frontal part, I welded several stiffening ribs, the main thing is that they are located to the left and right of the pallet, otherwise they may touch!
6. I painted it this way because I had paint and a spray gun.
7. I coated the inner surface with anti-corrosion mastic.
8. RPM did not make a hole for the drain plug. It doesn’t take that long to remove the protection, and you don’t need to drain the oil from the RPM every day.
Source
Niva trunk: current situation, first attempt at improvement
A simple replacement of plastic factory shelves with purchased wooden ones (20 mm plywood, coated with carpet) ended in failure. The noise has not decreased, and functionality has not increased.
The homemade trunk was of average quality and cost 1,800 rubles.
The main reason is the “flimsy” design of wooden shelves. It is clear that the manufacturer tried to save money on everything. For comparison, the photo below shows the main part.
Crankcase protection for VAZ Niva 21214
It becomes possible to install a wheel with a radius of 31 inches, which is considered optimal for the Niva 2121 to overcome most of the obstacles encountered. The angles of entry and exit of the SUV from obstacles, as well as the radii of the vehicle’s longitudinal and transverse maneuverability, also increase. Sometimes only the front part of the Niva is lifted, since the size of the “apple” of the rear axle is small. It is this half of the car that accounts for 64-67% of its total weight.
When lifting the structure, the clearance on the bridges increases slightly, except in cases where a more expensive and complex modification is performed - the installation of portal bridges.
The service life of the body also increases, and the protection of mechanisms from damage improves. On the other hand, if you plan to participate in rally raids, you will have to take care of enhanced crankcase protection.
There are two ways to lift a car.
- Body lift. In this case, the car body is raised above the wheel axles using stands for it, modification of the hose, etc. This option is not suitable for the Niva 2121, since its design does not include a frame. As an option, you can trim the wheel arches, which will allow you to place wheels of a larger radius in them. In this case, it additionally becomes possible to cut off the edges of the arches damaged by rust. At the same time, the clearance increases within 4-5 cm.
- Suspension lift. It is more attractive for increasing the cross-country ability of a car. We “raise” the entire car without cutting the arches, using spacers and washers for the shock absorbers, and installing larger springs on them. In this case, the clearance can be increased by 5-8 cm.
Sometimes both the first and second methods are combined. This makes tuning more expensive, but allows you to raise the body by a significant amount.
The simplest, safest and most cost-effective lift of the Niva 2121 is the installation of rubber spacers over the suspension springs.
To increase the ground clearance by 1.5 cm, it is enough to install K-139 tires, the size of which is an inch larger than the factory one. Don't chase heights. With a high lift, you can “break” the spar or axle shafts. The risk of the vehicle rolling over also increases.
What problems may arise
The fact is that to replace the engine on a VAZ-2121, you can choose almost a dozen different engines, but they are all from foreign cars. But the main problem is that you will have to do some additional work during installation, for example, install or change fasteners, add new parts. Because of this, it is not so easy to find a budget replacement option. The choice is significantly narrowed down to just a few options. In order for an engine to be suitable for installation, it must meet several conditions:
- The engine from a foreign car must be freely placed in the Niva engine compartment. This is one of the most important criteria to pay attention to. If you have to add new parts, adjust old ones, or change the shape of the body, it’s better to discard this option. The cost of such a replacement is too high to be profitable.
- The new internal combustion engine should not be inferior or significantly exceed the power of the old version. The maximum permissible excess power is 10-20 hp, that is, from 90 to 110 hp. In this case, the maximum power limit is a critical value, and parts with this indicator are not recommended to be installed at all.
- The replacement must provide some benefit, otherwise it will be useless.
Which engine should you consider first?
Like many brands of cars, the body deteriorates the most during use. Main “sore spots”:
- rust under the headlights;
- lower parts of wings;
- thresholds;
- arches;
- the bottom under the driver's feet.
Also interesting: How to correctly perform chip tuning of a Niva engine
I would like to talk about the last problem in more detail. The bottom under the driver's seat of the Niva deteriorates due to constant contact with water. In winter it is melted snow, in other seasons it is rainwater. The liquid impregnates the sound insulation and the metal is rubbed to holes. It is also worth paying attention to the place where the transfer case is attached to the bottom. Cracks form there.
Installation of a ready-made lifting kit for Niva 21212
To understand the process, let’s look at the geometry of the suspension on NIVA SUVs (front axle). The drawings clearly demonstrate the position of the elements relative to each other. If you organize an elevator only by increasing the length of the spring, its bending radius decreases, and lateral loads appear on the mountings of the levers. To compensate for this side effect, spacers are used: under the spring cup and ball joint.
The standard version shows that the axle shaft (CV joint) is located virtually parallel to the ground. The spacer is installed between the spring and the lever. The radius of curvature of the elastic element is small, the softness of the suspension is maintained. The fastening is reliable, there is no backlash. Disadvantage - the additional element adds unsprung masses (aluminum parts can be used to reduce weight). The spacer is installed between the cup and the spring. There are no unsprung masses, the radius of curvature of the elastic element is even smaller than in the previous version. The disadvantage is that the attachment of the additional element is not so reliable.
In all cases, the elevator changes the position of the axle shaft. The load on the tripods (gimbals) increases. When lowering the suspension, the travel of the upper arm to the bump stop decreases. To restore the geometry, a spacer is installed under the upper ball joint. Factory kits are designed taking into account all the design nuances of the front axle and rear axle.
The set includes:
- Drawings for correct installation Spacers Extended shock absorbers New trailing arms for the axle Extended panhard rod New cups and springs
About standard engine protection
The Niva is designed primarily for off-road driving or very bad roads. This leads to regular landings “on the belly”, hitting the ground and stones. The standard crankcase protection for Niva 21214 is a curved metal plate 2-3 mm thick. Several fins and holes are provided for additional engine cooling.
In reality, according to reviews from most drivers, when driving on real off-road or deep snow, the ventilation clogs instantly. If you do not clean it regularly, then after a while a dense layer of mud will form between the crankcase and the protection. It leads to additional heating of the engine. In addition, the factory protective plate will save the maximum from soft ground. It can only withstand a blow against a large stone.
Therefore, it is strongly recommended to replace the standard crankcase protection with a professional one from a store or make it yourself. Some models consist of one element, others - of two (1 plate for the engine, 2nd for the gearbox and underbody). There are three materials for making parts, each of which has its own characteristics:
- Iron or steel. Factory version of the tread, which actually does not fulfill its purpose during aggressive off-road driving. It is cheap, but is present under the crankcase purely nominally.
- Aluminum (duralumin). The plate is 4-5 mm thick, but at the same time significantly lighter than its iron counterpart. The material does not rust and is practically not subject to corrosion; it does an excellent job of cooling and protecting the engine. A significant disadvantage is that the cost is almost 2 times higher than factory models.
- Composite The material provides maximum “armor”, not much heavier than duralumin plates. The main problem is the price (the average price tag is 8,000 rubles).
Welding work
The first step is to remove rusty metal and corrosion. It is advisable to carry out this work with a grinder. Hard-to-reach places are cleaned using a gas welding machine. Then the metal patches are cut out. This is done with special scissors. This way you can make correct, even workpieces without torn edges.
It will be easier for two people to weld a new floor, since you will have to fix the patch and weld it at the same time. Basic rules for welding the bottom:
- The patch is stuck at 3-4 points, and then completely scalded.
- Short sutures are used to correct small defects. Length – 3 cm.
- The patch is applied as tightly as possible. In gaps, corrosion quickly forms again.
- To increase the strength of the seams, they are hammered.
After repairs, be sure to check the work done in a well-lit room. If necessary, weld the seams on the Niva again. Only after this can the seam beads be cleaned.
Now about the necessary gadgets
Now it’s worth talking about what “bells and whistles” you will need when tuning your Niva for off-road use. So:
1. Let's start with the little things - the trunk. In general, the luggage compartment of the Niva is terribly small, so you either need a trailer or attach the luggage rack from above. It’s clear that we don’t need a trailer off-road. Therefore, we simply install an additional roof rack. Advice: Install a reinforced trunk, with powerful fastenings to both the roof and the body. You can also add a ladder, then it will be easier to climb.
2. Since off-roading also involves overcoming water obstacles, I strongly recommend that you do the following:
- completely seal the air filter and remove the air intake to the roof;
- replace the factory fan with twin electric ones. They can be turned off from the cabin when crossing a ford;
- of course, carry out additional waterproofing of the ignition system.
3. Finally, an indispensable attribute of off-road tuning is a winch. I’ll tell you what: very often I see a winch installed on a car, but it’s of no use. Why? Everything is very simple. Some people install a winch more for show than for purpose. In order for the winch to actually perform its functions off-road, you need to do the following:
- Be sure to purchase a quality product. Don't spare money on it;
- It is advisable to install a winch not only in front, but also in the rear. Then you can easily pull your field forward when necessary, and pull it back if you get really serious.