Side window deflectors, or simply called wind deflectors, are installed on many cars.
In addition to the fact that side window deflectors give the car a beautiful appearance, they do not allow rain and snow, direct sunlight (tinted deflectors) to enter the car interior, and, to some extent, protect the side windows from rapid contamination.
Also, the convenience of using side window deflectors lies in the ability to open the side windows of the car even in rainy weather and thereby provide air ventilation in the cabin.
The main material used in the production of side window deflectors is thermally formed plastic, which, despite its thinness, is very durable.
It is logical to assume that each car model has its own side window deflectors, a very large assortment.
There are basically two types of windshields, plug-in ones and those that are glued to the car doors.
Any installation of windshields does not take much time, but requires the right actions, which determine whether they will disappear immediately or be attached “forever”.
Correct selection of device
First of all, when choosing window deflectors, you need to remember that they are purchased exclusively in accordance with the specific brand and type of vehicle. There are no universal models, because the design of the body and windows of each car model is unique. The main criterion by which all devices are classified is the method of attachment to the car window. On this basis, the following categories are distinguished:
- Side window deflectors with a screw connection, for installation of which it is necessary to damage the hood and door frames by drilling holes in them;
- Devices that are mounted on a double-sided elastic lining treated with an adhesive liquid;
- Combined deflectors. Their design combines several methods of mounting on car windows;
- Side window deflectors, which are attached using special clamps and brackets.
Window deflectors
Units for the installation of which require drilling holes, thereby compromising the integrity of the car body coating, are becoming less and less popular. The most common installation methods today are the following:
- Glue the device with adhesive tape or insert it under a rubber gasket (used when working with window deflectors);
- Secure the device using clamps, brackets and special adhesive pads.
Price of car deflectors
The first thing to consider when choosing deflectors is their cost; it is unique for each car and, most often, good quality is not cheap. For example, simple wind deflectors from the manufacturer WeatherTec for the BMW X5 will cost from $50 to $100. The advantage of this manufacturer is that if one of the deflectors breaks, you can buy it separately, rather than buying the entire set.
Another manufacturer, Star, may offer chrome-plated deflectors made from durable steel. The cost of a full set will cost $140, and a pair will cost $70. Star also suggests buying a set in pairs if one of them breaks, rather than buying the entire set, thereby overpaying for unnecessary ones.
If you decide to purchase a budget option for a domestic car, then most often a set of four pieces will cost $10-20. It will not be difficult to find this type of windshields in the car market.
As a result, we can say that the deflector not only gives the car a better appearance, but also serves a practical purpose, protecting the interior and creating comfort.
Video of installation of car deflectors:
Installation of the “Vetrovik” deflector
It is very easy to install such a device with your own hands. Once everything necessary for installing the deflector has been correctly selected and prepared, you can begin to work. First of all, you need to carefully examine the surface where the installation will take place. It is advisable to use a degreaser. For polishing, it is best to use a technical solvent, rags, as well as paraffin and wax-containing mastic. It is best to glue the side window deflectors when the weather is dry outside and the body temperature is not lower than eighteen degrees. Please note that installation work must be carried out simultaneously for both the front and rear windows of the car.
When installing a window deflector, you should adhere to the following algorithm of actions:
Installation of the Fly Swatter
Each “fly swatter” always includes several mounting brackets. They may differ slightly in parameters, but they perform the same function. If you want to properly install the “fly swatter” with your own hands, then you need to proceed according to the following scheme:
The process of installing the deflector on the hood
- The hood must be thoroughly washed and wiped dry, after which its front part is degreased using a solvent;
- It is necessary to install brackets on the device and perform fitting;
- The places where the brackets will be attached are marked on the hood;
- The marked areas are covered with special gaskets that protect the paintwork;
- The brackets are mounted on the hood and fixed in a strictly established place;
- “Pads” are attached to the back parts of the devices from which the film is removed (strictly in the place indicated in the instructions);
- The device is mounted in the intended place, the bolts on the brackets are tightened.
What is a deflector - a wind deflector for a car
Deflector translated from English means cut-off device. This accessory is a plastic visor that is installed in the upper part of the side opening of the car, as well as on the hood.
The deflector cuts off air flows that bring dirt and dust into the car interior. It also protects the windshield from dirt from the front side, where dirt from outside often penetrates into the car.
By installing the deflector on the hood and windows, you can be sure:
- dead insects will not stick to the hood,
- debris flying towards the car (stones and gravel from roads) will change its trajectory and be diverted away from the hood and glass,
- When opening a window during rain, you don’t have to worry – water won’t get into the car’s interior.
An example of installing a deflector on a car body.
Cars are not equipped with deflectors as standard. This is due to the fact that installing a deflector reduces the streamlining of the body, resulting in an increase in air resistance.
This in turn leads to increased fuel costs. In this regard, each driver decides for himself whether he needs deflectors and whether he is ready for additional gasoline costs.
Choose deflectors from trusted manufacturers.
Body protection accessories
Do not think that damage from road litter is harmless and is extremely rare. If the car is used and not parked in a garage, its body wears out and experiences harmful effects. Damage to the hood surface will subsequently be marked by a corrosion process. But a more unpleasant situation is when small stones hit the front window. The resulting chip or scratch in sunny weather will make itself felt by refracting light and blinding the driver. If this damage is left unattended, a gradually growing crack will appear on the glass. Thus, delaying restoration will entail more financial costs.
How to glue side window deflectors to a car
The advantages of using this adhesive material include ease of use, since there is no need to drill holes or use additional fasteners. The car doors remain undamaged.
Gluing windshields to the car - instructions
For gluing you will need the following materials:
- a set of deflectors (it is better to purchase original versions for your model, after trying them on the door or hood and making sure that they fit - the deflectors should not obstruct your view),
- construction hairdryer
VIDEO INSTRUCTIONS Operating procedure:
- Remove all dirt from both surfaces and decontaminate them with napkins, which usually come with windshields. To do this, holding the device in your hands, peel back the film covering the outer layer at both ends. You can heat the adhesive strip, as well as the place to install the deflector, with a hair dryer. This will improve the adhesive properties and increase the service life of the windshields.
- Attach the windshield to the installation site and glue the edges. Make sure there are no gaps. If they are not there, then pull the protective film from under the deflector and firmly glue the device. It is more convenient to do this together: one person will hold the product, and the second will remove the film and press the windshield to the surface. Working together, you can adjust the position of the deflector at the very beginning of installation.
- Press down on the windshield and hold for five minutes.
All work must be carried out in a warm room, the temperature should not be lower than +10C. On average, gluing the windshield takes no more than 10 minutes.
We glue the deflector to the car door
If you purchased the push-in options, installing them will be even easier.
To do this you need:
- Roll down the windows.
- Insert the products into the glass groove under the machine door frame. If the shape of the deflector is not suitable, the windshield needs to be slightly bent. The windshields are held in the front doors by being installed in a spacer. In the rear doors they are taped around the perimeter with double-sided tape.
It is worth keeping in mind that cheap windshields damage the protective film of the glass, since such manufacturers do not sharpen the mounting edge properly and a tight edge will not allow the car window to close.
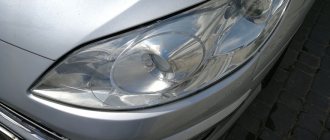
Deflectors for headlight protection
Car headlights are one of its most expensive components. Damaged optics are quite difficult to immediately replace with new ones, since original samples have to wait a long time after ordering, and analogues may not be suitable. By taking care of the protection of the headlights, you can extend their service life, and for this there are deflectors that preserve the optics of the car.
Such deflectors also fit well into the overall design of the car and they do not affect the quality of lighting. Installation work does not take much time because there is no need to remove the headlights. Plastic fasteners are located in the engine compartment or on the side of the trunk compartment. The deflectors installed on the headlights are able to provide adequate protection from the harmful effects of road conditions and prevent glass optics from chips and cracks.
Useful functions of deflectors
- The deflectors are made in a streamlined shape, which prevents rain and snow from entering the interior of your car through a slightly open window.
- For those who like to smoke inside the car, deflectors are a must! The smoke is drawn out well, and natural air exchange occurs in the cabin.
- Deflectors protect against the ingress of dirty water from under the wheels of other cars.
- They are able to emphasize the silhouette of the car and change the aesthetic appearance. Deflectors are selected for a specific make and model of car.
Functional purpose
I think you won’t have any problems with your choice. The only thing I can say is that the low price should alert you. It may be a piece of plastic, but at a cost of several tens of rubles, it’s not worth buying such parts.
Again, if you turn to trusted and leading manufacturers of such accessories, then the choice will be extremely simple and with a guarantee of quality.
Let's move on to the appointment. Often deflectors on windows are positioned as decorative elements. This is wrong. Such parts perform several functions:
- Improves visibility. How it works? When driving at speed in snow or rain, a lot of moisture accumulates on the side windows, which interferes with visibility through the glass itself and prevents you from looking in the mirrors. Deflectors prevent active pollution because they divert water further;
- Ventilation. This is true for those who smoke while driving. During the trip, the wind blows smoke back into the cabin. These are unpleasant odors and hot ash accidentally falling on the upholstery. The deflector helps the driver with this too;
- Protection from wind, rain and snow. The deflector also helps when you drive with the window open. The wind does not blow so much and increases comfort;
- Aesthetic component. And yes, the windshields also look interesting and give the car a more original appearance. Why not?!
This is important to consider before installation
Before installing deflectors on car windows, you need to familiarize yourself with several subtleties, which are discussed below.
The most important advice: when purchasing side window deflectors, you must try them on on the car on which they will be installed. The main problem with some deflectors is that they fit unevenly to the car and, for this reason, do not adhere well to the door.
Choose such deflectors that they do not block the rear view mirror, otherwise they will slightly interfere with your view!
It is advisable that when installing deflectors, the ambient temperature should not be lower than +10 degrees.
How to avoid installation problems
To avoid unexpected surprises during the installation of wind deflectors, take note of 5 simple rules:
- Change windshields only in dry weather or in a dry, well-ventilated garage.
- When purchasing a set of cut-offs, try on several pairs for your car windows and choose those that fit as closely as possible and do not block the view of the rear mirror.
- Install wind deflectors with an assistant - an extra pair of hands will help you complete the task faster and achieve a high-quality result.
- If the air temperature is less than +18...+20°C, do not be lazy and warm up the joints of the parts with a hair dryer.
- After attaching the fairings, do not use the car for at least a day, including do not wash it.
Gluing and removing the windshield is not as difficult as it seems at first glance. The key to success lies in the correct selection of fairings specifically for your car model and depending on a couple of circumstances: the presence of an assistant, suitable weather and accuracy.
Instructions for installing deflectors on tape
Can only be installed with double-sided tape
So, let's move on to the installation process itself. If you choose deflectors that are installed only with adhesive tape, then installation will be the simplest.
| Remove from the package | We remove the protective covers from the deflector, usually plastic film. |
| Trying it on on the spot | Before installation, you need to attach the deflectors to figure out how they will be positioned correctly. The deflector must go along the edge of the window! Place marks where the deflector will be located. This can be done with masking tape. |
| Wipe with an alcohol wipe | After this, degrease the gluing area with alcohol or alcohol-containing liquids. Usually, new deflectors come with a degreasing cloth. After degreasing the surface, wipe it with a dry and clean cloth or simply let it dry. |
| We slightly detach the protective strip | Then peel off the protective tape of the double-sided tape a couple of centimeters and bend the peeled fragments upward. |
| Glue along the edges | Carefully glue the deflector to the place that has already been marked, gradually tearing off the rest of the tape. |
| We press well | Immediately after this, the deflector must be pressed firmly. It is better to do this with a clean, dry cloth. |
Installing deflectors on clips: step by step
Clip fastening
There are deflectors that are not just glued to the car with double-sided tape, but also have holes for additional fastenings. Accordingly, additional fastenings themselves are included with such deflectors. The installation process of such deflectors is similar to the process of installing deflectors without additional fasteners.
| Alcohol wipe | To begin with, we apply deflectors and put marks, degrease the gluing area. |
| Clip | After this, you need to install the clips under the rubber on the door arch |
| Hole for clip | Approximately in the places where there are holes on the deflector. |
| Installed like this | The clips are installed with one end under the elastic band, and they should be recessed there as deeply as possible. |
| Scotch tape on the deflector | Then partially detach the top strip. glue the deflector and press it firmly. |
| Leave a tail | We bend the tape so that the edge peeks out. |
| Clip under the hole | Take the rubber ring and insert it into another part of the clip. Then we install this in the hole on the deflector from the inside, combine it with the clip that was installed earlier under the door arch rubber. |
| Clip with clamp | Then we insert this nail. |
| Installed mount | This is what the installed clip looks like from the outside. |
| From the inside | And so from the inside. |
Step-by-step process for attaching deflectors
Auto service employees will quickly glue windshields to Hyundai Creta, Toyota and any other car. But you will have to pay them a lot of money. Let's figure out how to stick a window deflector on a car yourself.
Mounting options (with and without gluing)
Deflectors are installed using adhesive tape or clips. Before purchasing, check the installation method. For example, products without any fasteners are suitable for cars of the LADA model range.
On the side windows
Before installing the deflector on the side window of a passenger car, place it on the surface and accurately determine the mounting locations. Installation instructions on adhesive tape are as follows:
- Degrease the door frame with the solvent or cloth that comes with the kit.
- Remove 3-4 cm of the protective strip from both sides of the deflector, lift its ends and attach it to the installation site.
- Remove the remaining film from the adhesive strip and press the windshield completely onto the door frame.
- Hold the structure for several minutes. Then glue the windshields to the other car windows in the same way.
Manufacturers of original deflectors use high-quality adhesives. On Chinese fakes, the adhesive strip may fall off or partially not attach to the surface. In this case, use double-sided mounting tape. Cut it into strips of the desired size. Secure one side to the structure and the other to the door frame.
Installing deflectors on side windows
Pour clear silicone sealant into the space between the windshield and the door frame. The structure will hold tighter, and the tape will not get wet from moisture.
Now let's look at the instructions for installing windshields without fastening:
- Lower the side window, use a utility knife to pry and move the seal in the place where the deflector is planned to be attached.
- Attach the structure to the window frame, having previously treated it with anti-corrosion lubricant.
- Bend the windshield in the middle and install it in the gap between the seal and the door edge.
- Raise and lower the window again.
A properly installed deflector will remain in place.
On the windshield
There are 2 ways to attach deflectors to a car windshield. Let's consider the option recommended by product manufacturers:
- Degrease the installation site with a rag soaked in alcohol and wait a couple of minutes for the substance to evaporate.
- Remove 10 cm of film from the visor and slowly secure it to the window, gradually removing the protective tape.
Installing deflectors on the windshield
Now about another way to install a windshield on the windshield. In addition to the part itself, you will need double-sided tape, crepe tape, and Madeline sealant with an adhesive layer. Observe the following installation sequence:
- Apply crepe tape along the edge of the windshield.
- Remove and set aside the side trim.
- Step back a millimeter from the crepe tape, then apply double-sided tape.
- Remove the adhesive strip from the windshield and attach it to the tape.
- Cut a strip of Madeleine tape and place it on top of the deflector, but do not press it flush against the top of the windshield.
- Place the side cover on the tape and secure it with bolts.
- Remove the crepe tape.
On the car hatch
Roof deflectors are intended for cars with sunroofs. Be sure to check its size before installation.
Installing deflectors on a car sunroof
Installation instructions include 5 steps:
- Open the hatch and degrease the intended installation area for the deflector.
- Attach the structure and make marks on the roof with a pencil.
- Remove the protective film from the deflector, screw in the screws and secure the brackets.
- Place the tape at the fastening points so that it bends and grips the side of the hatch.
- Place the windshield on the surface and secure the screws with a screwdriver.
The deflector must be firmly glued, otherwise it will fall off during strong winds. But adhesive tape leaves marks and you will have to renew the paintwork. Therefore, be sure to make a protective backing from tape.
On the hood
Typically, the plug-in deflector comes with soft double-sided pads and mounting clips. Manufacturers make them from plastic or metal.
Installing deflectors on the hood
The product is attached to the internal reinforcing frame of the hood in this way:
- Wash the car and wipe with a dry cloth.
- Place the windshields on the surface and make marks in the place of intended attachment.
- Wipe the deflectors with an alcohol rag.
- Glue soft pads to the outside and inside of the hood to protect the paintwork.
- Place the clips on the sealed areas so that their holes align with the holes in the deflectors.
- Secure the clips and windshields with screws.
Products are sold with a plastic clasp in the center. They are attached in the following way:
- Attach them to the hood and mark the mounting location.
- Then wipe the structure with an alcohol wipe, press it to the hood and tighten the screws on the windshield. The structure should not touch the unprotected surface of the body.
Leave at least 10 mm of clearance between the hood and the windshield. Otherwise, it will be difficult to remove the dirt accumulated under the structure.
Installation procedure for deflectors with internal spacer fasteners
Polish Heko deflectors are installed this way
There is another type of fastening, when the deflector is first installed, and then the fasteners are inserted inside.
When you lift the glass, it falls into place and firmly fixes the deflector, spreading it out. In the diagram, the installation of the deflector with fasteners looks like this: Mounting diagram
for how to install such wind deflectors, see the following table.
| Set of deflectors with fasteners | This is what a set of deflectors with brackets looks like. Two pieces for each deflector. |
| Pieces of tape | Additionally, adhesive tape is applied to the deflectors. |
| The deflector is inserted under the rubber band | We place the wind deflector in the corners of the doors under the rubber band, after first removing the protective strip from the tape. |
| Spacer fastener | Please note that the mounting brackets have a “burr”; with this “burr” the fasteners are turned towards the interior. |
| The spacer is inserted here | They retreat slightly from the edge of the deflector. And install the fasteners here. |
| And still here | And in this place. |
How to properly install deflectors in winter
First, let’s ask ourselves: is it possible to install windshields in winter? Of course, it is not recommended to install deflectors in winter, since double-sided tape will not stick in the cold. But if such a need nevertheless arises, then it must be done in a warm hangar or garage, where the temperature is not lower than +10 degrees. If this condition is not observed, the deflectors will come off after a few hours. If it is not possible to use a warm garage or hangar, then it is best to contact a car service specialist or wait for the warm season!
As an introduction, we suggest watching a video that shows how to install deflectors on the front and rear windows of a car.
Video: installing windshield deflectors
Preparing the surface and car for installation
To work successfully, you should stock up on:
- original cut-offs for your model;
- high-quality tape, such as: “AvtoAks” , “SIM” , “SA-Plastik” ;
- construction hairdryer;
- technical solvent and cleaning material.
To prepare the surface you need to:
— The car is first washed, and the mounting points are thoroughly wiped with a solvent.
— Special attention should be paid to cleaning if the body was polished using mastics that contained wax/paraffin.
— It is recommended to install deflectors on an adhesive base in the absence of humidity and at a temperature not lower than +15°C.
How to safely remove old adhesive from baffles
The procedure for removing the adhesive layer or remaining adhesive tape is required when replacing the cutters.
We offer several cleaning methods that have been tested in practice:
- Take a drill with a butterscotch and carefully peel off the adhesive layer from the door frame. As a nozzle, some experts advise using a nipple from a tubeless tire.
- Remains of the adhesive base, after cleaning with a drill, can be easily removed with anti-glue.
- Horse universal lubricant to the traces of double tape , leave for 15-20 minutes , and then clean off with improvised material.
All methods require care and patience to avoid damaging the surface during operation.