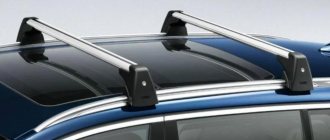
Car roof rails are often compared with large all-wheel drive SUVs, as well as with recreation and exciting travel. Although if you look at them more closely, it will not be difficult to determine their real, wide range of applications. But roof rails are installed on the roof of a car not only for the sake of aesthetics - they have a very practical function. Judge for yourself - thanks to just a few steel crossbars, you can easily transport any cargo, household items, clothes, mountain bikes or a baby stroller.
Due to its versatility, this part is widely used not only on minivans and jeeps, but also on passenger cars, both domestic and imported. However, the cost of them is sometimes very high, which makes it necessary to make them yourself. How to make roof rails for a car with your own hands? You will find out the answer to this question in our article today.
What is the advantage of homemade roof rails?
Firstly, there is cost. You can buy roof rails for a car like VAZ Kalina from 4-4.5 thousand rubles. The cost of homemade analogues will not exceed one thousand rubles. Secondly, this is a spring appearance. If you are the owner of a full-size SUV, roof racks made for industrial purposes obviously will not decorate its appearance, much less make it look aggressive. Agree, 1.5-centimeter crossbars will clearly look like an absurd appendage against the background of a 4-5 meter jeep with a width of 2 or more meters. Thirdly, it is strength. Of course, factory products are also designed for colossal loads, but you can hardly put more than 60-120 kilograms here. And on such roof rails, as shown in the photo below, you can confidently transport even sheets of construction slate:
Installation of roof rails
The installation method differs in each individual case and depends on the car model and the manufacturer of the roof rails. We collected materials and distributed them by car brand, described the intricacies of installation, and selected suitable video materials.
Niva Chevrolet
The car has special mounting holes above the doors, so the installation procedure is simple. The manufacturer prudently supplies some kits with protectors that are glued to the car’s paintwork at the points where the roof rail mount comes into contact with the roof. This provides additional protection for the paintwork.
If these are not included in the kit, you can cut out the rubber pads yourself.
Hyundai Creta
Under the plastic rail on the roof of the Hyundai Creta there are fasteners for fixing it. With the help of special fasteners, the so-called kits, the roof rails can be easily attached to them, thus avoiding drilling holes.
Hyundai Tussan
You can, as in the previous case, secure the trunk to the ledges for attaching the molding. For variety, let's consider other options, when the fasteners are welded to the roof, and when holes are drilled in it.
Mercedes Vito
On the roof there are sockets for attaching roof rails (the number of fasteners differs depending on the body), which you can purchase or make yourself.
Below is an excellent and inexpensive DIY option from one of the Vito owners.
Prado 120/150
Toyota has already provided standard holes for installation; you just need to remove the plastic plugs and install the trunk. The fastening system may vary depending on the manufacturer, but in general the procedure is quite simple. The main rule when carrying out work is to do everything carefully so as not to damage the paint.
Volkswagen Touareg
Tuaregs, depending on the body type, may not have standard mounts. In this case, you can install a universal or transverse one “under the door”.
UAZ Patriot
You will have to tinker with the installation of standard longitudinal roof rails on the Patriot. To do this, you will need to remove the ceiling in the cabin, use a crown to drill holes in the body reinforcements for a head, which we will use to tighten the bolts.
On later models, starting from 2012, these holes are already provided.
Kalina, Granta
On Kalina and Grant, under the door sealing rubber there are already special holes for installing roof rails. Longitudinal arcs are screwed to them, to which cross members are subsequently attached.
Be sure to seal the holes that remain unused, since the sealing rubber will not fit tightly to the body due to the fasteners, which will lead to moisture accumulation in these holes.
Renault Captur
Installation of roof rails without drilling is carried out on the hooks of the welded seam using brackets. In general, the procedure differs little from that described for Hyundai cars.
The video describes the entire procedure in detail and step by step.
Renault Logan
The mount is completely similar to what was described for the Lada Kalina.
Nissan X-Trail
The new body for the entire x-trail model range includes standard roof rails, and in the maximum configuration they have built-in headlights.
On older models, you will have to drill holes, which requires removing the ceiling in the car.
Kia Sportage 3, 4
Integrated roof rails are already present on the Kia roof, so all that remains is to select crossbars (branded or other manufacturers) and install them.
Opel Astra
If you want to limit yourself to only crossbars, the process will take no more than 15-20 minutes, since standard fasteners are already available under the plastic plugs in the moldings. But if you need a full-fledged trunk, with longitudinal arches, then you will have to tinker. It will be necessary to remove the ceiling trim, after unscrewing the visors, lighting, handles, and everything else. Almost all elements are plastic, be careful when dismantling.
Under the removed moldings there are clamps and pre-installed screws for the crossbars to which they were attached in the video. They won't be needed, so feel free to remove them. The original longitudinal ratings have 4 attachment points, 2 of them are in the places where the standard screws were, and the other 2 are in the factory plastic plugs that can be pierced with an awl or screwdriver.
After this, all that remains is to tighten the nuts from the inside, and then return the trim and the removed interior elements to their place.
You can share the intricacies of installing roof rails on the described models or other cars in the comments.
About making a trunk
Before carrying out work, you need to accurately determine its dimensions. The dimensions of the roof rails must clearly coincide with the width and length of the car roof (at least their mounting points). As for the height parameter, it is not so important for the car, so here you can take any value you like. After determining the dimensions of the crossbars, the pipes should be cut to the required length. The number of crossbars is from 2 to 4, and the support should extend to 8 points (so as not to bend the roof). It's best to start from the bottom.
Classification by installation method
Installation of roof rails depends on the specific model of the trunk. The most common classification remains:
- longitudinal;
- transverse arcs.
Longitudinal rails are installed on the roof in the drainage area. Transverse rods are attached to the arches. What are these roof rails needed for? - for transporting large-sized, non-standard cargo. The rods are attached to the longitudinal arches through locking fasteners. Depending on the size of the roof and the transportation option, you can remove the middle bar or install an additional one by selecting the desired distance between the crossbars.
Transverse structures are two- and three-support arches that are mounted across the roof. For station wagons and liftbacks, the installation of four transverse arches or longitudinal integrated roof rails is provided.
Integrated roof rails are an arc, after installation of which there is no free space left between the roof and the element. The arches are most often installed at the factory; they have only a model version and are not intended for reinstallation on other brands of cars.
The rack is designed for installation on a flat roof. The kit includes an integrated lock or fastener that is mounted in the doorway.
Making the bottom base
Before telling you about the intricacies of carrying out this work, we note that if you have no experience working with welding machines, it is better to practice welding some other iron. Learning the basic technology of metal welding is very simple - it will take no more than 1-2 hours.
To carry out work on the manufacture of roof rails, we need a flat surface. Ideally, a metal table or several metal stands would be suitable. We discard the wood immediately, since at a melting temperature of a couple of thousand degrees Celsius, it is possible that some of the sparks will burn or ignite the surface. After welding, the seams must be sanded. Also make sure that there are no burns at the joints - this will significantly reduce the strength of the structure.
Expeditionary trunk type "basket"
The technology for manufacturing an expeditionary trunk will be much more complicated. In this case, you will need to first draw up a drawing. In addition, you cannot do without a welding machine and the ability to handle metal.
Mesh base - a practical solution for expedition luggage
Construction drawing
Let's take a homemade trunk for a Chevrolet Niva as an example. The length of the trunk will be 163 cm, width - 123 cm. To make an expedition trunk, you will need a metal profile 15X15 (approx. 9 linear meters), 20X20 (approx. 7 linear meters), 25X25 (approx. 7 linear meters) and 30X20 (approx. 6 p.m.).
It’s quite possible to make an expedition rack for Niva using this drawing yourself
Sequence of actions of the wizard:
- We start making the trunk from the base: we cook the perimeter. Longitudinal guides are made from profile 30X20, transverse jumpers are made from profile 20X20.
- We weld load-bearing lintels from a 30X20 profile into the perimeter. For them the platform will be attached to the rails.
- We reduce the distance between the load-bearing jumpers by welding additional transverse ones from the 20X20 profile.
- We make an arc that will be located in front in order to improve aerodynamics: we measure 5 cm from the edges of the profile and cut out a triangular sector, after which we bend the profile. We weld the arc on the outside of the perimeter.
- To increase the strength of the structure, we fasten the jumpers together with sections of 15X15 profile. If desired, non-load-bearing lintels can be replaced with metal mesh or stainless steel sheets.
- We make the sides. We cut the profile into pieces 6–10 cm long and weld it to the base. If desired, they can be mounted on a thread - then the sides and the upper part of the trunk can be removed.
- It was the turn of the top crossbar. It should be the same size as the bottom one, but the side crossbars should be slightly shorter, and the posts connecting them to the base should be angled to improve aerodynamics.
- We fasten the trunk in a manner similar to that described above. An important point: to evenly distribute the weight, the expedition rack should be secured to six points.
Making the top base
This part of the trunk should be made strictly according to the dimensions of the lower base. Remember that even the slightest deviation will noticeably distort its appearance. Next, we connect these two halves of the parts using jumpers. Here you can go in two ways - secure everything tightly by welding or leave the upper part removable, which will allow you to use the structure as a platform.
Next, sand the remaining seams and begin painting the structure. If the trunk will be used frequently on the car, you can install selected reflectors, a backup brake light or a reversing light, but this is not necessary.
Of course, all this equipment requires additional holes and wires to connect to the on-board power supply. The design color can be any, but it is better to use either matte black or metallic silver. First, the crossbars should be cleaned of rust, degreased and treated with a primer (preferably in 3 layers, since some of the metal will constantly rub here).
Why do you need roof rails on a car?
The roof is made of thin metal that can only withstand rain; any load will inevitably leave dents on it.
Under the outer panel, a fraction of a millimeter thick, there is, of course, a power frame that can withstand even a car rollover, but all the decorativeness will be ruined even by a bag of country produce. Therefore, for a roof rack, or even just cargo attached to the roof, a solid foundation is necessary.
The roof rails are not attached to the roof panel, but rather to its load-bearing structure under the thin panel. The outer layer of metal should not be in contact with the load at all.
This is interesting: What do car headlight markings mean?
To do this, holes are made in the panel through which the fastening of long longitudinal beams - roof rails - passes, and a trunk or simply power cross members are installed on them, placed at any distance from the front and rear windows of the body.
What benefits will this give us?
In addition to the fact that installed homemade roof rails on a car allow you to safely transport a large number of a wide variety of cargo, it should be noted that these crossbars significantly change the appearance of your vehicle. The presence of several steel crossbars on top can be the final chord in transforming the design of the car. Rails (especially chrome) look very stylish and elegant. In addition, such a trunk may well become a highlight of the exterior and make the appearance of the car more individual.
So, we found out how to make roof rails for a car with our own hands, and what advantages the presence of this design on the car gives us.
Important Features
When choosing a trunk, car owners pay attention to the following points:
- Material and appearance. Various materials are used for production: plastic, fiberglass, metal, aluminum, all kinds of combinations.
- Load capacity and dimensions. The load capacity is expressed in the maximum permissible load on all structural elements and directly depends on the material of the railing. Dimensions are relevant when choosing boxes and expedition racks.
Longitudinal roof rails are the basis on which you can attach both universal racks for transporting goods and specialized mounts for skis, snowboards, bicycles, closed boxes, and expedition racks.
Attaching the trunk to the roof rails with your own hands: stages of work
Before starting work on installing crossbars on the roof rails of a car, it is necessary to consider a fastening design that could ensure strong retention of the metal profile and prevent damage to the paintwork of the body. If you choose methods that exclude drilling holes in the roof rails, then the ideal option for attaching the cross members to them would be a bracket.
Yardstick
How to properly weld a trunk frame
The operation will take approximately 20 hours to complete. The frame pipes are welded together to form the bottom. When working with aluminum, argon welding is used. In the same way, the sides are welded, which can, if necessary, be made from metal sheets.
Argon welding of aluminum
It is advisable to lay a reinforcing mesh or small diameter tubes at the bottom, which will serve as stiffeners. Usually three jumpers are enough, but it is better to make five. The exact quantity can be determined already at the assembly stage. The recommended distance between jumpers is 15 centimeters. The remaining tubes are welded longitudinally to further strengthen the structure.
Some drivers complain of rattling noises when traveling with an expedition rack. To avoid this effect, the mesh is welded in all places where it comes into contact with the metal crossbars. The crossbars are located at a large distance from each other. Therefore, it is necessary to weld sections of the profile in the openings between them. You can use bolts instead of welding, but this fastening is less reliable and the operation takes more time.
To prevent the mesh from rattling while driving, it needs to be soldered to the frame in as many places as possible
The arcs must be made from rolled metal with a round cross-section. They improve the aerodynamic properties of the vehicle. To attach the structure to the car, you can take ordinary corners with holes for bolts. They will be welded to the frame from below, so if necessary, you can remove the trunk at any time. To prevent scratches from forming on the roof rails when they come into contact with metal, rubber gaskets should be glued to the fastenings.
The top frame should have right angles at the front. At the back you need to make edges that will be located along the edges. It is necessary to weld 12 profile sections of arbitrary size to the frame. The height of the future trunk depends on their size. Usually they make a height of 190 millimeters. It is necessary to secure six segments in the corners, and the rest will connect them in pairs.
An upper frame is welded on top of the vertically located profile elements. The next step is the installation and welding of the diagonal element. This part is optional, but can be used to install a branch guard when traveling into the woods. If necessary, you can make fastenings for additional elements:
- Fasteners for spare tire.
- Additional lighting, spotlights.
- Hooks on which the cable will be held.
- Polymer boxes for equipment, such as tents.
- Various types of attachments for tools, such as shovels.
- A ladder that simplifies access to things lying on the trunk.
Making fasteners for a spare wheel is easy. To do this, you first need to choose a place where the spare tire will lie. At this point you need to weld the nut. Next, the stud is screwed into this nut, but not welded. Now the wheel can be put on the stud and secured with another nut. If you plan to attach headlights, they will require waterproof wires.
Any additional elements can be added later, after the basket has been installed. It is also not necessary to make the hooks or ladder yourself. Often they buy ready-made parts and attach them to a homemade trunk
But after welding the frame, it is important to sand all the seams and try on the structure to make sure it fits
Car rack MONTBLANC ReadyFit 20Al
The crossbars for standard MONTBLANC ReadyFit 20Al roof rails are installed without pre-adjustment.
It will take a few minutes to insert rubber seals into the upper T-groove. A convenient crank simultaneously tightens the roof rack support on the roof rail and the support on the crossbar.
After tightening, the knob is carefully “recessed” into the support.
All that remains is to trim the plastic plugs included in the kit and close the lower slots with them. But the locking mechanism is not very well made, in my opinion. The “recessed” knob is locked with a plastic secret, which is accompanied by a rather flimsy plastic key.
If the trunk is not removed from the roof rails for a long time, it is sometimes not possible to unlock it with this key. Another disadvantage of this trunk would be the profile from which the crossbars are made.
It is hollow, without any reinforcing partitions, which will negatively affect the overall load-bearing capacity of the trunk.