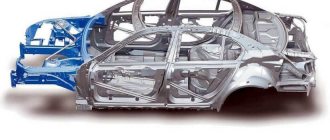
Paintwork is a protective layer of a car body that prevents exposure to moisture, aggressive environments, and chemicals. The destructive effect of minor mechanical damage, as a result of which pockets of corrosion are formed, is also reduced.
During the operation of the car, the layer of varnish and paint wears out and loses its properties and original shade. You can restore the attractive appearance of your car if you know how to paint a car with your own hands; a step-by-step guide will help you with high-quality execution.
What is required for painting?
Painting is a rather complicated procedure that requires certain skills. But, having studied the prepared manual, it is quite possible to perform all the manipulations at home without the involvement of specialists.
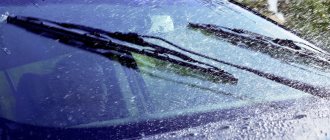
A prepared room is one of the important conditions for successful DIY painting. This could be a garage or other spacious facility, well ventilated, with bright lighting. First, a thorough cleaning is carried out, which will prevent foreign particles and dirt from getting onto the coating. Dust is swept away from the walls and wet cleaning is carried out. The walls and ceiling can be additionally covered with film.
What tools are needed for painting:
- compressor and spray gun - recommended for large volumes of work;
- spray can – a solution suitable for local painting;
- keys and screwdrivers - necessary for dismantling removable elements, which will prevent the ingress of pigment or the formation of other defects;
- scraper, spatula, chisels and brushes - used to create an ideal plane and eliminate flaws formed as a result of mechanical influences.
Choice of materials:
- detergent, rags - required to clean the body and remove all contaminants;
- degreaser - used for processing before applying putty, primer, pigment;
- putty, primer, sandpaper - create the basis for spraying pigment and varnish;
- masking tape, film - necessary for insulating non-removable elements;
A suitable shade is also selected. This uses the vehicle's unique VIN or computer program. For independent work, choose paint that dries without heat treatment. To determine how many materials are needed, take into account the amount of work and the desired result.
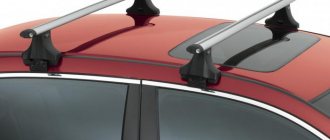
Element protection
Spray gun device.
Lack of element protection is one of the main mistakes when painting a car. When painting, some areas and parts of the body must be reliably protected from paint getting on them. To do this, use masking tape and seal the elements with it.
Check the quality of the glued protection, as the adhesive tape comes off easily at the folds. Pay special attention to checking after abrasive soil treatment. It is best to change the seal completely.
Preparing the body before painting
To properly paint your car, you should start with a wash. This involves removing all dirt and dust using water and detergent. Using a degreaser or white spirit, you can easily get rid of greasy traces and bitumen. This is important, this way the working compositions are applied better and do not lose their properties.
Next, all available parts are removed:
- bumpers, turn signals;
- lighting equipment, mirrors;
- shock protection, if used;
- handles, locks;
- numbers, wipers.
All spare parts are thoroughly washed and dried. Glass elements are covered with paper or film. Masking tape will be needed to insulate the rubber seals.
How is the surface of parts cleaned?
According to the step-by-step guide, before painting , it is necessary to clean up defects and polish the car body components. To perform this stage efficiently, good lighting is necessary. You can work in the garage or outside.
Basic steps:
- when inspecting the car, use a colored marker or acrylic paint in a spray can to mark problem areas - dents, chips, deep scratches;
- during re-evaluation, minor defects are identified and marked with a spray can;
- Using a chisel and coarse sandpaper, clean problem areas;
- it is important to minimally affect a good coating, creating a smooth transition;
- Having discovered dents, they are removed by hitting a prepared wooden stand with a rubber hammer from the inside;
- When pockets of corrosion are identified, they are polished to a shiny metal.
Dust is generated during the process. It is recommended to periodically remove it, which will eliminate the possibility of missing defects. If the coating is old, it is advisable to completely remove it. This will give the car a better paint job, although it will take longer.
Body filler and sanding guide
After cleaning, uneven areas remain. To paint a car with your own hands, following the step-by-step guide, you need to make the work surface perfect, because painting will reveal flaws.
Putty allows you to eliminate imperfections, and it is better to carry out manipulations in the garage. Before applying the material, inspect the body again, remove dirt, and degrease it using special compounds or white spirit.
How to putty:
- It is recommended to use finishing compounds (synthetic polyester) with a fine-grained structure, which will simplify sanding. Prepare spatulas, metal and rubber.
- When thinking about how much putty is needed, they estimate the number of defects. But you need to prepare the composition in small portions - it dries out quickly. To do this, use metal sheets, plywood, and containers with a flat bottom so that the finished material is easy to get.
- Application is carried out vigorously, performing cross movements at an angle of 90 degrees. This creates a flat, slightly protruding plane.
- All problem areas are treated. If grains appear, it means the composition has dried out and should no longer be used.
- Treated areas are left to dry. How long does this take - usually 30-50 minutes, depending on temperature and humidity.
- You can easily check dryness using coarse sandpaper. If no sticking occurs during sanding, the composition is dry.
Next, the treated areas are polished. The process begins with the use of coarse sandpaper and ends with the use of sandpaper with the lowest grain density - 600. It is necessary to constantly check the surface by touch, eliminating the formation of defects. Some areas will have to be re-treated.
The process of priming, preparation for painting
After removing dust and degreasing the surface, paste over all areas where paint will not be applied.
Further:
- spray a thin layer of primer, but go a little over a good coating (this is the primary layer that allows you to identify all defects);
- any defects that have arisen are eliminated;
- a secondary layer of primer is applied after 4 hours;
Priming is a mandatory step, without which it is impossible to paint a car. This is the basis for any coating, providing a reliable bond with the metal. According to the step-by-step guide, it is recommended to choose a primer that comes in a can, which will make application easier.
The paintwork of parts around the treated areas is sanded with sandpaper No. 1200, which will provide better adhesion to the new coating. Thus, it is easier to paint cars completely, but the guidelines also apply in situations where painting is required only for individual parts.
Craftsman's tips - how to paint a car with your own hands with a step-by-step guide
Having properly prepared the car, garage and pigment, you can easily paint the body.
When wondering how a craftsman would paint cars, it’s worth studying the guide:
- Work begins by diluting the pigment to optimal density. The solvent is added so that when pulled, a thin thread of 1–2 mm is formed. The resulting dripping should be 3 to 4 drops per second.
- It is advisable to strain the paint and then pour it into the tank of a pre-configured spray gun. Experts advise choosing a nozzle No. 1.4 mm, setting the pressure to 3 Atm.
- If you use a spray can for work, the procedure is simplified and you can immediately paint the part.
- When you need to paint a car completely, work starts from the roof, gradually moving to the lower parts.
- In this case, the spray gun nozzle is kept at a distance of up to 25 cm from the working surface.
- Sometimes, after painting a car, you may notice stains and other defects. Smooth movements, optimally selected pressure and paint thickness can eliminate them.
- So, 2-3 layers are performed with short 15-minute breaks for drying. For each subsequent layer the pigment becomes more liquid.
To paint with high quality, you can’t rush. With each subsequent layer the color will become brighter and more saturated. After painting the body, you need to leave it until completely dry. This usually takes no more than 36 hours.
The step-by-step guide also includes tips for doing the procedure yourself:
- You can only work in a respirator, providing additional ventilation;
- so that, after painting the car, there are no traces of dust on the coating, the compressor is installed outside the paint shop;
- Smoking is prohibited in the work area as flammable substances are used.
By following this step-by-step guide, it's easy to paint your car, resulting in a high-quality, attractive finish.
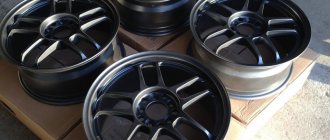
Glowing paint in cans
How to make a kenguryatnik for a car with your own hands and legalize the product. Do-it-yourself kenguryatnik on Niva manufacturing and installation
Today, domestic manufacturers are much inferior to European companies in the quality of their products, their range and cost.
There is a variety of paint in cans
The color palette of popular manufacturers is simply huge, so you can choose a color for even the most demanding car owners. To help make your vehicle stand out from the crowd of others, some manufacturers offer not just plain but luminous body paint.
Luminescent paint is an ordinary paint, one of the most important components of which is a special additive. It is thanks to it that the paint acquires the ability to accumulate light energy during daylight hours and release it at night.
Typically, a phosphor is used for this purpose. During the day it looks like a white substance, and at night it acquires the ability to glow with different light. The choice of glow depends on additional ingredients - fluorescent fillers, which manufacturers add to luminous paint in a certain percentage.
Both the phosphor and the fillers are a regular powder composition; to turn it all into paint with a luminous effect, craftsmen add any transparent medium.
For example, to paint any metal surface you need to take acrylic varnish and mix it with filler and phosphor in the required proportions. To ensure that none of the ingredients precipitate, you need to thoroughly mix the mixture until a homogeneous mass is obtained.
After preparation, the luminous paint can be immediately applied to the surface. The peculiarity of the phosphor is that it does not dissolve in the varnish, therefore, in order to avoid painting defects and to ensure that the luminous additive is evenly distributed throughout the body, it is recommended to use a spray gun for painting.
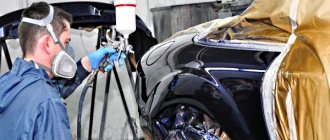
How to paint a car correctly: preparation and painting itself
The paintwork of a car cannot remain in its original form forever. Over time, it loses color and brightness. The surface becomes covered with defects such as cracks, stains and dents. The appearance of the car and the protective functions previously performed by the paintwork deteriorate.
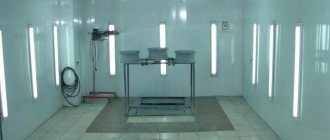
Ideally, it is better to carry out painting in a special box.
The condition of the paint, in addition to the effects of time and objects (objects) that leave defects, is also affected by gas pollution on the roads and the use of acidic car wash products. These factors become the reason for the desire to improve the appearance of your car through painting. But taking into account the high cost of this procedure, thrifty motorists choose an independent way to solve the problem.
Is it possible to paint a car yourself?
Painting a car yourself is inferior in quality to work done at a car service center. Especially if you don’t have the necessary knowledge, technology and experience. But if you do not have the opportunity to contact a specialized car service, you can do the painting yourself, in your own garage. It should be understood that the owner of the car in this case takes responsibility for the result.
If you follow the necessary technologies and features of all stages, from preliminary cleaning of the body to painting itself, you can achieve quite a decent result. But you should remember that painting a car is a labor-intensive and time-consuming process.
Functions and characteristics of car paints
About thirty years ago, the question of what paint is best to paint a car had one answer: auto enamel. Today this term is interpreted much more broadly, and the decorative function of paint is no longer the only one. The second, no less important task of the car paint layer is to create a protective coating that would be a reliable barrier for body parts from aggressive external influences.
Of course, the aesthetic component remained paramount, and to meet the growing needs of motorists for a means of individualizing their four-wheeled friends, paint manufacturers have managed to create many varieties that allow the car to stand out. A striking example is luminescent compounds that glow in the dark.
But even without such refinements, the problem of painting a car does not look too simple, since the difference in the composition of car paints causes corresponding changes in their physical and chemical properties. However, it seems to us that this is worth talking about in more detail.
At the dawn of the automobile industry, Henry Ford, distinguished by democratic morals, repeatedly said that the buyer could choose a car of any color. But only if he's black. This humor had good reason - the only quick-drying material in those days was black Japanese varnish, consisting of natural ingredients. It was then that they were used in conveyor production. In addition, in those days, aesthetic appearance was not a priority; the main function of auto enamel was precisely corrosion protection.
It was then that they began to use galvanized metal and apply a special anti-corrosion coating, which made it possible to significantly expand the color range.
One way or another, the set of physical characteristics of modern coloring compositions has a direct impact on both its protective properties and its visual appeal and texture. These basic characteristics are known: hardness, density and elasticity. These indicators can be manipulated by changing the composition of the paint. Modern paints and varnishes used in the automotive industry consist of the following components:
- binder. It is a solution whose main task is to bind paintwork materials;
- film former. As the name suggests, this substance of synthetic or natural nature is responsible for the rapid formation of an outer layer that prevents the paint applied to the metal surface from spreading;
- solvents - substances that serve to change the degree of viscosity of the composition;
- coloring pigment – a substance that gives car enamel color;
- special additives Their task is to change the aesthetic perception of paint, creating various effects such as “chameleon” or “metallic”.
- fillers - substances that affect the density of the coloring composition.
Of course, specific types of car paints may not contain certain components. Thus, in the manufacture of powder paints, solvents are not used; transparent varnish does not require a coloring pigment. The only required element of any paint is a binder.
Let's now talk about the main types of car paints, after familiarizing yourself with which, you can determine for yourself which car paint is better and why. Let us only note that they all have different compositions and, accordingly, main areas of application.
Duxone 2K
Preparing a car for painting yourself
First you need to wash your car.
- Next, the external elements that cannot be painted are dismantled.
The removed parts should be washed, cleaned and dried. - Afterwards, the paintwork is checked for defects. If cracks, dents or chips are found, they are marked.
- Next, the identified irregularities are cleaned using metal brushes, scrapers and sandpaper.
- Next, they begin to putty. To do this you will need polyester synthetic car putty and spatulas.
- The putty is mixed with the hardener in the proportions written on the packaging. After thorough mixing, the resulting mass is applied to the defective areas. Be careful to get a smooth surface. It is better to putty quickly, since mixed putty tends to harden soon. After completing the work, you must wait 30-45 minutes. so that the surface is completely hardened and dry.
- The treated surface is cleaned with emery cloth. This stage lasts until the surface being treated begins to match the surface of the body. When cleaning, the surface should not be wetted with water, as it will deteriorate the quality of the putty.
The body is once again cleaned of dust. The areas of the body that are not to be painted are sealed with paper. The entire area to be painted is polished with sandpaper (use No. 1200), after which a primer is applied to it. You need to prime in 2-3 layers, each of which is allowed to dry for 5-6 hours.
This is interesting: Video on how to remove the starter on a Chevrolet Niva
What to do if the check engine light is on - see here.
Also see what you need to pass your license and how to successfully pass the exam.
Roof painting and varnishing
Painting a car roof
Painting the roof begins with preparing the paint composition. To do this, the paint is mixed with a special hardener, in the proportions recommended in the manufacturer's instructions. A special solvent is gradually added there. Automotive enamel is poured into a spray gun.
When painting the roof yourself, the hand with the spray gun should move from the front to the back, along the surface of the element. Movements are uniform, smooth and fast. The process begins from the edge of the roof, gradually moving towards the center. Then they move to the other side, where they begin to paint from the center, gradually moving to the opposite unpainted edge.
In order for the coating to be good and uniform, the paint is applied in two layers: the first is thin, diluted quite rarely, the second is thicker, with less dilution of the paint, thick. After each applied layer, the paint is allowed to dry completely.
After application and drying, the car enamel is often coated with a highly transparent varnish in one or two layers. Applying varnish and painting are performed using the same technology. It is better to varnish the roof of a car on the same day as painting, so that the paint on it does not dry out. As the varnish dries, the roof is polished. This procedure improves its appearance, eliminates minor roughness, and gives its surface exceptional smoothness and gloss.
Painting a car roof will not be difficult if you take into account the technological features of preliminary preparation (putty) and follow the painting technology.
How to paint a car yourself
After completing the preliminary procedures, painting begins. First, the enamel is diluted. The enamel is diluted to the desired consistency using a solvent (it is better to follow the instructions). The paint is prepared immediately in the required quantity to avoid color differences.
The painting process according to the technology begins with the roof of the car. To distribute the paint evenly, the pressure in the paint gun is set to 3 atm. Maintain a distance of 200 mm from the paint gun to the body. The car is painted in 2-3 layers (each layer is dried for at least 15 minutes).
It must be remembered that the final color and shade will appear only after painting the surface with the 2nd layer. It is optimal to dry the car indoors for 1-2 days.
After painting, some dust may settle on the car, so the car is additionally polished. It is better to do this using an abrasive paste and a polishing machine.
Watch how to prepare and paint a car yourself (video)
Nuances
- Painting is carried out in a spacious room. This will allow you to walk around the car freely and ensure the correct distance from the remote control to the surface.
- Before work, you need to thoroughly clean the garage from dust and dirt, pay attention to the cleanliness of the ceiling and moisten the floor with water. Otherwise, the remaining dust will certainly fall on the body and painted surfaces.
- It is imperative to work in a protective respirator. This will help protect your lungs and airways, since paint is an aggressive substance.
- The room should be thoroughly ventilated. A draft will help reduce the concentration of harmful substances in the air.
- It is strictly prohibited to light a fire or smoke indoors. The paint is highly flammable.
You can paint your car yourself. Given the right conditions, the necessary equipment and the correct execution of the work steps, this process will not cause difficulties. But, inexperience in this matter does not lead to the expected result. Therefore, before you start practicing, carefully read the theory, or even better, consult with a car service worker.
A competent master will be able to explain in what order the process is carried out and how to do everything with minimal expenditure of time, money and nerves.
Recommendations
The described work should be carried out either in a paint booth or in a garage prepared for the corresponding work. It is unacceptable to do this outdoors or in a dusty or damp room. You should purchase high-quality materials, since low-quality paint or varnish can not only complicate the work, but also ruin the result.
Since the car roof is a large horizontal surface, you should use a spray gun to paint it.
In addition, it is located quite high, so to provide more convenient access to it, you should create a stand or platform on the sides or along the perimeter of the car.
Before starting work with your own hands, you should practice on some similar horizontal metal surface. This will allow you not only to master the painting technique, but also to adjust the spray gun to the required pressure (it should produce an oval-shaped torch). It is also advisable to watch the video.
How to paint a car correctly?
Once upon a time, there always comes a time when the car owner begins to seriously think about the fact that the time has come to update his iron horse, or, more precisely, to paint it.
Of course, the best option would be to contact the appropriate specialists who would quickly paint the car, of course, for a fee. But what to do if there is simply no required amount, and there is absolutely no desire to wait for the extra money to appear? The answer is simple - paint the car yourself; learn about car painting technology here.
However, remember that painting a car is a rather serious and painstaking task. And since you are planning to carry out this process yourself, then you will have to follow a number of recommendations. So, how to paint a car yourself? What do you need to know about this process?
Painting a car includes several stages:
- car preparation (before painting),
- puttying,
- grinding,
- primer,
- directly painting and polishing.
But first of all, you should decide on the place where the car will be painted. It is desirable that this place-room be spacious, although an ordinary box or garage will do, the main thing is that there must be a constant positive temperature there.
Step-by-step instructions on how to paint a car yourself.
The first stage is preparing the car for painting.
The surface of the car must be prepared as best as possible for applying putty. Using various detergents, all contaminants are removed from the surface of the body, and if there are grease and bitumen stains, it is necessary to use special solutions to remove such stains. By the way, the quality of surface degreasing can be checked using filtered paper: if greasy stains remain on it, then the surface must be washed again with a solvent. Remember: any grease stain on the surface of a car is a potential source of corrosion.
After the degreasing procedure, it is necessary to dismantle the front and rear bumpers of the car, the radio antenna, the decorative radiator grille and external lighting equipment. All these parts must be thoroughly cleaned of dirt.
Next, in a well-lit place, we conduct a detailed examination of the paintwork to detect defects. If cracks, dents or chips are found, they should be marked with colored chalk or quick-drying acrylic paint.
Removal of the existing paint coating can be done mechanically or chemically. For the mechanical cleaning method, you will need metal brushes, scrapers, and sandpapers. They also clean defective areas, and the transition from a defective surface to a defect-free one should be very smooth. The chemical method of surface cleaning involves the use of special cleaning agents.
If you find rust on the car, then you must get rid of it without fail, first by removing the oxide and clearing the affected area. For these purposes, you can use a grinder, drill, angle grinder, regular sandpaper, or do etching, that is, get rid of rust chemically. A composition already prepared for this (acid-based) can be purchased at a specialized store.
Video on preparing to paint a car
The second stage is puttying.
Puttying must be carried out if there are uneven surfaces on the treated surface. To carry out this procedure you will need spatulas and putty.
Puttying is carried out as follows: the putty is mixed with a hardener, and then applied to the surface in several separate layers, 1-2 mm thick). Each layer must dry for at least 40 minutes indoors at a temperature of +20 degrees Celsius.
Video on car puttying
The third stage is grinding.
The surface must be sanded dry, that is, without wetting. For sanding you will need P80 sandpaper, as well as a flat, hard sanding block. The block must be held along the horizon line. If necessary, some areas of the car surface can be degreased, puttied and sanded again.
Video on car sanding
The fourth stage is priming and painting.
The car is driven into the paint shop, glued, blown, wiped and degreased. Covers are placed on the wheels.
The primer is applied in 2-3 layers, each of which is allowed to dry: the surface becomes matte and the shine disappears.
Then the car is blown again, degreased and the smallest dust is removed. Then they move directly to the painting itself. And they start from the roof of the car.
At the end of this stage, the surface of the car is treated with an antistatic cloth.
Video on priming a car
The fifth stage is polishing.
After painting, some dust will certainly settle on the car, which means that the car requires polishing.
The polishing process is quite simple: after the surface becomes matte, an abrasive paste is taken and with its help the car is polished with a polishing machine. Read more in the article polishing a car with your own hands.
Video on polishing a car after painting
Glypthal paints
This type of paint has been known for quite a long time. Its difference from the cellulose variety lies in the formation of a thicker layer of film, while its texture is perfectly smooth. In other words, after drying, such paint does not require polishing, and one coat is enough to obtain an even color.
But their main drawback is the long hardening time. Thus, at a temperature of 20-25°C, polymerization of the top layer occurs in about a day, but for another two to four weeks the coating remains sensitive to mechanical stress and chemically active substances.
Raising the drying temperature to 800°C (or adding hardeners and polymerization activators) can significantly reduce the hardening time, but this is an extra resource expenditure that increases the cost of this method of painting cars. For this reason, this type of car paint is becoming less and less popular every year.
Afterword.
If you were wondering: how to paint a car yourself, you probably received a detailed answer. However, do not rush into this process, relying only on the knowledge you have just acquired. After all, lack of experience in painting a car can affect the final result. In other words, you risk getting a look that is far from what you originally expected.
Know that painting a car requires compliance with all the small nuances, so before you start practicing, if you decide to do it, master the theory thoroughly!
For the creative: a step-by-step guide on how to paint a car yourself
Have you ever thought about refreshing your car? How to do it? You can install new wheels, install good sound, or paint the body. Yes, yes, you heard right. If you have a free week, perseverance and imagination, you can paint the car yourself. A step-by-step guide is presented below: read the article before embarking on a hand-made adventure.
How to paint a car yourself: step-by-step guide
A step-by-step guide for beginners is a reference book for future creativity. Pay attention to the advice in the text, otherwise the result may be disappointing. Remaking unsuccessful art is an expensive procedure. Therefore, do everything correctly the first time, especially since it is not difficult.
Preparing the body
Wash the car. Be careful when cleaning the dirt - water alone will not be enough. It’s better to take the car to the wash and do a complete mess. You can read about how to use the self-service car wash here.
Wipe the body with white spirit to remove the greasy layer. Do not use gasoline or thinner to avoid damage to the coating. Remove the bumper, headlights, antenna, and radiator grille from the car. If there are additional decorative elements, remove them. Your task is to get a bare body. Wash the parts, wipe them with a terry cloth and put them in a separate place.
Cleaning up defects
Take the car outside and inspect it carefully. Mark areas that have defects with a washable felt-tip pen or acrylic paint. Regular chalk will do. It is better to repeat the procedure twice to be sure that all defects are covered.
Take sandpaper No. 60, 80, 100. Sand problem areas down to metal. At the same time, do not allow the stripping to go beyond the defective area. The edges of the transition should be as smooth as possible. Check this by running your hand from the edges to the middle of the surface being treated. Remove dust from the body, wipe with a cotton towel and wipe again with white spirit. Leave the car for a couple of hours to dry.
Important! After the work is completed, drive the car into the garage so that dust does not accumulate on it outside.
The best car enamel pencils
Mobilehel Pencil
These types of products are extremely popular among car owners, allowing them to quickly and effectively hide minor paintwork defects. Their main advantage is that there is no need to select paint for your car.
The Mobihel pencil can be used to repair all types of vehicles, from motorcycles to buses. The product is a plastic cylinder filled with a patented composition with a volume of 0.012 liters. Consolidation of the tinting result is achieved by applying a colorless one-component varnish. The compact size of the pencil allows you to apply auto enamel evenly and economically, while the rod itself does not lose its properties after a single use and can be used until the paint is used up.
Advantages of Mobihel Pencil:
- economical, dosed consumption of the composition;
- the paint does not spread after application even on vertical surfaces;
- ease of use of the composition;
- a large selection of basic colors, allowing you to select the desired tone with sufficient accuracy;
- reusable;
- reasonable price.
The composition is quite fluid, so it is advisable to store the pencil in a vertical position - otherwise there is a risk of leaks.
This product is not suitable for treating large surface areas, but it masks minor defects very well. The main disadvantage is the length of time it takes for auto enamel to dry (about several hours). If the width of the applied layer is excessive, the excess can be wiped off with a dry towel or napkin.
Mobilehel Pencil
Vegatekc
Among the best pencil-type car paints, it is worth noting this completely ready-to-use marker, the purpose of which is to mask small and shallow scratches.
The Japanese pencil uses Eurocolor and Mobihel coloring compounds as a filler. The surface to be treated must be degreased, after which paint can be applied.
Advantages of the Vegatekc pencil:
- compact dimensions, simplicity and high speed of processing of small paint defects;
- a wide selection of colors, making it easier to select the tonality of the pencil;
- high-quality camouflage of cracks/scratches, impossibility of visual detection of the treated surface from a distance of more than a meter;
- optimal, economical use of coloring agent;
- acceptable price.
Among the disadvantages, we note that when stored horizontally, and even more so when positioned upside down, liquid leakage is possible. The main difficulty is the correct selection of pencil color.
Vegateks
Aligning the body
To putty the car body for subsequent painting, stock up on metal and rubber spatulas of different sizes and polyester putty. Dilute the mixture as indicated on the packaging of the material and get to work immediately. Apply it alternately in cross movements to the problem area. Before changing direction, rotate the spatula 90 degrees. This will ensure a level surface with the rest of the body.
After the putty is finished, allow the treated areas to harden. This usually takes 30–40 minutes, provided that the ambient temperature is above 20°. To check the effect, go over the former defect with sandpaper with grit No. 80. If the putty sticks, it means that the composition has not yet hardened. Sand the finished surface with No. 100 and 600 until completely homogeneous with the body.
The final touch will be to clean the problem areas from dust with a towel soaked in white spirit. Dry. Apply a thin coat of spray primer, covering the untouched edges of the body. If the defect is still visible, correct it.
This is interesting: Video of removing dents without painting
Step-by-step guide: how to paint a car with enamel
Carefully read the instructions for the purchased enamel so that it does not cause excruciating pain later. Dilute it to the desired thickness with solvent, strain and pour it into the spray gun. Use a gun with a nozzle No. 1.4; the air pressure when supplying paint should not exceed 3 Atm.
To paint, follow these instructions:
- Start with the roof: point the nozzle of the gun at the surface and apply 2-3 coats of enamel in a back-and-forth motion.
- Drying time between coats should be 15 minutes.
- Start painting the sides, then the hood and trunk.
- When finished, leave the car to dry. In warm weather, the enamel will harden in 26–36 hours.
A few tips to help you paint your roof efficiently
- You should carefully and wisely choose the appropriate tone and color of paint. When selecting, it is advisable to know its factory VIN code. The best option is to use computer color selection and recommendations from a professional colorist.
- Choose auto enamel that dries easily and quickly under natural conditions. Don't save money!
- Before applying paint, test paint any old car part or any horizontal metal surface with the prepared enamel. At the same time, it is worth adjusting the pressure intensity in the spray gun so that you get an oval-shaped cloud of paint.
- Painting the horizontal roof surface is carried out using a spray gun connected to a compressor.
- Feel with your hands the fit of the protective tape or paper at the border of the painted and unpainted parts.
- The room where painting will be carried out should be spacious, easily ventilated, it is recommended to moisten the floor to avoid dust getting on the surface of the car.
Safety rules for painting your car yourself
For painting to be successful, be sure to follow safety rules . They are not complicated, however, they can protect you from rash actions that could lead to an accident:
- Perform work wearing a respirator. The room you are in must have artificial or natural ventilation.
- Locate the painting compressor outdoors.
- Do not smoke in the area where you are working. Substances released by enamel are explosive.
To reinforce the step-by-step instructions, we suggest you watch the video. We hope that now updating your car with your own hands is as easy for you as inserting the key into the ignition. Good luck on the roads!
How to paint a car metallic: step-by-step instructions, recommendations
- How to paint a car metallic: step-by-step instructions, recommendations
- Features of metallic painting
- Factors affecting metallic shade
- Metallic car painting
- Necessary materials
- Step by step work
- Applying the base layer
- Car wash
- Sanding old coating
- Padding
- Applying paint
- Varnishing and polishing
The technology of metallic car painting has been known since the 60s. Nowadays it is widely used both for completely changing the color of a car and for painting individual parts. We will tell you more about the process of such painting in the article.
Features of metallic painting
Metallic paint is a one-component composition that does not require a hardener. Its peculiarity is the presence of metal particles: the color manifests itself depending on the depth of their occurrence.
Do-it-yourself painting is a complex process that requires accuracy and adherence to technology, since even minor deviations from it are immediately noticeable. A common problem is bullseye: round spots that can appear even after all stages of painting.
Causes:
- The paint has been diluted incorrectly. Using a solvent or hardener from a different brand than the paint manufacturer will result in color pigments peeling off.
- If the thinner is weak, then the viscosity level decreases and the uniformity of the coloring pigment is lost; or the components did not have time to mix with each other.
- An incorrectly selected nozzle does not spray paint over the surface, but directs it in a spray stream.
- The coating layer is too thick.
- Excessively strong jet pressure during finishing coating.
To eliminate this defect, wet and dry grinding is carried out, and then cosmetic painting.
Factors affecting metallic shade
The main factors that influence the metallic shade are the rate at which the solvent evaporates and how deep the metal particles lie. Their uniform arrangement depends on how dry or wet the solvent layer is.
In the first option, the solvent will dry quickly, and the metal particles will not have time to take the position they need, the paint will become lighter, without the expected saturation. If the layer is wet, the particles will lie too deep and the color will darken.
Color reacts to the following factors:
- If the spray pressure level from the paint torch is higher than specified by the manufacturer, then less will reach the surface itself.
- At low viscosity, the layer is thinner, and metal particles do not have time to penetrate to the depth they require.
- The higher the room temperature, the faster the paint dries.
- With faster passes, less solvent reaches the surface.
- A fast solvent has a high evaporation rate.
The effect of these factors is described in more detail in the table:
Powder paints
From the point of view of uniformity of application, powder paint is considered the best car paint. The application method itself requires the use of special, expensive equipment, thanks to which microparticles of paint are magnetized and applied by spraying to the painted surfaces of the car.
Then, under the influence of high temperatures, the powder grains melt, forming a perfectly homogeneous layer of paint. The powder method is universal: it can be used to paint not only metal, but also any other hard surfaces, from plastic to glass. In terms of strength, this coating has no equal. However, the method is not applicable at home due to the high cost of high-tech equipment.
Metallic car painting
Before you start painting, it is recommended to test all processes on the old part. Knowing the technology and having tried all its stages, it will be easier to get started. A popular method of application is spraying, during which unprotected areas are covered with tape and paper. The paint is applied in three layers.
Painting is often done using a technique called fade. It is appropriate when the damage is minor and only a certain part of the body needs to be painted.
How to paint metallic silver without apples: video
The implementation technology is presented in two options:
- Spray paint and varnish the entire piece.
- After spraying the paint, varnish with a transition.
Stages of preparation of parts:
- Repair the damaged area of the part without affecting entire parts.
- Matte entire parts with gray Scotch-Brite and matte paste.
- Blow and degrease the part. Apply a thin layer of binder on it - a “base” for the paint, which promotes its even and smooth layer.
Paint application technique:
- Paint over the spot without going beyond it.
- Apply paint to the spot wider than its borders, trying to smooth out the transition. This stage is performed in 3–4 approaches. Wait for the paint to dry.
- Varnish the part. It’s easier to do it entirely, but if the damage is minor, then varnish with a transition.
Varnish application technique:
- Mix the varnish with the activator and apply the mixture to the stain. Let the layer dry.
- Apply the mixture again, expanding the boundaries of the stain.
- The last layer is thin. Dilute the activated varnish with solvent in a 1:1 ratio, apply it even wider than the previous time.
- Polishing can be replaced with a solvent, but only if this process is performed by an experienced person.
Necessary materials
Before starting work, make sure that you have the necessary materials at hand:
- antisilicone - degreases the surface;
- wipes for degreasing surfaces - complete the effect of anti-silicone;
- masking tape and film - protect unprotected parts;
- Scotch Brite - creates matteness and a smooth color transition;
- solvent - used if necessary to wipe something;
- car putty - removes small scratches. Used at the final stage of painting;
- developing powder or aerosol - allows you to identify defects after grinding. If such have been identified, then the surface is ground again;
- antistatic or sticky wipes - remove dust and static voltage;
- acid or phosphate primer - a two-component primer for bare metal;
- two-component acrylic primer - levels the surface;
- primer for plastic - used for painting plastic materials;
- metallic paint;
- car varnish - covers the paint with a protective layer;
- polishing pastes - add shine to the surface.
You will also need special equipment:
- brushes - manual and those that are installed on a grinder and drill. Remove dust and paint residues;
- vinyl nozzles - used for thorough cleaning;
- abrasive paper - removes scratches and defects.
Step by step work
The process of painting a metallic car is as follows:
- Washing the car with car shampoo.
- Removing grease and corroded areas.
- Degreasing the surface.
- Creation of anti-corrosion coating, first and second priming.
- Applying paint to the surface.
- Varnish coating.
Applying the base layer
Metallic paint consists of three layers. For the first layer, the paint is diluted with a solvent in a ratio of 2:1 - kept deliberately dry to prevent the occurrence of an unpleasant effect called “fish eye”. Wait 10–15 minutes for it to dry.
This stage is necessary to eliminate visible signs of the repair work carried out. If a defect occurs during the process, give the paint half an hour to dry. Gently sand the area with sandpaper and water, clean and degrease.
Car wash
Wash the car using a high-pressure hose. It is better to leave the sponge and bucket aside, since the sponge spreads the remaining sand and dust particles over the surface. Make sure your surroundings are also clean.
Sanding old coating
Sanding is a long process that takes up half the work time. It can be dry or wet. Dry significantly saves time and materials: this method is less harmful to health. Necessary for removing paint and rust residues and giving the coating a matte finish. Remove with light circular movements.
Padding
Priming creates additional protection and adheres to the paint. Eliminates small dents and streaks after sanding.
Performance:
- First, mix the soil thoroughly.
- Dilute it with solvent and hardener.
- Filter the mixture with a filter or gauze.
- Apply a couple of layers. Leave time to dry between each coat.
The color should not show through. A universal option is shades of gray.
Applying paint
After the base coat, two subsequent ones are applied. Dilute the paint with solvent in a 1:1 ratio. Apply the second layer thickly. Wait for it to dry and apply the third layer in the same way.
Full painting stages
Painting a car or part should be carried out only after a number of preparatory works:
✔ The old layer of paint is removed; ✔ All areas of the body affected by corrosion are cleaned; ✔ Small dents on body parts are leveled out; ✔ Deep scratches and dents that cannot be leveled are putty; ✔ A primer is applied to the surface of the body; ✔ The body is sanded and blown with compressed air to remove dirt and dust particles; ✔ All surfaces are degreased.
The next stage is painting the entire car. The paintwork is applied with a spray gun, and first the body elements are coated with enamel in several layers, after which the same method is used using transparent varnish. The latter “fixes” the paint and also becomes its additional protection from UV rays, moisture, temperature changes and small abrasive particles.
In our detailing studio, all painting work takes place in an Italian paint booth in compliance with all standards of the manufacturer Spies Hecker.