No matter how diligently you take care of your car, it is impossible to avoid minor scratches and damage.
Most often, the top layer of paint is damaged when parking, when the doors were unsuccessfully opened or there were stones on the road.
In any case, the damage is not significant, it is not always possible to notice it immediately, but over time it can turn into a serious threat and become a problem.
In this case, you just need to contact a car service. There you will already have to shell out a more serious amount of money.
Therefore, while the problem is insignificant, they prefer to eliminate it at the root, not go anywhere, but simply paint it on their own using spray paint.
The method is very economical and does not require special knowledge.
Description and characteristics
In fact, the cans contain all the same types of primer for cars that are produced in metal containers, namely:
- acrylic
- epoxy
- acid.
The difference is that it is customary to produce two-component formulations in metal containers. They must be properly prepared before use. A hardener and solvent are added, and only after that the product is ready for use.
Epoxy primer in a can
An aerosol is always a one-component composition that is completely ready for use and does not require additional preparatory manipulations. This is the absolute convenience of the spray.
In terms of its properties and characteristics, the aerosol is no different from soil in jars. The only difference may be the density. It is logical that the aerosol should spray well and provide an even, high-quality coating on metal or plastic. Therefore, it should have appropriate fluidity. If you want to get a dense, viscous primer for your car, buy the product in a can - a spray will not suit you.
But it is suitable for application to the following types of coating:
- black metals;
- chrome steel;
- galvanized steel;
- light alloys;
- plastic.
Primer in a can for plastic
Painting with auto enamels
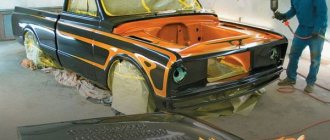
And now we come to a very important moment - painting the car. Unlike previous layers, this layer will be “the most visible” for us. Don't forget to shake the can of car paint thoroughly, especially if the paint contains metallic particles (they settle to the bottom of the can). In general, when painting, you will have to shake it periodically so that the metallic particles are more uniform. Before applying paint, be sure to do a test color to check the color. Be sure to evaluate the pressing force on the valve, the spray and its speed. Practice, for example, on a “cardboard”. The paint is applied evenly and carefully over the entire surface in 2-3 layers, usually with drying time between layers of about 15 minutes (follow the manufacturer's instructions). Do not apply paint in a thick layer or in one go, always avoid smudges! If necessary, apply a third, light correction layer after 15-20 minutes. Please note: after drying, basic car enamels are quite matte; the coating will receive its elegant and finished look only after coating with varnish.
Advantages and disadvantages
Aerosol soil, like any other product, has its advantages and disadvantages. If we talk about the advantages of the spray, we can highlight the following factors:
- simplicity and ease of use;
- compactness;
- even smooth coating;
- the possibility of smooth transitions during local processing;
- lack of preliminary preparation of material for work.
Primer BLACK 400 ml aerosol
The disadvantages of the spray include 2 factors: low productivity and the ability to use only a fluid consistency. To paint the entire car, it is unlikely that you will be comfortable working with spray cans - it is troublesome, time-consuming and ineffective. It is much more rational to prepare a large container of a two-component product and use a pneumatic gun. But the aerosol is indispensable for local types of car repairs. If you are painting over a scratch, scuff or chip, the aerosol option is much more convenient. It is more efficient and will help to better process the desired area.
Sometimes liquid fluid mixtures are not suitable for treating a car body - they flow down the metal without giving the effect of a durable protective film. An aerosol auto primer will also not work for you here—you’ll have to buy viscous mixtures in cans.
Primer for cars in a can
Smooth transition painting technique
First, let's look at spray painting with base paint. To make the coloring as invisible as possible, we need to try to follow the following coloring technology, which is called “smooth transition”. Painting using the smooth transition method also allows you to remove a small but noticeable difference in the tone of the paint. So, mentally outline the area of damage (“spot” that needs to be painted over) with a slight deviation beyond its edges of a couple of centimeters. The resulting area will be painted over as the first step.
We begin to paint the transition, spreading the paint in several steps. We carry out the first spraying with a torch slightly inside the repair spot, only along the priming zone with a slight approach to the old paintwork (no more than 2-5 cm), and doing exactly the minimum spray in the direction of the existing old and pre-matted paintwork. Next, after 5-7 minutes, we carry out a second spray of base paint over the surface to be repaired, but with an additional indentation of up to 5-10 cm beyond the priming area, while performing smooth and rapid movements of the torch from the center of the primed surface towards the old paintwork, as if reducing it to “no” and moving it to the side (twist the can with your hand), that is, the spraying at this transition point should be less dense and lighter. In other words, the base paint on the second spraying again covers the primed area, but also extends beyond it by 5-10 cm, already going a little into the dust and to the side. Now, as a rule, it is necessary to spray a third time (also after 5-7 minutes), similarly over the entire repaired surface, going even further than the second spraying by 5-10 cm, but this time with the lightest spraying. As you already understood, our task is to “spread” the paint very smoothly (twisting the spray can from side to side with your hand), while the transition zones should be painted with a “softer” spray of the torch, moving to the side, so that the transition is not stepped, but smooth .
Purpose and use of soils
A primer is a mixture with which, during repair work, the surface is treated before applying any finishing material. The soil helps to increase tenacity and frost resistance. In addition, the use of soil, leveling the absorbent surface, protects it from corrosion.
Advantages and disadvantages of the method
If the paintwork is only slightly damaged, many people try to avoid an expensive painting procedure.
In addition, this procedure can be carried out on your own by purchasing the appropriate cans of paint. It is important to carry out the procedure in the appropriate room and in compliance with all technologies.
Before that, you can evaluate all the advantages of this method:
- To carry out such painting, no special skills or preparation are required;
- using a spray can you can carry out high-quality repairs;
- any surfaces are covered, hard-to-reach places and bends are much easier to paint; no additional components in the form of a roller, spray gun, etc. are required during the work;
- if you have no experience in painting, you will be able to apply an even layer of paint;
- to apply an even layer you do not need to work with a roller or brushes;
- Spray painting will cost less than other means; this service is available to many motorists.
However, it is necessary to realize that all painting methods have their own nuances and disadvantages.
Spray painting is no exception to this issue, so be prepared for the following disadvantages:
- there are no detailed instructions on the rams for painting;
- Sometimes you come across cylinders of poor quality, so before applying to a car, test on another surface;
- Sometimes the declared shade and the real one may differ, so you should immediately purchase the required amount.
Select the color scheme in accordance with the labeling, but if you are still not sure of your choice, then you should consult with the experts in their field.
He will be able to carry out tinting using special equipment.
If the depth of the chip or scratch is insignificant, then it is not necessary to resort to painting; you can polish it.
If primer or metal is visible in the damaged area, then the work will be more serious and eliminating the defect will take longer, as will painting the damaged part of the body.
Spray painting a car is a step-by-step procedure that is ideal for doing it yourself, which allows you to save money at the same time.
This method is suitable for working with a small area of damage, but if the problems are serious, then contacting a service station cannot be avoided. All work will be carried out there in a special box.
Composition and technical characteristics
Acrylic primer. For metal processing, a primer with an acrylic composition based on organic solvents is used. This mixture has proven itself in practice as a reliable and high-quality composition, suitable for processing aluminum and duralumin coatings, helping to obtain a high-strength coating and its excellent protection.
When using such a primer, the properties of the metal do not change even when exposed to high temperatures, since acrylic has a temperature-compensating characteristic.
Acrylic primer is suitable for processing products whose surface is coated with:
- plastic;
- steel;
- aluminum;
- putty;
- metal and so on.
It is resistant to temperature, humidity and adverse weather conditions.
Acrylic aerosol primer is used to treat various types of plastic coatings, small areas such as a rear view mirror or a plastic bumper.
A primer used to prevent corrosion. To ensure good protection of metal parts from corrosion, as well as better adhesion of paint to the surface, an anti-corrosion primer is used.
Strengthening soil. This composition is used to eliminate scratches, dents, small defects, as well as any cracks on car bodies. Several layers of this highly adhesion primer are sufficient to fill mechanical damage.
Corrosive or acidic primer. This composition is designed to work only on metal; it corrodes a thin layer of coating and ensures reliable paint adhesion and fights corrosion. However, an acid primer does not remove rust, but does not allow it to spread.
Alkyd primer is universal, suitable for wood, concrete, and metal.
Instructions for spray painting a car
The dyeing process is divided into a certain number of stages. At the first stage, preparatory work is carried out, which includes cleaning the body, degreasing work, and the use of anti-silicone.
At the next stage, you need to decide on the shade. Having previously checked the body marking instructions, a specialized store will help you choose the required option.
To prevent an error, colorize the body. Specialized equipment and software will evaluate the level of color fading and other factors.
It is worth noting that you will have to spend a lot of money on the procedure. In addition, paint options such as “metallic” or “chameleon” cost much more, because these shades are the most popular.
If there is already rust on the body, then you need to get rid of it, in this case you will need sandpaper, which will turn the surface matte.
After degreasing, we begin the putty process. If the defects are more serious, then you should use putty with windshield washer.
Do not overdo it with a layer, because it may peel off. Layers are applied gradually until the surface is completely leveled.
To make the putty dry faster, there is a secret - you should add a large amount of hardener to the putty. But in this case, you should not overdo it, because you can turn the putty into a crumbling element.
The putty is considered ready when a homogeneous mixture is created. Apply it as quickly as possible, because it begins to harden instantly, already in the seventh minute. If the procedure is not carried out in a timely manner, lumps may form.
The most optimal technique for applying putty is to apply it across scratches and chips, and then level it lengthwise. Thus, it is easy to fill the voids that appear.
The temperature at which the mixture dries as quickly as possible is 25C. Next, sandpaper is used to level the surface. If the damage is deep, use coarse-grained paper; fine-grained paper for smaller scratches.
The next stage is primer. In the modern world, primer in cans is popular; it is easier to apply and saves time. But you can prepare the primer yourself by mixing everything according to the instructions. As a rule, the required proportion is indicated on the packaging.
The resulting mixture is stirred with a wooden stick and filtered through a filter. Many car enthusiasts use a regular stocking as a filter.
The resulting primer is poured into a spray gun, which will help apply it evenly. Remember that the solution can be used for 2 hours, then it begins to dry out.
The dried primer is treated with sandpaper, but a plane is more suitable to save time. Those areas where the old paint will be combined with the new must be prepared: matte them with Brite tape with abrasive paste or sand parts of the body with P1000 sandpaper.
The surface should be cleaned of chips and dust so that the paint lies evenly on the surface.
To avoid other defects, walk over the surface with an antistatic cloth and treat with a degreaser.
Next comes painting. The spray can is held perpendicular to the surface to be painted and strictly at a short distance. Moving upward, painting is done horizontally.
The distance at which the can is held is 30 cm, painting is carried out at room temperature. Thus, uniformity and absence of drips are achieved. When the first layer has been applied, it is worth letting it dry and applying the next one.
It is not necessary to apply all the paint; once you have achieved the desired color you can stop working. When the paint has dried, it must be varnished and polished.
In the process, you will experience how simple and fast it is to spray paint a car. Finally, a clear varnish can be applied to the coating. The application of this substance is carried out according to the same principle as paint.
It is recommended to apply at least three coats of paint within twenty seconds.
If there was a violation of the coating procedure, then certain defects may form:
- If the surface is not properly prepared, the coating may begin to peel off over time. In this case, you will have to do all the work again.
- the paint may be applied unevenly, due to the composition of the paint or thick application, the work will have to be done again.
- In some places the paint may fade; you should strip the coating down to the metal and carry out the procedure again.
By following the instructions above, you will be able to complete all the work quickly and efficiently. The paintwork will delight you for a long time.
Once painting is complete, you can polish the area that was repaired. This procedure is carried out using a paste, and it is necessary to eliminate visible differences between the new paint job and the old one.
After polishing, the surface of the car shines like new.
Popular polishing techniques are abrasive and protective. The most popular polishing pastes contain wax or Teflon.
After carrying out work, leave the car indoors or in the shade. Minor defects can be easily removed with an aerosol can.
The procedures are carried out using our own efforts, which allows us to save money. But significant damage is eliminated by the intervention of specialists in a specialized chamber.
Selecting soil in aerosols
Mixtures of soils are produced in jars and cans in the form of an aerosol. Aerosol cans are one-component formulations; immediately after purchase they are ready for use without additional preparation.
Using an aerosol in cans is most convenient for use.
Aerosol is a product whose identifiable qualities are not much different from primers made from an aluminum container. After applying this component, the surface turns out to be very smooth, where the difference between the painted and untreated part is completely invisible.
Criterias of choice
When choosing a primer you need to consider:
- release date and expiration date;
- manufacturer's reputation;
- description and application features;
- compatibility with car body material.
Apply putty if necessary
After cleaning and preparation, if the surface requires leveling, you will need putty. As a rule, the putty is mixed with the hardener in a ratio of 100:1, and the finished mixture is applied to the surface, but in any case, first of all, consider the manufacturer's instructions. Most likely, for independent work you will have enough putty with a volume of 200-250 g. We use any universal polyester putty, or reinforced with fiberglass, the latter is more durable. So, we degrease the surface with a degreaser, give it time to evaporate and then apply putty no more than 3-5 mm thick. We have already written about why a degreaser is necessary in our previous articles. It is more convenient to apply the putty using a special spatula, applying pressure. Pressure with a spatula will better fill existing voids and ensure maximum contact of the putty over the entire surface. It is better to apply putty in two thin layers than in one large one. After application, the putty must dry completely, and the room should not be too humid, otherwise the putty will absorb moisture and this will certainly appear on the future paintwork.
Preparatory procedures, how to paint correctly
If you decide to carry out all the repair work on your own, then you should do everything as soon as possible. Once you discover damage, do not delay the process, as the problem may get worse.
Once the scratch reaches the metal, the oxidation process begins, leading to rust and corrosion. Because of these defects, more serious work will be required.
Before painting, the car is cleaned using conventional detergents. You need to wait until the surface is dry and then degrease it.
For this, special wipes and solvent are used. After saturating one napkin with it, wipe the surface dry with the second. To ensure greater comfort, you need to remove the part that will be worked on.
All other areas of the body that cannot be painted are covered with protective film and masking tape.
To prevent painting defects from appearing, a special chamber is needed; the room must be completely clean of dust and other contaminants. Lights, like devices, should be directed toward the work surface to avoid glare.
Work should not be carried out outdoors, as exposure to sunlight will negatively affect the result. At high temperatures outside, only the first layer is subject to drying out; it will take longer to wait for complete drying.
Therefore, before applying a new layer, wait until the previous one dries.
Before spraying the can, you should shake it well. Try not to go overboard and cover up the rest of the components.
If you are not sure of the result, then you can try your hand at an old part that you have.
Don't forget to follow the existing instructions and stock up on the following tools:
- paint,
- sandpaper of different levels,
- putty and primer,
- antisilicon,
- polyethylene,
- masking tape,
- elements for protection.
When doing all the work yourself, be sure to consider hand protection; use a rubber or silicone spatula so as not to cause unnecessary damage to the surface. The work of the aerosol begins only after the primer has been applied, dried and polished.
Application methods
Acid primer can be applied using several methods and tools:
- Simple brush.
- Spray gun.
- By lowering a metal product into a solution.
- Electrical spraying.
- Using electrodeposition technology.
In everyday life it is customary to use the first 2 tools. Immersion technology is used in factories.
Is it possible to apply paint to acidic soil?
Experts do not recommend applying paint over a layer of one-component acid primer. Otherwise, the components may cause a change in the shade of the paint due to the action of the yellow pigment.
We clean the surface down to metal using an abrasive
We begin all work, as a rule, by cleaning the damaged area with a coarse P80-P100 abrasive. If there are traces of corrosion or the layers have “lifted”/delaminated, it is imperative to “remove” all this with an abrasive down to the metal layer. If the repair is small, we can sand it manually with sandpaper, or (if available) use grinding wheels and a special sanding machine to process a large area. Remove all corrosion completely. Any, even the smallest, rust left on metal can “manifest itself” by the next season. After treatment with abrasives, it is recommended to additionally treat the area of serious corrosion with a special rust destroyer or rust converter. Next, it is necessary to protect the metal from corrosion (even if there has been no corrosion yet), and the right step would be to apply a special acid primer. Acidic soil will react with damaged metal and create a protective film on its surface. This thorough approach will provide the longest protection against re-corrosion. In general, corrosion is one of the most difficult problems in paintwork repair. Once started, it is very difficult to stop in the future.
Never leave even the slightest trace of corrosion.
Features of aerosol use and its consumption
During construction and renovation work, it is imperative to prepare the coating before applying finishing materials. There are some peculiarities of using soil in cans. Using primer in the form of an aerosol helps you do without tools: brushes, rollers. There are primers for treating brick, or concrete, plastic and wood. A can can be enough to cover an area of approximately 2 to 6 m2. Primer consumption depends on the type of coating and the degree of destruction. The instructions for use provide detailed information on how to use the aerosol and how much it will be needed for repairs.
When carrying out repair work, sometimes you have to deal with heavily rusted metal parts. It should be noted that it is not entirely necessary to clean them completely; you can simply remove loose fragments of rusty scabs with sandpaper. After this, the primer in the form of an aerosol is applied directly to the rust.
Sanding the putty area
After the putty has dried (this will take about 35-40 minutes), it must be sanded with abrasives of P120-P180 grit, giving it a correct and even shape (the same as it was before the element was damaged). It is at the stage of work with putty that the alignment of the element’s shape is completed. All other layers will perform only a protective and decorative function. You can also sand manually using a smooth and thick substrate and sandpaper, or with a machine, which will make the process faster. Please note that before priming, be sure to additionally pass through P240 and then P320 abrasives (we interrupt the previous one with a coarser abrasive). The fact is that the materials in aerosol cans are more fluid (liquid), and due to the large risk of abrasive - on black and dark colors after painting, what painters call “lambs”, that is, round visible stains from sanding marks, may appear.
Advantages of aerosol packaging
The use of epoxy primer in the form of an aerosol has certain advantages and benefits over other forms of applying a protective layer.
It doesn’t take much time to prepare the soil for use: you just need to vigorously shake the can several times and warm it up to about 20-25oC. When working with an aerosol, you need to spray with a very thin stream, slowly treating the surfaces of the most complex shapes and even closed profiles.
If not all of the epoxy primer in the can has come out, then the spray head must be tightly closed, and the mixture can be used again.
Painting with acrylic paint
If you are working with acrylic paint, then a smooth transition is performed in a similar way. Its only difference is that the base paint will then be varnished and the transition will not be noticeable, but it is advisable to give acrylic additional smoothness at the transitions by using a special thinner for transitions. Thinner for transitions in a small amount (with a soft torch, without smudges) is applied immediately after painting, in those places where we made indentations each time, expanding the area by 5-10 cm, and allows particles of new fresh paint to “penetrate” more strongly into old coating, thereby reducing the visibility of the transition to a minimum. By the way, if you applied acrylic auto enamel, then this stage is the final one.
Communities › All about Paint and Painting › Blog › Local painting of cars with spray cans.
Recording for those who have a lot of time, but no tools, garage, or money for professional painting. For those who want to paint a part or car themselves, but are afraid of mistakes or failure.
I will say this, everything is real and achievable. The main thing is to believe in yourself and properly prepare the car for painting.
So, we started this adventurous idea, where to start? 1. We watch YouTube and the correct videos on preparation, shelter, transitions and their options. There are videos directly on painting from cylinders, but there is little practical information. It took me about 3 months to study and understand the essence of the process. 2. We collect information about the preparation of the body with materials. Which is better price-quality, which is less hemorrhoids and which will not cause problems in the future. 3. We carefully study all the information about 1k materials and their compatibility. I will say more, here I missed. Of the entire body, the paint was only damaged on the hood. I still wonder why. Maybe the materials on which I laid the base may have been overlooked somewhere. 4. Experimenting with plastic. This means the primary primer for plastic and the plastic material. In my case, the Primer did not work on plastic. My experiments came off the bumper in pieces. I found an unusual solution. Instead of Primer, I first blew out the paint with Montana, and then applied everything else to it. Google will tell you more about what Montana is than I can. I will say this, she falls on everything and everything falls on her. It's difficult to rip off.
It was all practice and preparation. We already know how to do, what to do and what to do. All that remains is the matter of purchasing materials.
What was bought, in my example: 1. Sandpaper, strips and circles from 80 to 320 in increments of 100 2. Sanding block and a sole with Velcro for the circles 3. Putty with fiberglass and finishing Novol 4. body anti-silicone, degreaser, I don’t remember Which. 5. Sticky wipes 6. Covering polyethylene 7. Scotch tape 8. Gray kudo primer in a can 9. The base is slightly darker than the mobihel base in a can 10. Base, selection by code and comparison by hatch, in a can 11. Motip varnish in a can
Priming. Don't pour too much. In general, the basic rule for working with cylinders is not to try to pour and cover the area with one and the first layer. The first layer is semi-dry, the second is slightly oilier. Do not keep it in one place (there will be smudges) and do not move it too quickly (there will be stripes and bald spots). Where they messed up, sand three times until the transition is smooth. We erased the primer and painted it again.
Substrate. A necessary option for large painting areas. Because paint from a container is expensive and it only contains 100 grams. paints. Therefore, we select the most similar color for the base by eye. And after the primer, we cover it with a substrate. Also, the first one is semi-dry, the second one is oilier. We need to find that golden mean of metallic coverage.
Varnish. Nothing complicated. All the same recommendations as before. One thing, layer 3 must be blown above average. Those. something between medium dry and almost glassy.
This is the basis. Of course, different colors will have different results, but in general, everything is real.
Will I do this again? Probably not. It takes a lot of time to prepare a car for almost 50% of painting. Metallic is a very capricious paint. It's very easy to mess up. Next is my choice of nitro and the Montana black series. It's a pleasure to work with her. Well, a photo. What was, what became.
There are enough jambs, but for the first time, I think it’s normal.
Source
Types of varnish
Among the large number of car varnish, the main types can be distinguished depending on its distinctive properties. According to the structural structure:
Depending on the chemical content:
Taking into account texture components:
There is another systematization of car varnish, taking into account the substances included in its composition: metallized, acrylic, polyurethane, acrylic-polyurethane, cellulose, glypthal varnish, etc.
Polyurethane
Polyurethane products are popular among car enthusiasts. They form an excellent protective layer from water, mechanical, atmospheric and chemical influences, are easy to apply, dry quickly, shine, have good performance properties, and abrasion resistance. Aerosols are sold in both single-component (high-drying speed) and two-component forms (environmentally friendly, odorless). Disadvantage: Spraying is only possible at temperatures above +20° C.
Acrylic
Acrylic varnishes create an excellent decorative coating and are among the safest products. The treated surface of the car dries due to the evaporation of water, which is part of the varnish. Fast drying and hardening makes it possible to save time and consumables. Drying time 2 hours. You can reduce the drying time by increasing the room temperature to + 60. The resulting shiny film has good adhesion and is not subject to mechanical stress. Disadvantage: cannot be used in rooms with high humidity.
Nitrocellulose
The main advantage of nitro varnishes is their ease of use and drying speed. It can be applied at any temperature and humidity, and chromium-containing compounds contain an additional reflective effect. Disadvantages: strong solvent smell, not very good adhesion, toxicity.
Materials
To paint, you will need to prepare the appropriate tools and find an equipped room. A garage is suitable, but it must be clean, spacious, ventilated, and well lit.
To paint the wing, you need to prepare:
- spray gun;
- compressor unit;
- screwdrivers, keys;
- brushes with spatulas;
- chisel;
- detergent;
- primer with putty;
- any degreaser;
- paint;
- emery;
- rags.
The number of consumables for painting a wing yourself will depend on the condition of the body and the current requirements for the result. High quality consumables guarantee the durability of the decorative layer and its attractive appearance. Home craftsmen pay special attention to preparing the body for painting.
Proper storage
If storage conditions are not observed, the varnish will quickly deteriorate. Typically, the shelf life of a quality product is at least 2 years, but violation of the conditions reduces this time. You need to carefully read the label, which indicates the storage parameters of paintwork materials.
It is especially important to check the ambient temperature. Prolonged freezing renders most varnishes unusable. The product becomes cloudy, and application to furniture or a car body will lead to unpleasant consequences. Prolonged storage at high temperatures causes the hardeners to thicken, and after 1-1.5 months the container will have to be thrown away. The recommended temperature range must be strictly observed, then the varnish will remain fresh for a long time.