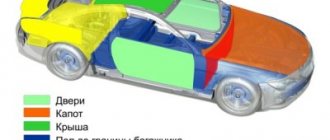
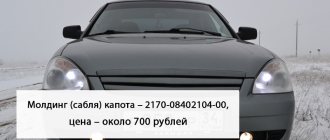
With prolonged use of the car, over time, the need for complete or partial repainting arises. In accordance with the rules of body repair, additional elements are dismantled before starting painting work. After this, the body is painted. The removed parts, which include bumpers, moldings, and radiator grille, are cleaned and painted separately. This article discusses in detail the technology of painting the radiator grille.
How to paint a car radiator grill with your own hands
1 1 1 1 1 1 1 1 1 1 Rating 5.00 (2 Votes)
The rapid motorization of Russia in recent decades has given rise to a huge market for car repair services and products that can seemingly satisfy the tastes of the most demanding car owner. The whole question now is only inflated prices and often questionable quality of workmanship.
Is it really worth shelling out a decent amount of money at service centers for any, even minor, malfunction in a car? We are ready to show you with a concrete example that this is not so! We assert that you can easily perform many troubleshooting operations, especially those related to body repairs and other external components and structures of the car, yourself, with your own hands, at home, and without incurring significant expenses.
As an example, we invite you to participate with us in painting a car radiator grille. It is she, along with the car bumper, that is the first to encounter the impacts of gravel and sand from under the wheels of the vehicle in front; dirt, moisture, and anti-icing agent settle on it. The complexity of the climatic conditions and roads of Russia very quickly renders the appearance of this decorative element of the car unusable. The plastic of the radiator grille loses its original appearance; “rots”, “flat spots”, spots appear on it.
What do we need to paint the radiator grille at home?
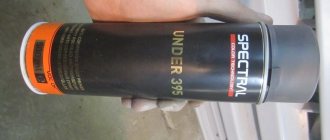
— Aerosol paint. You can take any universal aerosol enamel
— Gloves, mask and goggles — personal protective equipment
- cotton rags, warm water for cleaning the grill
Step-by-step instructions for painting a car radiator grille
Step_1 Choose a place to paint and cover it with old newspapers or covering film. You can work with the grill both in the garage and in an open space (yard, cottage, etc.)
It is only important that there is no dust or flying insects around the painting area, which can significantly spoil the appearance of the product being painted.
Step_2 Remove the grille from the car body. Remove the car logo plate from the grille, unless, of course, you want to paint it.
Step_3 Thoroughly clean the surface of the radiator grille using rags, rags, remove dirt and oil stains using a cleaner and degreaser. The paint must be applied to a clean and completely dry surface at a temperature of +10 to +35 degrees. C, the air environment must be sufficiently dry.
Step_4 For better coloring, we recommend that you first apply an acrylic primer with increased adhesion as the first paint layer. Thoroughly shake the aerosol can with primer for 1 minute using progressive and circular movements to prepare it for use. First make several test applications of the primer on some surface.
ATTENTION! It is desirable that the tone of the primer matches the enamel that we apply to the primer layer. For example, if we are going to paint the radiator grille in chrome color, then the primer should be quite light: gray or terracotta
Step_5 Apply the primer to the grate from a distance of 30–40 cm, making circular movements with your hand with the balloon. Let each side of the grate dry for at least 30 minutes.
Step_6 After the primer has dried, apply a layer of aerosol enamel. We also shake the container with enamel thoroughly for 1 minute to mix its composition. For better coloring of all parts of the radiator grille, we recommend that you apply 2-3 layers of thin enamel, with each subsequent layer applied after the previous one has dried in 20-30 minutes. The last layer of enamel should dry completely within 2-3 hours.
Step_7 The radiator grille is ready! We install a nameplate with the car company logo on it and mount it in its original place. A carefully painted, updated detail of the car’s exterior decor again organically emphasizes the unique style of your car.
We not only acquired important skills in repair painting parts of your car and clearly saw that many problems can be fixed with your own hands at home, but we also saved significant money. To paraphrase the hero of a famous novel, we can confidently say that we have been “hit” by auto painting at inflated prices and sloppiness of service centers! With the money saved, we believe, you can buy aerosol enamel to continue trying your hand at repair and restoration work on your car
But more on that in the next article >> If you found this article useful, please rate it (at the top of the page). Thank you!
voice
Article rating
Matting or removing chrome
This term refers to the process of removing chrome or paint coating and leveling the surface, carried out by applying numerous shallow scratches with sandpaper.
Removing the coating can be done in two ways. The first of them consists of treating the part, represented in this case by the radiator grille, with an abrasive material, which is used as sandpaper. The second method involves using a sharp instrument for this purpose. However, this technology is not applicable in all cases, since it cannot be used to process some hard-to-reach areas of the part. Therefore, we should consider the first matting method in more detail.
For these works you will need sandpaper with a grit of P 600-P800. This abrasive material is used at the initial stage of matting. Then the work is continued with gray abrasive tape - Bright. This material should be used wet.
During the matting process, it is advisable to periodically dry the radiator grille, as this will reveal untreated areas. The need for this is explained by the fact that it is imperative to carefully treat the entire surface of the part, including hard-to-reach areas.
If there are unprocessed fragments on it, the auto enamel will cover this body element poorly, as a result of which such paintwork will be short-lived. That is, upon completion of matting, the coating must be completely removed from the radiator grille.
Users who want to carry out the work in question on their own should also familiarize themselves with the features of matting technology. The radiator grille is treated with uniform hand movements directed in a straight line. Circular movements are not allowed. In this case, the pressing force on the abrasive material must remain constant throughout the entire processing of the part. The fingers are directed at an angle of 90° relative to the line of movement. When matting small areas, the force is distributed evenly over the abrasive material over the entire surface of the fingers. It is unacceptable to press only with their tips. In other words, the load of abrasive material on the surface of the workpiece must be distributed evenly.
For many users, this matting technology may be unusual, but it allows for high-quality processing, including due to the fact that it eliminates the possibility of damage on the radiator grille in the form of deep scratches that will be visible through the paint coating applied later. After matting is complete, the metal surface looks like worn aluminum.
Grinding
After drying, the primed radiator grille is carefully inspected for coating defects in the form of, for example, chips or deep scratches, which can be eliminated by putty and subsequent sanding.
To carry out this work you will need a grinding machine. Grinding, depending on the grain size of the abrasive wheels used, is classified into dry and wet. In the first case, wheels with grit P240-P360, P800-P400 are used, while wet grinding involves the use of wheels with grit P600, P800.
During the work process, a new abrasive wheel should be used at the initial stage of grinding, and a worn one - during final processing.
Matting and degreasing of the surface
You can’t just apply paint to a plastic surface - it will definitely start to peel off. Painting the radiator grille begins with preliminary matting and priming of the surface. Matting is done “wet” with P600 or P800 sandpaper. In hard-to-reach places, you can use gray Scotch-Brite also “wet”. After each grout, dry the part to ensure there are no untreated areas.
Chrome surfaces must also be matted to ensure durable paint retention. A properly matted chrome part with your own hands looks like shabby aluminum. Physically, removing chrome from a radiator grille is extremely difficult - the coating peels off in thin strips, and in some places it is simply impossible to get close to it.
Upon completion of this stage, the grille must be thoroughly washed and degreased again. A special degreasing agent for plastic products, including anti-silicone, removes oil and fuel oil well. To completely remove greasy stains, you should:
- wash the surface of the radiator grille with anti-silicone at least twice;
- use a clean cloth each time for wiping;
- subsequent stages of work should be carried out only after complete evaporation of the solvent.
Padding
This work is the next stage of painting. However, first, immediately after matting, it is necessary to degrease the radiator grille with white spirit. After the solvent has dried, begin applying the primer. It is recommended to use Velcro material for plastic cans. It should be shaken for a minute before use. The primer is applied in two layers with a short break between them.
After priming, the treated surface must be dried. For this purpose, dryers are used, in which the radiator grille is dried at a temperature of 60°C for 10-15 minutes. In addition, you can use infrared lamps for drying, placing them at a distance of at least 70 cm from the part to be dried. This process can also be carried out at a temperature of 20°C. In this case, drying will also take 10-15 minutes.
The most optimal options
The simplest and most inexpensive models will be those without sidewalls. They are compact, easy to install, and inexpensive. If the radiator deviates slightly from the plane of the wall, you should choose hanging grilles with a top cover. To completely hide the battery structure, you need to choose hanging boxes. At Les Massive, these products are available in a variety of sizes and styles at the best prices. The most popular are wooden radiators, which are completely environmentally friendly. Each product is described in detail in the electronic catalog, which helps with its selection. In addition to technical characteristics, its current price must be indicated.
Our advantages
Wide range of decoration possibilities
Possibility to decorate profiles up to 7 m long and flat products up to 4 m long.
Strict adherence to deadlines
Order production time is 4-5 working days.
Low prices
The price already includes chemical preparation, packaging and loading and unloading.
Large selection of decor options
Our catalog contains more than 96 samples: wenge, beech, cherry, Cremona oak, acacia, marble, granite, onyx, malachite, etc.
Possibility of two-color decorative painting
Creating a surface with two different decor options or combining powder coating with decoration.
High quality materials
Using only high-tech films and primers from the best foreign manufacturers - Transfertex, Menphis, Decoral System, Akzo Nobel.
High performance
Having three pieces of decorative equipment allows you to complete an order of almost any size within a working week!
Development of new technologies
New technologies are constantly being developed and introduced: decorating doors, heating radiators, etc.
Types of battery paint
Previously, the range of coloring compositions in stores was poor, because of this, most people painted batteries with oil paints. Now the buyer is offered different types of paint.
Oily
A classic version of radiator coloring that is still relevant today. Over time, the product line expanded and many shades appeared. Advantages:
- heat resistance;
- the finished layer has a high strength and density;
- the coating is slowly erased from mechanical stress;
- does not emit harmful fumes during operation.
Flaws:
- during operation, the composition emits an unpleasant, persistent odor that must be removed from the premises;
- it is difficult to make an even layer due to the high density of the liquid mass;
- Rust may appear under the dried paint, which will eventually lead to the destruction of the coating.
Due to long drying times, smudges often appear on vertical surfaces.
Alkyd
The composition of alkyd paints is a base of glypthal or pentaphthalic varnish, which is diluted with various additives and pigments. Advantages:
- after drying, you get a smooth, beautiful coating without smudges;
- high wear resistance;
- good adhesion;
- does not lose color during use;
- resistance to high temperatures;
- additional protection of metal bases from rust formation;
- low price.
Flaws:
- enamels containing solvents have a pungent odor;
- Enamels made on an organosilicon base, after drying, form a matte layer, which many people do not like.
Odor from solvent-based enamels may appear when the battery is very hot. Therefore they are not suitable for allergy sufferers.
Alkyd enamels with brush
Dispersion acrylic
A type of acrylic composition that is resistant to prolonged heating. Advantages:
- have no odor;
- the original color remains for a long period of time;
- dry quickly;
- easy to apply.
In the store you need to pay attention to what kind of finished surface you should get - glossy or matte
Powder
They are resistant to long-term mechanical stress. To apply such paints, you need to use a gun that sprays the composition onto the prepared surfaces. Additionally, the electric tool must heat the base, the uncured decorative coating.
Silicone
They are made on the basis of silicone, which is combined with various solvents. Advantages:
- The integrity of the decorative coating is maintained for a long time. After drying, painted surfaces can be washed with chemicals.
- There is no need to additionally prepare the substrate before applying the paint layer.
- High resistance to high temperatures.
- Does not degrade with prolonged exposure to ultraviolet rays.
Silicone-based compositions are more expensive than other types of paints.
Other paint options
In addition to the main types of paint, you can also find other paints and varnishes on sale:
- Serebryanka - many people like to coat radiators with aluminum powder mixed with drying oil and varnish. The dried layer is resistant to high temperatures, but during work it emits harmful fumes.
- Coloring compositions based on silicate resins. Resistant to heat, form a uniform layer. They emit an unpleasant odor when applied.
- Hammer is a type of alkyd composition that can be used to create uncharacteristic surfaces with decorative cracks and irregularities. With their help, old cast iron batteries are restored.
Do it yourself
How to do tuning VAZ-2104 with your own hands
Even though you know the catalog number of the grille that would fit your car, I suggest we talk about tuning it yourself. Still, it is much easier to install a finished element and wipe the icon with polish than to cut, glue and saw yourself.
Let's look at the process step by step. The front of the car will be pleasantly pleasing to the eye, and the knowledge that you did everything with your own hands will lift your spirits even more.
- In order for the new mesh to fall into place, it must be released. To do this, remove the factory radiator grille. Usually it is held on by plastic clips, so there should be no problems with how to remove the element;
- Be careful that there are no wires or hoses trailing behind the grille. Cars are different, so anything is possible. Try to avoid damage to the old frame. This is where your new grille will be mounted;
- After removal, the inner part is cut out with a hacksaw. The task is to remove everything unnecessary so that the new element fits perfectly. It depends on what size the new part will be;
- Be sure to clean everything and sand it thoroughly. It is better to fill all excess holes with fiberglass or automotive putty;
- You can use an old frame or buy a new one. In the second case, everything is clear. If you rework an old part, you can paint it or wrap it in vinyl. By painting you will be able to chrome the part, that is, give it the appearance of real chrome. Or carbon. As you wish;
- The new mesh is cut based on the dimensions of the frame. It is fixed with clamps and screws for reliability. The modified radiator grille is placed in its rightful place.
Do not forget that the radiator grille has not only a decorative, but also a protective and functional task. It prevents large debris from reaching the radiator, plus it provides air supply to cool the engine. Therefore, under no circumstances make the new grate solid or too fine-mesh. There must be good air flow to the motor, otherwise there will be problems with overheating.
In some cases, it is really worth considering not just replacing the grille, but replacing the entire front bumper. It's more expensive, but not more difficult. You just need to remove the old bumper and install a new one in its place. The main thing is that the part and the car match in size, and there is no need to drill, weld or cut anything. Although many are ready for this for the sake of tuning.
About internal installation
Motorists who want to install a fine-mesh mesh directly in front of the radiator need to prepare the following tools:
- a set of keys and screwdrivers for removing the front bumper or radiator grille (if possible);
- metal scissors;
- roulette, ruler.
Most often, plastic clamps are used to fasten the mesh.
To fasten the mesh, you can use the same clamps or self-tapping screws, if the design of the body kit allows it. Instead of aluminum cellular material, it is possible to use a plastic mesh secured with a glue gun. The installation algorithm is as follows:
- Wash and dry the car. If fog lights are installed in the bumper, disconnect the negative terminal of the battery before starting work.
- Remove the front body kit by disconnecting the fog lamp connectors.
- Applying the mesh to the grille opening from the inside, cut out the blank with a margin of at least 1 cm on each side.
- Attach the workpiece to the body kit. Here you can use a combined method: first, tighten the mesh to the grille with clamps, and then screw the edges with self-tapping screws. Attach the plastic material with a glue gun at several points.
- Reinstall the front body kit, connect the headlights and battery.
Mesh attached to removed bumper
Advice. Do not screw the screws directly into the front parts of the grille, otherwise their ends will come out. For such fastening, choose jumpers and stiffeners facing inward, and screw in the screws from the side.
This is what the mesh installed inside looks like
Indoor Installation Video
Repair of damaged elements
Sometimes it happens that the grille partially breaks; in this case, repairing the radiator grille yourself is quite simple. For successful work, you should have with you several tools necessary for every car owner:
- mesh, which is sold in a car store or on the market;
- electrical ties;
- a hacksaw for working with metal or, as a last resort, ordinary scissors;
- a screwdriver or wrench to help unscrew the bolts;
- pencil and cardboard.
Repairs should begin after dismantling the old factory protective grid. How to remove the radiator grille was written in the previous chapter; therefore, repairs and installation, which will be carried out in several stages, deserve further attention. It is worth noting that it will take a lot of time to complete the process, so it is better not to rush, all the work should be done gradually.
The bumper removed from the body must be placed on any flat surface to be washed from accumulated dirt with water and automotive detergents. Insects and lumps of dirt will not allow all the work to be done efficiently, which is why you can start only after cleaning and drying the bumper.
Replacing the radiator grille is done by cutting out a piece of mesh of a suitable size. A pattern drawn on thick cardboard will help simplify the process. A carefully measured section of the mesh is cut out using a hacksaw for metal. In order to correctly fit the shape, it is better to enlarge the cut piece a little on the sides; additional allowances will make the work easier.
The edge of the new protective element should be bent at a right angle - this will allow it to be adjusted to the installation location in the radiator grille. When the mesh exactly fits the contours of the bumper, it should be slightly bent. If necessary, the mesh can be painted, well dried and coated with several layers of colorless varnish, which increases its service life.
Self-installation of mesh in the bumper
Installing a radiator grill in the hands of an experienced car owner will not take much time. The finished mesh must be inserted into a certain place on the bumper from the inside. Previously bent parts must be straightened, which will increase its stability. The edges heated over the fire should melt into the bumper. Those who are engaged in such actions for the first time should be extremely careful, since an overheated bumper can easily become deformed, in which case local repairs will have to be made with straightening.
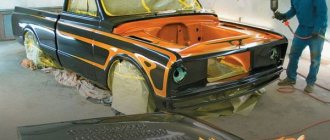
Painting a plastic part
The actual painting of the radiator grille, for example, black, is always divided into two main stages:
- applying paint;
- applying varnish coating.
It is worth noting that the most difficult thing about painting yourself is choosing a paint color that matches the color of the car body. The black color is exceptional. You can easily purchase spray paint yourself or contact any car service center where they will help you choose the desired shade. It is advisable to paint in two or three layers. Between applying the next layer, it is necessary to maintain a pause of 20 minutes. Having completed the last coat, wait 20 minutes and begin applying the varnish. After a day, the painted grille will dry completely and it will be possible to install it in its place.
So, recently the radiator grille began to catch my eye, which had peeled off in places, although the chrome remained intact. I decided to paint the entire grille matte black, except for the badge.
Then he carefully removed the grille, unscrewed the chrome parts and removed the badge; my assistant, a Tobet dog named “Rocky,”
who enthusiastically watched my work)).
I purchased the following for business: The whole thing was sanded with sandpaper. Degreased it with nail polish remover). Chrome had the most problems; sandpaper didn’t take it. But I wanted to paint it well, I decided not to go to the collective farm and went to a chiropractor, for a nominal fee he used a special machine to remove the chrome, which he degreased and left to dry.
First I primed the chrome guides running from the badge to the side, 2 times. It turned out just like at the factory! I also primed the radiator grill with 2 layers of primer. because after the first time you can see where little has been applied, where it’s normal, after 2 times everything is as it should be!
Then I saw that there was another chrome ring around the badge, which could not be left like that, so I sanded it and applied 2 layers of primer.
Then I painted all the parts with matte paint in 2 layers, with an interval of 1 hour.
Since the badge was held on by double-sided tape, I removed the old one, cleaned it and degreased it.
Well, in general, I assembled everything carefully, and placed the badge on double-sided tape!
This was the first time I did this work with my own hands, and I liked the result!
Thank you to those who read to the end! Let’s take a look and comment, maybe there will be comments or criticism, I’ll listen without any problems and take note. If you like the work done, CLICK))
With prolonged use of the car, over time, the need for complete or partial repainting arises. In accordance with the rules of body repair, additional elements are dismantled before starting painting work. After this, the body is painted. The removed parts, which include bumpers, moldings, and radiator grille, are cleaned and painted separately. This article discusses in detail the technology of painting the radiator grille.
Features of painting a car radiator grill
It is not uncommon for some motorists to make some changes to the appearance of their “iron horse” to stand out from the crowd. For example, if the car’s optics are “chrome,” some paint it some other color, most often this color is black quartz. Thus, the car will no longer look like everyone else’s.
How to paint a car radiator grille?
Of course, it is best to paint the radiator grill using a spray gun, but you can also do this with paint in special cans. Today, finding a cylinder with the most suitable color shade is not a problem, since they are sold in almost every car store.
So, we figured out the choice of paint, now we will need to open the hood and start the process.
- Using a flat screwdriver or a clip remover, remove all the clips;
- Remove the radiator grille;
With all this, it is also worth noting the fact that even though the painting process itself is not so difficult, many do not know how to paint the radiator grille correctly. The grille, like any other part of the car, must be washed and dried before painting.
Next, we need some kind of high stand, for example a chair. Of course, you can also paint on the floor, but in this case the lighting will not be enough, plus dust will fly from the floor. You can degrease the part with a special degreaser.
Next, take a can of paint, shake it well (about one minute) and then apply primer in two layers to the grate. At the same time, also try not to get on matted chrome.
Now we need to wait about 15 minutes, after which we apply the first layer of wet paint. Next, wait about 5 minutes and apply a second, drier auto enamel. If after the second layer you still notice gaps, you will need to apply another layer.
15 - 20 minutes after applying the last layer of paint, you can apply varnish. But at the same time, you should also remember that varnish is more liquid than paint, and therefore you cannot pour it too much. Otherwise, it is possible that you will create smudges that will be very difficult to remove from the grate. This job is much easier to do on a flat surface.
The first layer of varnish we apply must be dry, since in this case it will adhere to the surface much better, and most importantly, it will not cause smudges. But we apply the second layer in the “spill”, trying to lay it without shagreen.
https://autokuz.ru/pokraska/kuzov-bamper/kak-pokrasit-reshetku-radiatora.htmlhttps://kuzovspec.ru/pokraska/reshetka-radiatora/https://www.drom.ru/reviews/nissan/ sunny/52125/50452/https://okuzove.ru/pokraska/pokraska-reshetki-radiatora-svoimi-rukami.htmlhttps://samokraska.ru/articles/auto-bike/182-how-to-paint-autoradhttps: //v-mireauto.ru/osobennosti-pokraski-reshetki-radiatora-avtomobilya/
Requirements for decorative grille
In addition to the points already described above, the decorative radiator grille must meet the following requirements:
The manufacture of grilles for heating radiators can be made from materials with low thermal conductivity, so that heat enters the room and is not wasted on heating protective screens. The inner surface of the decorative grille should have a dark color, which improves the ability to absorb heat and release it. As a rule, the inside of the protective elements is painted black or dark brown. There are no requirements for the color of the outer surface of the screens. An integral element of radiator heating is convection, which is essentially the active movement of air masses. During their movement, dust and other small particles are always drawn in, so the surfaces of the grille at some point in time turn out to be quite dirty
To avoid problems with this, the decorative grille should be made of hygienic materials that are easy to clean. The radiator grille installed on the heating radiator performs not only a decorative, but also a protective function, which is especially important if there are children in the room. In order for the grille to provide reliable protection from accidental injuries, the material for its manufacture must be strong enough, but the structure itself must not have sharp corners or other protruding elements.
Grout
It is worth saying that rubbing or “washing out” the surface will only be necessary if acrylic primer is applied. If there is only Velcro on the surface of the radiator grille, you can immediately begin painting. To grout, you will need a bucket of warm, if possible, soapy water and waterproof, fine-grained sandpaper. In order to get rid of those scratches that were there and also not to make new ones, it is necessary to do all the work “wet”. Surface treatment is carried out until the unevenness is completely eliminated.